


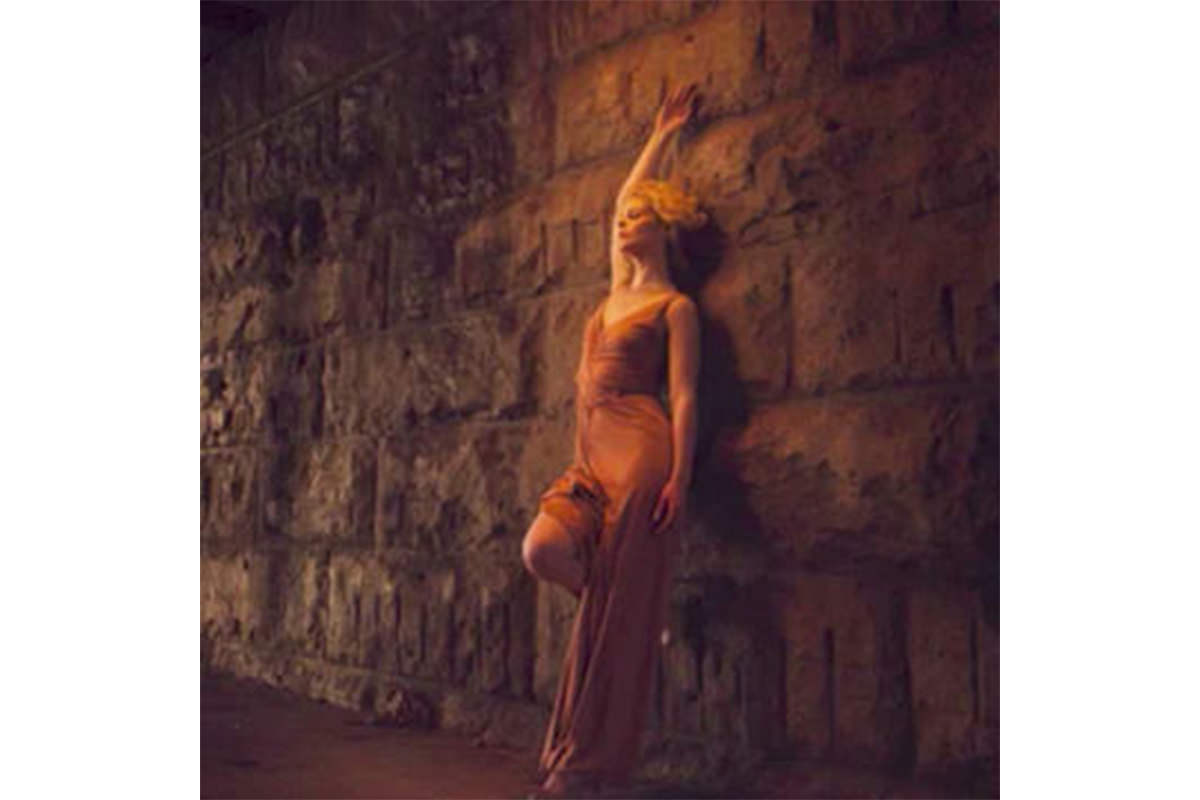
The yellow lights under a Chicago bridge lit the top of the subject’s head beautifully and left her face in the dark. This behind-the-scenes photography breakdown fills that in with a strip box kept just outside the frame and gelled with CTO to match the fixtures already there, then sets shutter speed and white balance so the added light reads as a second bridge light rather than a strobe.
We publish a new free tutorial every week, each one with sample images and PSDs you can download and follow along with. Sign up and they land straight in your inbox, along with early word on sales, events and subscriber-only offers.
Behind the Scenes: Matching Two Different Lights Under the Bridge
Shooting under a bridge in Chicago, with striking yellow overhead lights and full midday sun just outside the shade, this behind-the-scenes breakdown covers a specific problem: an existing light source that only lights half a subject. The fix combines a gelled strobe, a strip box, and careful camera settings to make it look like there’s a second version of that same overhead light filling in everything the first one missed.
Finding a Shaded Location for Creative Lighting Control
Shooting in the middle of a bright day usually means fighting with harsh, uncontrollable light, but a shaded area like the underside of a bridge changes that entirely. Areas out of direct sun give far more control over lighting than a wide-open, perfectly lit space would, since a shaded scene is essentially a blank canvas that strobes and gels can shape from scratch.
The Problem: Overhead Light Only Lit Half the Subject
The bridge’s existing yellow overhead lights looked great hitting the top of the subject’s head, but they only covered half of her — her face was left almost completely dark, with nice light on top and nothing filling in below.
Adding a Strip Box to Fill in the Shadows
The second light never appears in frame, which is what lets it pass for part of the location.
-
Position a Strip Box Out of Frame
Set up a strip box just out of the camera’s frame, positioned to shine light in from the side and slightly from behind the subject — effectively acting as a second light source the camera never actually sees directly.
This fills in the shadows the overhead light left behind and creates the impression that there’s another one of the bridge’s overhead lights positioned nearby, even though the shape and direction of light is coming from a strip box instead.
Matching Color Temperature With CTO Gels
Getting the direction right only works if the color matches too.
-
Add CTO Gels to the Strobe
Fit the strobe powering the strip box with CTO (Color Temperature Orange) gels, matched to the warm color temperature of the bridge’s existing overhead lights.
Why CTO Gels Specifically
Without a gel, a bare strobe outputs a much cooler, more neutral color than the warm yellow light already present on the subject, which would create an obvious mismatch between the two light sources. CTO gels shift the strobe’s output toward that same warm orange, so the added light blends in as though it came from the same source as the light already lighting the top of the subject’s head.
Positioning the Strip Box to Imitate a Second Overhead Light
Where the subject stands matters as much as where the light does.
-
Pose the Subject Against the Available Light
Position the subject against a wall or similar surface where both the existing overhead light and the gelled strip box can hit her from complementary angles, filling in what the other one misses.
The goal isn’t to recreate the exact same light twice, but to give the impression that there could be another one of these bridge lights positioned nearby — the strip box just needs to read as plausible additional light from the same source, not as an obviously separate studio strobe.
Choosing Camera Settings to Blend Ambient and Strobe
Shutter speed is the lever that decides how much of the location’s own light makes it into the frame.
-
Use a Slower Shutter Speed to Let in Ambient Light
Shoot at a slower shutter speed, around 1/40th of a second, at f/5.6 and ISO 100, letting a good amount of the ambient light from outside the shaded area contribute to the overall exposure.
Why a Slower Shutter Speed Lets More Ambient Light In
Shutter speed controls how much continuous ambient light the sensor captures, while the strobe’s brief flash duration stays largely unaffected by that setting. Slowing the shutter down lets more of the scene’s natural ambient light register in the exposure, supplementing rather than being overwhelmed by the strobe.
Choosing White Balance for a Warm or Neutral Look
White balance here is a creative decision rather than a correction.
-
Set White Balance to Daylight
Set the camera’s white balance to 5600 Kelvin, the standard daylight setting.
Why Daylight White Balance Instead of Tungsten
At a daylight white balance, the warm yellow overhead lights and the gelled strobe both read as warm and inviting, while the outside daylight beyond the shade looks natural rather than color-shifted. Switching to a tungsten white balance instead would neutralize that warm overhead light, making it look flat and gray, while pushing the outside daylight toward an unnatural blue — white balance here is really a creative choice about how warm or neutral the final image should feel, not just a technical correction.
Why This Approach Works
The entire setup depends on treating the added strobe as an extension of the existing light rather than a separate, competing source. CTO gels handle color: shifting the strobe’s neutral output to match the warm tone of the bridge’s own overhead lights means the two sources blend into one consistent color story instead of looking like two different kinds of light fighting each other in the same frame. Positioning the strip box to fill the exact area the overhead light missed, rather than lighting the whole scene evenly, is what makes it read as plausible — as if there simply happened to be a second version of the same overhead fixture nearby. Camera settings finish the blend: a slower shutter speed lets enough ambient light in that the shaded scene doesn’t look artificially lit, and a daylight white balance keeps both the warm added light and the cooler daylight beyond the bridge looking like they belong in the same photograph.
Final Thoughts
Shaded, awkwardly-lit locations like the underside of a bridge are often more useful for creative lighting than a perfectly sunlit spot, precisely because there’s an existing light quality worth building on rather than fighting against. Matching a strobe’s color temperature to whatever’s already present, positioning it to fill exactly what’s missing, and dialing in shutter speed and white balance to control how much of the ambient scene comes through are the same three levers worth reaching for in any similarly mixed-lighting situation.
Quick Reference: Settings and Tips
- LocationShade under a bridge, with warm yellow overhead lights
- Fill lightStrobe in a strip box, just out of frame, from above and slightly behind
- Match the colorCTO (Color Temperature Orange) gels on the strobe
- Exposure1/40 s, f/5.6, ISO 100 to let in ambient light
- White balance5600 K daylight for warm light; tungsten for a neutral look
- PosingAt an angle to the wall, not facing straight into it
Matching Strobe to Ambient Light: Common Questions
Why shoot in the shade on a bright day?
A shaded spot like the underside of a bridge gives you far more control over the light than a spot in full sun. You can build the look with your own strobes.
What was wrong with the bridge lights on their own?
The yellow overhead lights only hit the top of the model’s head. Her face was left almost completely dark.
Where does the strip box go?
Just out of frame, shining down and in from slightly behind the model. It fills the shadows and looks like another one of the bridge lights nearby.
What are CTO gels?
Color Temperature Orange gels. Placed on the strobe, they warm its light to match the color of the yellow overhead lights.
Why match the strobe’s color to the existing light?
When both lights are the same color, the lighting looks balanced and even, as if it came from the same kind of fixture. The strobe supplements the location light instead of competing with it.
What camera settings were used under the bridge?
1/40 of a second at f/5.6 and ISO 100, with white balance at 5600 Kelvin.
Why use a slower shutter speed with a strobe?
A slower shutter lets in some of the ambient light from outside the shade, so the scene doesn’t look lit only by the flash.
Why daylight white balance instead of tungsten?
At 5600 Kelvin the outside looks natural and the overhead light and gelled strobe look warm. Tungsten would make that light much more neutral and the outside much bluer, so it is a creative choice between warm and neutral.
How should the model stand against the wall?
At an angle to the wall rather than facing straight into it, where both the overhead light and the strip box can reach her.
From the Magazine View all
Stories, interviews and guides for photographers, new every week.
 EditingLightCraft vs Lightroom: I Edited the Same RAW Files in BothThe free clone on the same RAW files: what matches, what breaks and who should switch.
 InspirationRare Historical Photos: 13 of the Rarest Pictures Ever TakenFrom the earliest surviving picture of a person to the last passenger pigeon: who took each one and why it survives.
 EditingArtCraft: Photoshop Cloned by AI in Two Weeks. Is It Legal?ArtCraft cloned Photoshop and Lightroom with AI and gave them away. Any good? Legal? Safe?
Master Photoshop, Lightroom and Photography
Join PHLEARN PRO for $12.99 a month, or $99.99 a year (save 36%). Cancel anytime, with a 100% money-back guarantee.





