

Download Assets
This tutorial includes 1 PDF guide. Downloads are free with a PHLEARN account.
- Download the sample files from every free tutorial on PHLEARN
- New free tutorials published every week
- One free account: sign up once, then download anything
Free PDF Guide · 4 Pages
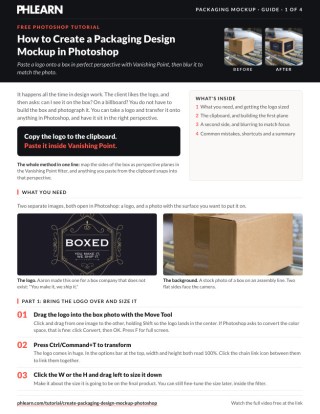
This Tutorial as a Step-by-Step PDF
The guide walks through sizing the logo with Ctrl/Command+T, copying it to the clipboard, building a plane in Filter > Vanishing Point with the Create Plane and Edit Plane tools, pasting and dragging it into perspective, tearing off a second plane for the side, then a Smart Object Tilt-Shift blur to match the focus. Keep it next to your keyboard.
description
A flat logo pasted over a photograph fools nobody. Vanishing Point fixes the geometry: define the surface’s perspective as a grid, then paste from the clipboard and the artwork snaps into it — and stays correct as you slide it around, or tear off a second plane and wrap it round a corner. A Tilt-Shift blur fixes the optics, because artwork that is uniformly sharp on a photo that is not still reads as an overlay.
Enjoying This Free Tutorial?
We publish a new free tutorial every week, each one with sample images and PSDs you can download and follow along with. Sign up and they land straight in your inbox, along with early word on sales, events and subscriber-only offers.

How to Create a Packaging Design Mockup in Photoshop
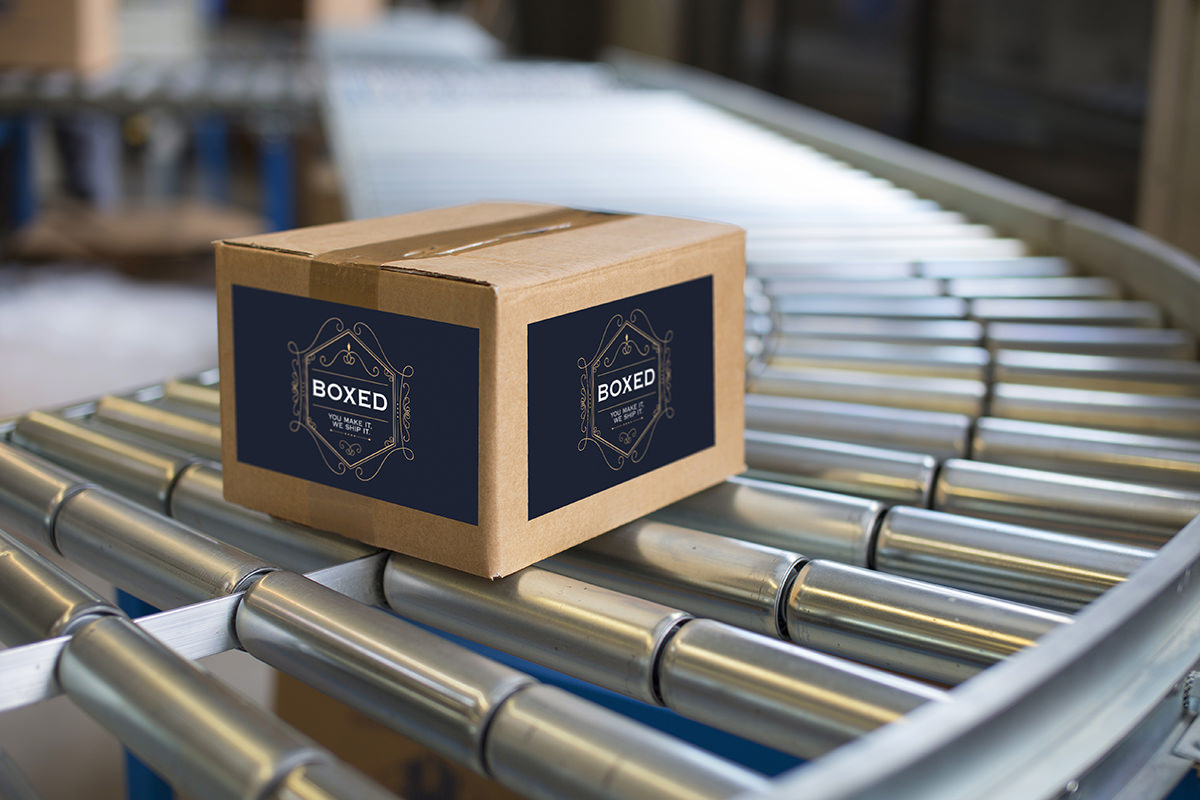
The request comes up constantly in design work. The logo is approved, and then the client asks what it looks like on the box. On a billboard. On the side of a van. Building the physical thing to photograph it is out of the question, and a flat logo pasted over a photograph fools nobody — the perspective is wrong and the eye catches it instantly.
Photoshop has a tool built for exactly this. The Vanishing Point filter lets you define the perspective of a surface already in a photograph and then drop artwork onto it, correctly foreshortened, in a couple of clicks. Once the plane is built you can move the artwork around the surface and it stays in perspective the whole time.
Get the Logo Into the Scene and Sized
You need two files open: the photograph containing the surface, and the artwork.
-
Drag the artwork across with the Move Tool (Keyboard Shortcut “V”)
Hold Shift while dragging from one document tab to the other and it lands centered. If Photoshop offers to convert the color space, accept it.
-
Press Ctrl + T on PC (Cmd + T on Mac) to transform
-
Link width and height, then scrub to resize
Click the chain icon in the options bar so the two stay tied, then click and drag left on the W or H field. Size it to roughly what it should be on the final surface — getting close now saves fighting it later.
Put the Logo on the Clipboard
Vanishing Point does not see your layers. It reads the clipboard, so the artwork has to be copied before you open the filter.
-
Ctrl/Cmd-click the layer thumbnail
This selects exactly what is on that layer — faster and more precise than drawing a marquee around it.
-
Press Ctrl/Cmd + C to copy
-
Hide the artwork layer, deselect, and create a new empty layer
Select > Deselect. The new layer is where the filter will place its result, which keeps it independent of everything else.
Why the Clipboard Rather Than a Layer
It feels like a detour, but it is what makes the technique flexible. The artwork sits in the clipboard for as long as you need it, so you can paste it repeatedly — onto one face, then another, then a third — without leaving the filter or going back for it.
Build the Perspective Plane
-
Go to Filter > Vanishing Point
-
With the Create Plane tool, click the four corners of the surface
For a box face, click each corner in turn. A perspective grid appears between them.
-
Switch to the Edit Plane tool and zoom in to refine each corner
Drag every corner precisely onto the real corner of the surface. Nothing else in this process matters as much.
Accuracy Here Decides Everything Downstream
The grid is the only thing telling Photoshop what perspective to apply. A plane that is roughly right produces artwork that is roughly right, which reads as wrong. It costs a minute to zoom in and place the corners properly, and nothing you do later recovers a sloppy plane. The grid is also editable at any point, so there is no reason to accept a first attempt.
Paste the Logo Into Perspective
-
Press Ctrl/Cmd + V
The artwork appears flat, not yet in perspective. That is expected.
-
Press T and Shift-drag a corner to resize it
Shift maintains the aspect ratio.
-
Drag the artwork onto the plane with the Marquee tool
The moment it moves over the grid it snaps into perspective automatically. You can keep sliding it around the surface and it stays correctly foreshortened the whole way. If one side is all you need, press Enter and the logo is on the box.
Wrap the Logo Onto a Second Side
One face is often not the whole request. You can build additional planes off the first without leaving the filter.
-
Select the existing plane with the Edit Plane tool
-
Switch to the Create Plane tool, hold Ctrl/Cmd, and drag out from an edge
This tears off a perpendicular plane from the edge node of the one you already have, so the two share a corner and agree about the scene.
-
Adjust the new plane’s corners to the second face
-
Paste again, resize with T, and drag it onto whichever face you want
Artwork dragged from one plane to the other re-transforms as it crosses, which is what makes wrapping a design around a corner almost trivial. Click OK, and because the filter ran on a new layer, the logos come back on their own layer, free to move with the Move Tool.
When the Filter Fights You
Pulling a torn-off plane into position, you will sometimes feel it resist. That is Vanishing Point rejecting a geometry it does not consider physically possible from the perspective you have already established. It is information, not a bug — keep working the corners and it settles once the two planes agree.
Match the Focus with a Tilt-Shift Blur
Perspective alone still will not sell it. Photographs fall out of focus across a surface, and pasted artwork is uniformly sharp — which is the remaining tell.
-
Right-click the layer and choose Convert To Smart Object
Do this before applying any blur, without exception. See below.
-
Go to Filter > Blur Gallery > Tilt-Shift
-
Rotate the blur axis to match the surface
By default it blurs the top and bottom of the image. Grab the node just outside the center ring and drag, holding Shift to snap the rotation cleanly.
-
Set the sharp band, the feather, and the blurred zone
Pull the inner lines to define what stays sharp, and the outer ones to control how gradually it falls away. A little blur even near the center usually looks more natural than a perfectly crisp middle.
-
Adjust the blur amount and confirm
Convert to a Smart Object First, Always
Applied to a normal layer, a blur is permanent — too much and you are undoing and starting over. Applied to a Smart Object it becomes a Smart Filter: switch it off to compare, or double-click it and change the amount, keeping every other setting. Overshooting the blur is easy to do and completely painless to correct, but only if you converted first.
Where This Usually Goes Wrong
Forgetting to copy the artwork before opening Vanishing Point is the most common stumble — the filter reads the clipboard, so an uncopied logo simply is not available once you are inside. After that it is placing plane corners approximately instead of precisely, which quietly poisons everything downstream. Leaving the pasted artwork perfectly sharp on a photograph that is not is the tell that survives even good perspective work. And blurring without converting to a Smart Object first turns a two-second adjustment into a redo.
What Makes the Mockup Convincing
Two things, and they are separate problems. Perspective handles geometry — the artwork has to sit on the surface as though it were printed there, and the Vanishing Point grid is what supplies that. Focus handles optics: a real camera cannot hold an angled surface uniformly sharp, so artwork that is uniformly sharp announces itself as an overlay no matter how good the geometry. Solve only one and the result still looks pasted on. The same reasoning applies to any surface in any photograph, which is why this technique transfers directly to signage, vehicle liveries and product design presentations.
Use It on Any Flat Surface
Nothing here is specific to boxes. Anything with a definable flat face — the side of a truck, a billboard, a shopfront, a book cover on a table — takes the same treatment: build the plane, paste from the clipboard, match the focus. It is a handful of unfamiliar tools the first time and about five minutes every time after that, which makes it one of the highest-return techniques to have ready when a client asks to see the idea in the real world.
Quick Reference: Keys, Menus and Settings
- Bring in the logoMove Tool, Shift-drag to center it; Cmd/Ctrl + T, chain icon, scrub W or H
- Copy to the clipboardCmd/Ctrl-click the layer thumbnail, Cmd/Ctrl + C; Select > Deselect, new layer
- Build the planeFilter > Vanishing Point, Create Plane on the four corners, Edit Plane to refine
- Paste in perspectiveCmd/Ctrl + V, T and Shift to resize, Marquee tool to drag onto the grid
- Second sideCreate Plane tool, Cmd/Ctrl-drag out from an edge node
- Match the focusConvert to Smart Object, Filter > Blur Gallery > Tilt-Shift, Shift to rotate to vertical
- Zoom inCmd/Ctrl + +
No AI, no generative credits.
Free Downloads
Take the Guide With You
Get the PDF guide with every step for putting a logo on two sides of a box with Vanishing Point and matching its focus with a Tilt-Shift blur. Free with a PHLEARN account.
Packaging Design Mockups: Common Questions
Which Photoshop tool puts a logo in perspective?
Filter > Vanishing Point. You draw a perspective plane over the surface and paste the artwork onto it.
Why copy the logo before opening Vanishing Point?
The filter pastes from the clipboard, not from your layers. Cmd/Ctrl-click the logo layer’s thumbnail, press Cmd/Ctrl + C, hide the layer, deselect and make a new empty layer.
How do I drop the logo in the center of the photo?
Hold Shift while you drag it across with the Move Tool. Then press Cmd/Ctrl + T, link width and height and size it close to its final size.
How do I draw the perspective plane?
With the Create Plane tool, click the four corners of the box face. Switch to the Edit Plane tool, zoom in and drag each corner exactly onto the box.
Why isn’t my pasted logo in perspective?
It pastes flat. Press T to resize it, with Shift to keep its proportions, then drag it onto the grid with the Marquee tool and it snaps into perspective.
How do I put the logo on a second side?
Select the plane with the Edit Plane tool, switch to Create Plane, hold Cmd/Ctrl and drag out from an edge node. Fix the new corners, paste again and drag the logo onto that face.
Why does the new plane fight me when I drag it?
Vanishing Point pushes back when the shape does not fit the perspective it expects. Keep adjusting the corners and it settles.
How do I make the logo match the photo’s focus?
Convert the layer to a Smart Object, then go to Filter > Blur Gallery > Tilt-Shift. Rotate the bands to vertical with Shift and set the sharp, feathered and blurred zones.
I added too much blur. Do I have to start over?
Not if the layer is a smart object. Double-click the smart filter and lower the blur, or toggle it off to compare.
Is there a free download?
Yes, with a free PHLEARN account. You get 1 PDF guide with the steps for the perspective planes, the paste and the Tilt-Shift blur.
Master Photoshop, Lightroom and Photography
Join PHLEARN PRO for $12.99 a month or $99.99 a year. Cancel anytime, with a 100% money-back guarantee.





