

Download Assets
This tutorial includes 2 sample images and 1 PDF guide. Downloads are free with a PHLEARN account.
- Download the sample files from every free tutorial on PHLEARN
- New free tutorials published every week
- One free account: sign up once, then download anything
Free PDF Guide · 4 Pages
This Tutorial as a Step-by-Step PDF
The 4-page guide walks through dragging a star photo onto the background, setting it to Screen, filling the gaps with Ctrl/Command+J copies, merging with Ctrl/Command+E, clipping a Levels layer and dragging its middle slider, then masking the group to the horizon with the Magic Wand and Edit > Fill. Keep it next to your keyboard.
description
Light pollution, cloud or too short an exposure can leave a night sky empty. Compositing a star photo in comes down to one blend mode: Screen makes black vanish and only the light show through, so there is nothing to erase around each star. Duplicate to fill the gaps, clip a Levels adjustment to control how many stars survive, then mask the whole group to the horizon line.
Enjoying This Free Tutorial?
We publish a new free tutorial every week, each one with free downloads to follow along with. Sign up and they land straight in your inbox, along with early word on sales, events and subscriber-only offers.
How to Add Stars in Photoshop
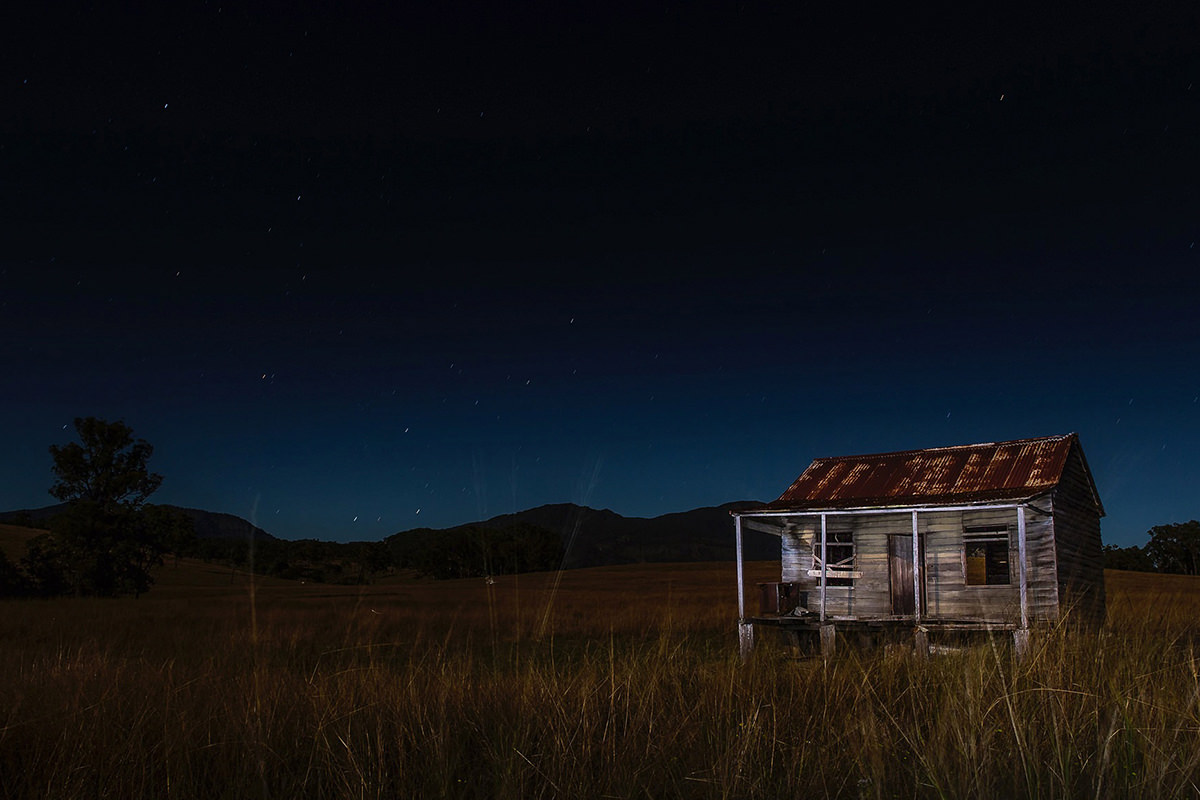
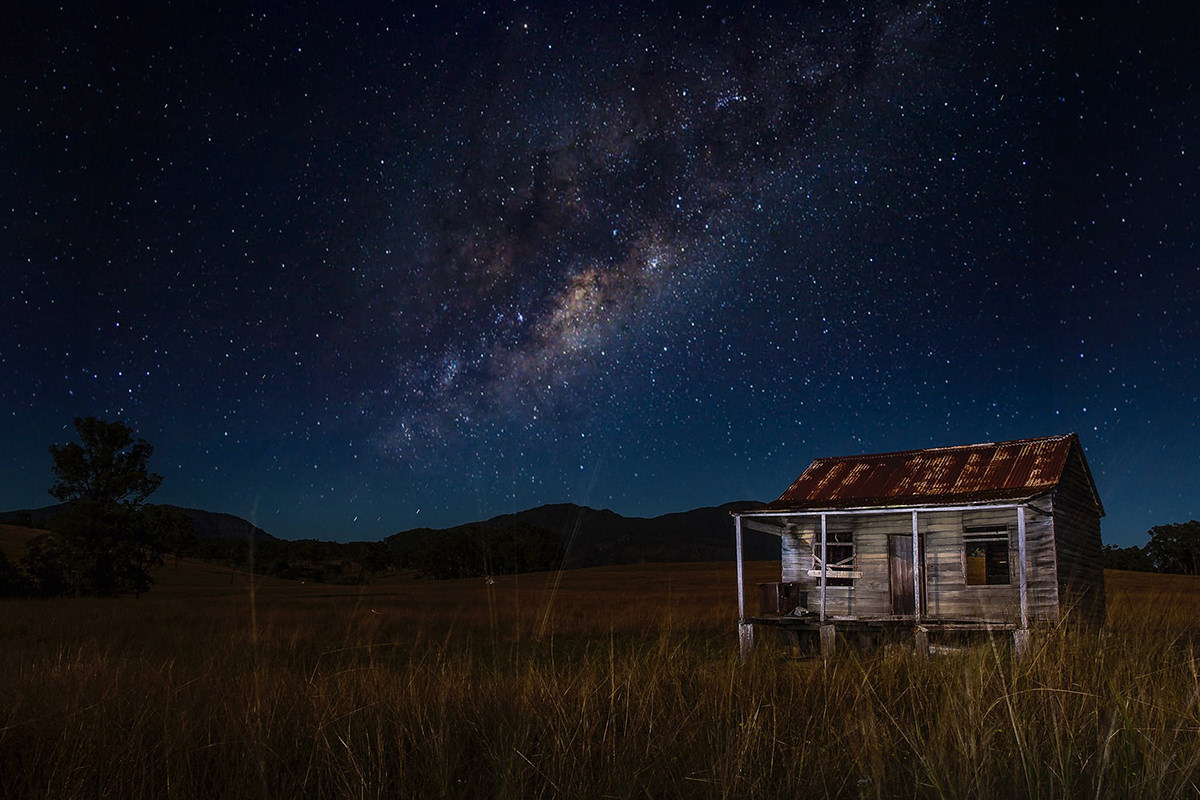
Night photography doesn’t always cooperate. Light pollution, clouds, or an exposure that wasn’t quite long enough can leave a night sky looking empty even when the rest of the shot is great. Compositing in a separate star photograph is a quick way to fix that, and the whole process comes down to one blend mode and a layer mask.
Bringing Your Star Photo Into the Background Image
Start with two images: your background photo and a separate star photograph, either one you’ve shot yourself or a stock image of a starry sky. With the Move tool selected, click and drag the star photo directly onto the background image so both live in the same document as separate layers.
Sizing and Positioning the Star Layer
The star photo usually won’t be large enough to cover the entire frame right away. Press Ctrl or Cmd+T to bring up Free Transform and stretch the star layer out until it covers the horizon. Be careful not to scale it up too far, though — stars that get stretched too large stop looking like real stars and start looking obviously fake, since actual stars in the night sky are quite small and evenly distributed.
Switching to Screen Blend Mode
Once the star layer is roughly positioned, change its blend mode from Normal to Screen. Screen blend mode makes black pixels completely invisible and only shows the lighter pixels, which means the black sky around each star disappears and only the stars themselves show through onto the background. This single change is what makes the whole composite possible — without it, the star layer would just sit as an opaque rectangle covering everything underneath.
Filling Gaps by Duplicating the Star Layer
Stretching a single star photo to fit the frame often leaves empty gaps on the left and right sides where the original image simply didn’t have any content. Duplicate the star layer with Ctrl or Cmd+J, then drag the duplicate over to fill one of the gaps, using the arrow keys to nudge it into perfect alignment. Repeat the process for the other side. If a recognizable feature like the Milky Way ends up repeating in an obvious way, Free Transform can scale or rotate that duplicate slightly so the repetition isn’t as noticeable — since these are just stars rather than a recognizable subject like a face, flipping or rotating a duplicate doesn’t read as a mistake the way it would on a person.
Merging the Duplicated Star Layers
Once all the duplicates are positioned to fill the frame, select all of the star layers together and merge them with Ctrl or Cmd+E. This combines everything into a single layer, which is easier to manage going forward. One thing to watch for: merging layers resets the blend mode to Normal, so remember to switch the merged layer’s blend mode back to Screen afterward.
Using a Clipped Levels Adjustment to Blend the Stars
Even with the Screen blend mode doing its job, the merged star layer often still carries too much light information, making the sky look overly bright or busy rather than like a natural star field. A Levels adjustment layer fixes this. Go to Layer, down to New Adjustment Layer, and over to Levels, then right-click the new adjustment layer and choose Create Clipping Mask so it only affects the star layer beneath it rather than the whole image. Because the star layer is in Screen mode, dragging the middle (midtone) slider to the right darkens the star layer, and its darker parts simply disappear, leaving just the brightest points — the actual stars — visible. Find a middle ground rather than pushing it to an extreme; the goal is for the stars to look like they’re part of the original sky rather than an obviously separate layer sitting on top.
Masking the Stars to the Sky
At this point the stars will likely be overlapping parts of the image where they don’t belong, like mountains, a house, or trees along the horizon. Group the star layer together with its Levels adjustment layer by shift-clicking both and pressing Ctrl or Cmd+G, then add a layer mask to the group so the stars only appear in the sky.
Selecting the Horizon with the Magic Wand Tool
Hide the group temporarily and create a new layer to work on. Press W for the Magic Wand tool and click in the sky, holding Shift and clicking a couple more times to include all of the sky until you have a clean line following the horizon — the exact shape of the terrain along the top edge, like where it meets trees, a house, or mountains. The area above that line doesn’t need to be perfectly selected yet, since it can be filled in separately.
Filling In the Layer Mask with White
With the horizon selection made, turn the group back on and click the layer mask button. Whenever a selection is active, that button loads the selection into the new mask. Anything not yet covered above the horizon line can be selected with the Lasso tool and filled with white using Edit, then Fill — white on a layer mask makes an area visible, black makes it invisible, so the sky above the horizon needs to be white and the ground below needs to be black. Hold Alt or Option while clicking the mask thumbnail to view the mask directly and check that the shape is clean. Once the mask is filled in, the stars will only be visible in the sky and hidden behind the mountains, trees, and any other foreground elements.
With the stars properly masked, you can still reposition them for the best composition. Free Transform still works on the grouped layers, letting you move, scale, or rotate the star field until it sits exactly where you want it, and a soft black brush painted directly on the mask near the horizon can fade the stars out gradually as they approach the ground for an even more natural transition.
Why This Technique Works
The whole effect rests on the Screen blend mode’s core behavior: black disappears, light shows through. That single property means a star photo can be layered onto any background without ever needing to manually erase the black sky around each star. Clipping a Levels adjustment to the star layer, rather than adjusting levels globally, keeps the change isolated to just the stars, letting you push the contrast until only the brightest points remain visible without affecting the underlying photo at all. And building the layer mask from the actual horizon line, using the Magic Wand tool to trace it, ensures the stars stay exactly where they belong — in the sky, and nowhere else.
Final Thoughts
Adding stars to a night photo takes only a few steps once you understand the underlying blend mode trick: bring in a star photo, switch it to Screen, fill any gaps with duplicated and repositioned copies, clip a Levels adjustment to control the brightness, and mask the result to the sky using the horizon as your guide. It’s a fast fix for a night sky that didn’t quite deliver on location, and it can make a real difference in the final image.
Quick Reference: Keys, Menus and Settings
- Bring in the starsMove Tool, drag the star photo onto the background; F for full screen
- Scale a littleCmd/Ctrl + T, just enough to cover the horizon
- Hide the blackLayers panel blend mode: Screen
- Fill the gapsCmd/Ctrl + J, arrow keys to align; Cmd/Ctrl + E to merge, then Screen again
- Blend with LevelsLayer > New Adjustment Layer > Levels, right-click > Create Clipping Mask, middle slider to the right
- Mask to the skyCmd/Ctrl + G, W and Shift-click the sky, layer mask button, Edit > Fill with white
- Check the maskAlt/Option-click the mask thumbnail
No AI, no generative credits.

Free Downloads
Follow Along on the Same Photos
Get the night landscape and the Milky Way photo from the video, plus the 4-page PDF guide to compositing the stars with Screen, Levels and a mask. Free with a PHLEARN account.
Adding Stars in Photoshop: Common Questions
Why does the Screen blend mode make the black sky disappear?
In Screen, dark areas become invisible and light areas stay visible. The black around each star drops out and only the stars show, so there is nothing to cut out by hand.
How large should I scale the star photo?
Press Cmd/Ctrl + T and stretch it just enough to cover the horizon. Stars are small in the night sky, and stretched stars stop looking real.
My star photo doesn’t cover the whole sky. What do I do?
Duplicate the star layer with Cmd/Ctrl + J, drag the copy over the gap and line it up with the arrow keys. Repeat on the other side, or bring in stars from a different photo.
How do I hide an obvious repeat, like a duplicated Milky Way?
Press Cmd/Ctrl + T on that copy and scale it until the repeat falls out of frame, or rotate it. With stars, rotating or flipping a copy doesn’t give anything away.
After merging, my stars cover the whole photo. Why?
Merging with Cmd/Ctrl + E resets the blend mode to Normal. Set the merged layer back to Screen.
Why does my Levels adjustment change the whole photo?
It isn’t clipped. Right-click the Levels layer and choose Create Clipping Mask; a small down arrow shows it now affects only the star layer below.
Which Levels slider blends the stars into the sky?
Aaron drags the middle slider to the right to darken the star layer. Because it is in Screen, the darker parts disappear. Stop at a midpoint where the stars sink into the original sky, not at completely invisible darks.
How do I keep the stars off the mountains, trees and house?
Group the stars and Levels with Cmd/Ctrl + G and hide the group. On a new layer, press W and Shift-click the sky until the selection follows the horizon, show the group and click the layer mask button. Fill the rest of the sky with white using the Lasso and Edit > Fill.
How do I fade the stars near the horizon?
Click the group’s layer mask and paint black with a really soft-edged brush along the horizon. Alt/Option-click the mask thumbnail at any time to see the mask itself.
Is there a free download?
Yes, with a free PHLEARN account. You get 2 sample images and 1 PDF guide: four pages with every step, the shortcuts, what trips people up and a one-page summary.
Master Photoshop, Lightroom and Photography
Join PHLEARN PRO for $12.99 a month or $99.99 a year. Cancel anytime, with a 100% money-back guarantee.





