Retouching Tutorials

Dodging and burning is a staple technique for professional photographers and retouchers. Learn how to sculpt highlights and shadows to add dimension, remove blemishes, and guide the eyes of the viewer to the most important parts of a photo.
Photoshop | Photo Editing | Medium | 5 hours | 14 videos
16 Sample Images | 1 Photoshop Brush

Go behind the scenes of a product photoshoot and also see part of the post-production process as Aaron demonstrates how to retouch and extend a background in Photoshop.
Sample Images Included

Join Ross Floyd and Aaron Nace as they walk you through 10 product photo edits from start to finish. Learn to cut out objects, remove blemishes, reshape products, and master advanced techniques like frequency separation and dodging & burning.
Photoshop | Retouching | Medium | 13.25 hours | 49 videos
31 Sample Images | 2 Photoshop Actions

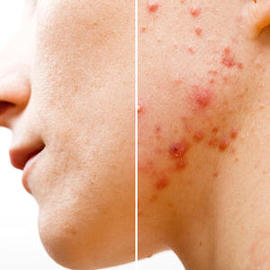
Learn how to color correct skin using Selective Color Adjustment Layers to isolate and adjust individual color channels to dial in the perfect look for your portraits.
Sample Images Included

Give your photos a professional finish with sharpening in Photoshop. Learn to enhance details, create contrast, and prepare your images for print, web, and social media.
Photoshop | Photo Editing | Medium | 3 hours | 14 videos
18 Sample Images | 1 Photoshop Action
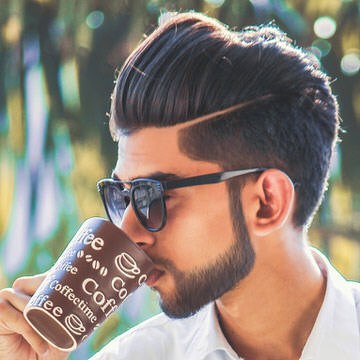
With so much natural variation, hair can be one the most challenging things to style and recreate in Photoshop. Not anymore! We break down some simple techniques that will help you shape, fill in, and paint new, realistic hair in minutes.
Sample Images Included
Learn to realistically cut out and paint hair in Photoshop. Make quick selections using Select Color Range, make advanced selections with Channels, and paint in new, ultra-realistic hair with the Brush Tool.
Photoshop | Retouching | Medium | 4.75 hours | 18 videos
12 Sample Images | 10 Photoshop Brushes

Dodging and burning is an incredibly useful technique to add contrast, depth, and definition to your photos.
Learn to dodge & burn in Lightroom with the power of RAW!
Sample Images Included

Sharpening is an important last step when finishing an edit. In this tutorial, we show you when and how to sharpen an image using our tried and tested method.
Sample Images Included

Having a soft, out-of-focus background is an extremely effective way of drawing the viewer’s eye to your subject. This is best done in camera, but we’ll show you how to do it in Photoshop.
Sample Images Included

Batch resizing is ideal for when you need to send a client several images for review but full-size files aren’t necessary. Learn to create an action that will resize an image to a specific length and apply it to all your images.
Sample Images Included
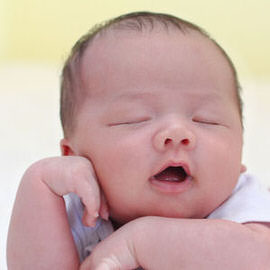
From adjusting red, blotchy areas to cleaning up dry, flaky skin, we’ll walk you through some newborn retouching techniques that anyone can learn to help capture memories that will last a lifetime.
Sample Images Included
From people and cars to buildings and reflections, if there’s a distraction in an image, we have a method to seamlessly remove it. Follow along was we show you how to create accurate selections, retouch environments, and simplify images.
Photoshop | Retouching | Medium | 6.5 hours | 20 videos
18 Sample Images

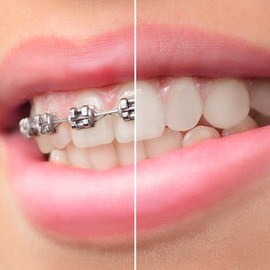
In this tutorial, we break down an easy process for reducing the dark circles that can often appear under eyes in a photo.
Sample Images Included

Hair will always be one the most challenging areas to retouch and enhance. In this tutorial, we’ll show you how to increase the volume of hair using the Liquify Tool and color it with one of Aaron’s favorite methods, a Gradient Map.
Sample Images Included

Don’t give up on underexposed images! In this tutorial, we’ll walk you through some techniques to brighten a portrait and, to show you how easy it can be, we’ll do it in only two minutes!
Sample Images Included

Join us as we demonstrate how to work with clients and shoot in a professional studio environment . Afterwards, we take you through Lightroom and Photoshop where you’ll learn retouching techniques like dodging and burning and blemish removal.
Photoshop | Photography | Medium | 7.25 hours | 21 videos
9 Sample Images | 1 Photoshop Action | 1 Photoshop Brush | 1 Photoshop Gradient

Being able to cut out a person or product and place them on a plain colored background is an essential skill to have. In this tutorial, we’ll walk you through the process of cutting out a subject and placing them a on a pure white background.
Sample Images Included
A portrait doesn’t need to be all clear skin and perfect hair. But whether you want to remove distractions from an everyday photo, or smooth skin until it’s flawless for a studio portrait, these 5 tools will make your life easier.
Sample Images Included

Add volume to eyebrows in Photoshop to achieve that trendy perfect brow. Start with shaping and then create a custom brush to add hair.
Sample Images Included

In this tutorial, we’ll walk you through how to create your own custom Photoshop Brush to add realistic freckles to any portrait in Photoshop!
Sample Images Included

Making local adjustments in Lightroom can help rescue details and remove distractions. From skin retouching to adjusting exposure, we’ll cover all the bases and show you how to do so while only affecting a specific part of your image.
Lightroom | Retouching | Easy | 45 mins | 3 videos
213 Sample Images

Retouching can be used to take any image to the next level, from wedding portraits for a friend, to products for a web store, to high-end fashion shots for the cover of a magazine. Master the art and craft of cleaning up photos and helping people and objects look their best.
10 Courses Included
Sometimes there is not enough information in the image for the Clone Stamp Tool or the Healing Brush Tool to work effectively. This is where knowing how to make the most out of the brush tool comes in handy!

What makes a great photo? In this comprehensive series, we take you from beginner to post-processing professional. Learn to make quick, subtle, and basic edits then level-up to making an all-out fully retouched composite.
Photoshop | Photo Editing | Medium | 20.75 hours | 62 videos
139 Sample Images | 1 Photoshop Action | 1 Photoshop Brush
A masterclass in high-end photo editing. See how the pros remove blemishes, clean up wardrobe and environments, dodge and burn, and then combine it all while completing a detailed composite image.
Photoshop | Photo Editing | Advanced | 7.5 hours | 15 videos
23 Sample Images | 1 Photoshop Action | 1 Photoshop Brush

If you’re familiar with the fundamentals of photo editing but want to brush up on skills or step up your game, this tutorial is for you! Learn how to color correct and color grade, change composition, dodge and burn, subtle compositing, and see the photography process unfold!
Photoshop | Photo Editing | Medium | 9.75 hours | 23 videos
46 Sample Images

Jump into the world of photo editing! Learn professional workflow and best-practices for editing within Lightroom and Photoshop.
Lightroom, Photoshop | Photo Editing | Easy | 4 hours | 24 videos
70 Sample Images
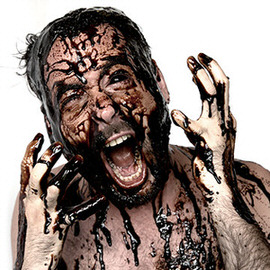
Follow along during our photoshoot where we pour black liquid on Aaron’s head, then take the image into Photoshop for finishing touches, including blacking out his eyes.
Sample Images Included

Combine the power of Photoshop compositing and retouching! In this tutorial, we show you how to remove a subject from a background, composite multiple images together, and perform high-end retouching on skin and wardrobe for athletes.
Photoshop | Retouching | Easy | 2.25 hours | 6 videos
11 Sample Images

Retouching hair can make a huge difference in a photo. Messy hair results in a messy image. Learn three powerhouse techniques to retouch any type of hair. Don’t forget to download the sample image, and upload your version below!
Sample Images Included