
Download the Sample Image
Description
Learn how to change the color of nearly anything in Photoshop using the powerful Hue/Saturation Adjustment Layers. Clothing, products, eyes, and hair–no matter what kind of photos you work with, this is an essential skill for any Photoshop artist.
This is Day 21 of our 30 Days of Photoshop series. Follow along with all 30 episodes as we explore the magic of Photoshop together!
Watch Next
30 days of photoshop
Sign up to receive email updates to keep you going, sample images to follow along, and a printable calendar to keep track of your progress!
CHANGE THE COLOR OF ANYTHING
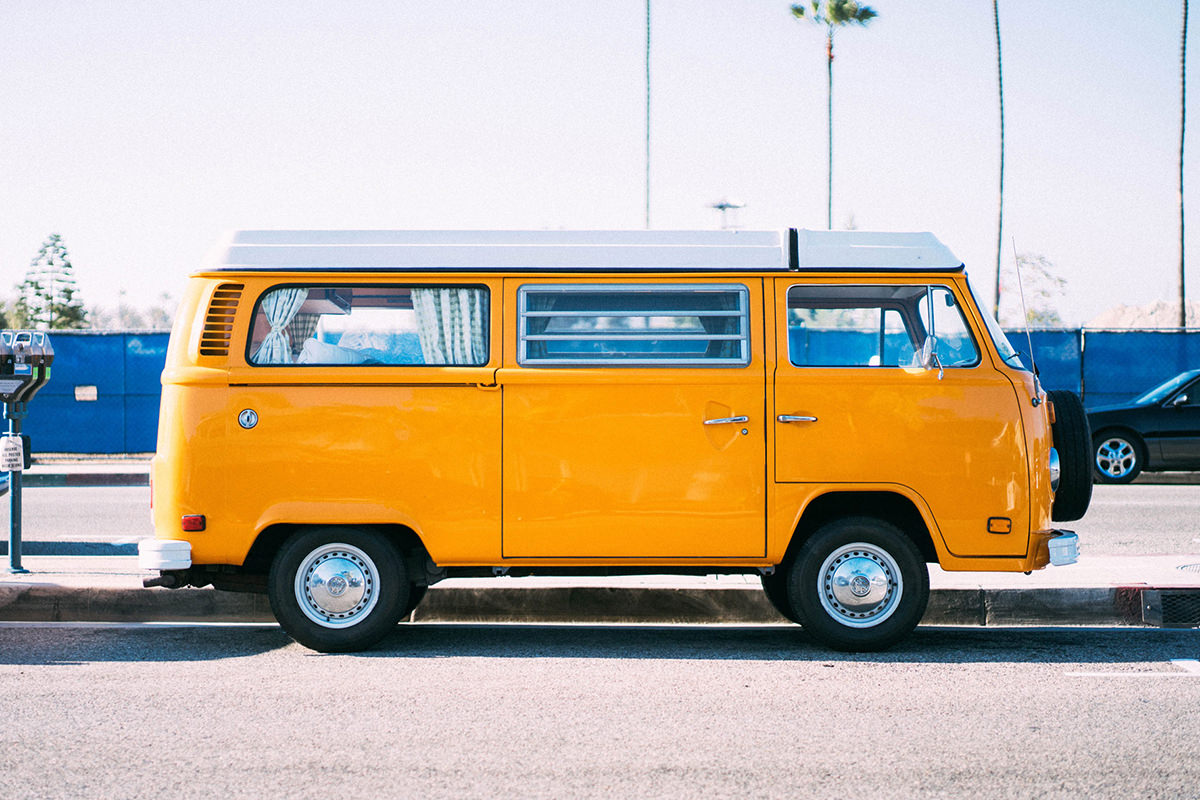
BEFORE
Change the Color of Anything!
The Hue/Saturation Adjustment Layer
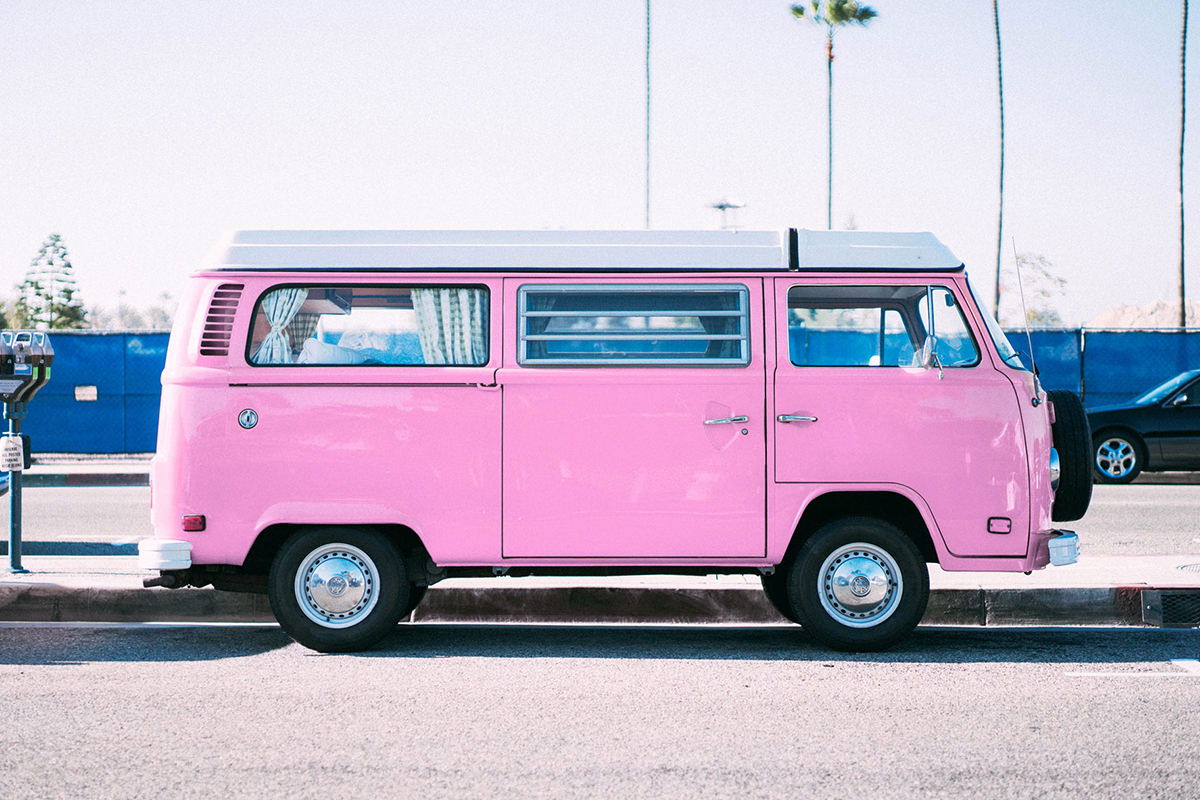
When you need to change a color in Photoshop look no further than the Hue/Saturation Adjustment Layer. Not only does it let you adjust the hue, saturation, and lightness of an image, it also allows you to target specific colors to change! Turn a red dress into a blue dress, or a yellow van into a pink one–all with Hue/Saturation Adjustment Layers!
Targeting Colors
When you create a Hue/Saturation Adjustment Layer, the Hue/Saturation properties dialog will appear. This window of drop-down menus and sliders gives you almost everything you’ll need to target and change any color in Photoshop.
Let’s use our photo of the yellow van as an example. Say we want to change the color of the van to pink. We first need to target the yellows in the image. The second drop-down menu provides different color options to target in the image. Start by selecting the Yellows. This will get us some of the way there, but we can get even more precise. Using the first of the 3 eyedropper tools, sample an area of yellow from the van. You’ll notice that a slider appears between the two color bars at the bottom of the menu. This slider displays what range of color you currently have selected. You can move it left to right, which will change the selected hues, or slide the the ends out to the left and/or right, which increases the feathering of the selected hues.
We’re pretty close! Try using the tip color slider labeled Hue to change the color of the van. You should see the color shift as you move the slider up and down. If you notice that it’s missing parts of the yellow van or shifting other colors you don’t want, just try and fine-tune the selected colors using the bottom slider.
Layer Masks
So now we know how easy it is to select and change colors, but we need one more tool to make it all work in a final image. You might notice that while our Hue/Saturation Adjustment Layer is successfully changing the color of the van, it’s also shifting the color of other objects in the image. Fortunately, Layer Masks make this a quick and easy fix!
Every Adjustment Layer you create comes with a Layer Mask. Just paint black on the Layer Mask over any areas of the photo that you don’t want color changes to occur. If you’re changing the color of something small in an image, it might be easier to Invert the Layer Mask of the Adjustment Layer (making it black and making the Hue/Saturation changes completely invisible), and then paint white over the object you want to change the color of.


