
A wide-open aperture separates a subject from its background automatically, but that look can be rebuilt after the fact if you respect how the optics actually behave. Learn why cloning out the subject before blurring prevents an impossible color halo, how to place a graduated blur with Tilt-Shift or a hand-built Lens Blur channel, and why a Smudge pass along the edge beats feathering the mask.
We publish a new free tutorial every week, each one with sample images and PSDs you can download and follow along with. Sign up and they land straight in your inbox, along with early word on sales, events and subscriber-only offers.

Creating a Shallow Depth of Field in Photoshop
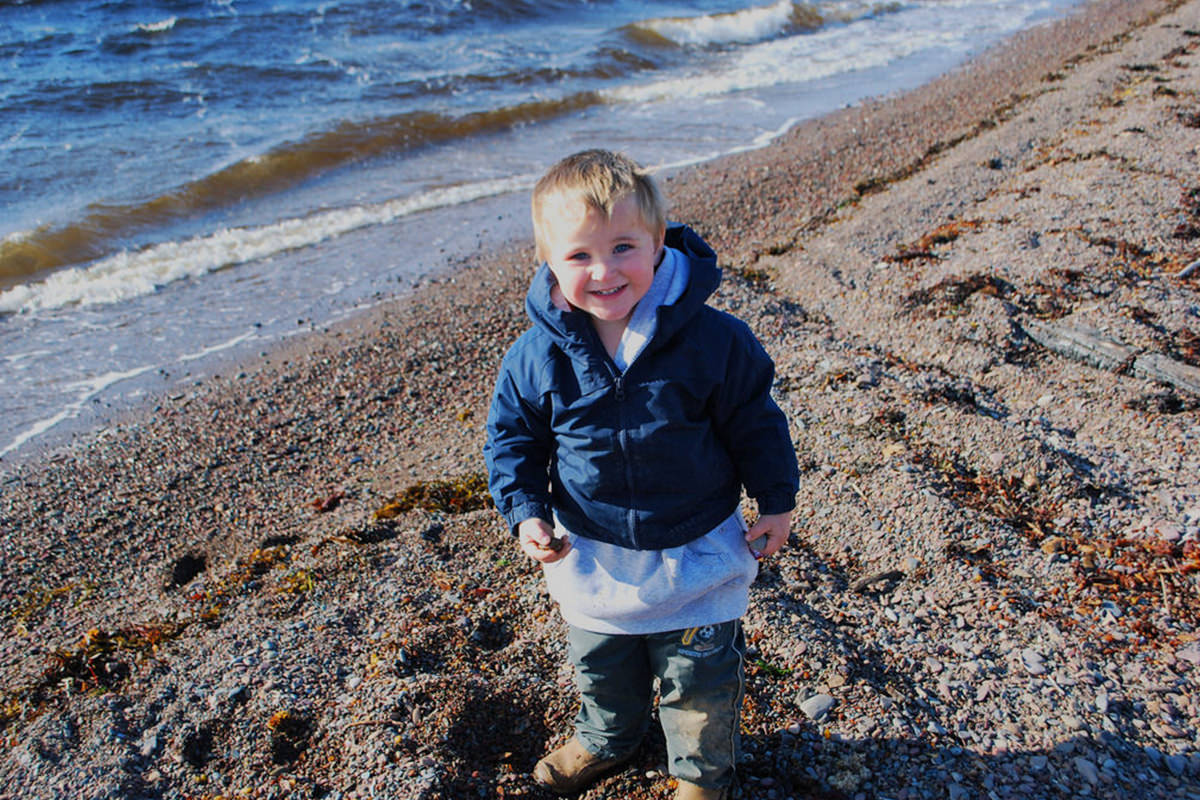
Shooting with a wide-open aperture naturally separates a subject from the background with a soft, out-of-focus blur, but not every photo gets shot that way. This technique simulates that same shallow depth-of-field look in Photoshop by cutting the subject out, carefully preventing color from bleeding around their edges, and applying a graduated blur that fades from sharp to soft exactly where a real lens would.
Getting Started: When This Effect Works Best
This effect works best on a relatively simple background, and it has real limits worth understanding before starting.
-
Check Whether the Background Suits the Effect
Confirm there is not something sitting immediately behind your subject’s head, like a wall a foot away. A background element needs some real distance from the subject for a natural depth-of-field blur to make visual sense.
Why Background Distance Matters
A shallow depth of field in a real photograph is not a simple left-to-right blur. It is based on distance from the plane of focus. Something a foot behind a subject would not naturally be very blurred at all, so applying a strong blur there would look obviously fake, while something ten feet back would plausibly be soft in real optics. Complex, layered scenes can still work with this technique, but they take longer since more careful masking is required.
Cutting Your Subject Out of the Background
The cutout does not have to be perfect everywhere, only where the blur will be strong enough to expose a bad edge.
-
Select With the Magnetic Lasso Tool
Click on an edge of your subject with the Magnetic Lasso tool and move your cursor along the outline. It will follow the edge automatically, though not perfectly, getting you roughly 80 to 90 percent of the way there.
-
Close the Selection
Double-click to close the selection once you have traced back around to your starting point.
Refining the Selection
A few passes with the regular Lasso clean up whatever the Magnetic Lasso got wrong.
-
Add to the Selection With Shift
Switch to the regular Lasso tool, hold Shift, and manually select any areas the Magnetic Lasso missed, like part of the hair.
-
Subtract From the Selection With Alt/Option
Hold Alt (Option on Mac) and select any areas that were incorrectly included, refining the edge as needed.
-
Prioritize Accuracy Where It Matters
Focus your refinement effort on edges near where the blur will actually be strong, and do not worry as much about areas, like feet close to the focal plane, that will not be blurred much anyway.
-
Copy the Subject to a New Layer
Press Ctrl + J (Cmd + J on Mac) to copy the selected subject onto its own layer.
Preventing Color Bleed Before Blurring
Blurring the background layer directly, with the subject still sitting on it, causes an obvious problem worth fixing first.
-
Duplicate the Background Layer
Duplicate the original background layer to preserve the untouched version.
-
Clone Stamp Out the Subject’s Former Area
Using the Clone Stamp tool, sample from the surrounding background and paint over the area where your subject used to be, working from the outside in.
Why Cloning Prevents a Color Halo
Blurring a background layer that still has the original subject sitting on it smears the subject’s own colors, like a blue jacket, into the surrounding blur. That would never happen with a real optical depth of field, since the subject in front is a separate physical plane from what is behind them. The Clone Stamp job does not need to be perfect, since most of it will end up hidden behind the subject layer placed back on top afterward. It only needs to cover whatever small edges might peek out once the blur is applied.
Blurring the Background With Tilt-Shift
The Tilt-Shift filter builds the graduated blur in a single step, with handles that control exactly where focus falls off.
-
Apply the Tilt-Shift Blur Filter
On the cleaned-up background layer, go to Filter > Blur Gallery > Tilt-Shift.
-
Position the Focus Plane
Drag the in-focus band to align with the part of your subject that should stay sharp, such as their feet if they are standing on the same plane throughout the shot.
-
Adjust the Blur Falloff
Drag the falloff handles to control how gradually the blur increases moving away from the focus plane, aiming for something that looks believable rather than pushed to an extreme.

An Alternative Blur Method Using Lens Blur
The same graduated result can be built by hand with a gradient and the Lens Blur filter, which is useful if you prefer more manual control over where the falloff sits.
-
Create a Gradient on a New Layer
On a new layer, use the Gradient tool set to Foreground to Transparent and Linear, and drag a gradient from top to bottom over the image.
-
Turn the Gradient Into a New Channel
Hold Ctrl (Cmd on Mac) and click the gradient layer’s thumbnail to load it as a selection, then create a new channel in the Channels panel and invert it with Ctrl/Cmd + I so it matches the gradient.
-
Apply Lens Blur Using That Channel
Go to Filter > Blur > Lens Blur, set the Source to your new alpha channel, and adjust the Radius until the blur fades gradually just like the Tilt-Shift result.
Softening the Edge With the Smudge Tool
A final pass with the Smudge tool blends the hard-edged cutout of the subject into the newly blurred background for a more believable transition.
-
Create a New Layer for Smudging
Create a new layer above everything and zoom in close to the subject’s edge.
-
Enable Sample All Layers and Lower Strength
Select the Smudge tool, check Sample All Layers in the options bar, and set Strength to around 10 to 15%.
-
Smudge Along the Edge
Click and drag back and forth along the subject’s edge to mix background and subject pixels together at the boundary.
How This Differs From Refine Edge
An edge-softening tool works by feathering or softening the mask itself, which changes opacity along the boundary but does not actually mix pixel colors together. The Smudge tool physically blends the color information from both layers at the edge, which produces a more realistic transition, especially appropriate here, since a real shallow depth-of-field photo would naturally have a soft, blended edge around an in-focus subject rather than a crisp cutout line.
Common Mistakes to Avoid
Blurring the background without first cloning out the area behind the subject is the most common mistake, and it leaves an obvious color halo bleeding into the blur that would never happen optically. Choosing a subject with something distracting directly behind their head, with no real depth to the scene, also undermines the whole effect before it starts. And leaving the cutout edge completely hard, without a Smudge pass to blend it, makes the composite look pasted rather than photographed with a genuinely shallow depth of field.
More Free Photoshop Tutorials
If this depth-of-field technique was useful, these free tutorials cover related selection and blur tools:
- How to Use Lens Blur in Photoshop
- How to Select Subjects and Refine Edges in Photoshop
- How to Use Smart Objects in Photoshop
Why This Approach Works
What makes this simulated depth of field convincing rather than obviously fake comes down to respecting how real optical blur actually behaves. Cloning out the subject’s former position before blurring is what prevents an impossible color bleed. In a real photo, a subject’s colors never smear into a background that is optically behind them, so skipping this step is one of the fastest ways to break the illusion. Positioning the focus plane and controlling the falloff, whether with Tilt-Shift or a hand-built gradient channel and Lens Blur, mimics how real depth of field increases gradually with distance rather than snapping instantly from sharp to soft. And finishing with a Smudge pass, rather than leaving a crisp cutout edge, accounts for the fact that a genuinely shallow depth of field naturally produces a soft transition at the boundary of an in-focus subject, a detail easy to overlook but one that separates a believable result from one that reads as an obvious composite.
Final Thoughts
Faking a shallow depth of field is one of those effects that rewards attention to the small details a real lens produces automatically: distance-based falloff, no color bleed between subject and background, and a soft rather than hard transition at the edges. Whether you reach for the Tilt-Shift filter or build the same result manually with a gradient and Lens Blur, the underlying principle is the same. Simulate what the optics would actually do, rather than applying a uniform blur and calling it finished.
New Free Tutorials View All »











Enjoying This Free Tutorial? Go Further with PRO.
Unlock Full Sample Files, PSDs, and Hundreds of Masterclasses!

Download full project assets, original PSDs, and RAW images for every lesson
Unlimited access to our complete library of PRO Photoshop & Lightroom courses
Instant 4K Ultra HD streaming on all devices, anytime, anywhere
Full access to our entire library of Photoshop Actions, Presets, and LUTs
Flexible monthly and annual membership plans
Cancel anytime with zero hassle or commitments