

Download Assets
This tutorial includes 1 PDF guide. Downloads are free with a PHLEARN account.
- Download the sample files from every free tutorial on PHLEARN
- New free tutorials published every week
- One free account: sign up once, then download anything
Free PDF Guide · 4 Pages
This Tutorial as a Step-by-Step PDF
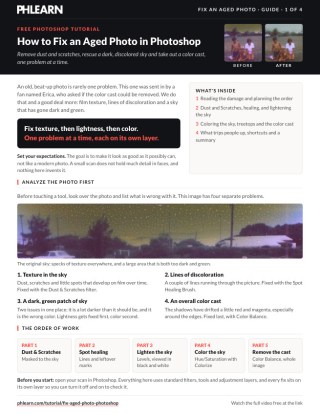
This guide walks through Filter > Noise > Dust and Scratches starting at Threshold 0 and Radius 1, masking it to the sky, the Spot Healing Brush, a Levels layer with a radial gradient on the mask, a Colorized Hue/Saturation sky, Clone Stamp at 70% Flow and Color Balance for the cast. Use it on any faded family photo.
description
An old photo is rarely one problem. There is film texture, a sky that has gone dark and discolored, and a color cast that shifted over decades. Aaron takes them in order: Dust and Scratches masked to the sky, the Spot Healing Brush for the remaining lines, a temporary black and white layer so lightness can be judged without color, then Colorize for the sky and Color Balance for the cast.
Enjoying This Free Tutorial?
We publish a new free tutorial every week, each one with sample images and PSDs you can download and follow along with. Sign up and they land straight in your inbox, along with early word on sales, events and subscriber-only offers.
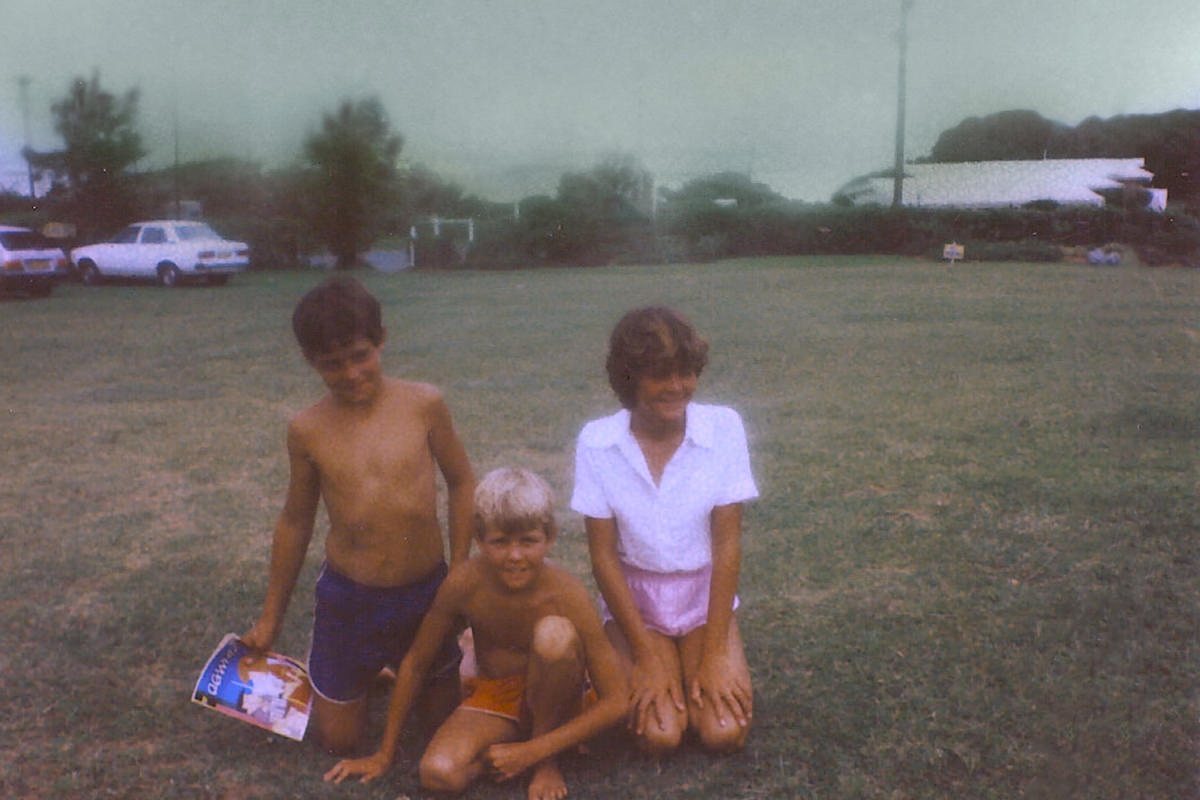
An old, beat-up photo usually has several separate problems stacked on top of each other: dust and scratches from the film itself, a discolored and too-dark sky, and an overall color cast that’s shifted over time. This tutorial works through each issue one at a time, removing texture and marks first, correcting lightness in black and white, then finishing with targeted color correction. The photo was submitted by PHLEARN fan Erica, who asked if the color cast could be removed.
Removing Dust and Scratches With the Dust and Scratches Filter
The Dust and Scratches filter blurs away the small specks and texture that develop on aged film, with radius and threshold sliders that control how much detail gets protected in the process.
-
Duplicate the Background Layer
Click the background layer and drag it to the New Layer icon to create a copy to work on.
-
Open the Dust and Scratches Filter
Go to Filter > Noise > Dust and Scratches to open the filter dedicated to removing this kind of texture.
-
Start With a Low Radius and Zero Threshold
Start with Threshold at 0 and Radius at 1, then raise the radius only as far as needed, about 4 here, since raising it too high blurs the image far more than needed.
-
Raise the Threshold to Protect Detail
Bring the threshold up gradually, such as to six or seven, to protect more of the image’s real detail while still removing the texture.
-
Balance Radius and Threshold Together
Fine-tune both sliders together until the dust and scratches in the problem area, such as the sky, are gone without excessive blurring elsewhere.
Why the Radius Should Stay as Low as Possible
Raising the radius too high does get rid of dust and scratches, but it does so by blurring everything in its path, which erases real detail along with the damage. Keeping the radius low and instead raising the threshold protects that detail, since threshold controls how much of the original image is preserved rather than smoothed away.
Masking the Filter to Protect the Subjects
Because the Dust and Scratches filter blurs detail everywhere it’s applied, masking it so it only affects the sky protects the sharper detail on the people in the photo.
-
Add a Black Layer Mask
Hold Alt/Option and click the layer mask icon to add a black mask that hides the filtered layer entirely.
-
Paint White Over the Sky
Choose white and paint with a regular brush over the sky area, making the dust-and-scratches layer visible only there.
-
Toggle the Layer to Check the Result
Turn the layer off and on to confirm the sky looks cleaner while the subjects remain untouched.
Removing Discoloration Lines With the Spot Healing Brush
Distinct lines of discoloration left over on the film respond well to the Spot Healing Brush, which automatically chooses a sample point rather than requiring one to be picked manually.
-
Create a New Layer
Add a new layer to hold the healing work separately from the layers below.
-
Select the Spot Healing Brush
Press J to select the Spot Healing Brush tool, which chooses its own sample area automatically.
-
Paint Over Each Line
Paint directly over each visible line or mark, letting Content-Aware fill in the area convincingly, including near image edges. Then paint out any texture still left in the sky and any small spots elsewhere in the photo.
Viewing the Image in Black and White to Correct Lightness
Temporarily converting the image to black and white removes color from the equation entirely, making it much easier to judge and correct lightness on its own.
-
Add a Black and White Adjustment Layer
Go to Layer > New Adjustment Layer > Black and White and click OK without changing any properties.
-
Use It Only as a Temporary Guide
Keep this layer visible only while correcting lightness, since it will be deleted once the sky’s brightness is fixed.
Why Correct Lightness in Black and White First
Trying to judge whether an area is too dark while also seeing its color can make it harder to tell how much brightness actually needs to change. Removing color temporarily with a black and white adjustment layer isolates the lightness problem, so corrections can be made purely on how light or dark an area is before color is addressed separately.
Lightening the Dark Sky With a Masked Levels Layer
A Levels adjustment layer’s midpoint slider brightens the image, and painting a gradient onto its mask limits that brightening to just the dark patch in the sky.
-
Add a Levels Adjustment Layer
Go to Layer > New Adjustment Layer > Levels to create a new levels layer.
-
Drag the Midpoint Slider to Lighten
Click the midpoint slider and drag it left to brighten the image overall.
-
Invert the Layer Mask to Black
Press Cmd/Ctrl+I on the layer mask so the lightening effect is hidden everywhere by default.
-
Paint a Radial Gradient Over the Sky
Press G for the Gradient tool, set it to foreground-to-transparent with white as the foreground, choose a radial gradient, and drag it out over the dark patch in the sky.
-
Adjust Opacity and Paint Black to Protect Details
Lower the gradient’s opacity to control how much lightening is applied, and paint black over areas like trees that shouldn’t be affected.
Using a Brush Tool as an Alternative to the Gradient
For anyone more comfortable with a brush than a gradient, painting white directly onto a black layer mask with a soft-edged brush achieves the same targeted lightening.
-
Duplicate the Levels Layer
Duplicate the levels adjustment layer to create a second version to experiment with.
-
Fill the Mask With Black
Fill the duplicate’s layer mask entirely with black to hide the effect.
-
Paint White With a Soft Brush
Choose a soft-edged brush and paint white over the dark patch to lighten it directly, using whichever method feels more comfortable.
Coloring the Sky Blue With a Colorized Hue/Saturation Layer
The Colorize option in a Hue/Saturation adjustment layer tints an entire masked area to a single chosen color, which works well for painting a natural-looking sky blue.
-
Delete the Black and White Layer
Make any last touches to the sky’s lightness, then remove the temporary black and white adjustment layer.
-
Add a Hue/Saturation Adjustment Layer
Go to Layer > New Adjustment Layer > Hue/Saturation to add a new adjustment layer.
-
Enable Colorize and Choose Blue
Click the Colorize checkbox and choose a blue that approximates the sky’s natural color.
-
Invert the Mask and Paint Over the Sky
Press Cmd/Ctrl+I to invert the mask to black, then paint white over the sky area to apply the blue color there.
-
Fine-Tune Hue and Saturation
Adjust the hue if the wrong blue was chosen, and lower saturation if the color looks too intense.
Filling In Background Detail With the Clone Stamp Tool
An optional pass with the Clone Stamp tool can restore a bit more visual detail in soft background areas, such as treetops near the edge of the frame.
-
Create a New Layer for Cloning
Add a new layer to hold any additional detail work separately.
-
Sample and Paint With the Clone Stamp Tool
Press S for the Clone Stamp tool, lower the flow to around 70%, sample nearby areas, and paint to add a bit more detail to the treetops.
Correcting the Overall Color Cast With Color Balance
A Color Balance adjustment layer separates shadows, midtones, and highlights, making it possible to remove an aged photo’s built-up color cast from each tonal range individually.
-
Add a Color Balance Adjustment Layer
Go to Layer > New Adjustment Layer > Color Balance to add the adjustment.
-
Correct the Shadows First
Select Shadows and drag the Yellow-Blue slider toward yellow to take out some blue, move Cyan-Red toward cyan and add a touch of green, until the shadow areas look neutral rather than tinted red or blue.
-
Adjust the Midtones
Select Midtones and make smaller adjustments left and right until the overall balance looks natural.
-
Adjust the Highlights
Select Highlights and add a small amount of cyan and blue if the brighter areas need it.
-
Reduce Sky Saturation if Needed
Lower the sky’s saturation slightly if the added blue color looks too intense after the color balance pass.
Why Trust Your Eye Even Without Color Theory Experience
Judging exactly which color is causing a cast in the shadows or highlights takes practice, and not everyone will immediately recognize that a shadow has too much blue or red in it. Simply dragging each Color Balance slider left and right while watching whether the image looks better or worse achieves the same result, since the goal is a neutral, natural-looking image rather than a mathematically precise correction.
Why This Approach Works
Separating the fixes into distinct stages, texture removal, lightness correction, and color correction, keeps each problem from complicating the others, since trying to fix color while dust and scratches are still visible would make it much harder to judge what’s actually wrong. Working in black and white specifically for the lightness pass removes color as a variable entirely, so the sky’s brightness can be matched purely by tone. Splitting the final color balance correction across shadows, midtones, and highlights separately is what allows a color cast that built up unevenly across the image to be removed just as unevenly, rather than applying one flat correction to the whole photo.
Final Thoughts
An aged photo like this one will likely never look exactly like a modern, high-resolution image, especially in small details like faces, but working through dust removal, lightness correction, and color correction in order gets it about as close as possible. The same sequence of steps, Dust and Scratches, a black-and-white lightness pass, and a targeted Color Balance correction, applies to any old or damaged photo that needs a similar restoration.
Quick Reference: Keys, Menus and Settings
- Remove dustFilter > Noise > Dust and Scratches: Radius about 4, Threshold 6 or 7
- Keep it to the skyAlt/Option-click the layer mask icon, paint white over the sky
- Heal the linesJ Spot Healing Brush on a new layer
- Judge lightnessLayer > New Adjustment Layer > Black and White, no changes, delete it after
- Lighten the skyLevels midpoint left, Cmd/Ctrl + I on the mask, G radial white-to-transparent gradient
- Color the skyHue/Saturation with Colorize on, invert the mask, paint white over the sky
- Treetops and color castS Clone Stamp at 70% flow, then Color Balance: Shadows, Midtones, Highlights
No AI, no generative credits.
Free Downloads
Take the Guide With You
Get the PDF guide to restoring an aged photo, from the Dust and Scratches settings to the Levels, Hue/Saturation and Color Balance layers. Free with a PHLEARN account.
Restoring an Aged Photo: Common Questions
How do I remove dust and scratches from an old photo?
Duplicate the background layer and go to Filter > Noise > Dust and Scratches. Keep the Radius low, about 4 here, and raise the Threshold to 6 or 7 to protect detail.
Why keep the Radius low?
A higher Radius removes the specks by blurring everything, so real detail goes with them. Raise the Threshold instead to keep more of the original image.
The filter blurred the people. How do I fix that?
Hold Alt/Option and click the layer mask icon to add a black mask, then paint white over the sky only. The filter now shows just where it’s needed.
How do I get rid of lines and marks on the photo?
On a new layer, press J for the Spot Healing Brush and paint over each line. It picks its own sample area, and Content-Aware helps it keep the detail at edges.
Why add a Black and White layer when restoring a color photo?
Only to see lightness without the color getting in the way. Fix the dark patch in the sky while it’s on, then delete it before you correct the color.
How do I lighten just the dark part of the sky?
Add a Levels layer, drag the midpoint slider left, and press Cmd/Ctrl + I to invert its mask. Then drag a white-to-transparent radial gradient over the patch, or paint white with a soft brush if you prefer.
How do I make a discolored sky blue again?
Add a Hue/Saturation layer, check Colorize and pick a blue. Invert the mask, paint white over the sky, and fine-tune Hue and lower Saturation until it looks natural.
How do I remove the overall color cast?
Use a Color Balance adjustment layer and correct Shadows, Midtones and Highlights one at a time. If you can’t tell which color is wrong, drag each slider both ways and keep what looks better.
Is there a free download?
Yes, with a free PHLEARN account. You get 1 PDF guide with the restoration steps and settings from the video.
Master Photoshop, Lightroom and Photography
Join PHLEARN PRO for $12.99 a month or $99.99 a year. Cancel anytime, with a 100% money-back guarantee.





