
Download Assets
This tutorial includes 1 sample RAW file and 1 PDF guide. Downloads are free with a PHLEARN account.
- Download the sample images and PSDs from every free tutorial on PHLEARN
- New free tutorials published every week
- One free account — sign up once, then download anything
Free PDF Guide · 3 Pages
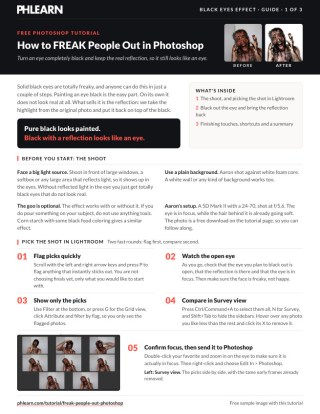
This Tutorial as a Step-by-Step PDF
The guide covers the shoot in front of a window, picking the shot in Lightroom with P, Survey view (N) and Edit In > Photoshop, then painting the eye black, Filter > Blur > Gaussian Blur, bringing the reflection back with Select > Color Range, a masked Curves layer for the eyelid, Levels and Black and White. Keep it next to your keyboard.
description
Solid black eyes are unsettling, but only if the eye still looks wet. That comes down to one thing set up before Photoshop opens: a real window or softbox reflection in the eye at the moment of the shot. Paint the eye black, soften the edge with Gaussian Blur, then lift that original highlight back out with Select > Color Range and paint it over the black — which is what keeps it reading as an eye.
Enjoying This Free Tutorial?
We publish a new free tutorial every week, each one with sample images and PSDs you can download and follow along with. Sign up and they land straight in your inbox, along with early word on sales, events and subscriber-only offers.
How to FREAK People Out in Photoshop
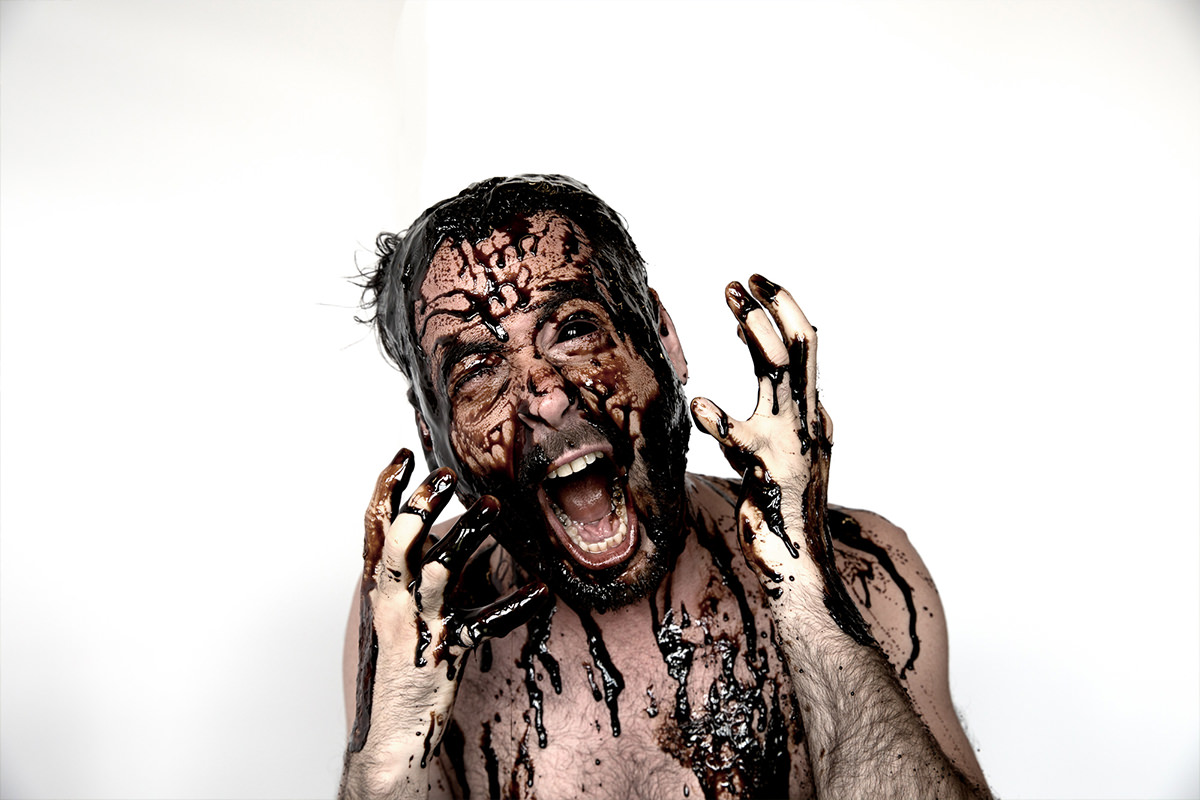
Turning someone’s eyes completely black is one of the simplest ways to make a photo look genuinely unsettling, and the whole effect comes down to a handful of Photoshop steps built around one key detail: keeping a real reflection visible in the blacked-out eye so it still reads as an actual eye rather than a flat, painted-over shape.
Shooting with Window Light for a Real Reflection
Before this effect works in Photoshop, it has to be set up correctly at the shoot. Position your subject facing a large light source, like a window or a softbox, so that light source shows up as a visible reflection in their eyes. Without that reflection already present in the original photo, blacking out the eye afterward will just look like a flat black shape rather than a convincing, glassy black eye — the reflection is what sells the whole effect. If you pour anything on your subject, as Aaron does with a black, molasses-like goo, don’t use anything toxic: corn starch with some black food coloring gives a similar effect.
Culling Your Shots in Lightroom
With a full set of shots imported into Lightroom, scroll through with the arrow keys and press P to flag any image that immediately stands out, without trying to pick a final favorite yet — this first pass is just about narrowing down to promising candidates quickly. Pay attention to whether the eye that’s meant to be blacked out is actually open, in focus, and clearly shows the window reflection, since all three are necessary for the effect to work later in Photoshop.
Using Survey View to Compare Similar Shots
Once you’ve flagged a batch of picks, filter to just those flagged images (press G for the Grid view, click Attribute and filter by flag), select them all with Ctrl or Cmd+A, then press N for Survey view and Shift+Tab to hide the sidebars so you see them side by side. Survey view makes it easy to eliminate similar shots one at a time — hovering over any image and clicking its X removes it from the group — which is a much faster way to compare near-duplicates than switching between single images one at a time. Double-clicking your final choice and zooming in confirms the eye is genuinely sharp before sending it to Photoshop: right-click and choose Edit In > Photoshop.
Painting Black Over the Eye
In Photoshop, create a new layer, select the Brush tool, and choose black as the foreground color. Zoom in close and paint all the way over the eye, covering its window reflection too, but leave the little reflections along the top and bottom lids alone. The eye’s reflection gets restored in the next step, so covering it briefly here isn’t a problem. There’s no need for pixel-perfect precision while painting; any black that spills outside the eye can be cleaned up afterward with a layer mask, painting black on the mask wherever the effect shouldn’t show.
Softening the Edge with Gaussian Blur
A hard-edged black shape painted directly over an eye tends to look flat and obviously artificial. Go to Filter, down to Blur, and over to Gaussian Blur to soften the edges of the painted black area slightly, letting it blend more naturally into the surrounding eyelid and skin rather than sitting as a sharp cutout.
Recovering the Eye’s Reflection with Color Range
With the black eye layer temporarily hidden, create a new layer and go to Select, then down to Color Range. This tool includes an eyedropper that lets you click directly on a specific color in the image and select every pixel matching that color range — in this case, clicking the bright highlight in the original eye selects that reflection specifically.
Selecting and Repainting the Highlight
Once Color Range outputs to a selection, turn the black eye layer back on and, on the new layer, paint with white using the Brush tool inside that active selection. Deselecting afterward reveals the original highlight reflection sitting on top of the black, which is exactly what makes the eye read as a real, reflective surface rather than a flat painted shape.
Darkening the Eyelid to Match the New Eye Color
Add a Curves adjustment layer and darken it slightly, then invert its mask with Ctrl or Cmd+I so the adjustment starts out completely hidden. Painting white on that mask specifically around the eyelid area — which would otherwise still reflect what used to be the bright white part of the eye — darkens that area to match the new black eye, keeping the transition from eyelid to eye looking consistent rather than leaving a mismatched bright patch behind.
Cleaning Up the Background with Levels
If the background wasn’t a pure, even white to begin with, a Levels adjustment layer can fix that quickly. Add the adjustment layer, select the white eyedropper within the Levels panel, and click on the background — anything at or near that brightness level gets pushed to pure white, adding contrast and cleaning up an uneven backdrop in one click. Raising the black point slider slightly afterward adds even more contrast to the overall image.
Desaturating for a Gnarlier Final Look
To push the final image further into unsettling territory, add a Black and White adjustment layer and lower its opacity rather than applying it at full strength — a partial desaturation often reads as more unsettling than a fully colorless image, since it keeps just enough realism intact. Reducing color and boosting contrast together shifts the overall feel of the image from a normal portrait to something considerably more disturbing, which is exactly the point of this effect.
Removing a Seam with the Brush Tool
A visible seam in a paper or foam core backdrop is a common distraction in a shot like this, and it doesn’t need anything fancy to fix. Create a new layer, select the Brush tool, hold Alt or Option to sample the background color, and paint directly over the seam. If a stray brush stroke covers something it shouldn’t — a hand or finger, for instance — a layer mask makes it easy to paint that detail back in without redoing the whole area.
Why This Technique Works
The entire effect hinges on one detail established before Photoshop even opens: a real reflection captured in the eye at the moment of the photo. Painting solid black over an eye is trivial on its own, but it’s the recovered highlight — lifted directly from the original image using Color Range and painted back on top of the black — that keeps the eye looking wet, reflective, and real instead of like a flat black circle. Darkening the surrounding eyelid to match, cleaning up the background, and finishing with a partial desaturation all support that central illusion rather than distracting from it, which is why the result reads as genuinely unsettling rather than obviously edited.
Final Thoughts
Turning someone’s eyes black in Photoshop is a fast, simple effect once the shot itself is set up correctly with a strong window reflection to work from. Painting black over the eye, softening the edge, and recovering that original highlight with Color Range does the heavy lifting, and a few finishing touches — darkened eyelids, a cleaned-up background, and a touch of desaturation — round the image out into something genuinely freaky, no black tar molasses required.
Quick Reference: Keys, Menus and Settings
- Flag and filter picksLightroom: P flags a pick; G for Grid view, Attribute, filter by flag
- Compare in SurveyCmd/Ctrl + A, then N; Shift + Tab hides the sidebars; click X to drop a photo
- Send to PhotoshopRight-click > Edit In > Photoshop
- Paint the eye blackNew layer, B, black; mask spills; Filter > Blur > Gaussian Blur
- Restore the reflectionBlack layer off, new layer, Select > Color Range on the highlight; black layer on, paint white, Select > Deselect
- Darken the eyelidLayer > New Adjustment Layer > Curves down a little; Cmd/Ctrl + I inverts the mask; paint around the eye
- FinishLevels white eyedropper on the background, blacks up; Black & White at lower opacity; Alt/Option-click to sample and paint out the seam
No AI, no generative credits.
Free Downloads
Follow Along on the Same RAW File
Get the RAW photo from the shoot, with the window reflection in the open eye, plus the 3-page PDF guide. Free with a PHLEARN account.
Black Eyes Effect: Common Questions
Why do my black eyes look fake?
Pure black looks painted. What sells the effect is the reflection: bring the highlight from the original photo back on top of the black so it reads as a real eye.
How should I light the photo for this effect?
Face your subject toward large windows, a softbox or any big light source so it shows up as a reflection in the eyes. Without that reflection there is nothing to bring back.
What can I pour on my subject safely?
The goo is optional; the effect works without it. If you use something, don’t use anything toxic. Corn starch with some black food coloring gives a similar effect.
How do I pick the best shot in Lightroom?
Press P to flag picks, filter by flag, then select them with Cmd/Ctrl + A and press N for Survey view. Click the X on any photo you like less, and zoom in to check the eye is in focus.
How do I paint the eye black?
On a new layer, paint black with the Brush Tool all the way over the eye, leaving the little reflections on the lids. If you spill outside the eye, add a layer mask and paint black on it there.
Why blur the black layer?
A little Filter > Blur > Gaussian Blur softens the hard edge so the black blends out to the edges of the eye.
How do I get the reflection back on top of the black?
Turn the black layer off, add a new layer and use Select > Color Range, clicking the white reflection with its eyedropper. Turn the black layer back on, paint white inside the selection, then Deselect.
Why does the eyelid look too bright around the black eye?
It is still lit by what was the white of the eye. Add a Curves layer pulled down a little, invert its mask with Cmd/Ctrl + I and paint the darkening in around the eye.
How do I make the background pure white?
Add a Levels adjustment layer and click the background with the white eyedropper. To hide a backdrop seam, sample the background with Alt/Option on a new layer and paint over it.
Are the sample files free?
Yes, with a free PHLEARN account. You get 1 sample RAW file and 1 PDF guide: the photo from the shoot and the step-by-step guide.
Master Photoshop, Lightroom and Photography
Join PHLEARN PRO for $12.99 a month or $99.99 a year. Cancel anytime, with a 100% money-back guarantee.





