

Download Assets
This tutorial includes 3 sample images, 3 sample PSDs and 1 PDF guide. Downloads are free with a PHLEARN account.
- Download the sample images and PSDs from every free tutorial on PHLEARN
- New free tutorials published every week
- One free account — sign up once, then download anything
Free PDF Guide · 3 Pages
This Tutorial as a Step-by-Step PDF
Every step from the video in order: Cmd/Ctrl+J, Image > Adjustments > Desaturate, Convert to Smart Object, Overlay, Filter > Other > High Pass and the radius, duplicating for a second pass, grouping with a black mask and painting white on the eyes, and the white mask painted black at the edges for a whole-image sharpen. Keep it next to your keyboard.
description
Learn how to sharpen images in Photoshop the way retouchers actually do it, using the High Pass filter on a Smart Object rather than the Sharpen Tool. Desaturating the layer keeps sharpening from shifting your color, and the Smart Object keeps the filter editable long after you’ve moved on.
We’ll show you how to stack passes at different radii, then hide them behind a black layer mask and paint the sharpening back exactly where it belongs. Three worked examples cover the eyes on a close portrait, hair and jewelry on a wider shot, and a full frame of texture.
Enjoying This Free Tutorial?
We publish a new free tutorial every week, each one with sample images and PSDs you can download and follow along with. Sign up and they land straight in your inbox, along with early word on sales, events and subscriber-only offers.
Image Source

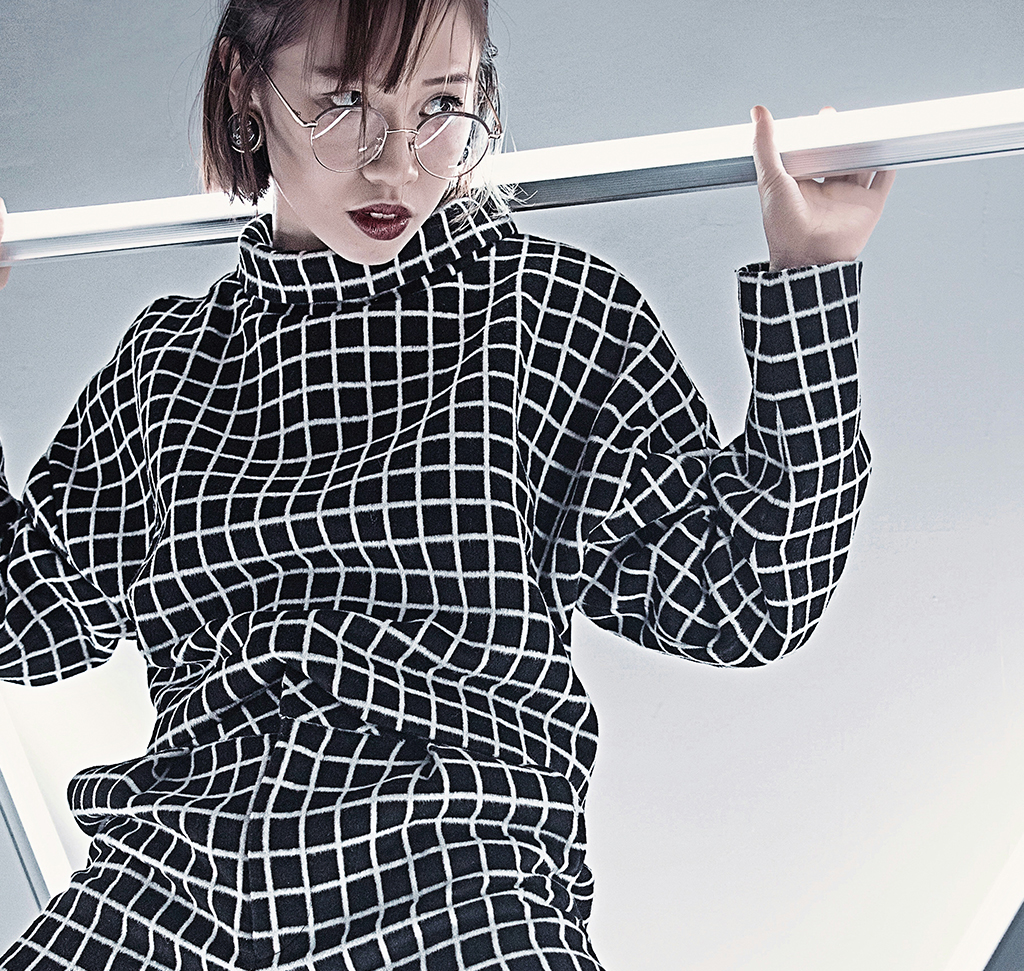
How to Sharpen Images in Photoshop
Sharpening is one of the easiest things to overdo. Run a filter across an entire photo and you get crunchy skin, bright halos along every edge, and a picture that reads as processed rather than sharp. The method in this tutorial avoids that by splitting one decision into two: how much sharpening to build, and where it is allowed to land. You create the sharpening on its own stack of layers with the High Pass filter, then paint it in by hand exactly where the image benefits — the eyes, the eyelashes, the texture in a jacket — and nowhere else.
Why Skip the Sharpen Tool
Photoshop ships with a dedicated Sharpen Tool, and it is deliberately not the recommendation here. Brushing sharpening straight onto pixels makes the result hard to control and harder still to undo once you have moved on. High Pass sharpening on a Smart Object behaves the opposite way: the filter stays live, so you can reopen it an hour later and change how strong it is without rebuilding anything. That editability is the whole reason this approach is worth the extra few clicks, and it is the foundation of our PRO course on mastering sharpening in Photoshop.
Sharpening Is Not a Global Fix
Most portraits do not need a sharper everything. They need sharper eyes. Sharpening the full frame drags attention outward and exaggerates precisely the things you spent time smoothing, while a little sharpening in the right place pulls the viewer straight to the subject. Deciding where the effect goes matters more than deciding how much of it you make.
Set Up Your Sharpening Layer
Every version of this technique starts the same way, whichever image you are working on. Three moves get you a layer that is ready to accept the filter.
Why Desaturate Before You Sharpen
High Pass reads edge detail as a flat gray with colored fringing wherever there is a strong color transition. Stripping the color out of the sharpening layer first means the filter only ever affects detail and contrast, never the color of the photo underneath. It is a one-second step that prevents a subtle color shift you would otherwise spend a while chasing.
-
Duplicate the Background Layer
Press Cmd + J on Mac (Ctrl + J on PC). Everything from here happens on the copy, so the original stays untouched and you always have a clean version to compare against.
-
Desaturate the Copy
Go to Image > Adjustments > Desaturate. The layer turns black and white, which keeps the sharpening from interfering with color.
-
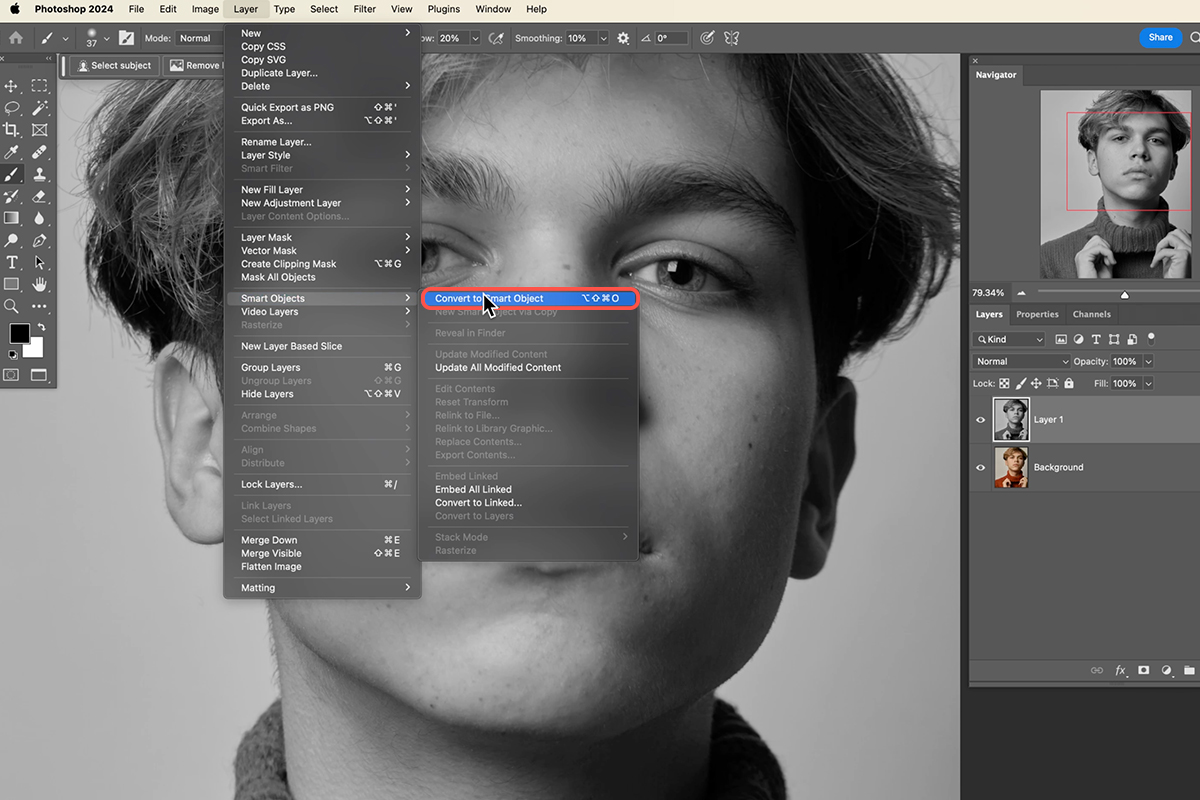
Convert It to a Smart Object
Go to Layer > Smart Objects > Convert to Smart Object, or right-click the layer and choose the same command near the bottom of the menu. Do this before applying any filter — it is what lets you reopen the High Pass settings later instead of starting over.
Apply the High Pass Filter
With the Smart Object ready, two settings turn it into sharpening: a blend mode that hides everything except the detail, and a radius that decides how much detail counts.
What the Radius Slider Is Actually Doing
High Pass keeps the edges in your photo and throws away everything else, and Radius sets how wide an edge has to be before it survives. A low radius catches fine detail like eyelashes and the texture in an iris. Push it higher and thicker transitions come along too, which is where sharpening starts to look obvious. The preview updates as you drag, so judge it on the image rather than on a number — when it stops looking like detail and starts looking like an effect, you have gone too far.
-
Change the Blend Mode to Overlay
Set the layer’s blend mode from Normal to Overlay. It will look strange for a moment; that is expected, and the filter is what resolves it.
-
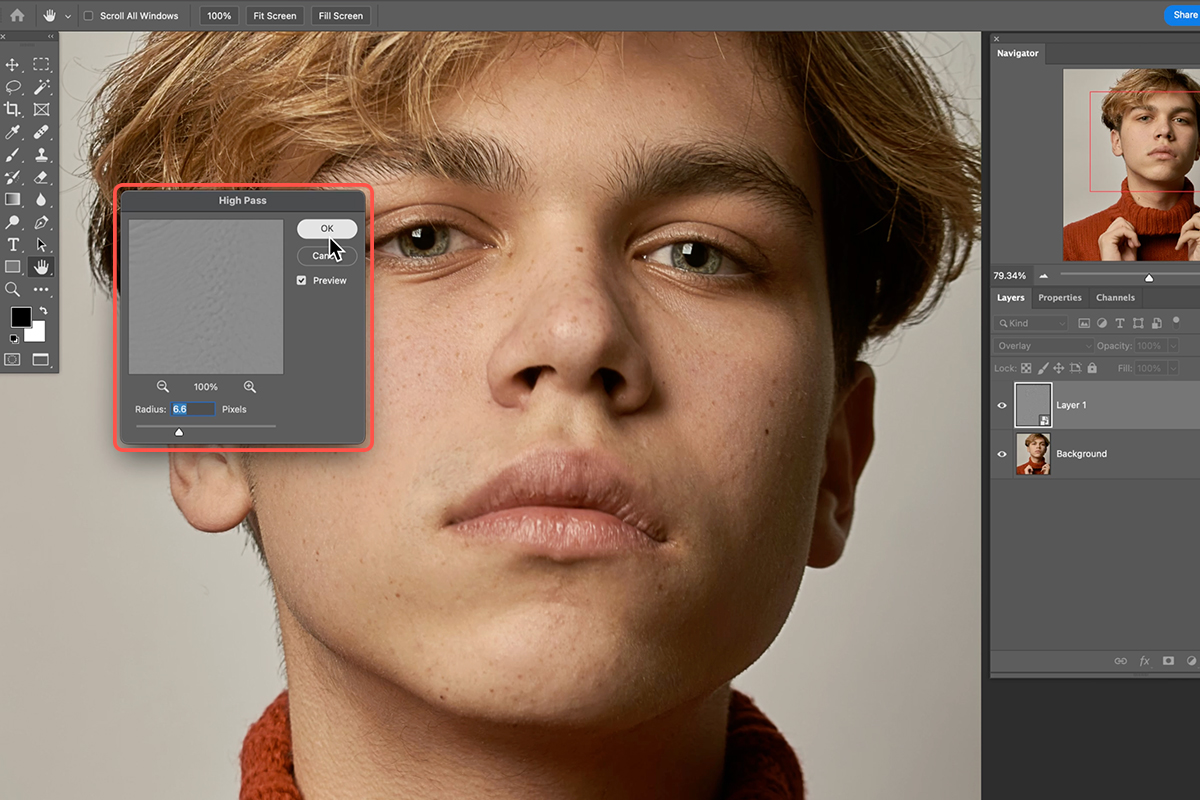
Run the High Pass Filter
Go to Filter > Other > High Pass. The image drops to gray in the dialog preview, leaving only edge detail behind.
-
Set the Radius
Drag the Radius slider and watch the photo update live. Stop where the detail looks crisp but the image still looks like a photograph, then click OK.
Stack a Few Passes for More Control
One High Pass layer sharpens. Two or three, at different radii, give you separate controls for separate kinds of detail — and because each one can be toggled or faded on its own, you end up with a sharpening mix rather than a single slider.
-
Duplicate the Sharpening Layer
Press Cmd + J on Mac (Ctrl + J on PC) to copy the layer you built in step 3. The effect doubles immediately.
-
Change the Radius on the Copy
Double-click High Pass beneath the duplicated layer in the Layers panel and set a different radius — usually a little higher than the first. One layer now handles fine detail and the other handles broader structure.
-
Group the Stack
Shift-click the sharpening layers and press Cmd + G on Mac (Ctrl + G on PC). The group is what you are about to mask, so all the passes are controlled together.
Paint the Sharpening Exactly Where You Want It
This is the part that makes the technique worth using. Rather than hiding sharpening you do not want, you start with all of it hidden and paint back only what the photo asks for.
-
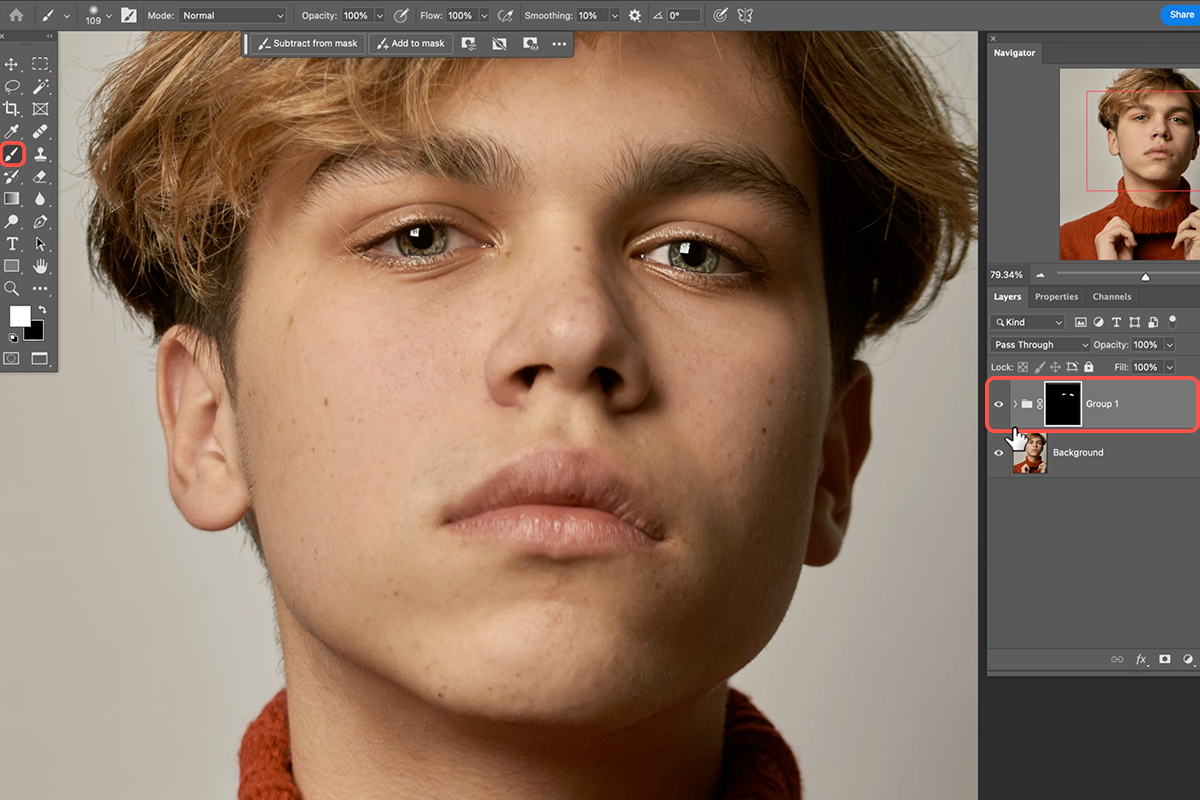
Add a Black Layer Mask
Hold Alt on PC or Option on Mac and click the layer mask icon on the group from step 9. Holding the modifier creates a black mask instead of a white one, which conceals the entire effect straight away.
-
Paint With White
Grab the Brush Tool (Keyboard Shortcut “B”), set your foreground color to white, and paint over the areas that should be sharp. On a close portrait that means the iris, the center of the eye where it catches light, and both the upper and lower eyelashes — the top lashes especially.
-
Toggle the Group Off and On
Click the group’s eyeball to compare. Zoom out as well as in: good eye sharpening is visible from across the room as a pull toward the subject, not as detail you have to hunt for.
Sharpening a Wider Portrait
When the subject sits further from the camera, eyes alone are not enough — the frame carries more information and the sharpening should follow. The build is identical; only the painting changes.
Leave Skin Out of It
Skip the skin deliberately. Sharpening does not smooth texture, it emphasizes it, so every pore and blemish you sharpen becomes more pronounced than it was before. Painting around skin while sharpening hair, eyebrows and jewelry gives you a subject who reads as detailed rather than one who reads as retouched badly.
-
Rebuild the Same Stack
Duplicate, desaturate, convert to a Smart Object, set Overlay, apply High Pass, then duplicate once or twice more at different radii and group them, exactly as in steps 1 through 9.
-
Paint the Features, Not the Face
On a black mask, brush white over the eyes and eyebrows, then over braids, loose hair, and any jewelry. Those details pop under sharpening in a way that skin never does.
Sharpening an Entire Image
Some photos genuinely want sharpening everywhere. A frame built around fabric, weave and surface texture is the case for it — there the detail is the subject, and holding it back would be the mistake. Here the mask starts white and you subtract instead of add.
Lower the Opacity Instead of Starting Over
If one pass in the stack lands too strong, drop that layer’s opacity rather than deleting it and rebuilding. Combined with the live High Pass settings underneath, it means every part of the effect has two independent ways to be dialed back after the fact.
-
Build the Stack and Leave It Visible
Run the same setup from steps 1 through 9, but do not hide it — the sharpening should apply across the whole frame to begin with.
-
Add a Normal White Layer Mask
Click the layer mask icon on the group without holding any modifier. A white mask leaves the effect fully visible, which is the opposite of the approach in step 10.
-
Paint Black Around the Edges
Switch your brush to black and paint around the outside of the frame to remove sharpening there. Softening the border quietly steers attention back toward the center and the subject.
Where Sharpening Usually Goes Wrong
Three habits account for most disappointing results. The first is applying a filter to the whole image and stopping there, which sharpens the things you never wanted sharpened along with the things you did. The second is skipping the Smart Object, which turns a five-second adjustment into a rebuild the moment you change your mind. The third is judging sharpening at 100% zoom only — the point of it is how the picture reads at normal viewing size, so keep zooming out to check.
What Makes This Look Natural
The result holds up because nothing about it is uniform. Real detail in a photograph is uneven, and a hand-painted mask is uneven in the same way, so the sharpening lands where a viewer already expects the picture to be crisp. That is also why it survives being pushed reasonably hard where a global filter would not.
Make Sharpening Part of Your Workflow
Once the pattern is familiar, the whole build takes under a minute and stays adjustable for as long as the file exists. Because every layer in the stack is a Smart Object, none of it is baked in — if you want to go further with edits that stay editable from beginning to end, our PRO course on smart objects covers that way of working in depth.
For photography and photo editing taught in order, our PRO Photography & Photo Editing Learning Path is where to go next.
Quick Reference: Keys, Menus and Settings
- Set upCmd/Ctrl + J, Image > Adjustments > Desaturate, Layer > Smart Objects > Convert to Smart Object, blend mode Overlay
- SharpenFilter > Other > High Pass; small radius for fine detail, more for strength
- StackCmd/Ctrl + J the layer, double-click High Pass to change its radius; two or three passes
- Only where you want itShift-click the passes, Cmd/Ctrl + G, Alt/Option-click Add Layer Mask (black), B, paint white over eyes, lashes, brows, hair, jewelry; skip skin
- Whole imageSame passes, a white mask, paint black around the edges to pull attention inward
- Too strongLower a pass’s Opacity or its radius
No AI, no generative credits.

Free Downloads
Follow Along on the Same Photos
Get all three portraits from the video, the three PSDs with the stacked High Pass layers and masks, and the PDF guide. Free with a PHLEARN account.
Sharpening: Common Questions
Why High Pass instead of the Sharpen tool?
Control. High Pass on a Smart Object lets you change the radius later, stack passes, lower the opacity and mask exactly where it lands. The Sharpen tool is harder to get right.
Why desaturate the copy first?
So the sharpening layer changes only detail, not color. Overlay then adds contrast where High Pass found edges.
What radius should I use?
Watch the image as you drag. Small for fine detail like eyes, more for strength. Too far looks crunchy. Aaron uses two or three passes at different radii rather than one big one.
Should I sharpen the whole portrait?
Usually just the eyes, lashes and brows, maybe hair and jewelry. Group the passes, give the group a black mask and paint white where you want it. Skin stays unsharpened so imperfections don’t show.
When does the whole image get sharpened?
When texture is the point, like the clothing in the third example. Even then, paint a little black around the edges of the mask so the eye goes to the center.
It looks over-sharpened. How do I back off?
Lower the opacity of a pass, or double-click its High Pass and reduce the radius. Nothing is baked in.
Are the sample files free?
Yes, with a free PHLEARN account. You get all three portraits, the three PSDs and the PDF guide.
Master Photoshop, Lightroom and Photography
Join PHLEARN PRO for $12.99 a month or $99.99 a year. Cancel anytime, with a 100% money-back guarantee.





