
Download Assets
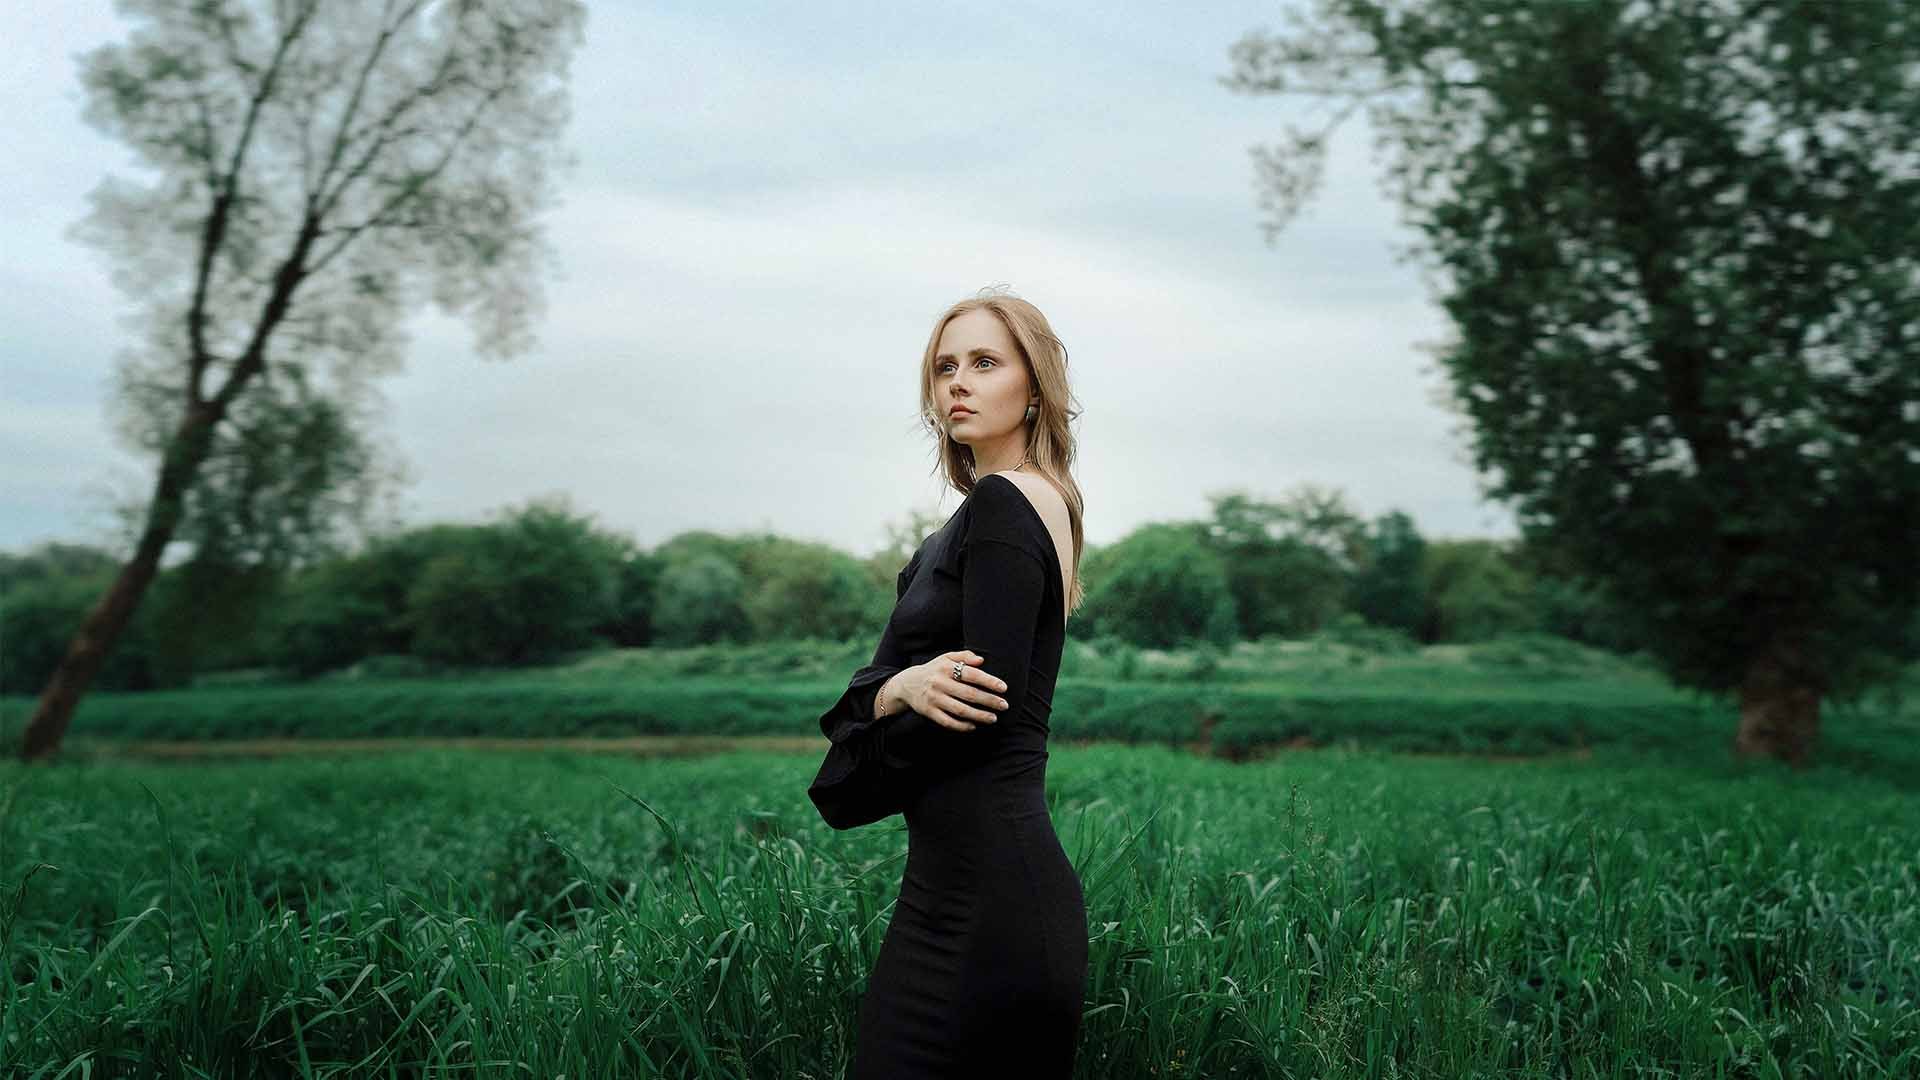
This tutorial includes 1 sample image, 1 sample PSD and 1 PDF guide. Downloads are free with a PHLEARN account.
- Free sample files with every tutorial on PHLEARN
- New free tutorials published every week
- One free account, then download anything
Free PDF Guide · 5 Pages
This Tutorial as a Step-by-Step PDF
Every step from the video in order: adding the layer, the slider order, the masks for the background and the subject, the glow behind her, and the quirks. Keep it next to your keyboard.
description
Photoshop 27.10 added a new Light adjustment layer — six Camera Raw-style tone controls that live in your layer stack, take a mask, and never touch your pixels. It’s the last piece of a set Adobe has spent a year moving over. Here’s the order to work the sliders, how to mask three of them onto one portrait, and how to bring the legacy Brightness and Contrast controls back. No AI or generative credits required.
Enjoying This Free Tutorial?
We publish a new free tutorial every week, each one with sample images and PSDs you can download and follow along with. Sign up and they land straight in your inbox, along with early word on sales, events and subscriber-only offers.
Image Source
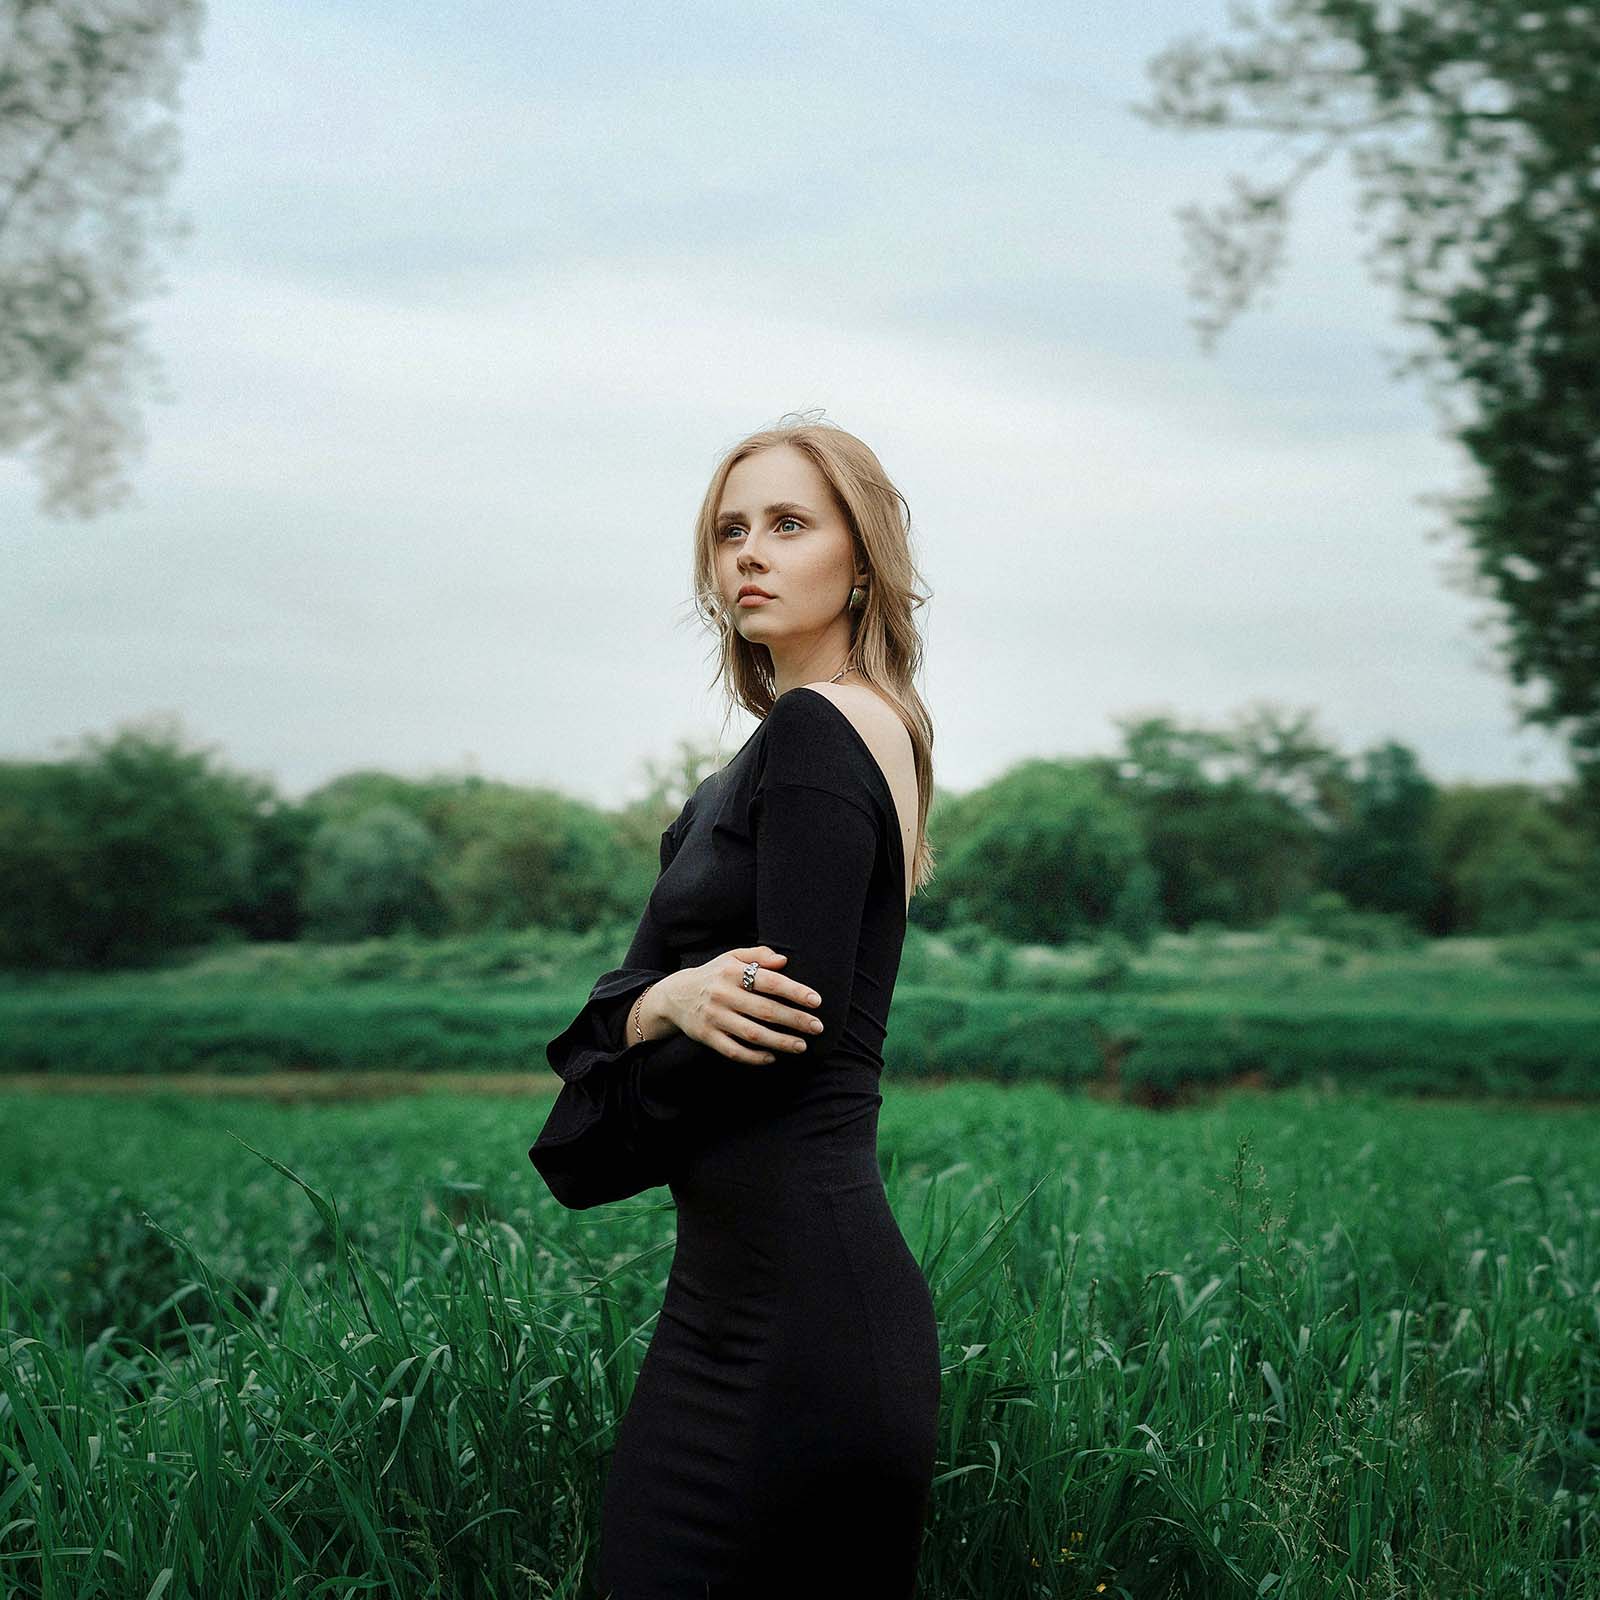
Photo by Hannah Popowski via Unsplash

Before
Photoshop Just Finished Moving Camera Raw Into Your Layers Panel
Photoshop 27.10 added a new adjustment layer called Light — six tonal controls that behave like the ones in Camera Raw, sitting in your normal layer stack. Exposure, Contrast, Highlights, Shadows, Whites and Blacks. Non-destructive, maskable, reorderable, and editable a week later when you change your mind.
On its own that reads like a small convenience. It isn’t — it’s the last panel in a set Adobe has been quietly relocating for a year, and with it in place, most of what you used to open Camera Raw for now exists as ordinary layers.
No AI, no generative credits, no plugins. This is a standard adjustment layer that ships with Photoshop.
What the Light Adjustment Layer Actually Is
It’s the last piece of a set, not a one-off
Light didn’t arrive alone. Adobe has been rebuilding Camera Raw’s controls as native adjustment layers panel by panel: Temperature and Tint went into the Color and vibrance layer in October 2025, then Clarity, Dehaze and Grain in January 2026. Light is the fourth piece, and the big one — the tonal core of the Basic panel. Put those together and the work you used to do in Camera Raw, on a flattened file, you can now do on a live layered document with a mask on every move.
Light replaced Brightness/Contrast — it didn’t join it
If you went looking for Brightness/Contrast in the adjustment layer menu and couldn’t find it, you’re not imagining it. Adobe’s own wording is that they “upgraded the classic Brightness/Contrast adjustment layer into Light.”
The destructive version is untouched — Image > Adjustments > Brightness/Contrast works exactly as it always has. What’s gone is the layer version. If you built a workflow on the old one, there’s a way back, covered below.
There’s no Brightness slider, and that’s deliberate
Adobe’s position is that Exposure does the same job with better tonal accuracy, and Exposure does hold up in the highlights where Brightness used to flatten them. They aren’t identical, though: an action or print-matching recipe built on specific Brightness and Contrast values will not translate.
How to Add a Light Adjustment Layer
-
Start with an RGB file at 8 or 16 bit.
Light is only offered for RGB documents at those bit depths. If it isn’t in your menu, this is almost always why — check the color mode before you check anything else.
-
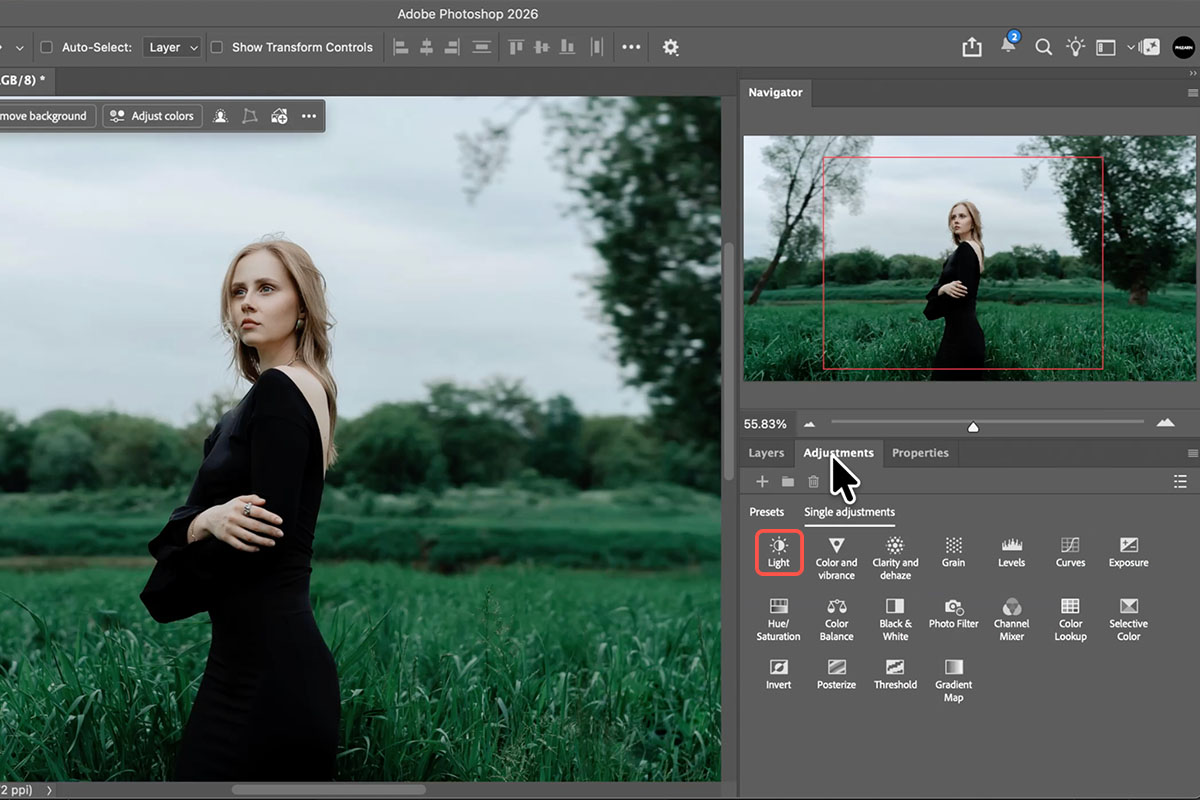
Open the Adjustments panel and choose Light.
It’s the tab next to Layers and Properties. Click it, and Light sits in the grid of single adjustments — right where Brightness/Contrast used to be.
-
Adjust without committing to anything.
The Properties panel opens with six sliders — Exposure, Contrast, Highlights, Shadows, Whites and Blacks. Nothing is applied to the pixels below; the layer can be re-edited, masked, reordered or switched off at any point.
The Order to Move the Sliders
Everybody already knows what a Highlights slider does. What’s worth learning is the order — these behave like Camera Raw now, not like Levels, so working the way you would in Camera Raw does most of the work for you.
-
Exposure first.
Set overall brightness before you touch anything else. Every other slider is a correction to this one, so getting it right first means you’re not re-doing the rest.
-
Whites and Blacks next, to set your endpoints.
Push Whites until the brightest part of the frame is just short of clipping, then pull Blacks until the darkest part reads as genuinely black. This is the step that gives an image its full range, and it’s the one most people skip.
-
Highlights and Shadows to recover detail.
Go back into each end and rescue what the endpoints cost you — pull Highlights down to bring a bright, flat sky back, lift Shadows to open the dark areas without washing out the frame.
-
Contrast last.
Everything above already changes contrast, so setting it first just means setting it twice. Leave it until the tonal structure is there and it becomes a small final decision instead of a big early one.
-
Toggle the layer off and back on.
The eye adapts as you work. Switching the layer’s visibility off for a second is the fastest honest check on whether you’ve actually improved the image or just moved it.

Masking Is Where This Gets Good
A single Light layer applied to a whole image is fine, but it’s not the reason this matters. The Camera Raw Filter can make the same moves, but it bakes into one layer and treats the frame as one thing. A Light layer stays live and takes a mask, so you can light different parts of a photograph independently — the way you would if you’d lit it on the day.
-
Start with a selection, not a blank layer.
Select your background layer, then run Select Subject. The active selection becomes your new Light layer’s mask automatically.
-
Add a Light layer, then invert its mask.
It’s masked to the subject by default. Invert the mask (Cmd/Ctrl+I, or Invert Mask from its contextual menu) to flip it onto the background instead.
-
Grade the background.
Work the sliders in the order above — Exposure, Whites and Blacks, Highlights and Shadows, then Contrast — to open up the background without touching your subject. Rename the layer “Background.”
-
Select the subject again and add a second Light layer.
Same move, but leave this mask as-is rather than inverting it, so the correction lands only on your subject. Grade it the same way and rename it “Subject.”

Building a glow behind the subject
This part isn’t obvious: a hidden technique that gives one adjustment layer two independent masks, so the glow shows up only in a soft area behind your subject.
-
Add a third Light layer and push Exposure hard.
Select the subject once more, add a third Light layer, and raise Exposure well past where you’d normally stop. Invert its mask onto the background, same as your first layer, and rename it “Glow.”
-
Group that layer with itself, then mask the group.
Select the Glow layer, press Cmd/Ctrl+G, then add a layer mask to the new group. Grouping a layer with itself gives it a second, independent mask — one on the layer, one on the group — the only way to stack two masks on a single adjustment layer.
-
Mask the group with a radial gradient.
Select the group’s mask, pick the Gradient tool with the black-to-white preset and a Radial style, then click near your subject and drag outward.
-
See why it works.
The layer’s own mask keeps the glow off your subject; the group’s radial mask fades it out the farther it gets from your subject. Together, what’s left reads as a soft glow rather than a lit rectangle.
-
Finish with a Color and vibrance layer.
Same approach, now for color: nudge Temperature and Tint, then add a little Vibrance. It sits on top of all three Light layers, live and separately maskable.

What Trips People Up
The Light layer looks like it stopped working
Add or edit an adjustment layer — Grain, for example — beneath a Light layer, and every Light layer above it visibly pauses: the image reverts to how it looked without them. It looks like a bug. It isn’t — Photoshop does this deliberately to keep things responsive while you work underneath, and the effect returns the moment you’re done.

Light isn’t in the adjustment layer menu
Check your color mode and bit depth. Light is RGB only, 8 or 16 bit — it isn’t offered in CMYK, Grayscale, Lab or Indexed Color, so your adjustment menu changes with the document you have open.
You want the old Brightness and Contrast controls back
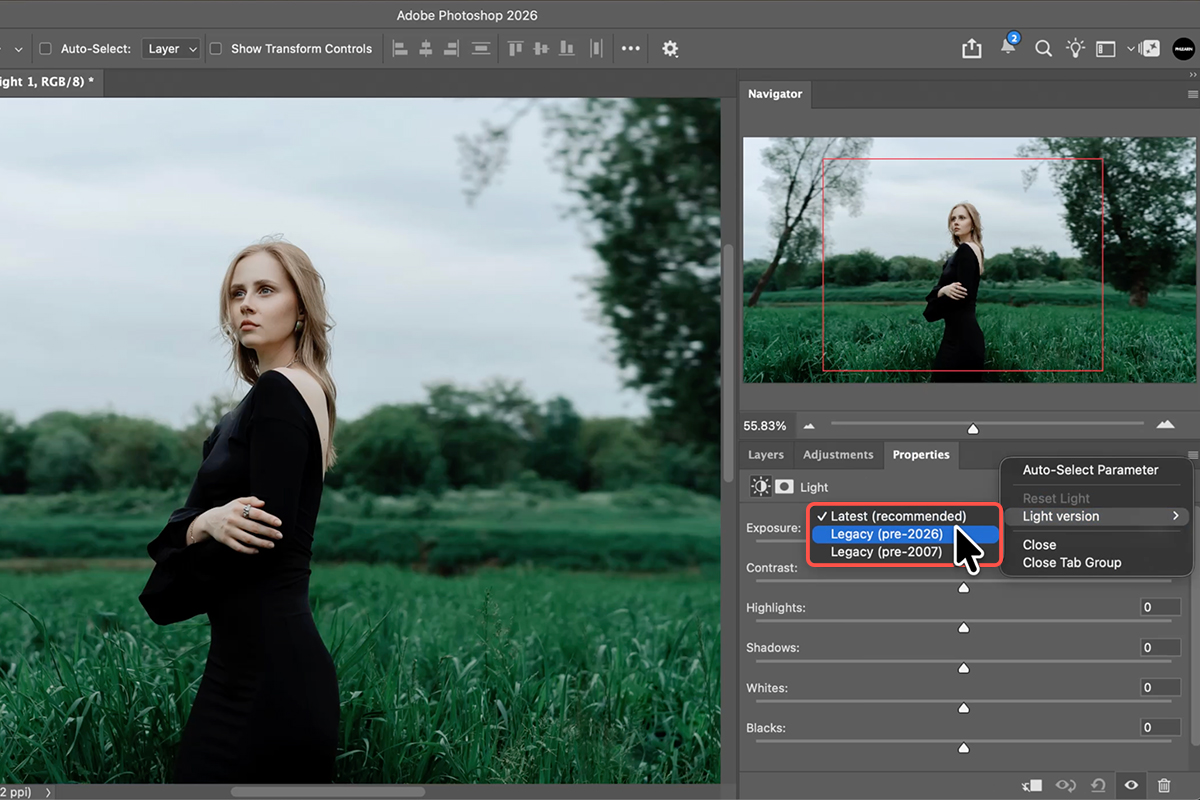
Adobe left a door open, and it isn’t where you’d look for it — it’s in the Properties panel, not the Layer menu.
-
Add a Light adjustment layer as normal.
-
Open the Properties panel menu.
The small stacked-lines icon in the corner of the Properties panel.
-
Choose Light version, then the legacy option.
The panel switches back to the familiar Brightness and Contrast sliders. Existing actions and plugins that call Brightness/Contrast keep working either way — Adobe kept that compatibility even though the panel changed.
You’re on a version that doesn’t have it
Light shipped in Photoshop 27.10, the August 2026 release, and isn’t in the long-term support branch — on a managed or LTS deployment, you won’t see it regardless of color mode.
When to Use It, and When Not To
Use a Light layer when your document has text, shapes or other editable layers you’ll want to change later — the Camera Raw Filter bakes into a single layer, while a Light layer sits above everything and leaves it all live.
Use it whenever the correction should only apply somewhere. If the whole frame needs the same treatment, almost anything will do the job; if different parts need different treatment, this is the cleanest way to do it in Photoshop.
Don’t expect it to do color. It’s the Light panel and nothing else — no HSL, no color grading, no Texture; those live in Clarity, Dehaze and Grain, and in Color and vibrance. For real precision on one narrow part of the tonal range, Curves is still the better tool.
Quick Reference: Keys, Menus and Settings
- Add a Light layerAdjustments panel > Light
- Get Brightness/Contrast backProperties panel menu > Light Version > Legacy
- Slider orderExposure, then Whites and Blacks, then Highlights and Shadows, then Contrast
- Reset a sliderDouble-click it
- Select the subject firstSelect Subject in the toolbar, or the Select menu
- Invert a maskCmd/Ctrl + I, or Invert Mask in the task bar
- Group a layer with itselfCmd/Ctrl + G, then add a mask to the group
- The glow maskGradient tool, black to white, Radial, drag out from behind the subject
- Hide the selection overlayCmd/Ctrl + H
Mac first, then Windows where they differ.

Free Downloads
Follow Along on the Same Photo
Get the sample image, the finished PSD and the 5-page PDF guide, and build the three Light layers on the same portrait. Free with a PHLEARN account.
Light Adjustment Layer: Common Questions
What is the Light adjustment layer in Photoshop?
Adobe’s replacement for Brightness/Contrast. It has Exposure, Contrast, Highlights, Shadows, Whites and Blacks, the same sliders as Camera Raw, as a regular adjustment layer you can mask and re-edit. It joins Grain, Clarity and Dehaze, and Color and Vibrance as Camera Raw tools inside Photoshop.
Can I get Brightness/Contrast back?
Yes. With a Light layer selected, open the menu in the Properties panel, choose Light Version and switch it to Legacy. Brightness/Contrast returns, and you can switch back at any time.
In what order should I move the sliders?
Exposure first, then Whites and Blacks, then Highlights and Shadows, and Contrast last. Double-click any slider to reset it. If you raised Exposure, bring Highlights down a little to protect them.
How do I apply it to only part of the photo?
Make the selection first, then add the adjustment layer: the selection becomes its mask automatically. In the video that’s Select Subject, then Adjustments > Light. To work on the background instead, invert the mask (Cmd/Ctrl+I, or Invert Mask in the task bar).
Why use two Light layers?
So the background and the subject get different light. One layer with the inverted mask darkens the background and brings back the sky; a second, made from a fresh Select Subject, brightens the subject. Toggle both off and on to see the difference.
How do I make a glow of light behind the subject?
Add a third Light layer from Select Subject, push Exposure up, and invert its mask so it sits behind the subject. Then group the layer with itself (Cmd/Ctrl+G), add a mask to the group, and on that mask drag a black-to-white Radial gradient out from behind the subject. The layer mask keeps it off the subject; the group mask keeps it inside the glow.
Why do my Light layers switch off while I edit?
It’s on purpose, not a bug. Change anything on a layer below a Light layer, like dragging a Grain slider, and Photoshop temporarily turns off the Light layers above it so you can see what you’re editing. They come back as soon as you let go.
Can I change the settings later?
Yes. It’s a non-destructive adjustment layer: click it to get the sliders back in Properties, toggle it off and on, or edit the mask at any time.
Is there a Camera Raw color adjustment layer too?
Yes, Color and Vibrance, with Temperature, Tint and Vibrance sliders. In the video it warms the photo slightly, nudges Tint toward green for the foliage, and adds a little vibrance.
Are the sample files free?
Yes, with a free PHLEARN account. You get the sample image, the finished PSD and the 5-page PDF guide, so you can build the same three Light layers on the same portrait.
Master Photoshop, Lightroom and Photography
Join PHLEARN PRO for $12.99 a month or $99.99 a year. Cancel anytime, with a 100% money-back guarantee.





