

Color fringing shows up when background color bleeds into the edge of a cutout, especially in hair. This tutorial compares Enhance Edge, the new AI tool in Photoshop Beta, against a free clipping mask technique using the Brush tool and Darken blend mode. See what the AI version actually does, where it falls short, how to fix the fringing by hand without spending a generative credit, and when each approach is the right call.
Free practice files
Practice Files for This Tutorial
The sample image, the layered PSD and the 3-page PDF guide from the video, so you can follow every step on the same files.
This tutorial includes 1 sample image, 1 sample PSD and 1 PDF guide.

Create a free PHLEARN account to download, or log in if you already have one. One account gets you the files for every free tutorial.
description
Enjoying This Free Tutorial?
Image Source
Before
Enhance Edge vs. a Free Clipping Mask: Fixing Color Fringing in Photoshop
Photoshop Beta just added a new AI tool called Enhance Edge, built to clean up the ugly color fringing that shows up around hair and fur after you cut a subject out. It works with one click, but it costs generative credits every single time you use it, and it needs an internet connection to run at all.
So this tutorial does two things. First, it shows you exactly what Enhance Edge does, honestly, including where it falls short. Second, it shows you the manual way to fix the exact same problem for free, using a clipping mask and the Brush tool, with more control than the AI version gives you.
No AI, no generative credits, no plugins required for the manual method below, just a layer mask, a clipping mask, and a soft brush.
What Color Fringing Actually Is
Why a good layer mask can still look bad
Cut a subject out with Remove Background or Select Subject and the layer mask itself often looks great: smooth, detailed, no obvious mistakes around the hairline. The problem doesn’t show up until you place that subject on a new background as part of a composite. Fringed pixels are real hair, they just carried a sliver of the old background’s color along with them when they were cut out. Against a similar background you’d never notice. Against a different one, a thin halo of the wrong color shows up right at the edge, most visibly on a subject with fine, detailed hair.
Why Enhance Edge exists
Adobe’s own description of the tool: it analyzes the pixels at the edge of a mask and removes background color fringing while trying to preserve fine detail, especially on hair and fur against high-contrast backgrounds. That’s a real, common problem, it’s just not the only way to solve it, and it’s worth knowing exactly what you’re trading for the convenience before you reach for it every time.
Enhance Edge is currently only available in Photoshop Beta, and it’s built on the same generative credit system that powers Photoshop’s other AI features, like Generative Fill and Generative Expand. That means it draws from the same monthly credit pool, worth keeping in mind if you’re already using those regularly.
Setting Up a Real Test
The fastest way to actually see fringing is to build a situation where it can’t hide.
-
Duplicate your background layer.
Press Ctrl+J (Cmd+J on Mac) to duplicate the layer with your subject on it. You’ll cut out the duplicate and keep the original untouched underneath as a safety net.
-
Remove the background from the duplicate.
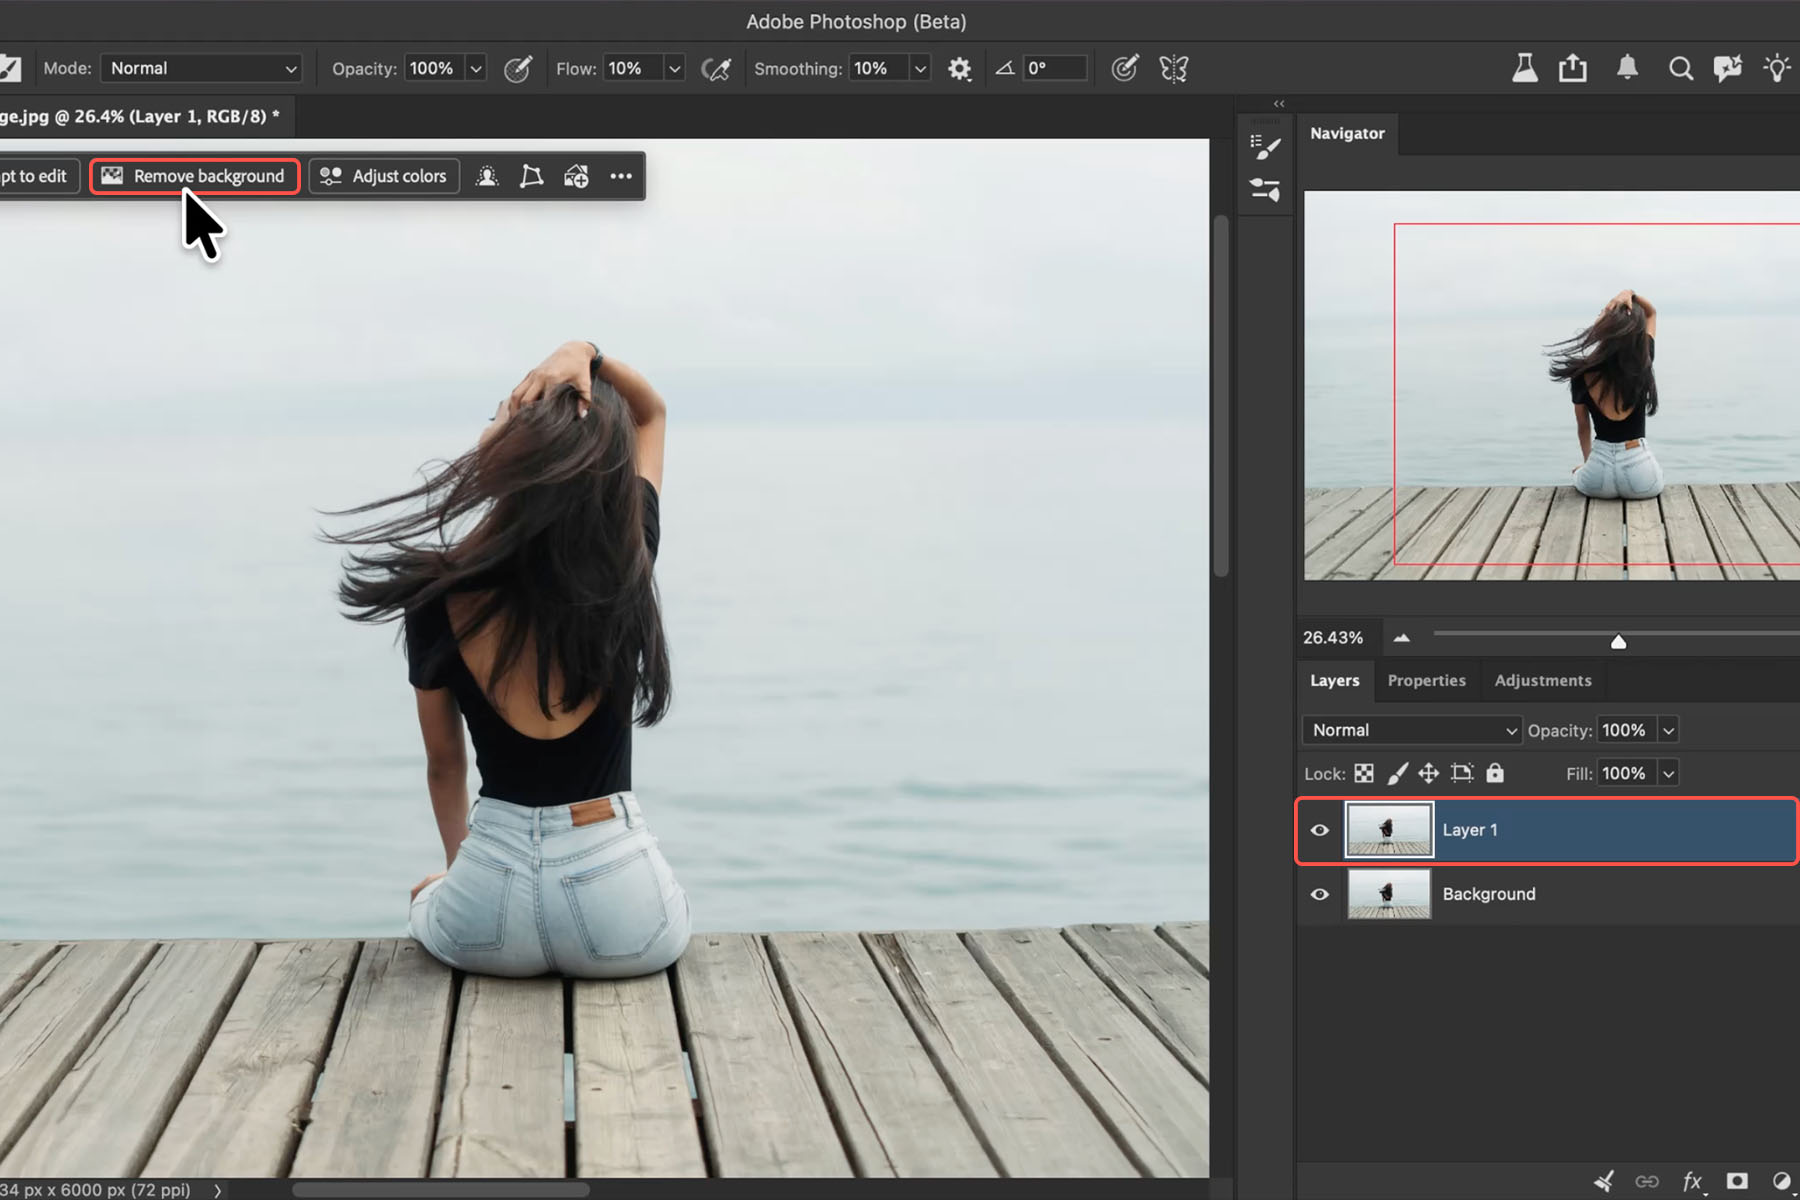
With the duplicate selected, click Remove Background in the Contextual Task Bar. This uses Photoshop’s standard AI cutout, it doesn’t cost any generative credits.
-
Check the mask on its own.
Hold Alt (Option on Mac) and click the layer mask thumbnail to view it by itself. On most images this looks genuinely good, which is exactly why fringing is easy to miss until it’s too late.
-
Put something different behind the subject.
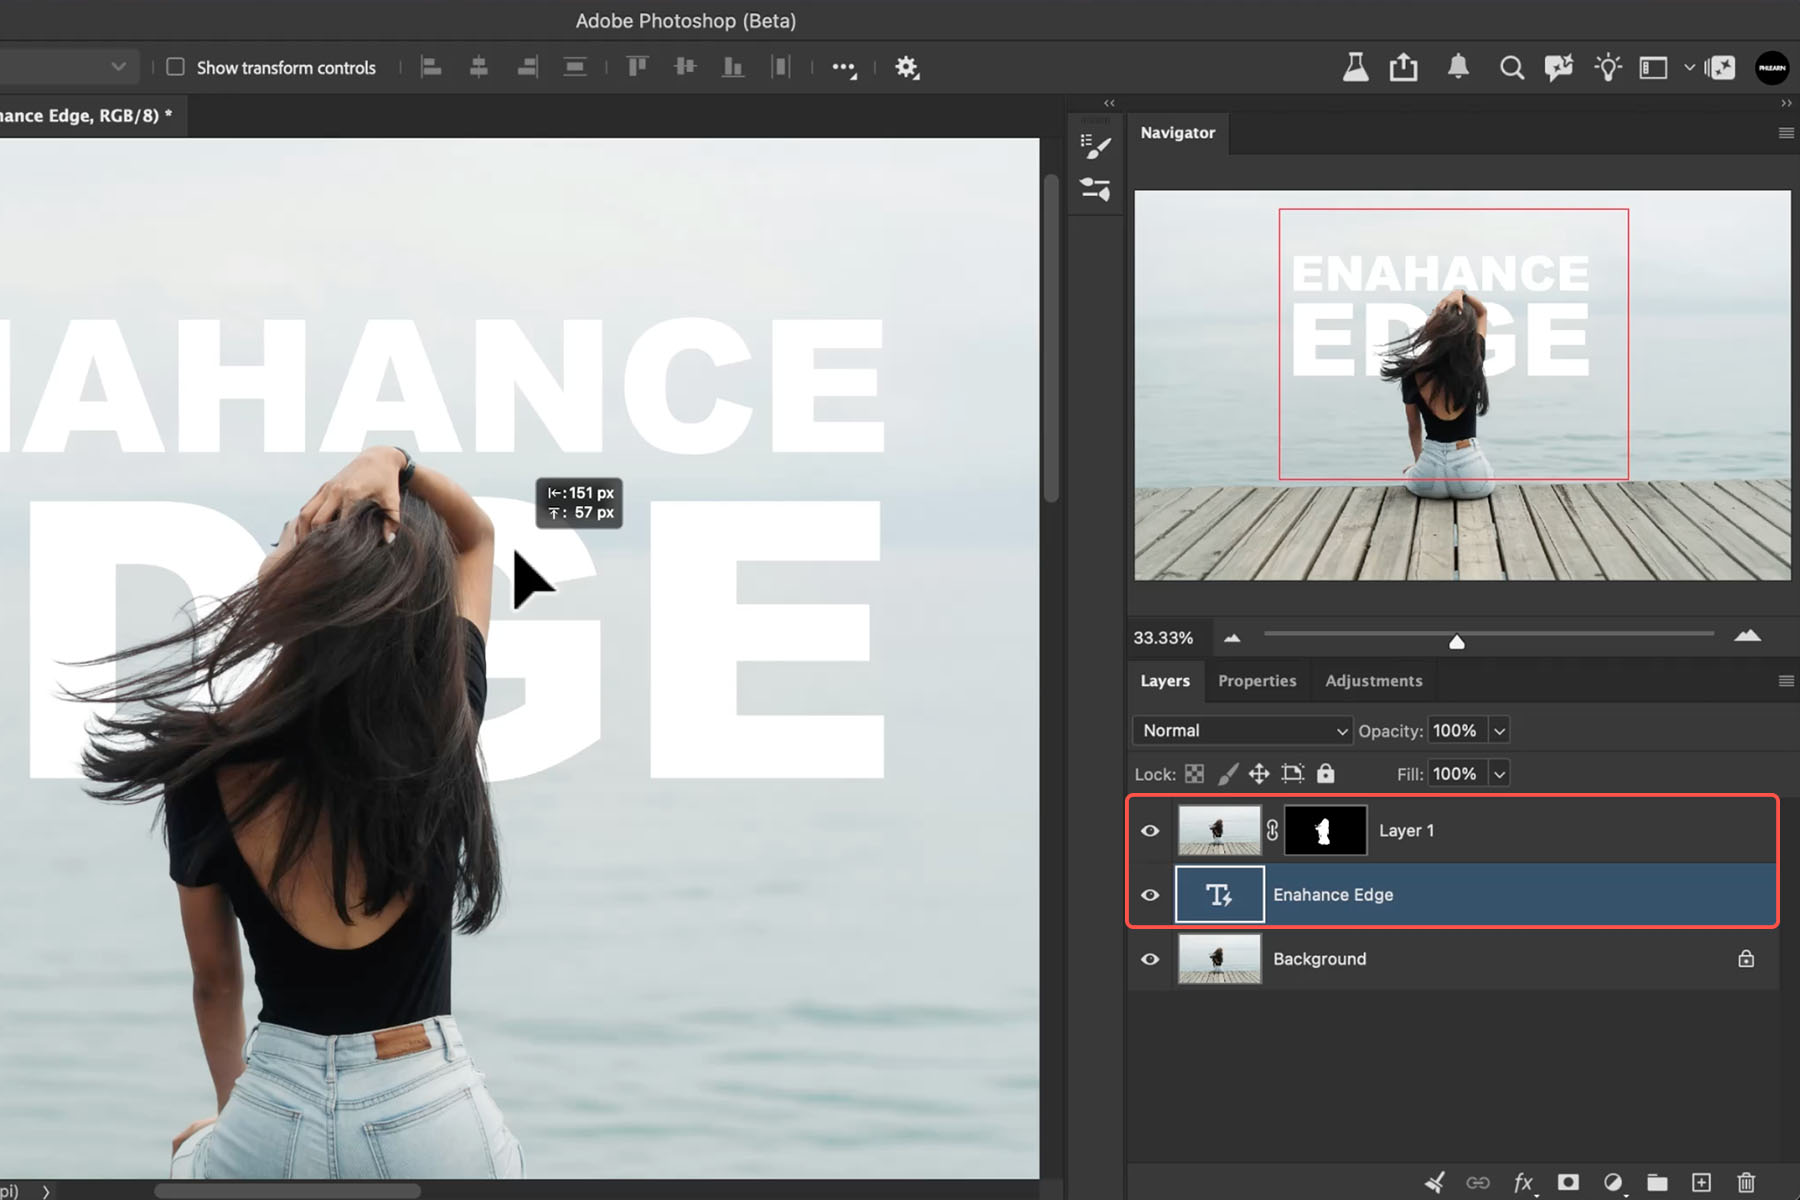
Add a new layer underneath the cutout and fill it, or add a Dynamic Text layer, and move it directly behind your subject.
-
Switch that layer to a strongly contrasting color.
A pale color sitting behind the subject can hide fringing almost as well as the original background did. Change the fill or text color to something high-contrast, like solid black behind light hair, and the fringing has nowhere left to hide.
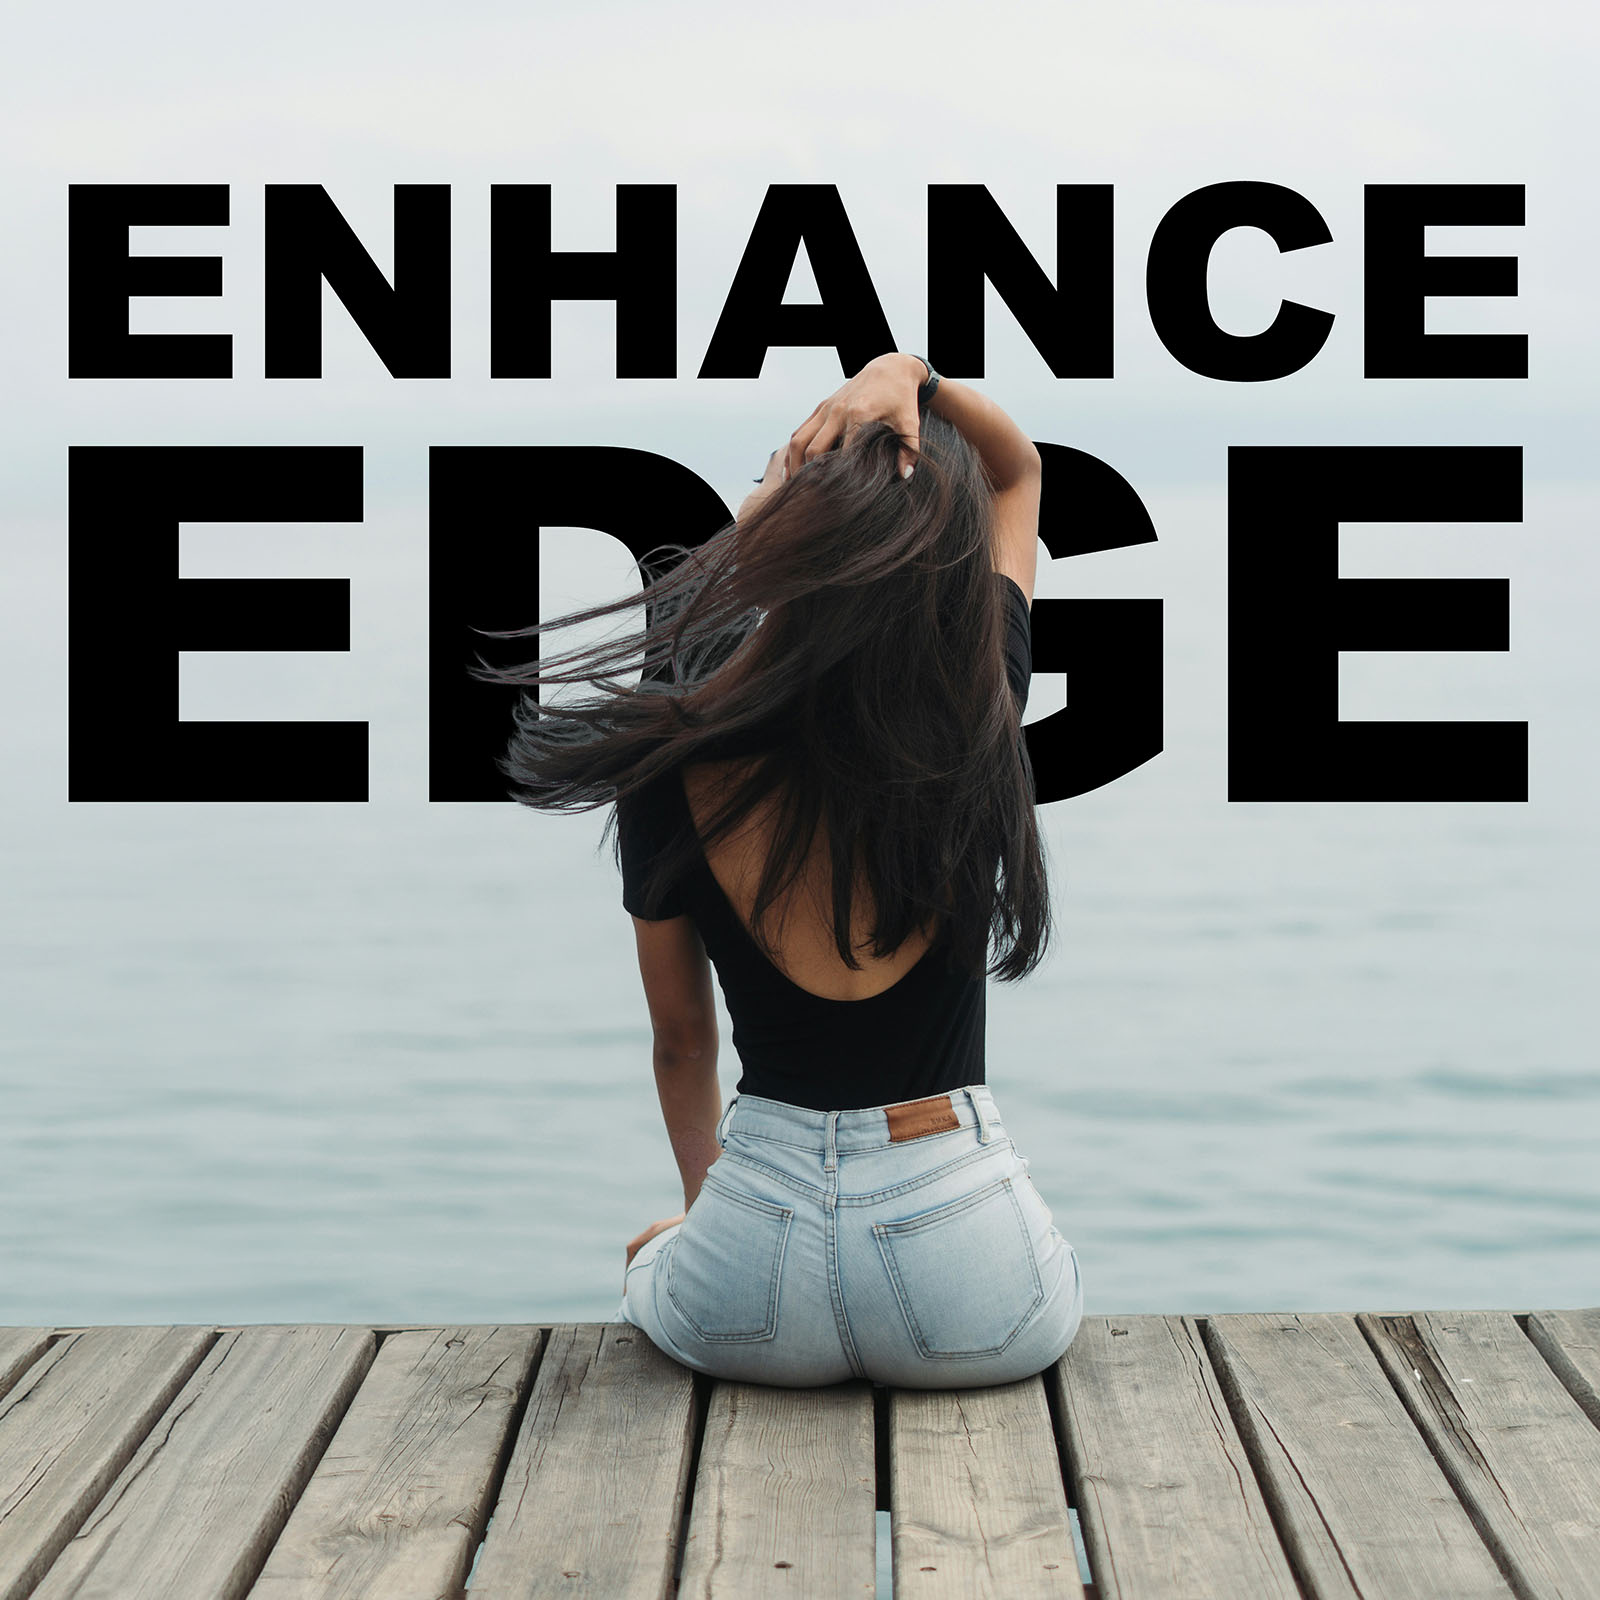
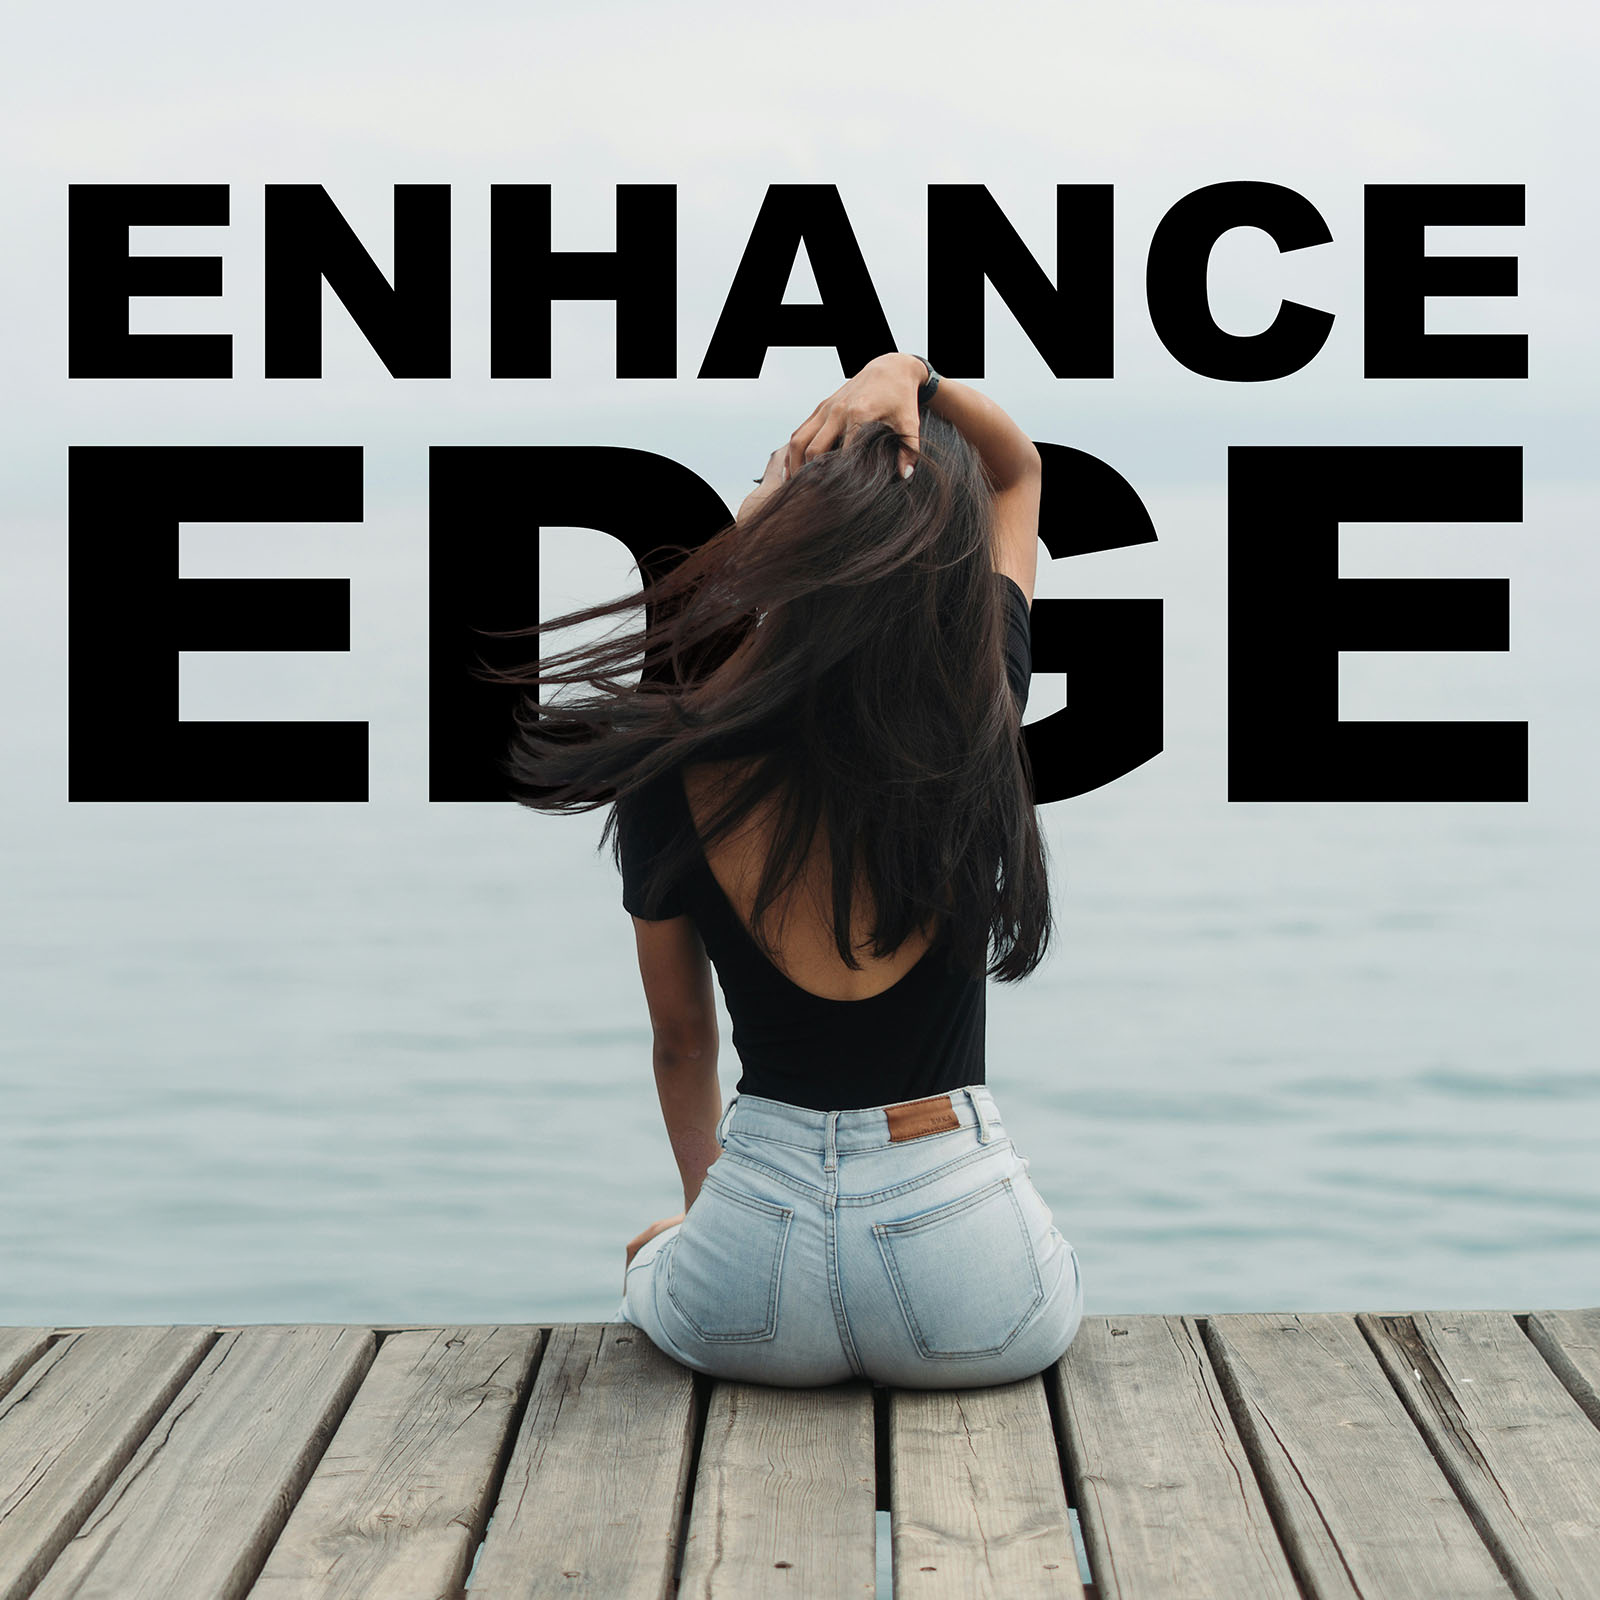
With a strongly contrasting color sitting behind the subject, the fringing becomes obvious: a thin rim of the old background color sitting right in the hair, especially near the top and sides of the head.
Using Enhance Edge
Enhance Edge is available on any layer that has a layer mask. Here’s how it works, and what it actually changes.
-
Open Enhance Edge from the mask.
Click the layer mask thumbnail for your cutout layer, then choose Enhance Edge from the Contextual Task Bar, or right-click the mask thumbnail in the Layers panel and choose it from there. It’s only available in Photoshop Beta, not the general release, so make sure your beta app is fully updated.
-
Run it, and expect it to cost credits.
Enhance Edge uses generative AI and spends 20 generative credits every time you click it, whether or not you like the result. It also requires an active internet connection; it won’t run offline.
-
Check what it actually did.
Enhance Edge writes its result to a brand new layer stacked above your Remove Background layer, it does not touch your original mask. Alt/Option-click the original mask and the new Enhance Edge mask side by side and you’ll find they’re identical; the tool isn’t refining the selection itself, it’s sampling colors from inside the image and pushing them outward across the fringed area to cancel out the color cast.

For a one-click tool, it does a reasonable job: the obvious color halo mostly disappears. It’s worth knowing what it isn’t doing, though. It doesn’t reshape the mask, and it doesn’t add or reconstruct any hair detail. It’s a color correction on top of whatever mask you already had.
The Free Way: A Clipping Mask and the Brush Tool
This is the same fix Enhance Edge is making, done by hand, with no credits spent and full control over exactly where the correction lands.
-
Go back to the version with fringing.
Turn off the Enhance Edge layer so you’re looking at the original cutout with the fringing visible again.
-
Add a new layer above the fringed layer.
Create a blank layer directly above your cutout layer.
-
Clip it to the layer below.
Hold Alt (Option on Mac) and click right on the line between the two layers in the Layers panel. This creates a clipping mask, which restricts anything painted on the new layer so it’s only visible inside the layer beneath it, in this case, only inside your subject.
-
Sample a hair color with the Brush tool.
Press B for the Brush tool, then hold Alt (Option) and click a clean, slightly lighter area of the subject’s actual hair color to sample it. Avoid sampling the darkest shadows in the hair.
-
Set the clipped layer’s blend mode to Darken.
In the Layers panel, change the blend mode from Normal to Darken, not Multiply. Darken only affects pixels that are lighter than the color you’re painting, which keeps the correction limited to the fringe itself.
-
Paint over the fringe with a soft brush at low flow.
Use a soft-edged brush with Flow around 10%, and paint in small circular strokes directly over the fringed edge. Because the layer is clipped, you can paint loosely without worrying about going outside the subject.

Build the color up gradually rather than in one pass, a few light strokes blend more convincingly than one heavy one. If an area needs to be a little darker, sample a slightly darker patch of hair and paint over just that spot.

What Trips People Up
“I used Multiply instead of Darken and it looks muddy”
Multiply darkens everything it touches, including pixels that were already fine. Darken only replaces pixels lighter than the sampled color, which is why it stays contained to the actual fringe.
“My clipping mask isn’t working”
If painting on the new layer affects the whole canvas instead of just the subject, the clip didn’t take. Alt/Option-click precisely on the line between the two layer thumbnails in the Layers panel, clicking the layer name or a different spot won’t create the clip.
“Enhance Edge charged me credits and didn’t really fix it”
That can happen. The credits are spent whether or not the result holds up, so it’s worth testing on a small crop or a low-stakes image first if you’re not sure it’ll help on a particular photo.
When to Use Each One
Use Enhance Edge when you’re in a hurry, you’re comfortable spending credits, and a quick automated pass is good enough for the job.
Use the clipping mask method when you want full control over exactly where the correction lands, you’re working with a limited generative credit budget, or you need it to work without an internet connection.
Don’t expect either one to reconstruct hair detail that was never captured in the original mask. Both techniques correct the color of the fringe, neither one invents new strands. If the underlying mask is genuinely bad to begin with, no amount of edge correction fixes that; the actual fix is a better selection using tools like Select and Mask, or a more targeted approach like the one in Select Subject and Refine Edges.
Either way, the underlying lesson is the same one worth taking from this whole comparison: a one-click AI tool and a five-minute manual technique can land on the same result. The AI version is faster and costs credits every time. The manual version costs nothing, works with no internet connection, and gives you exact control over where the correction lands, which matters more the more detailed the edge is.
Quick Reference: Keys, Menus and Settings
- Duplicate the layerCmd/Ctrl + J
- Cut out the subjectRemove Background in the task bar (no credits)
- Type toolT
- View the mask aloneOption/Alt-click the mask
- Turn a mask off and onShift-click the mask
- Enhance EdgeClick the layer mask, then Enhance Edge (Photoshop beta, 20 credits)
- Clip a layer to the one belowOption/Alt-click between the two layers
- Brush and samplingB, then Option/Alt-click to sample a color
- The free fix settingsBlend mode Darken, soft brush, flow about 10%
Mac first, then Windows where they differ.
Image source
Photo by Nursultan Abakirov via Unsplash
Free Downloads
Follow Along on the Same Photo
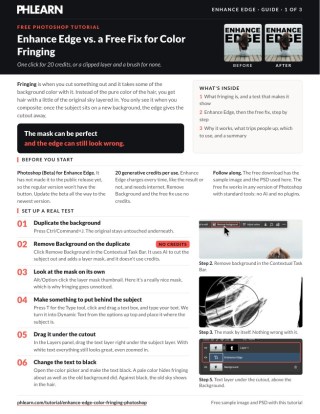
Get the sample image, the PSD and the 3-page PDF guide, and try Enhance Edge and the free clipping-mask fix on the same cutout. Free with a PHLEARN account.
Color Fringing: Common Questions
What is color fringing on a cutout?
When you cut a subject out, the edge takes some of the background color with it. The layer mask can be excellent and the hair still carries a little of the old sky. You only notice it once something darker sits behind the subject, which is exactly when you composite.
Where is Enhance Edge in Photoshop?
In the Photoshop beta only, at the time of recording. Click the layer mask of any layer that has one and the Enhance Edge button appears. The regular release doesn’t have it yet, so update the beta to the newest version.
Does Enhance Edge use generative credits?
Yes: 20 credits every time you run it, whether you like the result or not. Remove Background, which makes the cutout in the first place, doesn’t use any.
Does Enhance Edge improve the layer mask?
No. It makes a new layer with a copy of the same mask and leaves the original untouched. Option/Alt-click both masks and they’re identical. What it does is sample color from inside the subject and push it out over the fringe. Shift-click the new layer’s mask to see the color it painted across the image.
How do I fix fringing without credits?
Add a new layer above the cutout and clip it (Option/Alt-click between the two layers). Press B for the Brush, Option/Alt-click to sample a lighter hair color, set the layer’s blend mode to Darken, and paint along the edge with a soft brush at about 10% flow. Sample a slightly darker color for spots that need more.
Why Darken and not Multiply?
Darken is the blend mode Aaron uses for this; Multiply builds up too heavily. With Darken, the pale fringe takes on the hair color while the hair that’s already dark stays as it is.
Which looks better, Enhance Edge or the brush?
Both spread the subject’s own color over the fringe. Enhance Edge gives blotchy color rather than hair detail, and the brush gets a similar result for free. Aaron still thinks the tool has its place; it just charges you.
Why does the fringing only show on some backgrounds?
A pale background hides it about as well as the original sky did. Put the subject over something dark, like black text, and the old sky color in the hair stands out. That’s why the test in the video uses dynamic text behind the subject.
What if I need real hair texture at the edge?
Use the same clipping-mask setup with the Clone Stamp instead of the Brush. Aaron covers that in a separate free tutorial on clipping masks and the Clone Stamp.
Are the sample files free?
Yes, with a free PHLEARN account. You get the sample image, the PSD and the 3-page PDF guide, so you can try both fixes on the same cutout.
Master Photoshop, Lightroom and Photography
Join PHLEARN PRO for $12.99 a month or $99.99 a year. Cancel anytime, with a 100% money-back guarantee.





