

Download Sample Images
Download Assets
This tutorial includes 2 sample images, 1 sample PSD and 1 PDF guide. Downloads are free with a PHLEARN account.
- Free sample files with every tutorial on PHLEARN
- New tutorials published every week
- Unlimited downloads with your free PHLEARN account
Free PDF Guide · 4 Pages
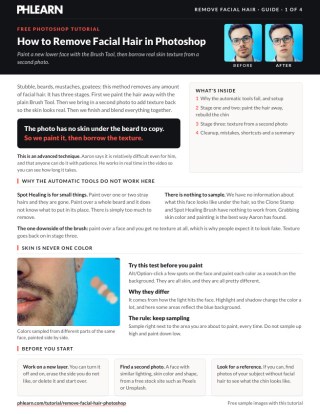
This Tutorial as a Step-by-Step PDF
Walks through all three stages: painting the hair away on a new layer with a soft Brush at about 20% Flow, rebuilding the chin’s light and dark, then borrowing texture from a second face with Desaturate, Overlay and High Pass at about 8 pixels, Split Warp, a black mask and a Healing Brush cleanup. Keep it next to your keyboard.
description
If you’ve ever needed to remove facial hair from a portrait, you know how tricky the process can be. That’s why we’re breaking down our method that will save you time and make sure the people in your photos look their best!
Whether your subject has a full-on beard or just a 5 o’clock shadow, you’ll learn how to paint away facial hair with the Brush Tool, recreate skin texture using a second reference image, and then blend everything together with some professional tools and techniques.
Enjoying This Free Tutorial?
We publish a new free tutorial every week, each one with sample images and PSDs you can download and follow along with. Sign up and they land straight in your inbox, along with early word on sales, events and subscriber-only offers.
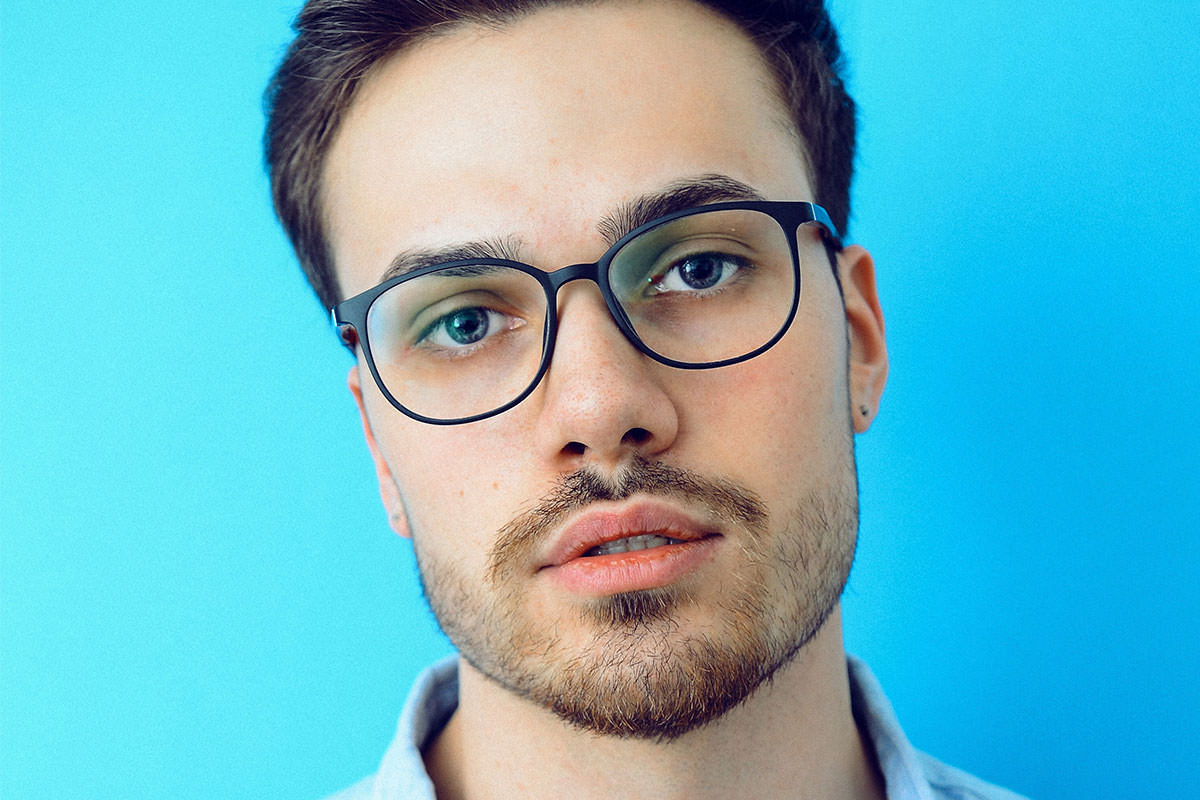
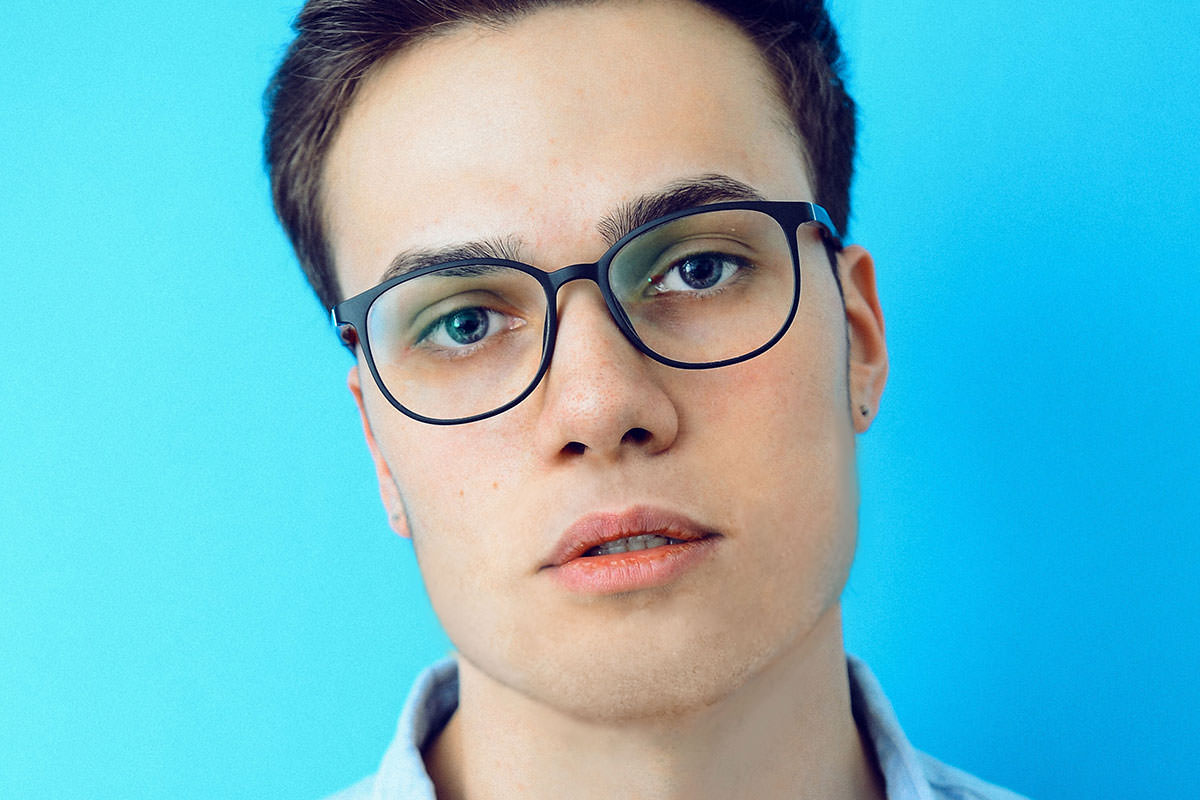
Repaint the Face, Then Borrow Someone Else’s Skin Texture
Removing facial hair is one of the few retouching jobs where every automatic tool fails, and understanding why explains the whole technique.
The Spot Healing Brush, Clone Stamp and Content-Aware all work by copying from somewhere else in the image. Ask them to remove a beard and there is nowhere to copy from — the photograph contains no information about what that person’s chin looks like, because it has never been visible.
So it gets painted by hand. And then the texture, which hand-painting cannot produce, gets borrowed from a completely different photograph. Want the opposite? PHLEARN also has a tutorial on how to add facial hair in Photoshop with a custom brush.
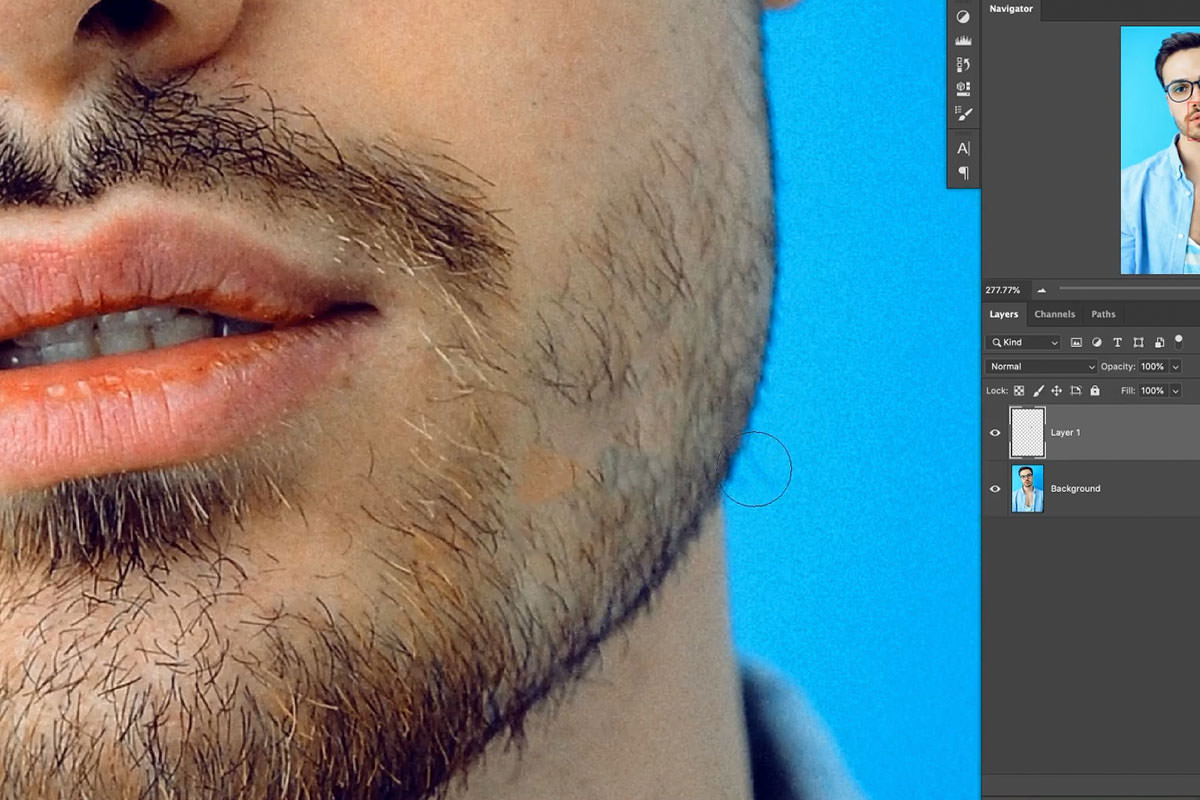
Skin Is Never One Color
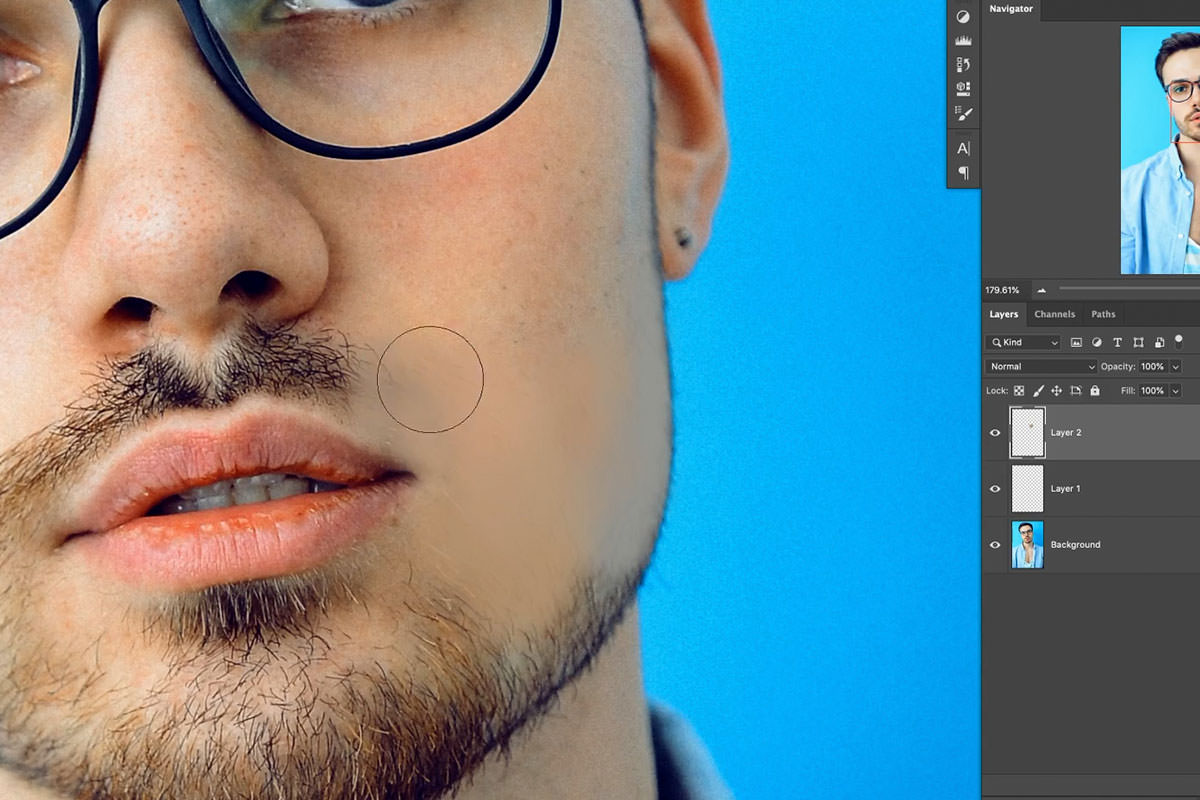
Before painting anything, do a quick test that changes how you approach this. Sample a color from the forehead, another from the cheek, another from the jaw, and paint each as a swatch side by side.
They will be startlingly different. Highlight and shadow, reflected color from the background, natural variation across the face — all of it means a single sampled color painted across a whole chin will look immediately wrong.
The rule that follows is the most important one here: sample immediately beside where you are about to paint, and re-sample constantly. Never sample the forehead and paint the jaw.
Stage One: Paint the Hair Away
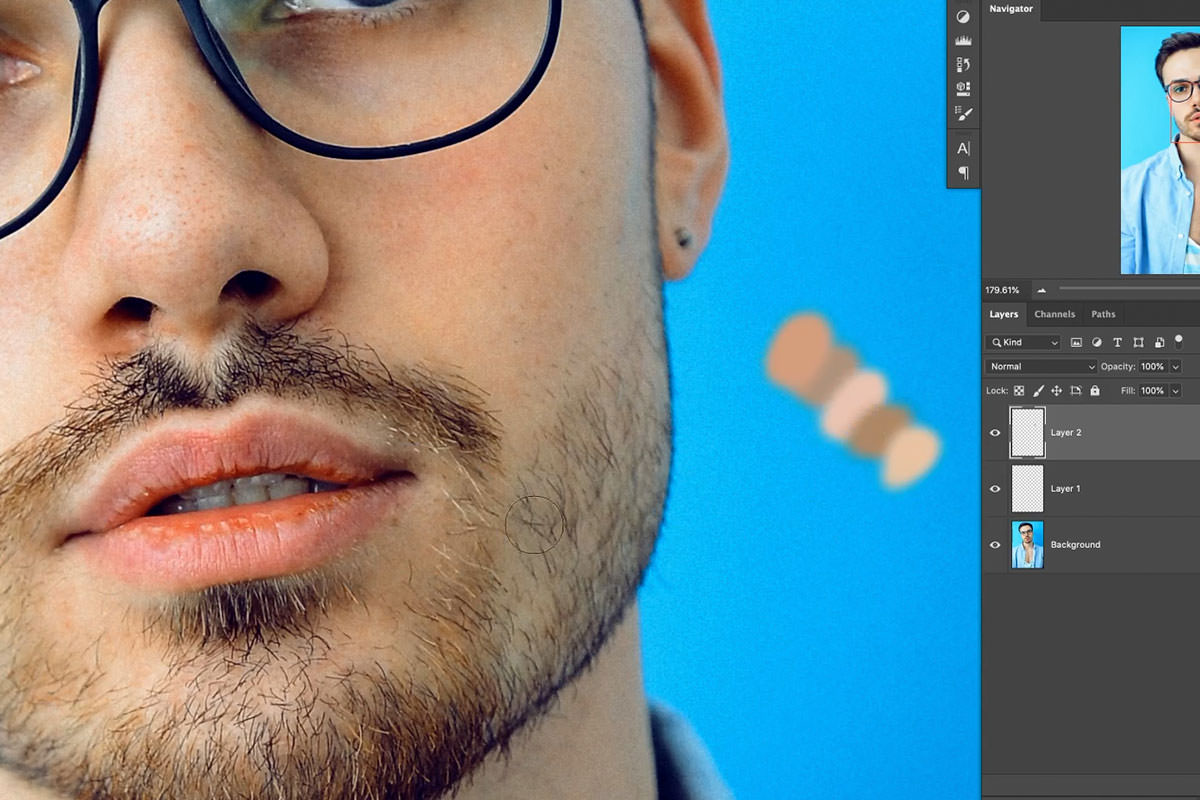
Brush settings
New empty layer, B for the Brush, right-click and set Hardness to 0. Set Flow to around 20% by holding Shift and pressing 2 — and if you’re on a mouse or trackpad rather than a tablet, go lower still, somewhere between 5 and 10%.
Low flow is what makes this possible. Each stroke deposits only a little color, so tones build gradually and blend rather than landing as flat patches. Resize the brush by holding Ctrl + Option and dragging (Mac) or Alt + right-drag (PC).
-
Sample beside where you’re painting
Alt/Option-click, then paint a short distance. Move along, sample again.
-
Rough the whole area in first
Don’t perfect one corner. Get the hair broadly covered, then refine.
-
Expect it to look wrong for a while
There will be no texture at all at this stage. That’s correct — texture is a later step, and worrying about it now leads people to abandon a technique that was working.
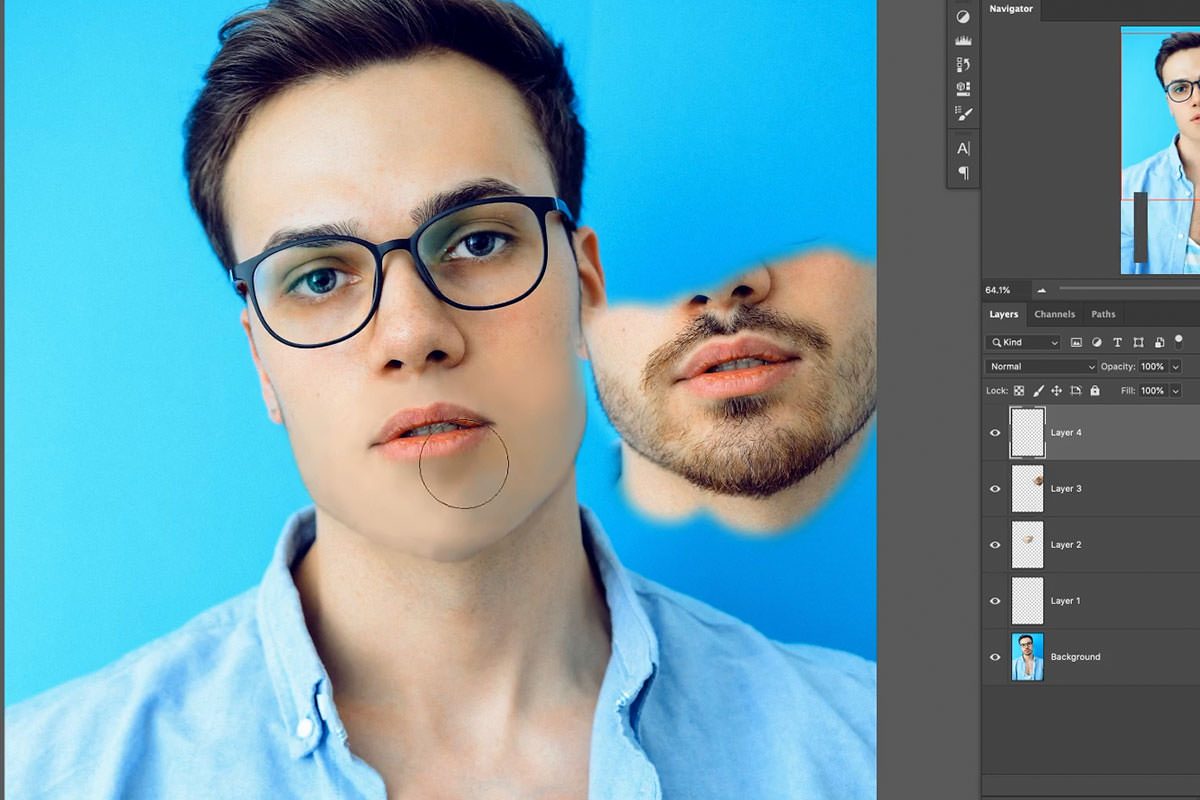
Zoom out to judge it
This is the check that tells you whether it’s working. Press Cmd/Ctrl + - several times until the image is small, and toggle your layer.
At that size texture is invisible anyway, so what you’re seeing is purely whether the shape and tone read as a face without a beard. If it works zoomed out, it will work when the texture goes on. If it doesn’t, no amount of texture will save it — go back and fix the painting.
Stage Two: Give Him a Chin Back
A beard hides the entire lower structure of a face. Paint it out flatly and your subject appears to have no jaw — which reads as wrong even when nobody can articulate why.
On a new layer, paint the shading back: a lighter tone along the front of the chin where light would catch it, darker beneath the lower lip and under the jaw. You are reconstructing anatomy, not covering hair.
Find a reference photograph of your subject without the beard if one exists. Faces vary enormously and guessing at a chin shape is the hardest part of this. Failing that, any reference of a similar face shape in similar light helps.
A useful trick: at the start of this stage, hide your paint layer, press S for the Clone Stamp with Sample set to Current & Below, and clone a small patch of the original bearded jaw off to one side, purely as a color and tone reference to sample from later.
Keep zooming out to check. This stage is genuinely difficult and takes several attempts — which is worth saying plainly, because the technique is sound even when your first pass isn’t.
Stage Three: Steal Texture from a Stranger
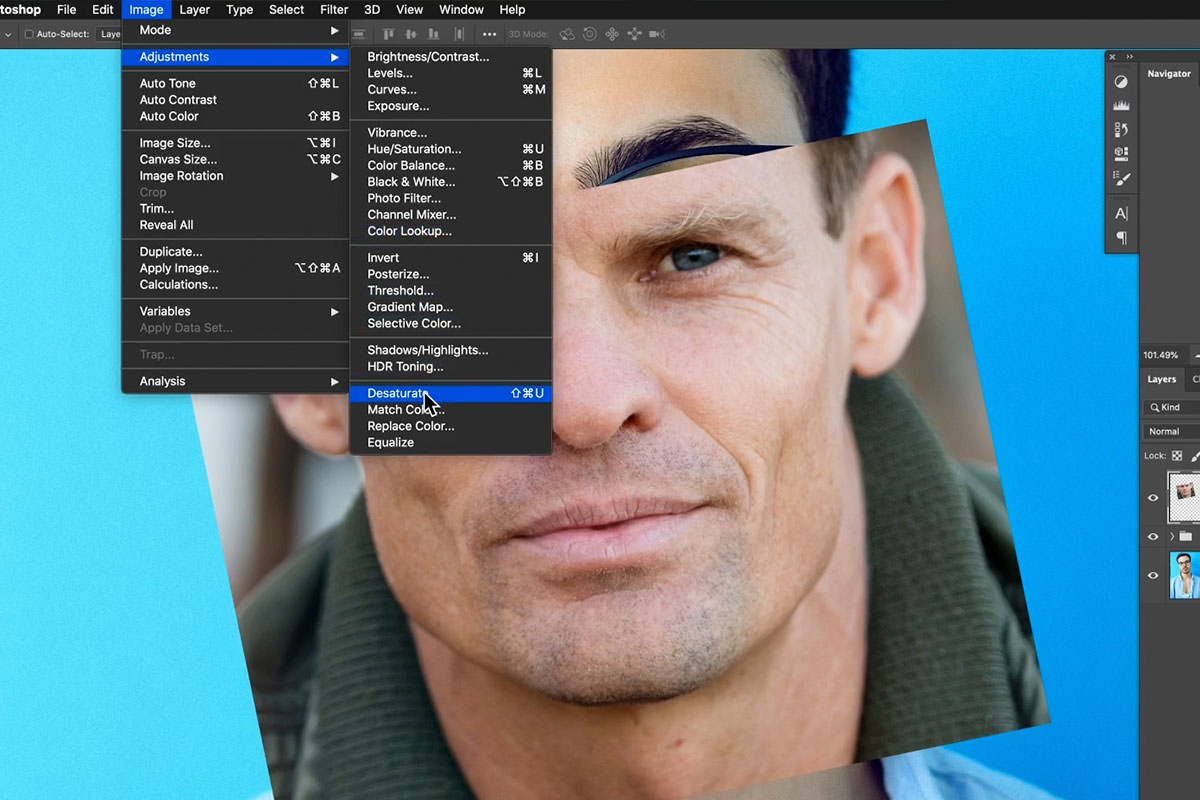
Here’s the part that makes the whole thing work, and it’s less strange than it sounds.
You cannot paint convincing skin texture — stubble, pores, the specific roughness of a shaved jaw. But you don’t have to, because skin texture is generic enough to transplant between people.
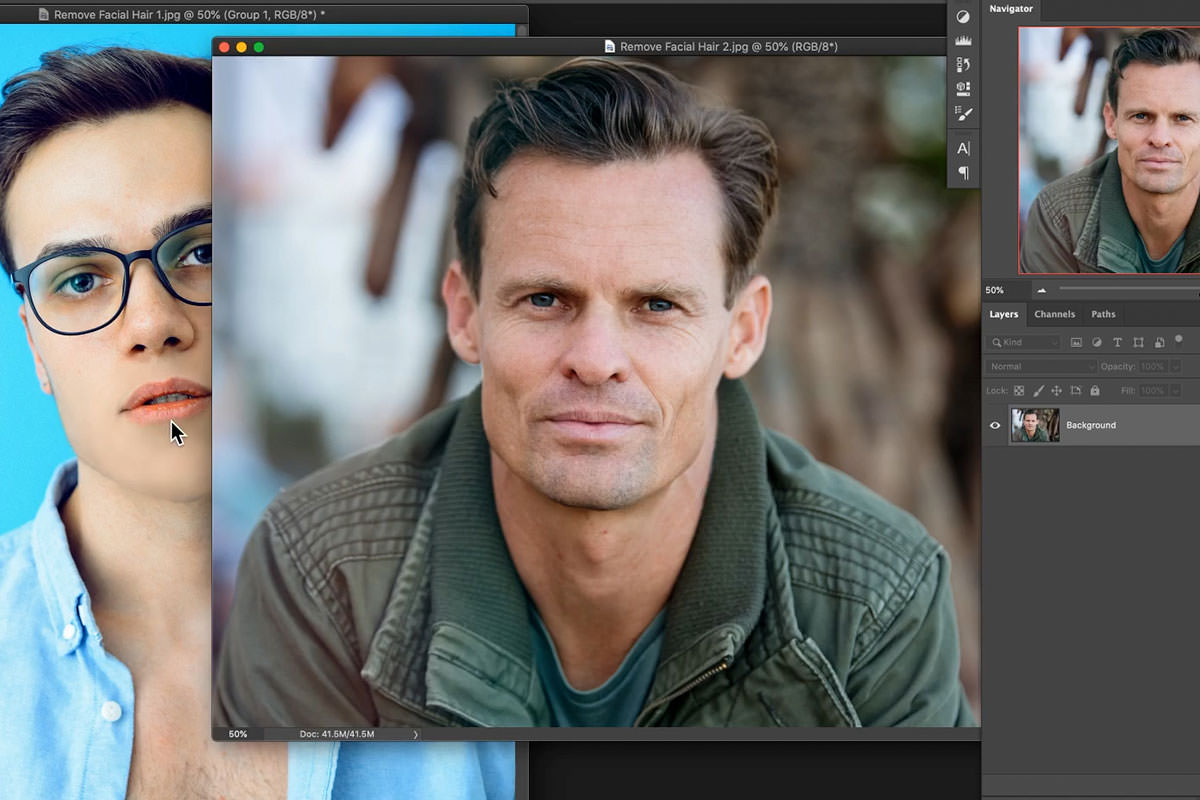
Choosing the donor
Find a free stock portrait on Pexels or Unsplash of a clean-shaven face, matching on similar lighting, similar skin tone, and roughly similar face shape. It does not need to be the same age or remotely the same person — only the texture is being used.
Crucially, take the texture from the lower part of a face. Cheek and forehead texture is quite different from the texture of a shaved jaw, and using the wrong region is a common reason this looks off.
Aligning it
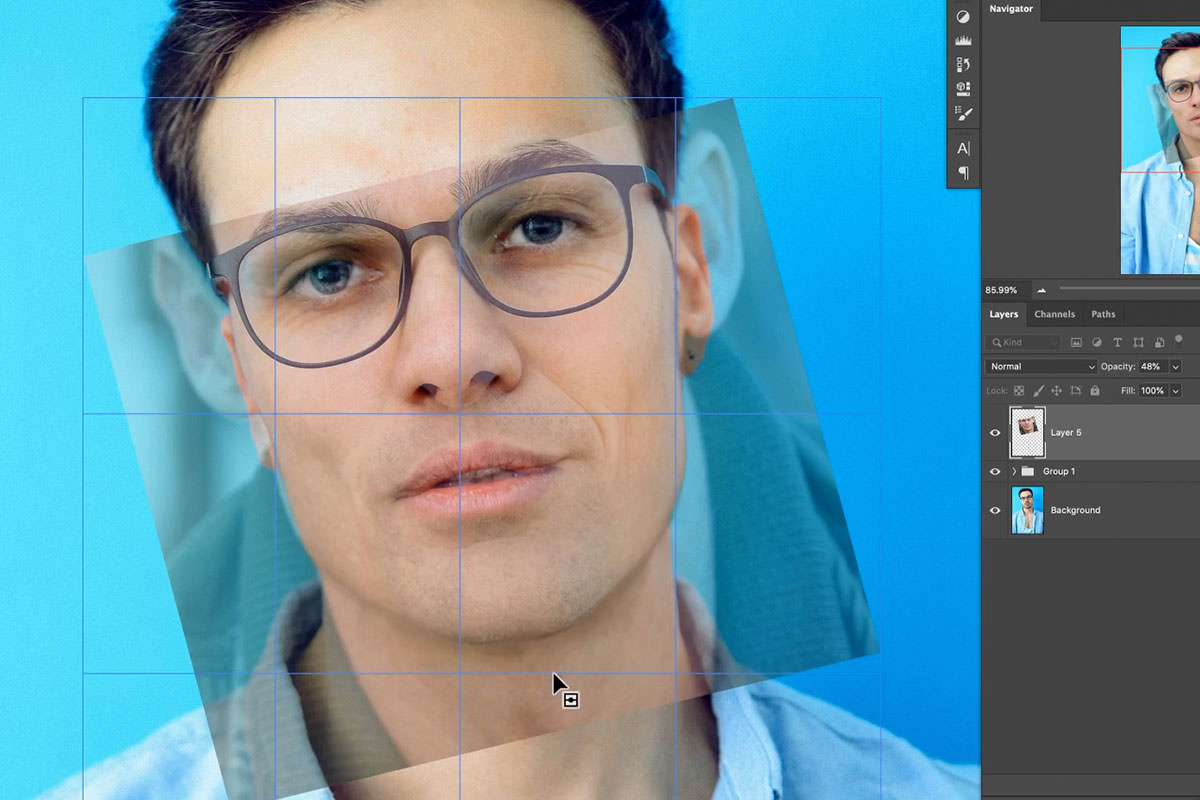
Marquee the donor’s face, from forehead to chin, drag it across with the Move Tool, and lower its opacity so you can see both. Cmd/Ctrl + T to rotate and scale until it lines up — prioritize the mouth, since that’s the area the eye checks. Everywhere else can be approximate.
Extracting only the texture
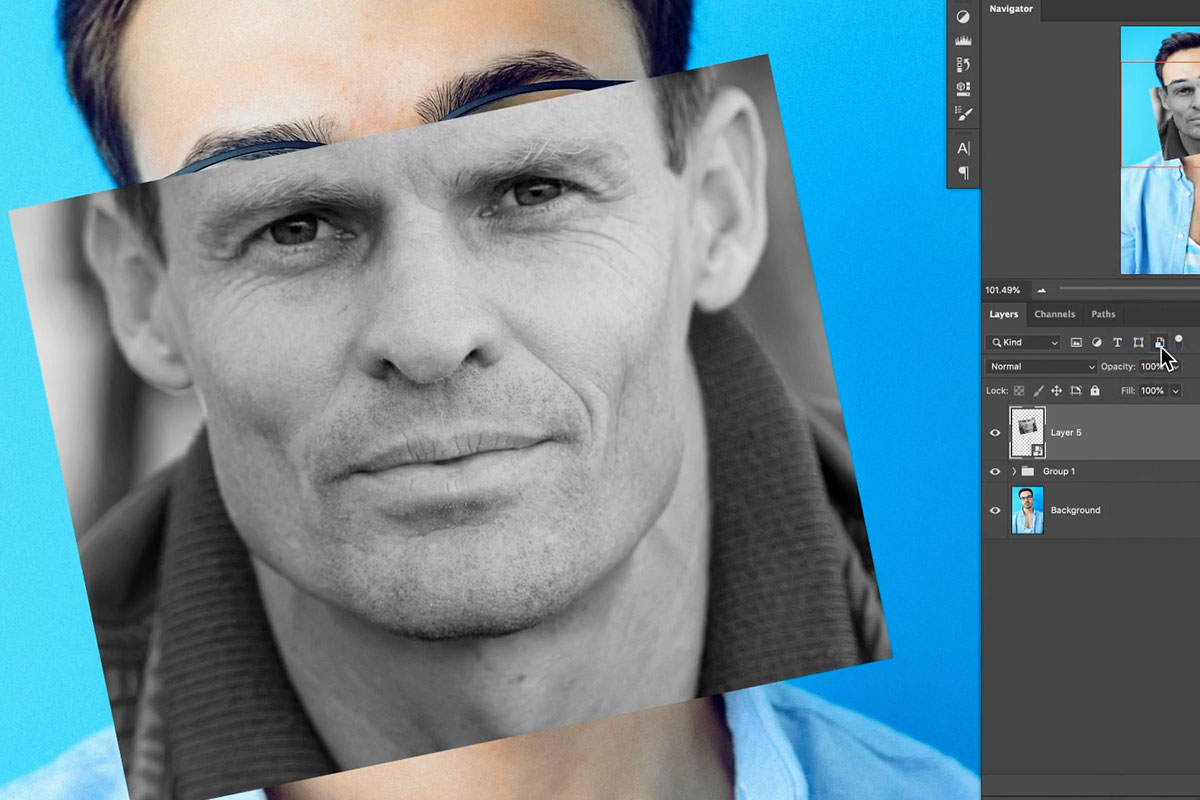
-
Desaturate the donor layer
Image › Adjustments › Desaturate. You want texture, not their color.
-
Convert it to a Smart Object
So the filter stays adjustable.
-
Set the blend mode to Overlay
It will look wrong until the filter goes on.
-
Filter › Other › High Pass
High Pass discards flat areas and keeps only edge detail — which, on skin, is exactly the texture. Around 8 pixels worked here; adjust until the stubble reads naturally.
Suddenly the flat painted area has pores and shadow. This is the same High Pass and Overlay pairing used for sharpening, doing a different job.
Warping the Texture Into Place
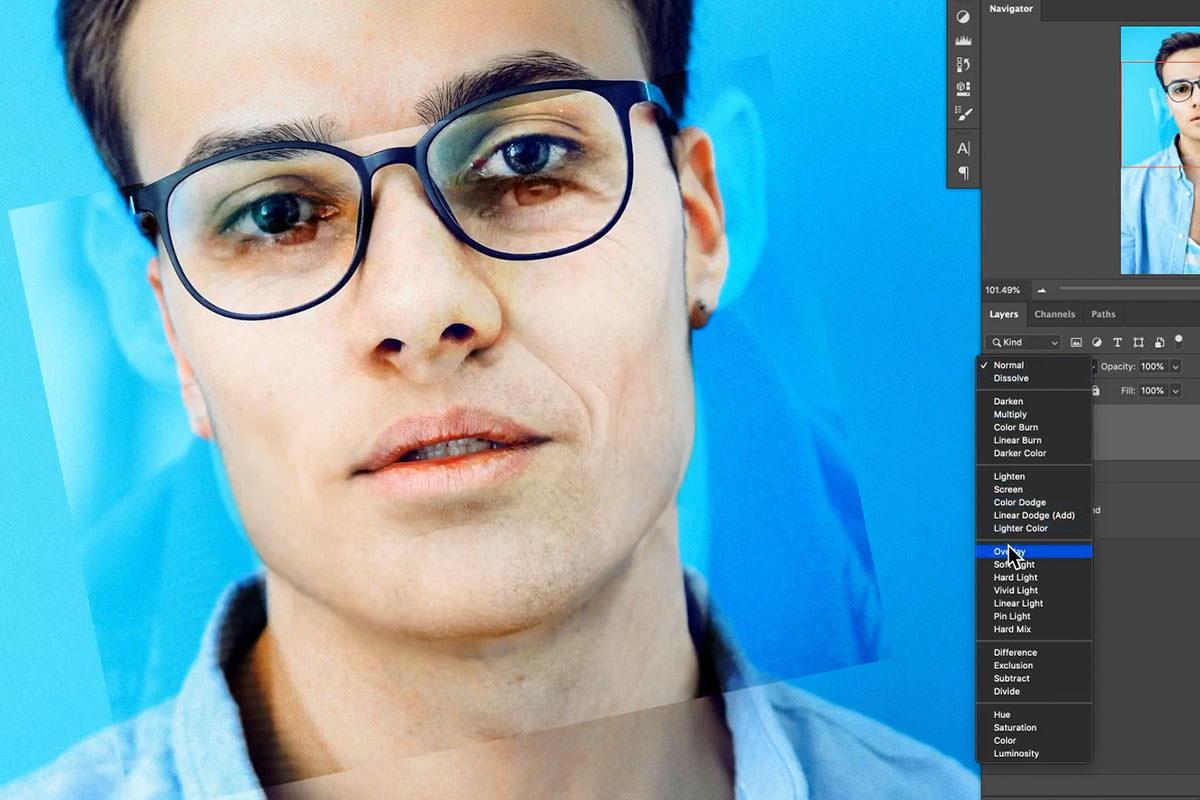
Two faces never align perfectly. Rasterize the layer once you’re happy with the High Pass amount, then Cmd/Ctrl + T, right-click and choose Warp.
Right-click again for Split Warp Horizontally and Split Warp Vertically to add division lines exactly where you need control — through the mouth, down each side of the jaw. Each split gives you an independent handle, so you can pull the texture into position region by region rather than distorting the whole patch.
Clean up first with the Clone Stamp set to Current Layer — not Current & Below — to remove the donor’s creases and age lines, which belong to a different face.
Masking It In
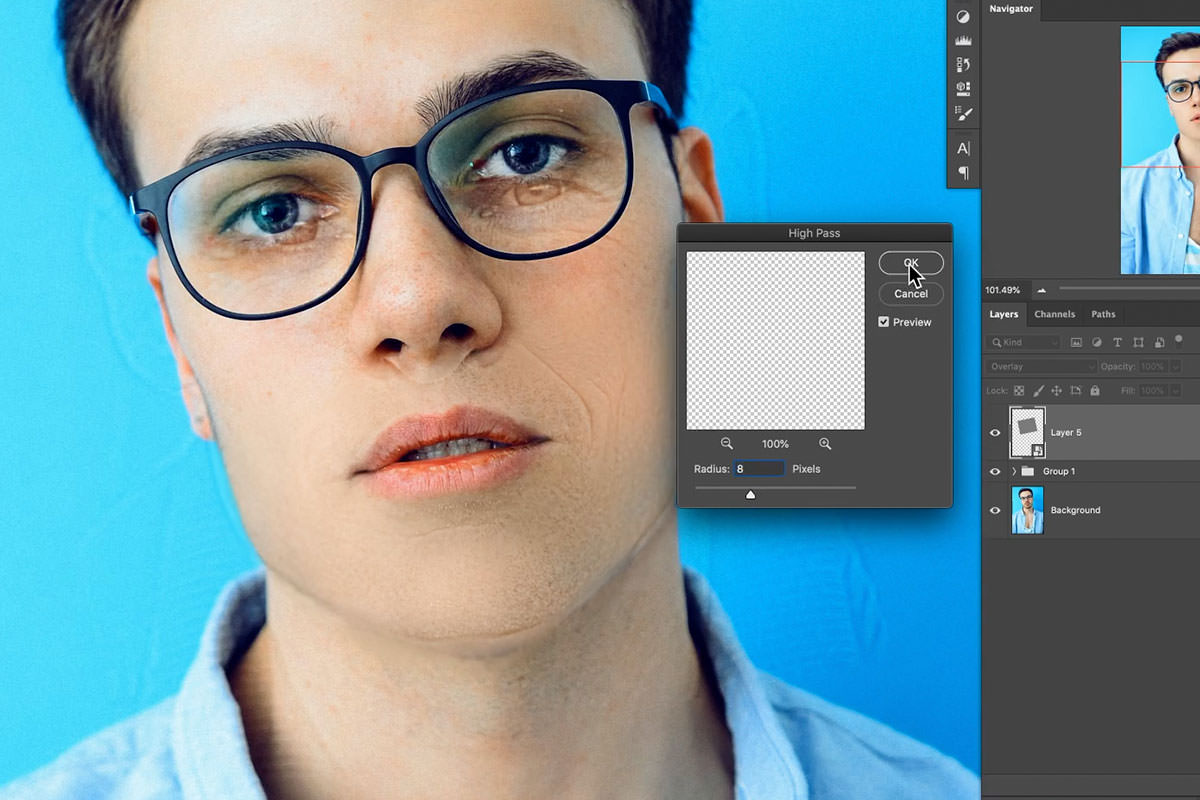
Alt/Option-click the layer mask icon to add a black mask, hiding the texture entirely. Then paint white to bring it back only where you need it — over the painted chin, above the lip, along the jaw.
Painting texture in selectively is what makes this look real. The original skin keeps its own texture; only the reconstructed area receives the borrowed detail, and the two meet inside an area of matching tone.
Final Cleanup
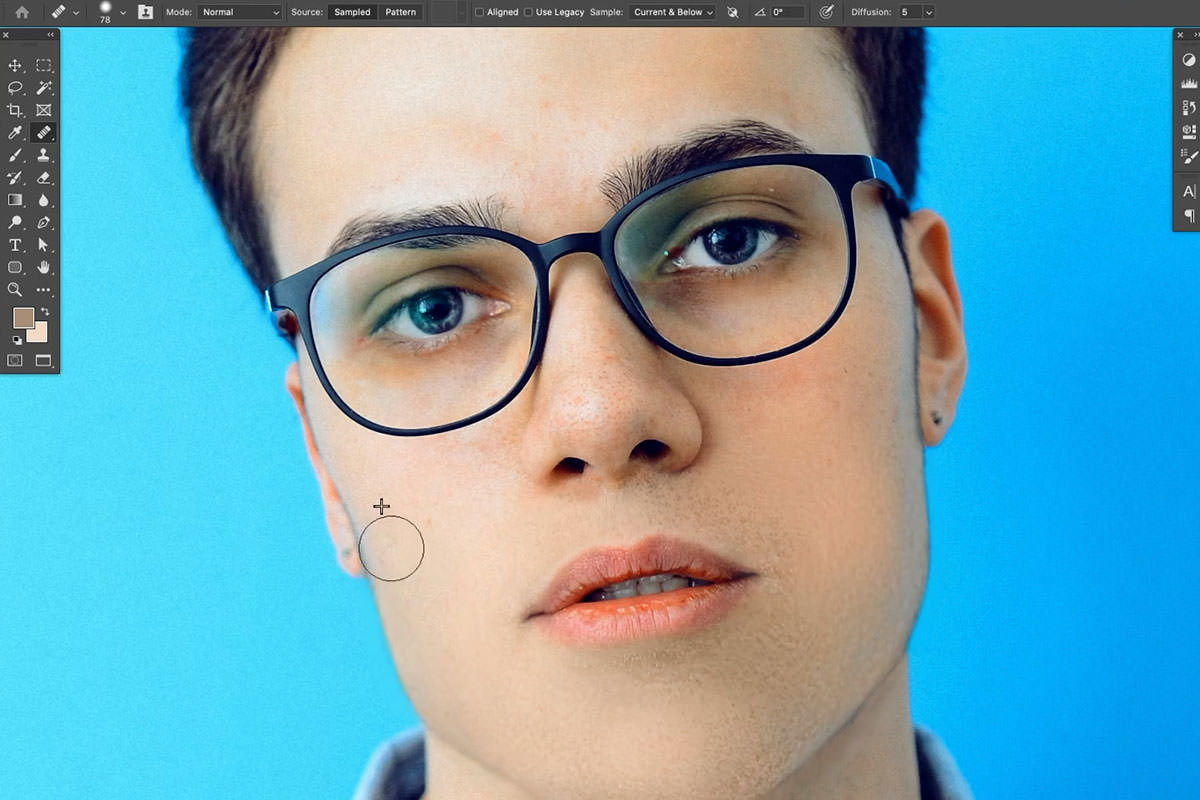
Two last passes. On a new layer, use the regular Healing Brush to sample your subject’s own skin from elsewhere and paint some of it back over the borrowed texture — it reintroduces their genuine skin character where the transplant is least convincing, and knocks back any stubble that reads as too strong.
Then the Clone Stamp on Current & Below for anything still untidy.
Because everything sits on separate layers, the painting underneath is still fully editable with the texture in place — adjust a tone below and the texture above updates with it.

Where Facial Hair Removal Goes Wrong
Reaching for the automatic tools
Spot Healing and Content-Aware have nothing to sample. They can remove a stray hair; they cannot remove a beard.
Sampling one color and painting everywhere
Skin varies dramatically across a face. Sample beside your brush, constantly.
Painting flat and forgetting the anatomy
Without rebuilt highlight and shadow the subject looks chinless, which reads as wrong long before anyone notices texture.
Panicking about texture too early
Stage one always looks fake. Judge it zoomed out, and let stage three handle texture.
Borrowing texture from the wrong part of a face
Forehead and cheek texture won’t pass as a shaved jaw. Take it from the same region.
Cloning with the wrong Sample setting
Cleaning the donor layer needs Current Layer. On Current & Below you’ll pull the subject’s face into the texture layer and undo your own work.
The Brush Tool Handles What the Clever Tools Can’t
The pattern worth carrying away: content-aware tools need somewhere to copy from, and when nothing in the image contains the answer, you paint it. Facial hair removal is the clearest example, but the same reasoning applies to any area where the information simply isn’t there.
Take your time with it. This is genuinely one of the harder retouching techniques, and the first attempt rarely lands. The method is sound — it just asks for patience rather than a shortcut.
Quick Reference: Keys, Menus and Settings
- Soft brush, low flowB, right-click: Hardness 0; Shift + 2 for 20% Flow (5 to 10% with a mouse)
- Resize the brushControl + Option-drag on Mac; Alt + right-click-drag on Windows
- Sample skinAlt/Option-click right beside where you paint
- Judge it smallCmd/Ctrl + - a couple of times, toggle the layer
- Extract textureImage > Adjustments > Desaturate; Convert to Smart Object; Overlay; Filter > Other > High Pass, about 8 px
- Fit the textureS with Sample: Current Layer for creases; Cmd/Ctrl + T, right-click > Warp, Split Warp Horizontally and Vertically
- Mask it inAlt/Option-click the layer mask icon for black, paint white where needed
No AI, no generative credits.
Free Downloads
Follow Along on the Same Photos
Get the bearded portrait, the clean-shaven second face used for skin texture, the layered PSD and the 4-page PDF guide. Free with a PHLEARN account.
Removing Facial Hair: Common Questions
Why can’t the Spot Healing Brush remove a beard?
There is nothing to sample. The photo has no information about the skin under the hair, so Spot Healing and the Clone Stamp have nothing to copy. They work for one or two stray hairs, not a whole beard.
What brush settings do I use to paint the hair away?
On a new layer, press B, right-click and set Hardness to 0, then press Shift + 2 for 20% Flow. With a mouse or trackpad, go lower, somewhere between 5 and 10%.
Why does my painted skin look blotchy?
Skin color changes a lot across a face with highlight, shadow and reflected color. Alt/Option-click right next to the area you are about to paint, every time, and never sample high and paint low.
The painted area has no texture. Am I doing it wrong?
No, that is normal at this stage. Press Cmd/Ctrl + minus a couple of times and turn the layer off and on. If it reads as a face without facial hair when small, you are off to a good start; texture comes later.
How do I keep him from looking like he has no chin?
On another new layer, paint the lighter area of the chin back in and go darker under the lips and around it. If you can, look at photos of your subject without facial hair to see what the chin looks like.
Where does the skin texture come from?
A second photo of a clean-shaven face from a free stock site like Pexels or Unsplash, with similar lighting, skin color and face shape. A different age or person is fine, because only the texture from the bottom of the face is used.
How do I take only the texture from the second face?
Image > Adjustments > Desaturate, convert the layer to a Smart Object and set it to Overlay. Then Filter > Other > High Pass; Aaron uses about 8 pixels. Rasterize the layer when you are happy.
How do I make the borrowed texture fit the face?
Lower its opacity and use Cmd/Ctrl + T to line up the mouths. Then Cmd/Ctrl + T, right-click > Warp, and add Split Warp Horizontally and Vertically lines to pull it into place. Alt/Option-click the layer mask icon for a black mask and paint white where you need texture.
Which Sample setting do I use for cleanup?
Current Layer when you clone the other person’s creases off the texture layer; Current & Below would mess everything up. For the final pass on a new layer, use the regular Healing Brush and the Clone Stamp on Current & Below.
Are the sample files free?
Yes, with a free PHLEARN account. You get 2 sample images, 1 sample PSD and 1 PDF guide: the bearded portrait, the clean-shaven face used for texture and a 4-page step-by-step guide.
Master Photoshop, Lightroom and Photography
Join PHLEARN PRO for $12.99 a month or $99.99 a year. Cancel anytime, with a 100% money-back guarantee.





