

Download Assets
This tutorial includes sample images. Downloads are free with a PHLEARN account.
- Free sample files with every tutorial on PHLEARN
- New tutorials published every week
- Unlimited downloads with your free PHLEARN account
description
The Patch tool is more forgiving than cloning over text letter by letter, because it blends the texture it samples into the lighting and tone already there. This Quick Tip duplicates the layer, draws loose selections around small sections of the unwanted text, and drags each one to a genuinely matching nearby area until nothing of the original text is left.
Enjoying This Free Tutorial?
We publish a new free tutorial every week, each one with sample images and PSDs you can download and follow along with. Sign up and they land straight in your inbox, along with early word on sales, events and subscriber-only offers.
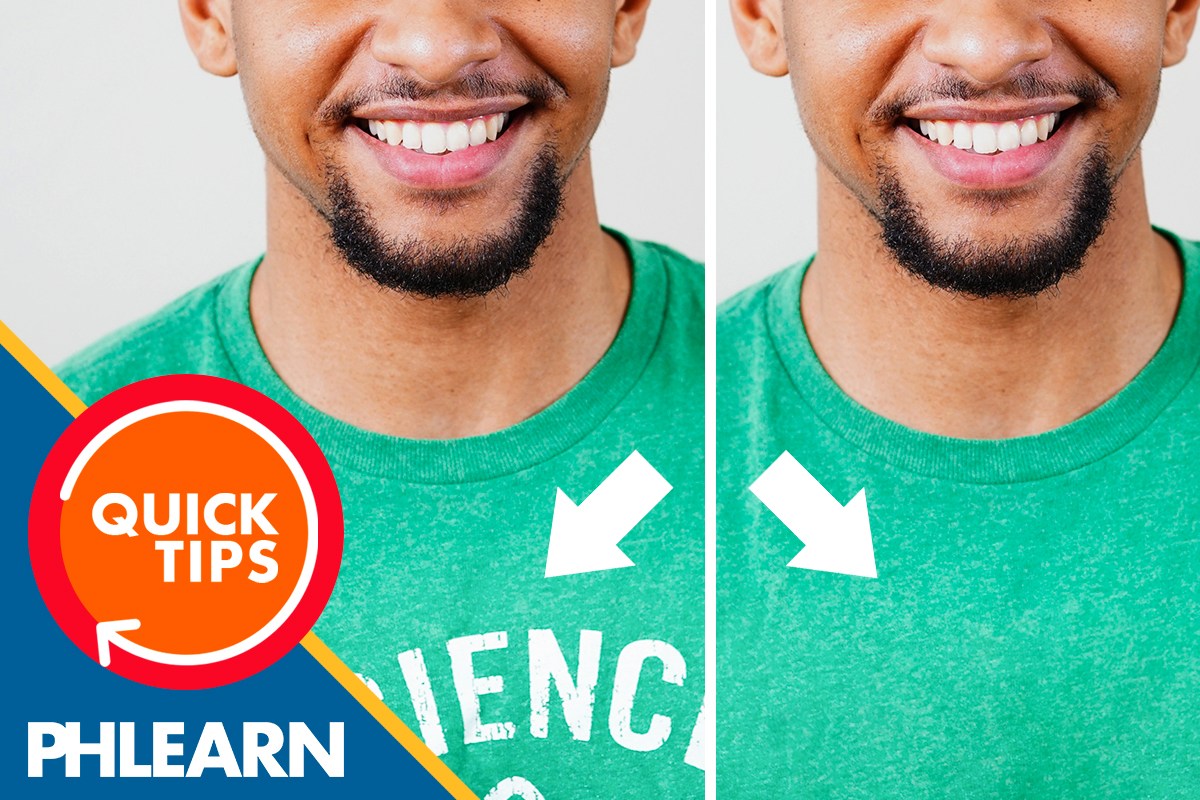
How to Remove Text from an Image in Photoshop
This Quick Tip removes unwanted text from a photo using the Patch tool, replacing small sections of the text with clean, matching texture pulled from elsewhere in the image.
Duplicating the Layer
The image layer is duplicated first, keeping the original untouched underneath in case any part of the removal needs to be undone or compared back to later.
Selecting the Patch Tool
Pressing J selects the Patch tool, built specifically for replacing an area of an image with texture sampled from somewhere else nearby.
Drawing Around Part of the Text
A loose selection is drawn around a portion of the unwanted text, working in small sections rather than trying to select the entire line of text all at once.
A Loose Selection Is Fine
The selection doesn’t need to trace the letters precisely; the Patch tool blends its edges automatically, so a rough shape around the text is enough to work with.
Dragging to a Similar Area to Replace It
That selection is dragged to a nearby area with similar texture and lighting, and the Patch tool blends the sampled area into the original spot, replacing the text underneath with clean image detail.
Why a Similar Area Matters
Dragging to a spot with matching color, lighting, and texture is what lets the Patch tool blend the replacement seamlessly; dragging to a very different area would leave a visible mismatch behind.
Repeating Until the Text Is Gone
The same draw-and-drag process is repeated over each remaining section of text until the whole line has been replaced with clean, matching image detail.
Working in Small Sections
Patching a small piece of text at a time, rather than the entire line in one pass, gives the Patch tool a better chance of finding a genuinely matching area to sample from for each section.
More Free Photoshop Tutorials
- Remove Logos and Branding in Photoshop
- Remove Distractions in Photoshop
- Generative Fill vs Clone Stamp vs Healing Brush
Why This Technique Works
The Patch tool blends sampled texture into a selection’s original lighting and tone automatically, which is what makes it more forgiving than manually cloning or healing over text one letter at a time. Working through the text in small sections, each patched from its own nearby matching area, is what keeps the whole removal looking consistent instead of uneven.
Final Thoughts
Removing text from a photo comes down to the Patch tool, drawn loosely around small sections of the text and dragged to genuinely similar nearby areas, repeated as many times as needed until no trace of the original text remains.
Related Tutorials
Master Photoshop, Lightroom and Photography
Join PHLEARN PRO for $12.99 a month or $99.99 a year. Cancel anytime, with a 100% money-back guarantee.





