Download Sample Images
DOWNLOAD PSD
Download the sample PSD (150 MB).
description
Learn how to create a custom fog brush in Photoshop, add fog and light rays to a photo, and then create realistic depth and atmosphere for a beautiful effect!
Share
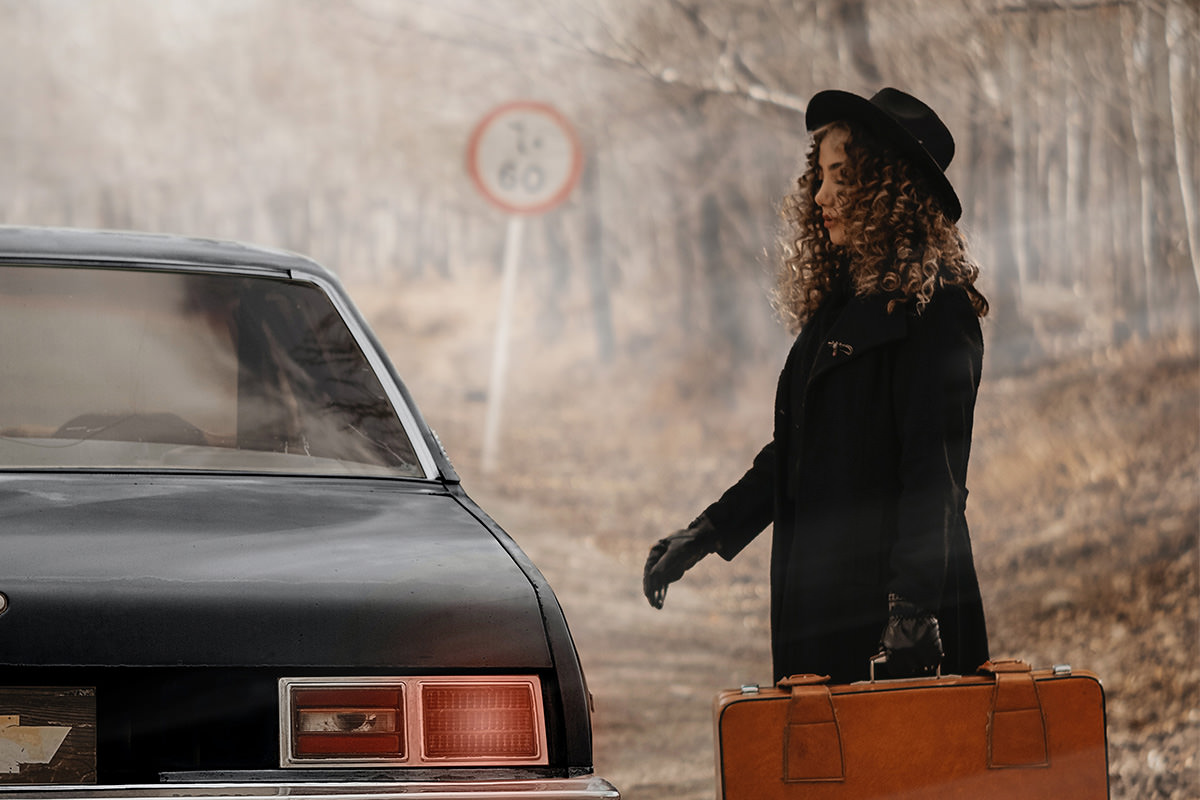
CREATE REALISTIC FOG & ATMOSPHERE
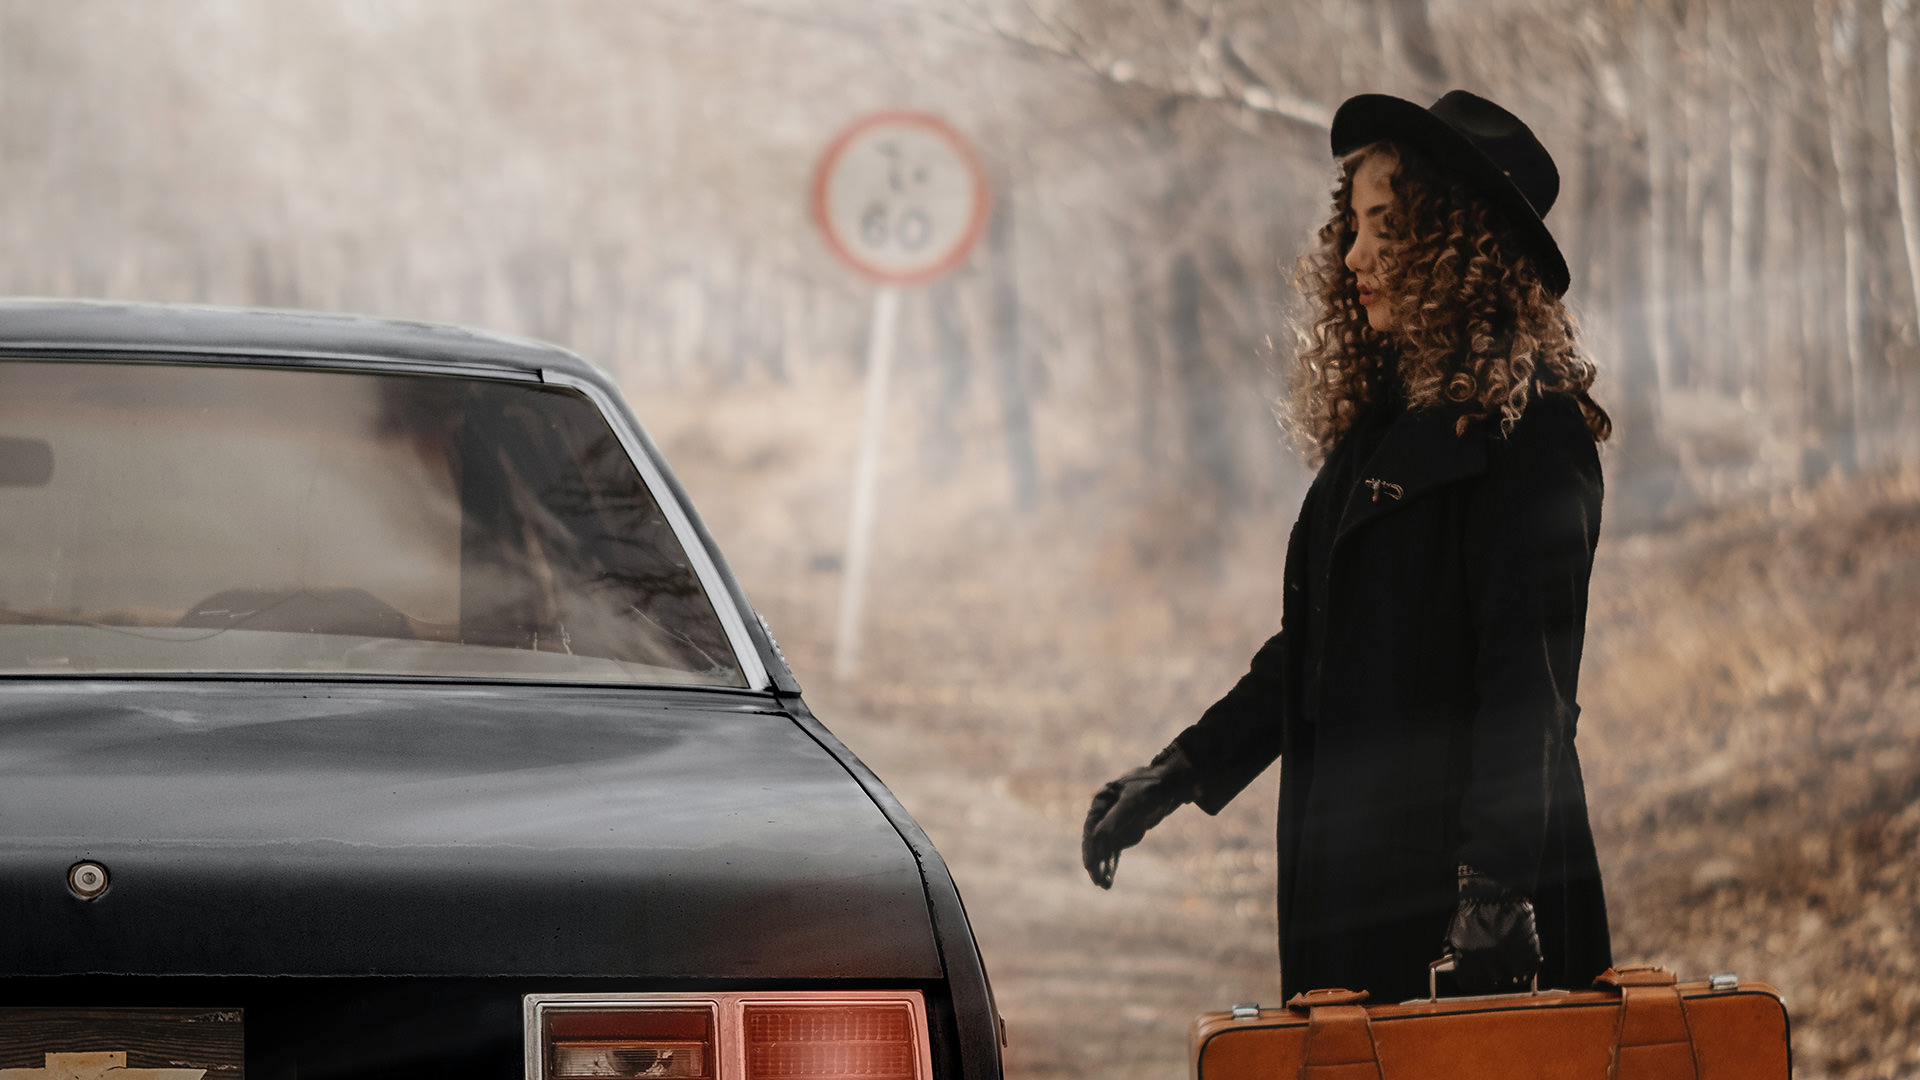
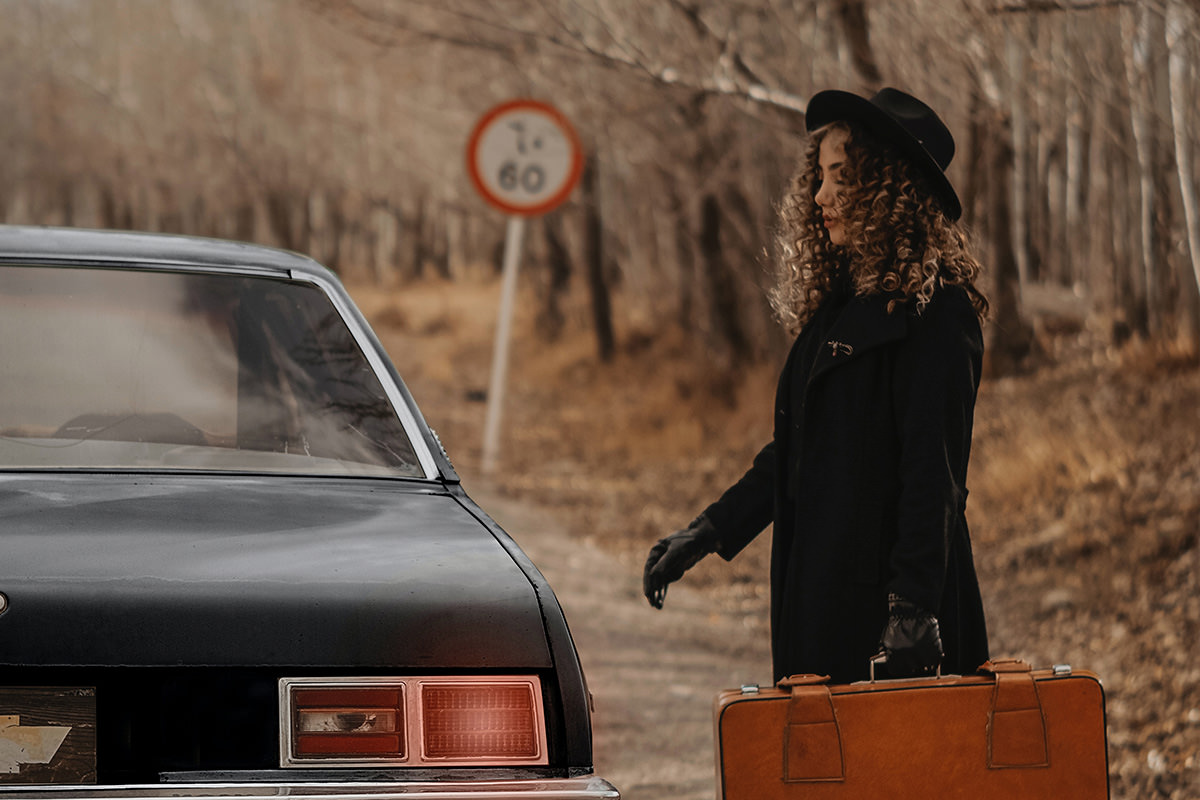
BEFORE
Realistic Fog & Atmosphere
Creating a Custom Brush in Photoshop
We’ve said it many times before, but the Brush Tool can do it all! While we cover its many uses extensively in PRO courses like The Amazing Power of the Brush Tool, this short tutorial is all about creating realistic effects like smoke, fog, and atmosphere.
But before we can start creating atmospheric effects, we need to create a custom brush that will make them possible!
Custom Brushes from Images
The trick to realistic custom brushes is to use real, photographed assets to create them. Since we’re trying to make a fog and cloud brush, an image of cloud is the best way to start.
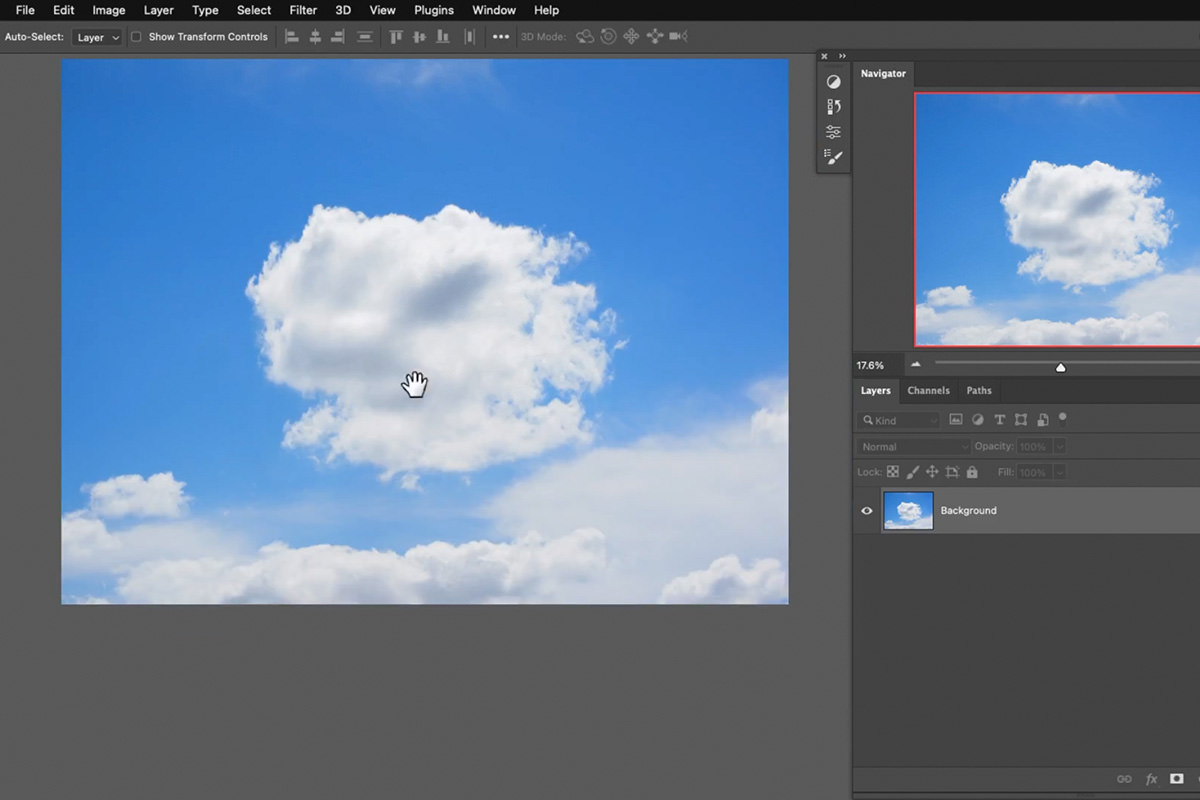
Since custom brushes are made using white elements on a pure black background, we need to get the cloud cut out and placed on a pure black background.
This sort of selection requires a lot of detail if we want the cloud texture to be preserved. And for detailed selections, there’s no better tool than Channels!
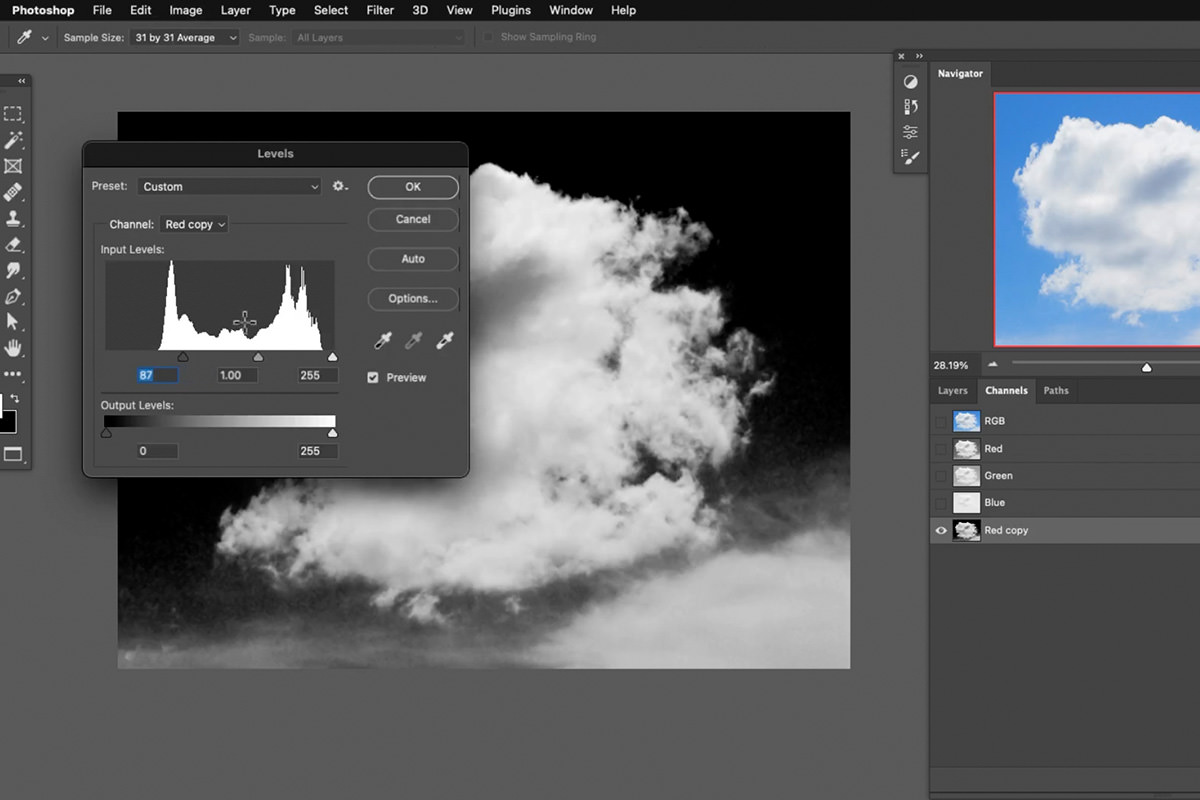
Open the Channels Tab within the Layers Panel. Click through each channel and find the one with the most contrast between the white cloud and blue background.
In this case, the red channel is perfect for our purposes. Duplicate the red channel, then hit CTRL or CMD + L to open the Levels dialog. Push the dark slider to the right to increase the contrast and push the darker areas to pure black.
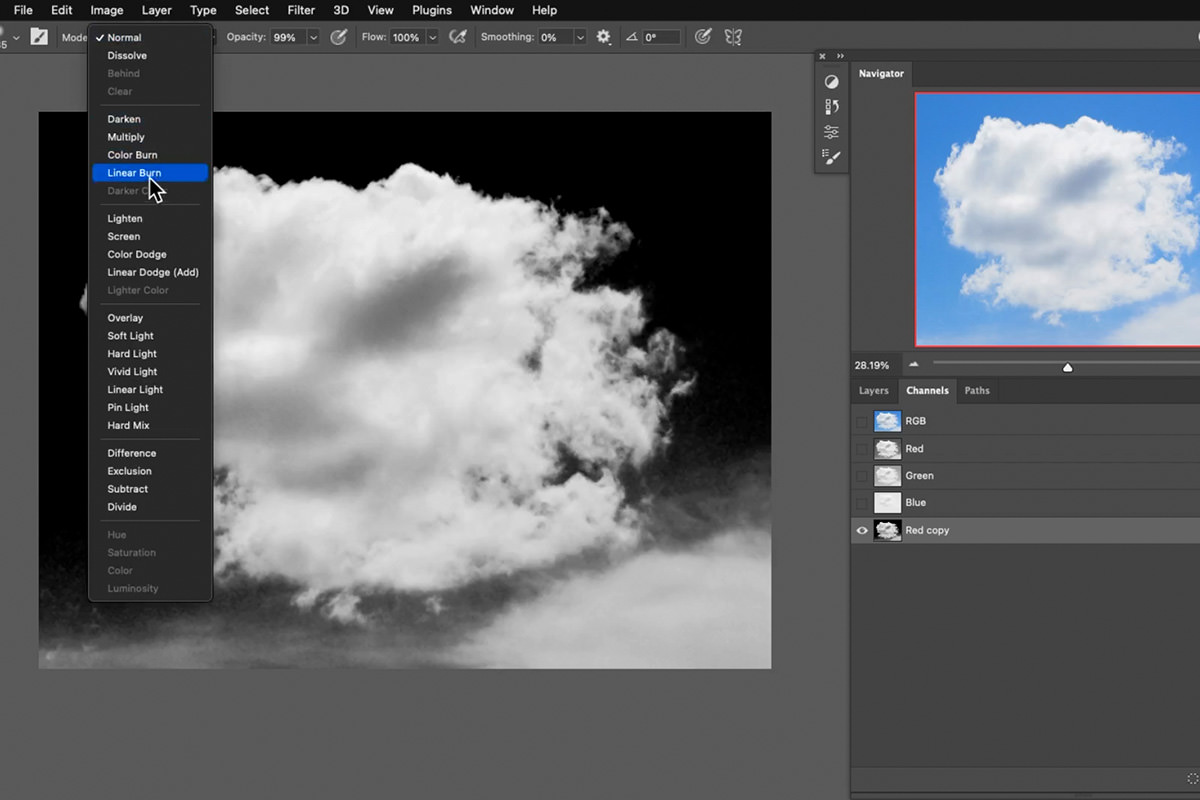
If that doesn’t take care of the entire background, you can use the Brush Tool set to the Linear Burn Blending Mode to paint the rest of the background pure black while preserving the lighter cloud areas.

Once the background is pure black, hold CTRL or CMD and click on the duplicated red channel. This will convert it into a selection.
Go back to the Layers Tab, create a new Layer, and Fill that selection with black.
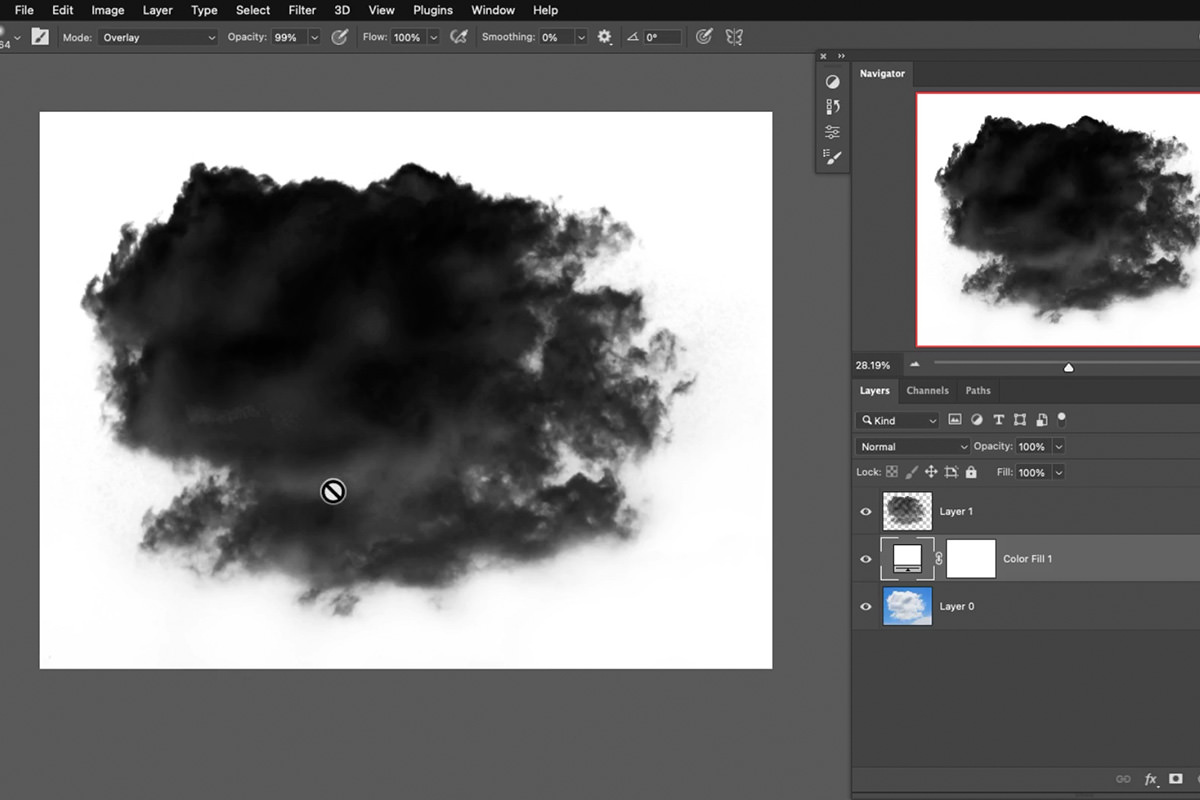
Create a white Solid Fill Layer underneath the black cloud. This will act as our template for the fog brush preset!
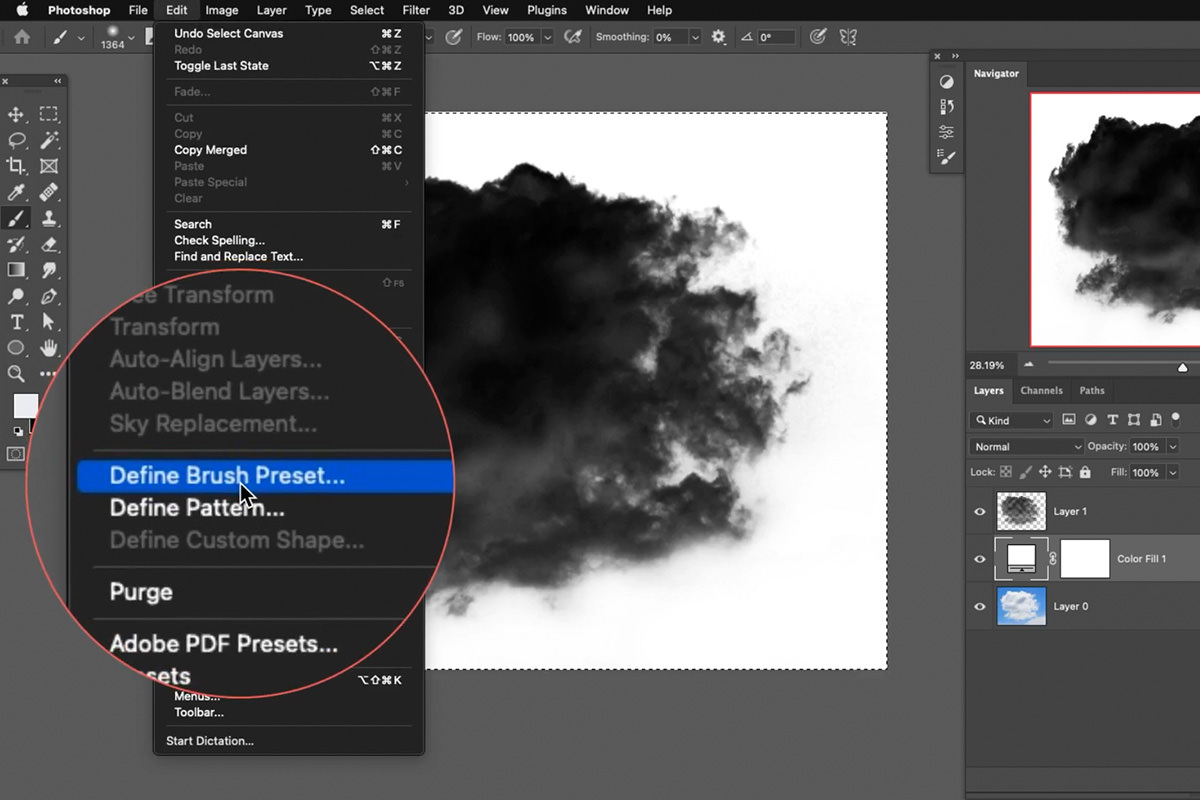
Open the Edit menu and select Define Brush Preset. Our new fog brush is available to start using!
But notice that the effect is creates isn’t exactly fog like. It’s just a solid repeating pattern that looks very unnatural. To fix this, we need to head into the Brush Settings dialog to create some natural variation.
The Brush Setting Dialog
Brush Settings allow us to add a bit of randomness and variation in our brushes. We can have them rotate randomly, space randomly, and even add random opacity changes.
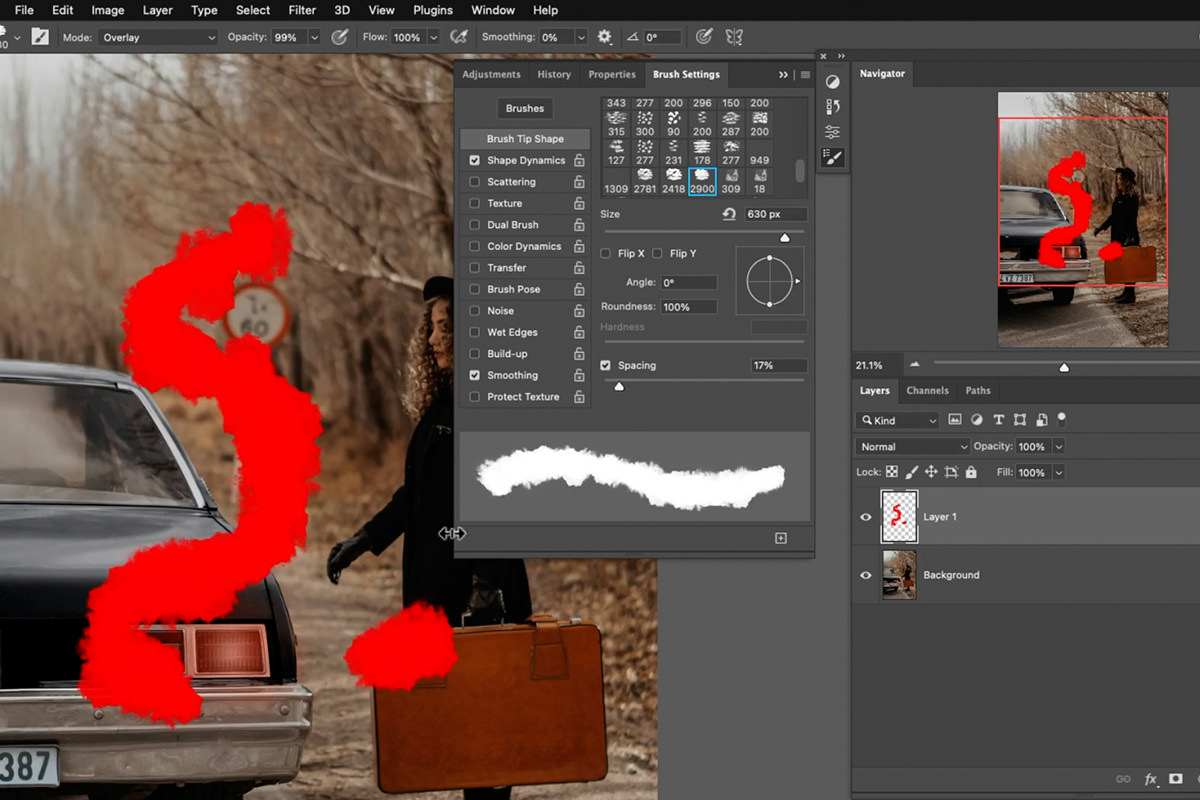
First, open the Brush Tip Shape options, check the Spacing box, and increase the Spacing.
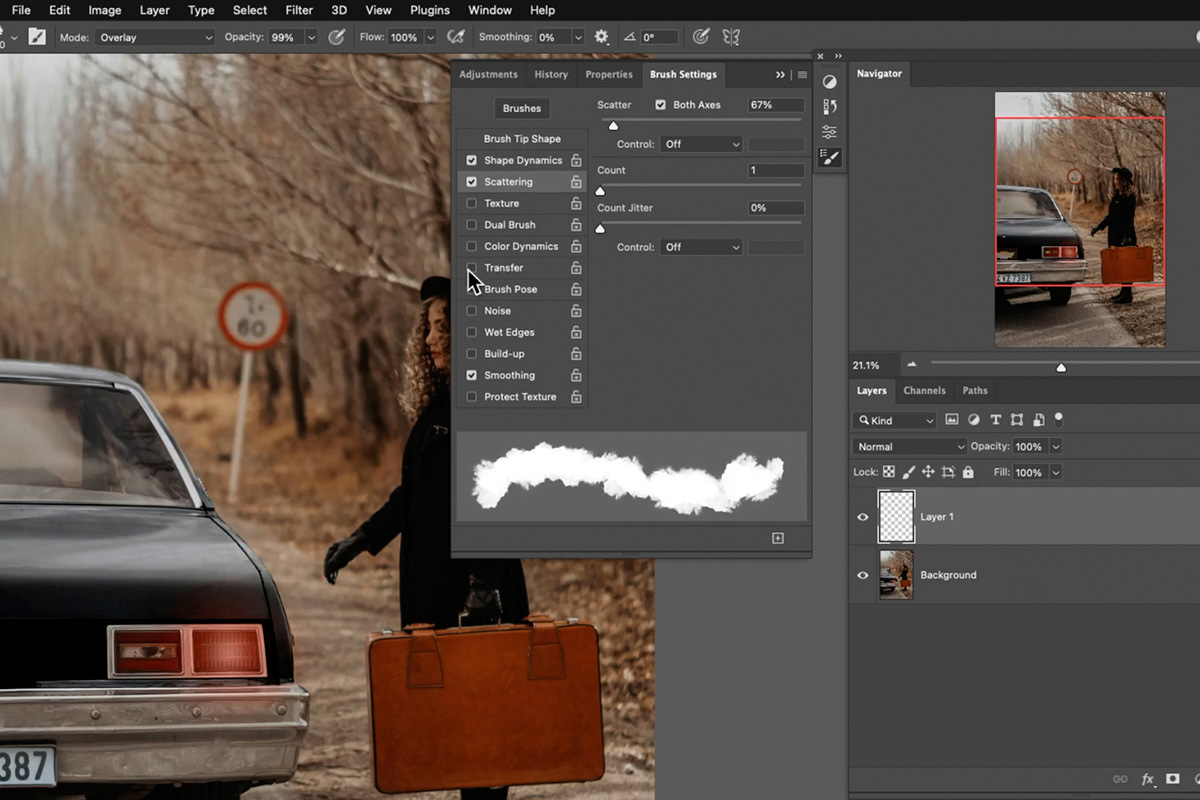
Next, open the Scattering options. Check the Both Axes box and increase the brush Scatter.
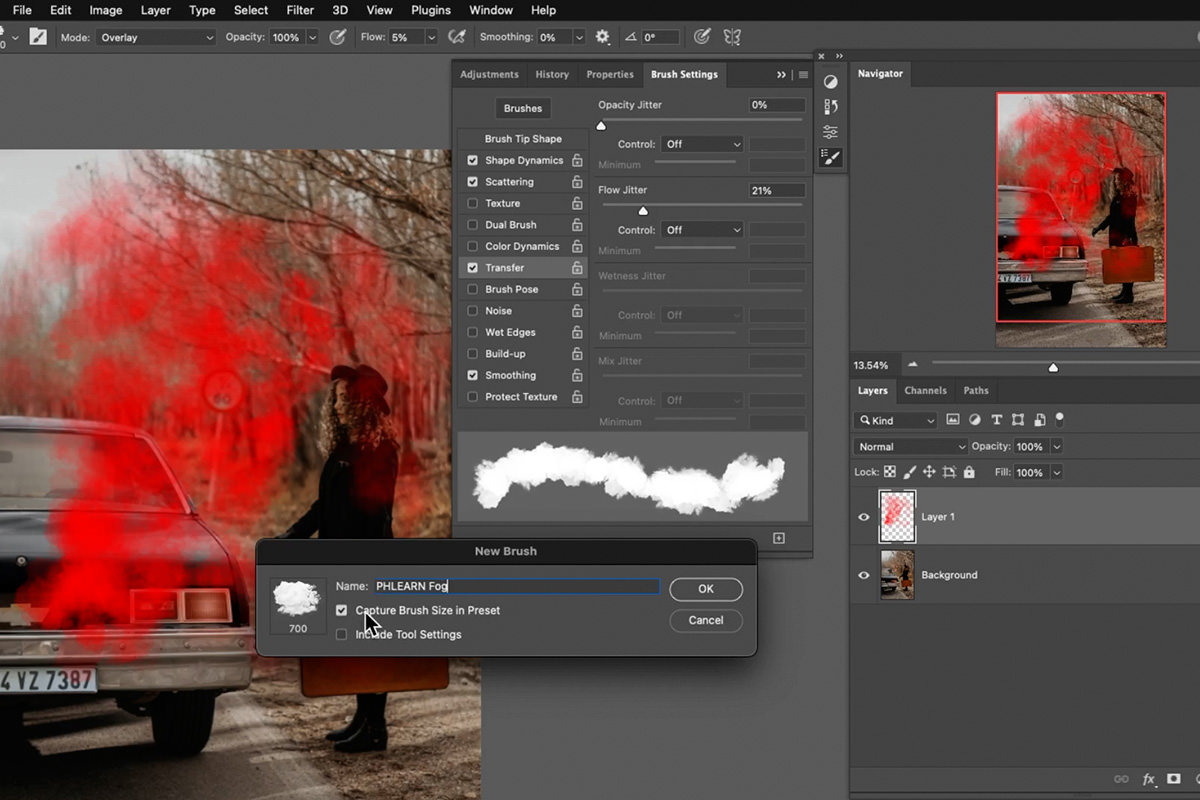
Lastly, open the Transfer options and increase the Flow Jitter.
Try painting with the brush again and notice that it looks much more natural. Save the brush. Now we can start creating the fog effect!
Creating the Fog Effect
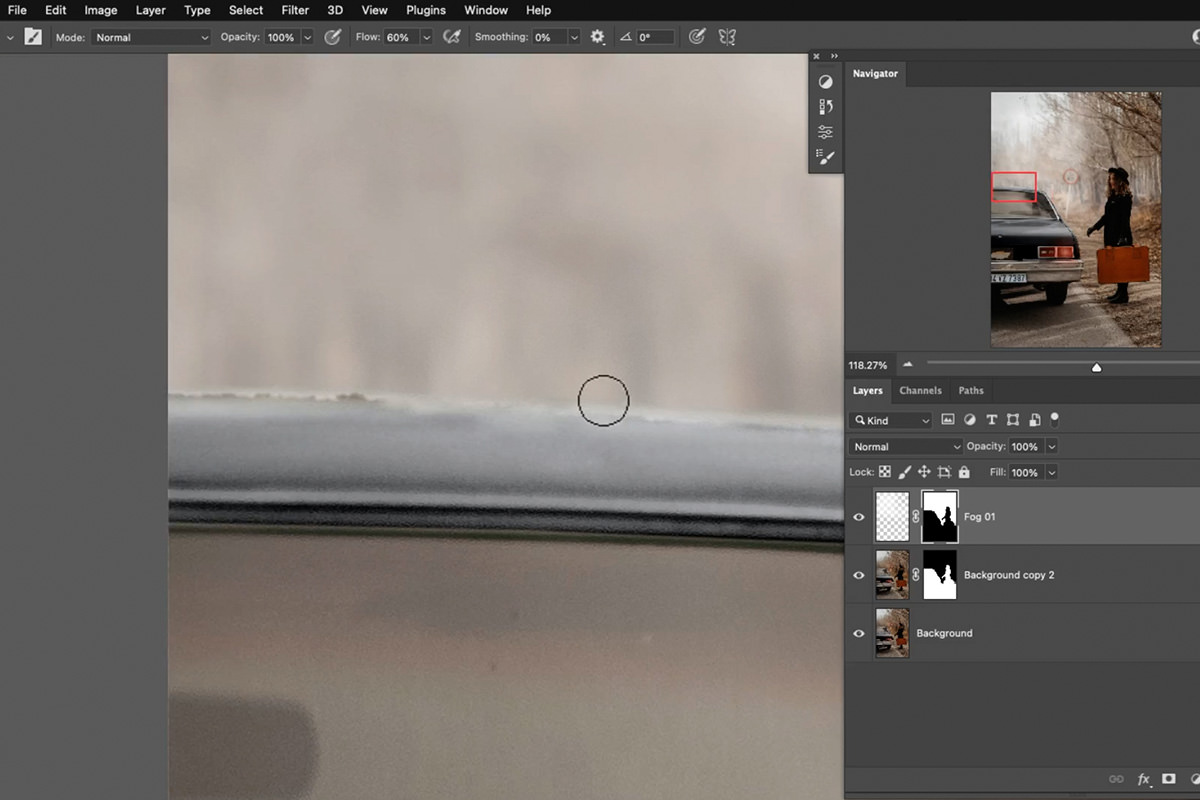
Using the brush tool on a new Layer, and with the fog brush active, sample a lighter color from the clouds in the image and begin to paint around the photo. (We recommend always using a low Flow to get a nice, natural effect.)
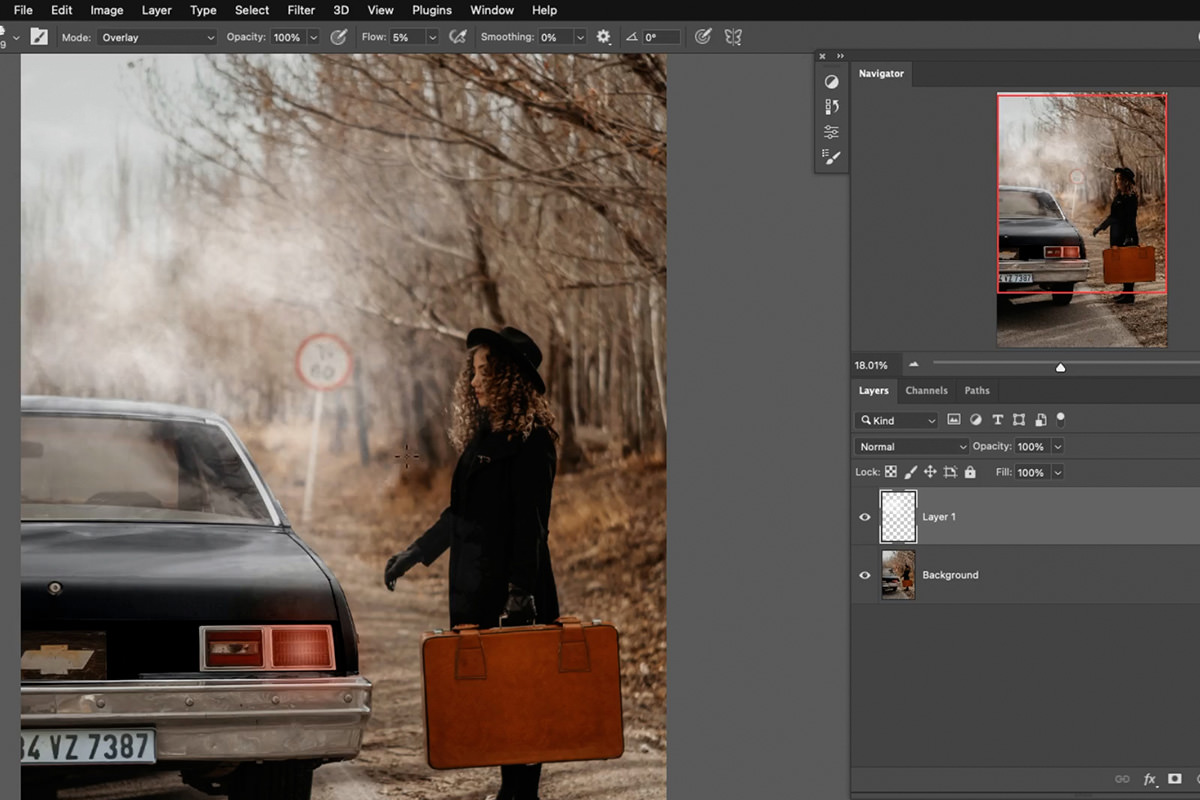
The effect is starting to come together, but upon closer inspection it’s a little too blotchy to look like real fog.

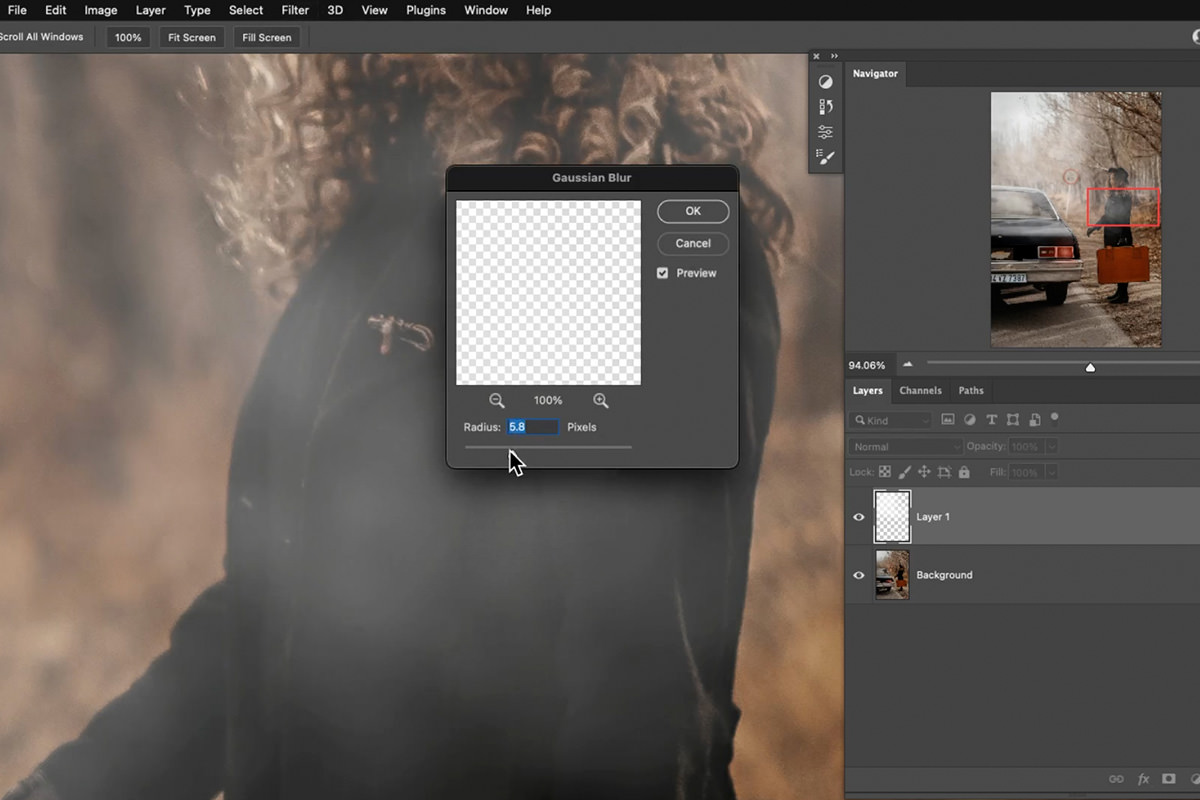
You can apply a Gaussian Blur to the fog layer to help soften the appearance and give it a more atmospheric look.
The fog looks great, but we can do a better job of blending it into the image. To create depth, we want the majority of the fog to appear behind the subject and any other foreground elements.
To do this, we need to make a quick selection of the subject and foreground elements. Since this image has a clear focus plane, we can use Select Focus Area to quickly select the areas that are in focus.
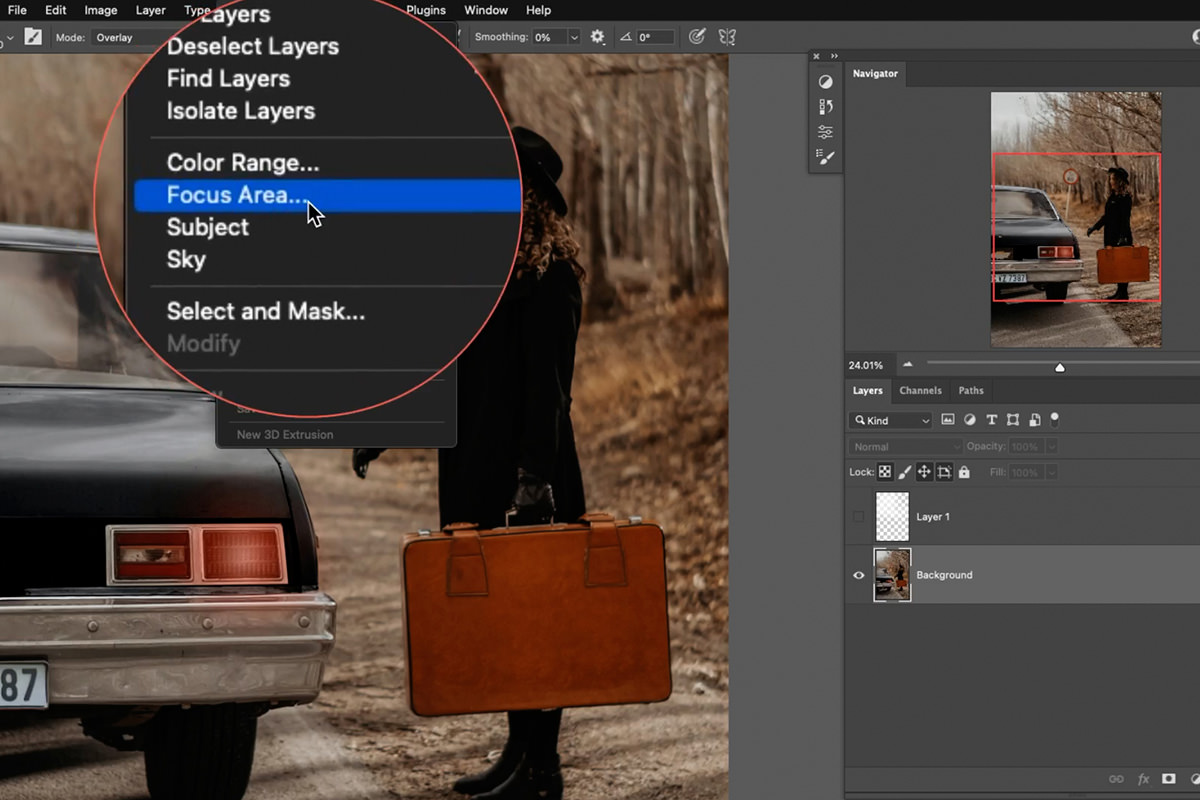
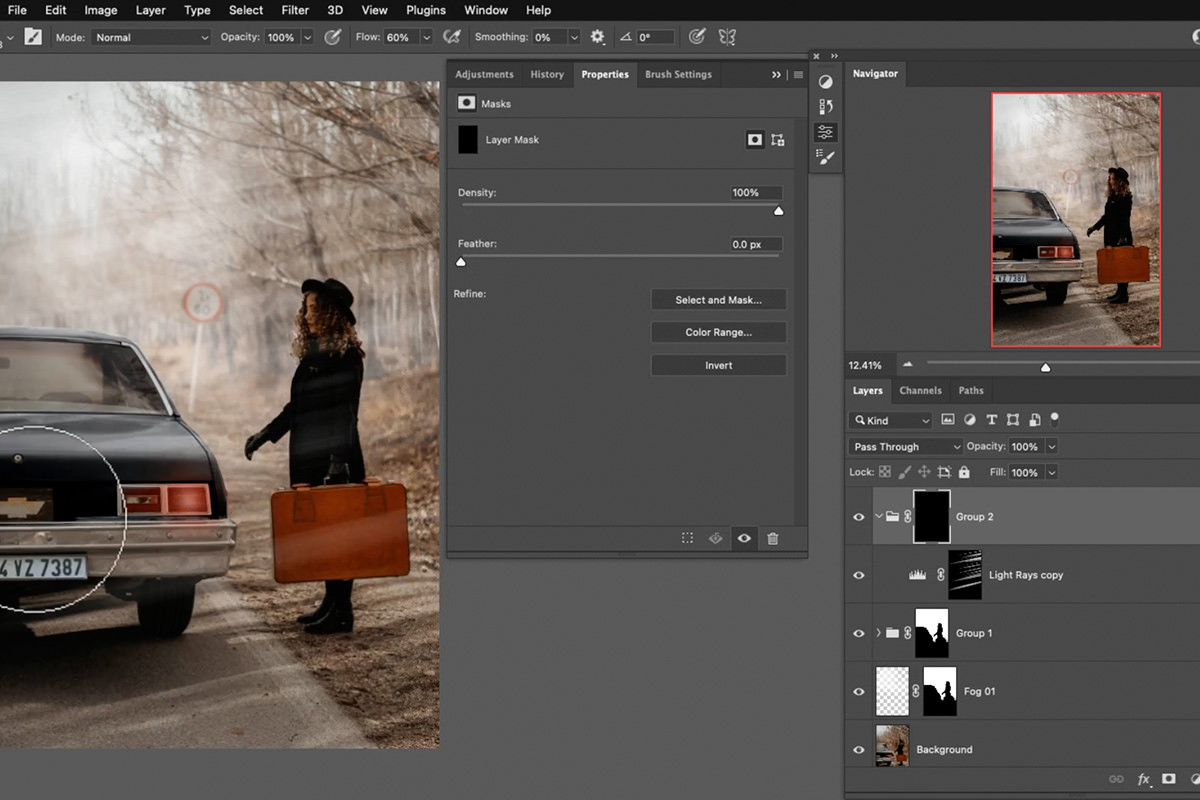
While this tool is helpful, you will likely need to use Select and Mask to clean up the selection a bit. Make sure that the foreground and foreground elements (in this case, the subject and the car) are visible, and the rest of the background is invisible.
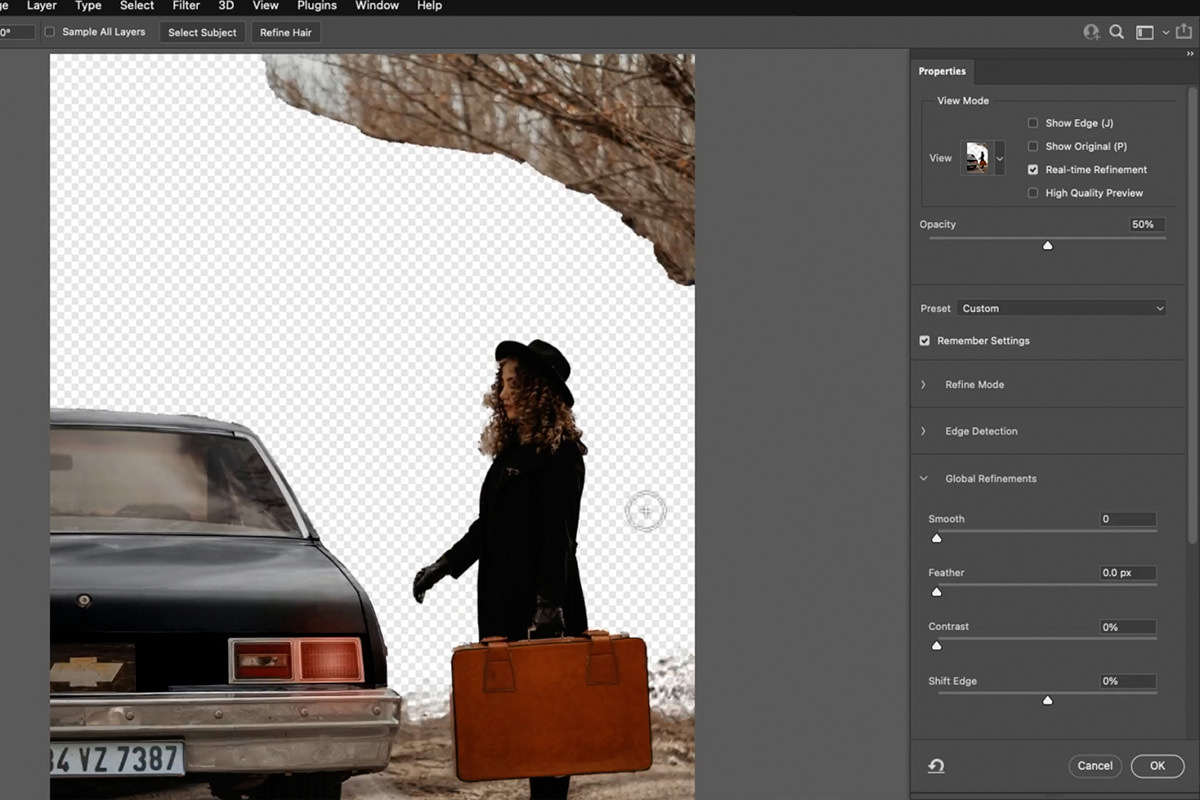
We also recommend zooming in to clean up the edges after you create the selection.
Hold ALT or OPTN and click and drag the new Layer Mask from the background image over to the fog Layer.

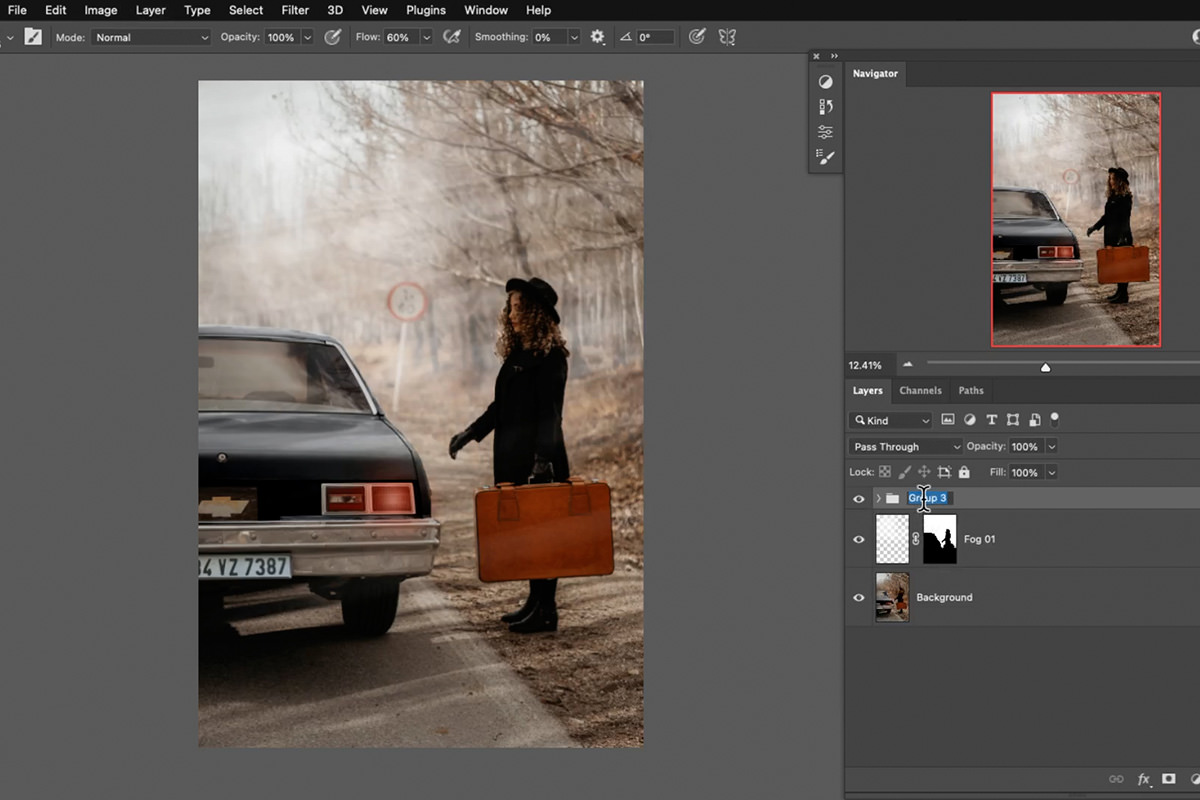
The fog will now appear only behind the foreground elements, creating a realistic sense of depth. You can create another Layer and add some soft fog in the foreground to complete the effect.
Creating Light Rays
To really sell the sense of atmosphere, lets add some light rays shining through our new fog.
Zoom in and look for lighting clues that can help determine direction and quality of the natural lighting in the photo.
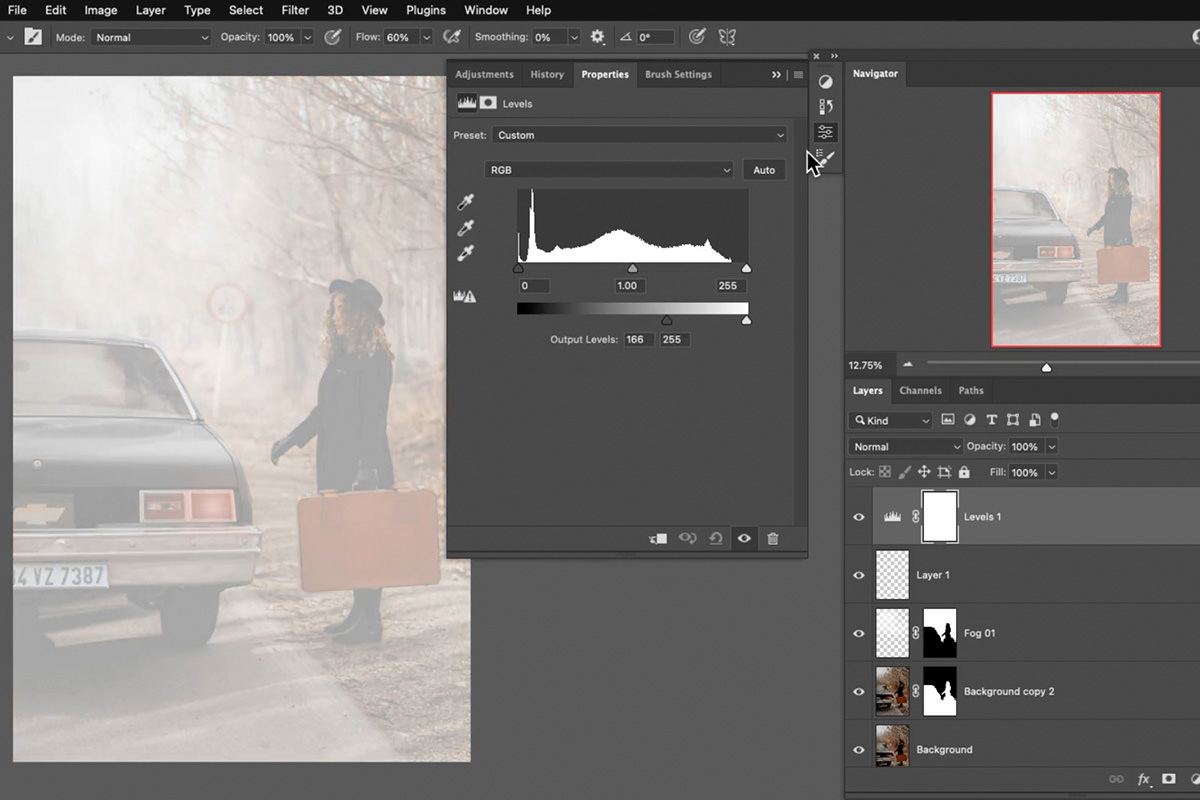
Create a Levels Adjustment Layer and brighten up the photo a bit.
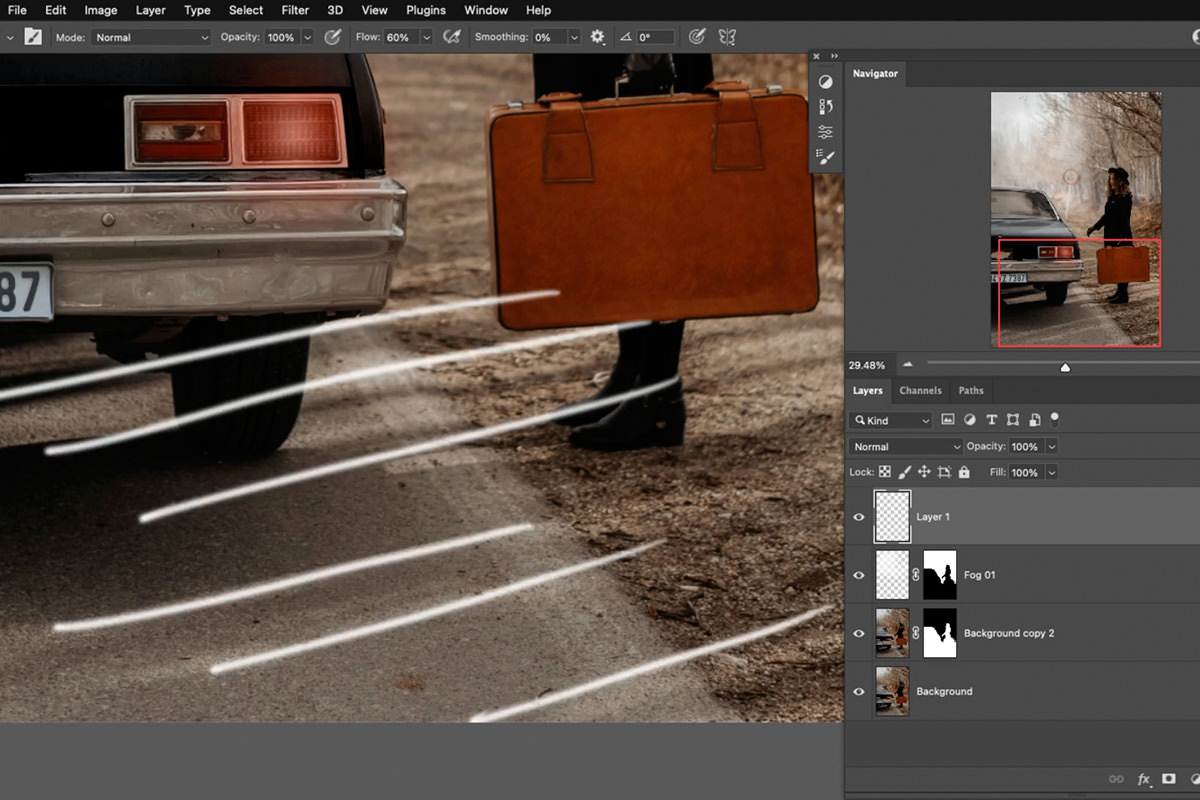
Then, fill the Layer Mask of the new Levels Adjustment Layer with black. Select the Brush Tool and use a normal, soft brush to paint white streaks across the Layer Mask in the same direction as the lighting in the photograph.
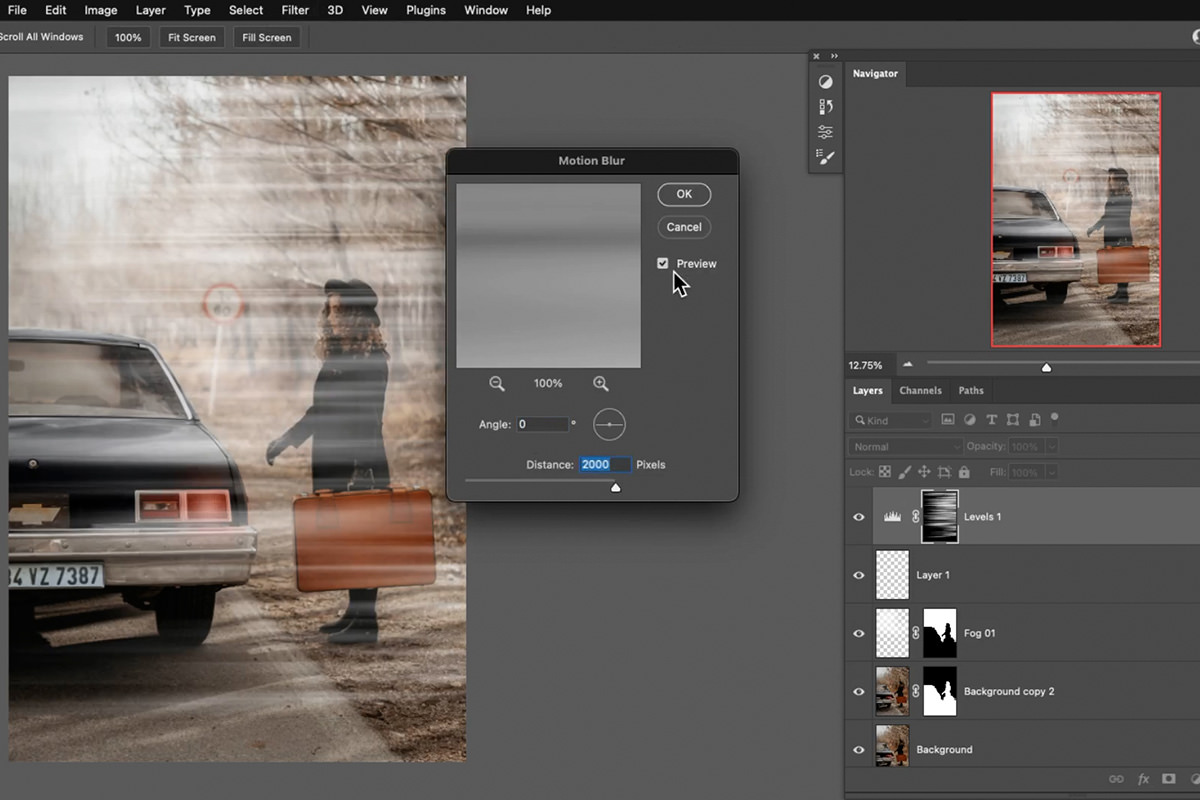
Go to Filter, Blur, and Motion Blur to add some directional blur to the Levels Adjustment Layer. This will help to soften it up.
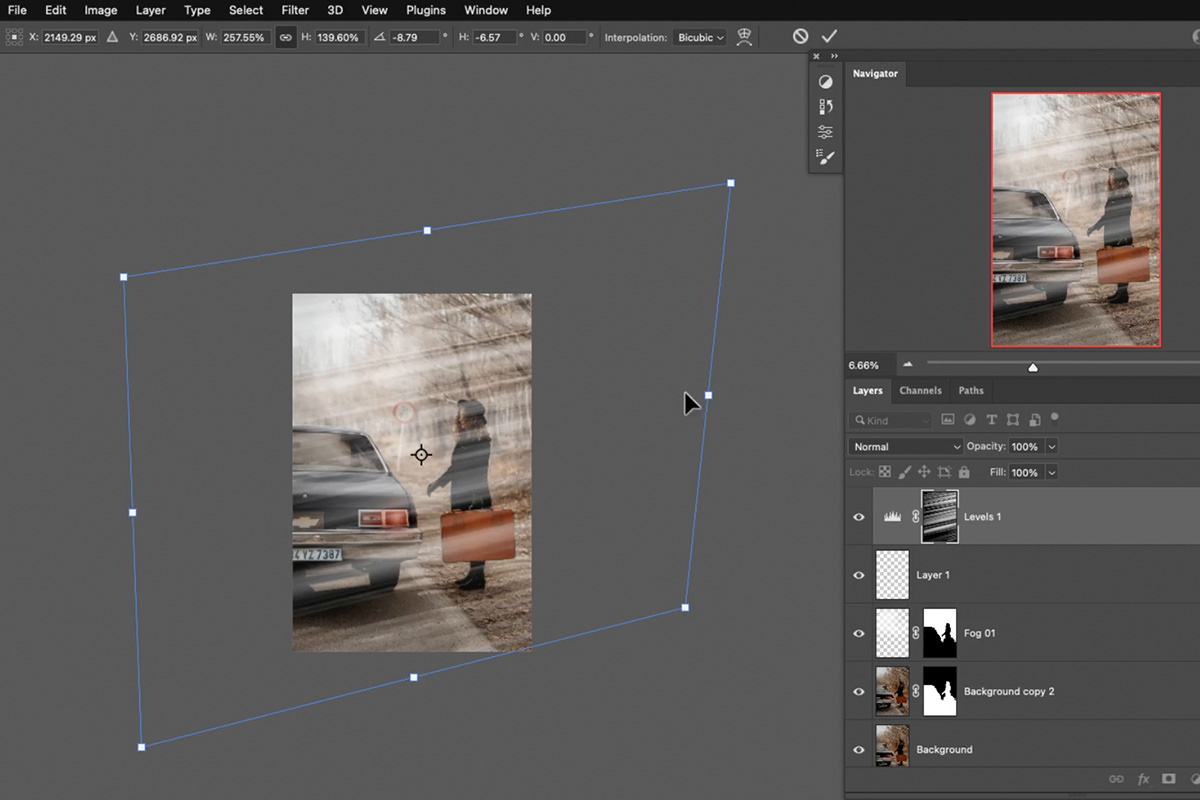
Now stretch the Levels Adjustment Layer, scaling it up until it starts to look a little more natural in the image.
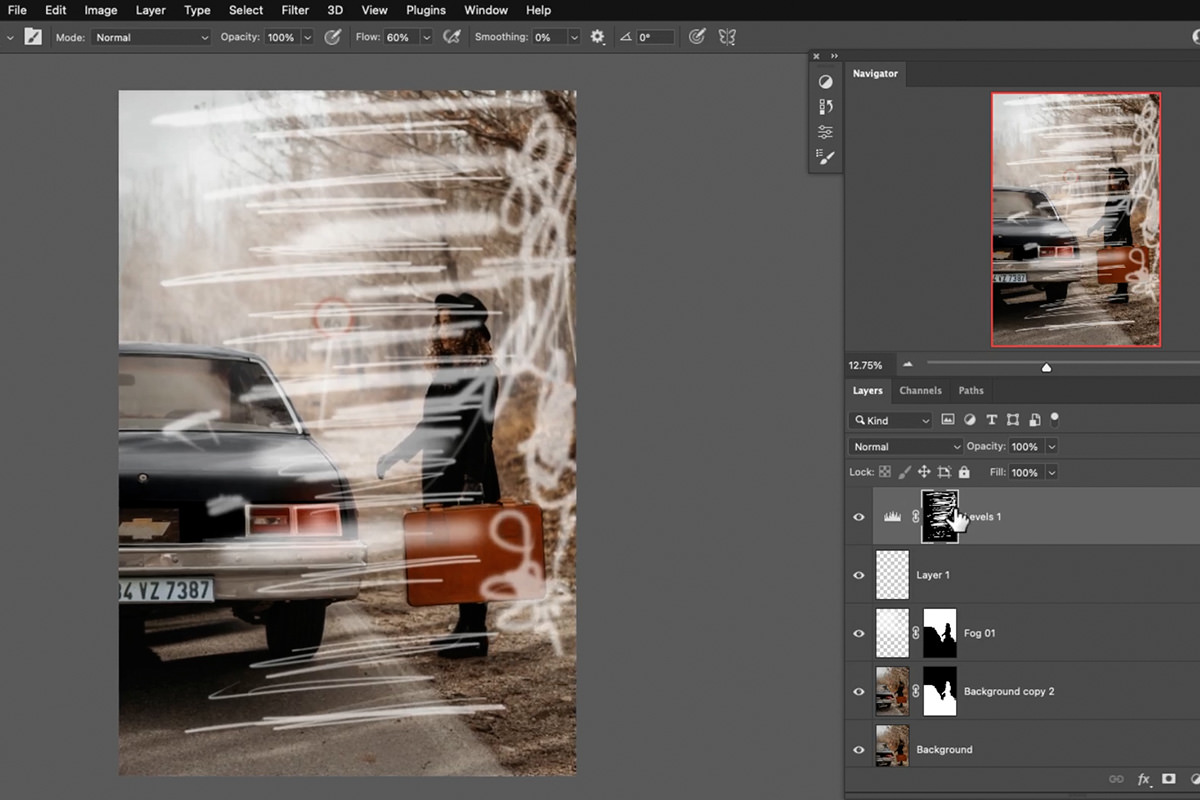
You can copy the same Layer Mask we created earlier to add that same sense of depth to the light rays.
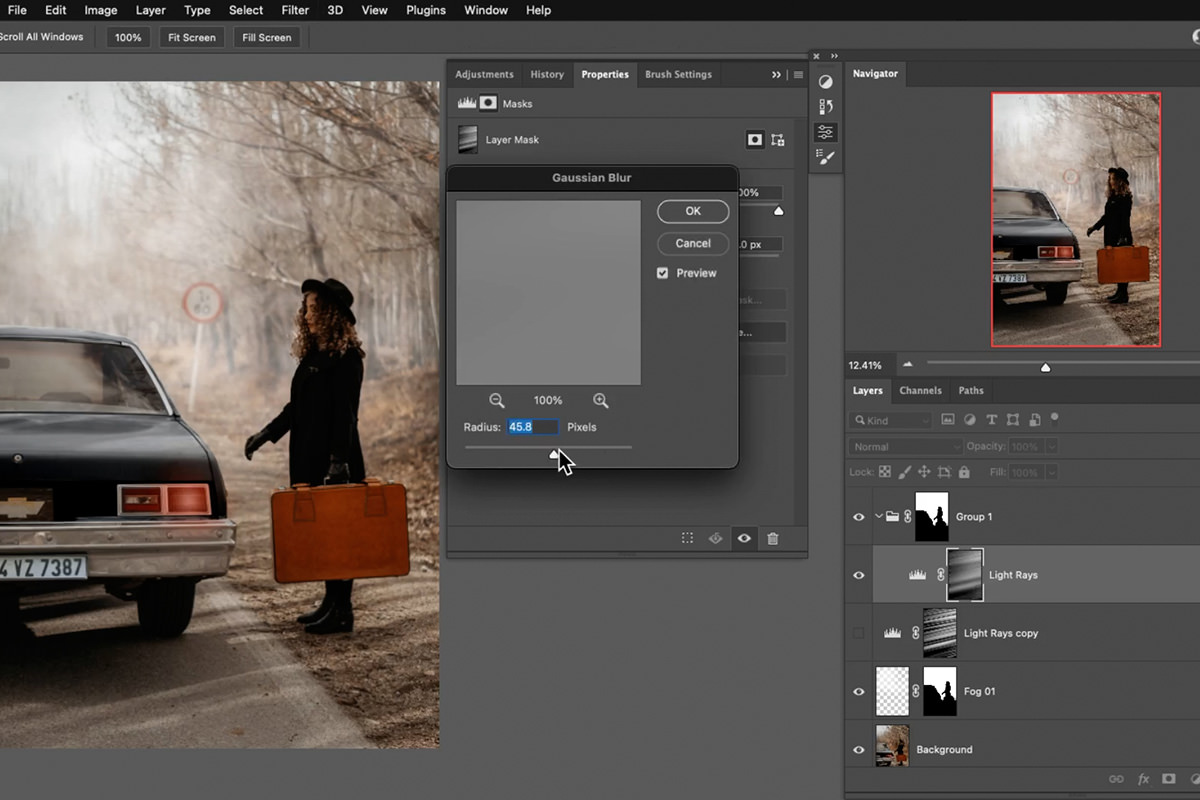
Finish off the effect with a Gaussian Blur to make it much more subtle and natural.
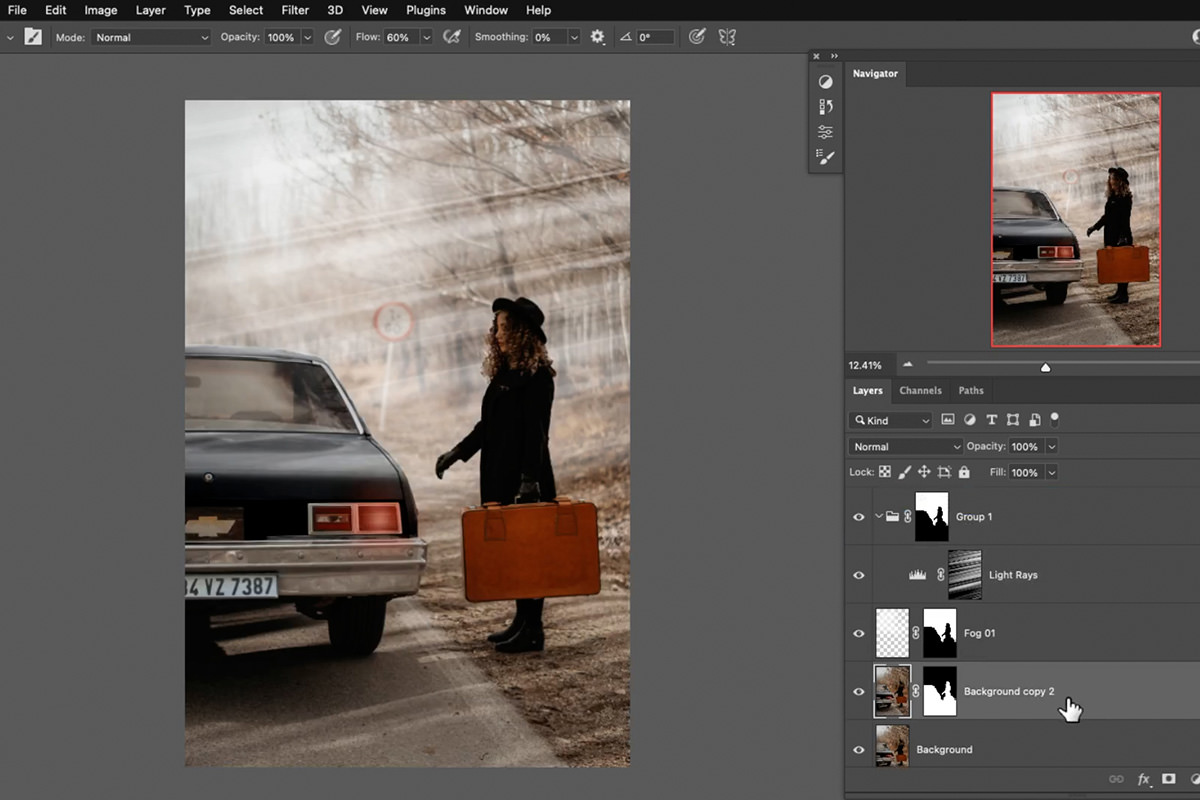
Don’t forget to add some light rays to the foreground as well. These should be a little more defined than the background rays, but try not to create as many.
Use tools like Blending Modes, Levels, and Layer Masks to get an effect that works for you.
Once you’ve finished the light rays, the effect is complete! Adding fog and lighting effects to an image is a great way to add a little more atmosphere, drama, and visual interest.
And custom brushes make the process quick and easy!


