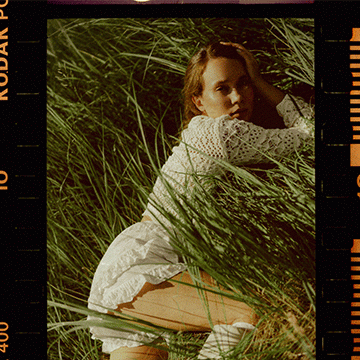
Download Sample Images
description
Learn how to help teeth look brighter and whiter in any photograph using these easy Photoshop techniques.
Share
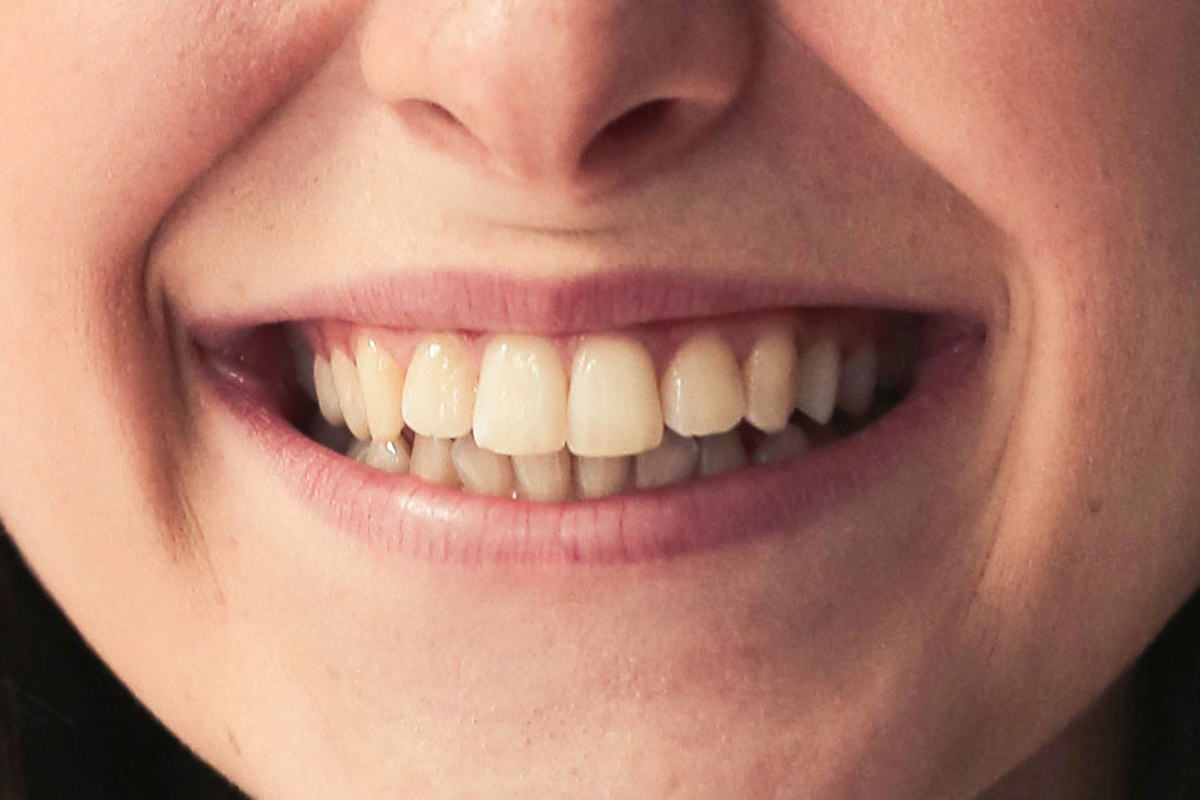
WHITEN TEETH IN PHOTOSHOP
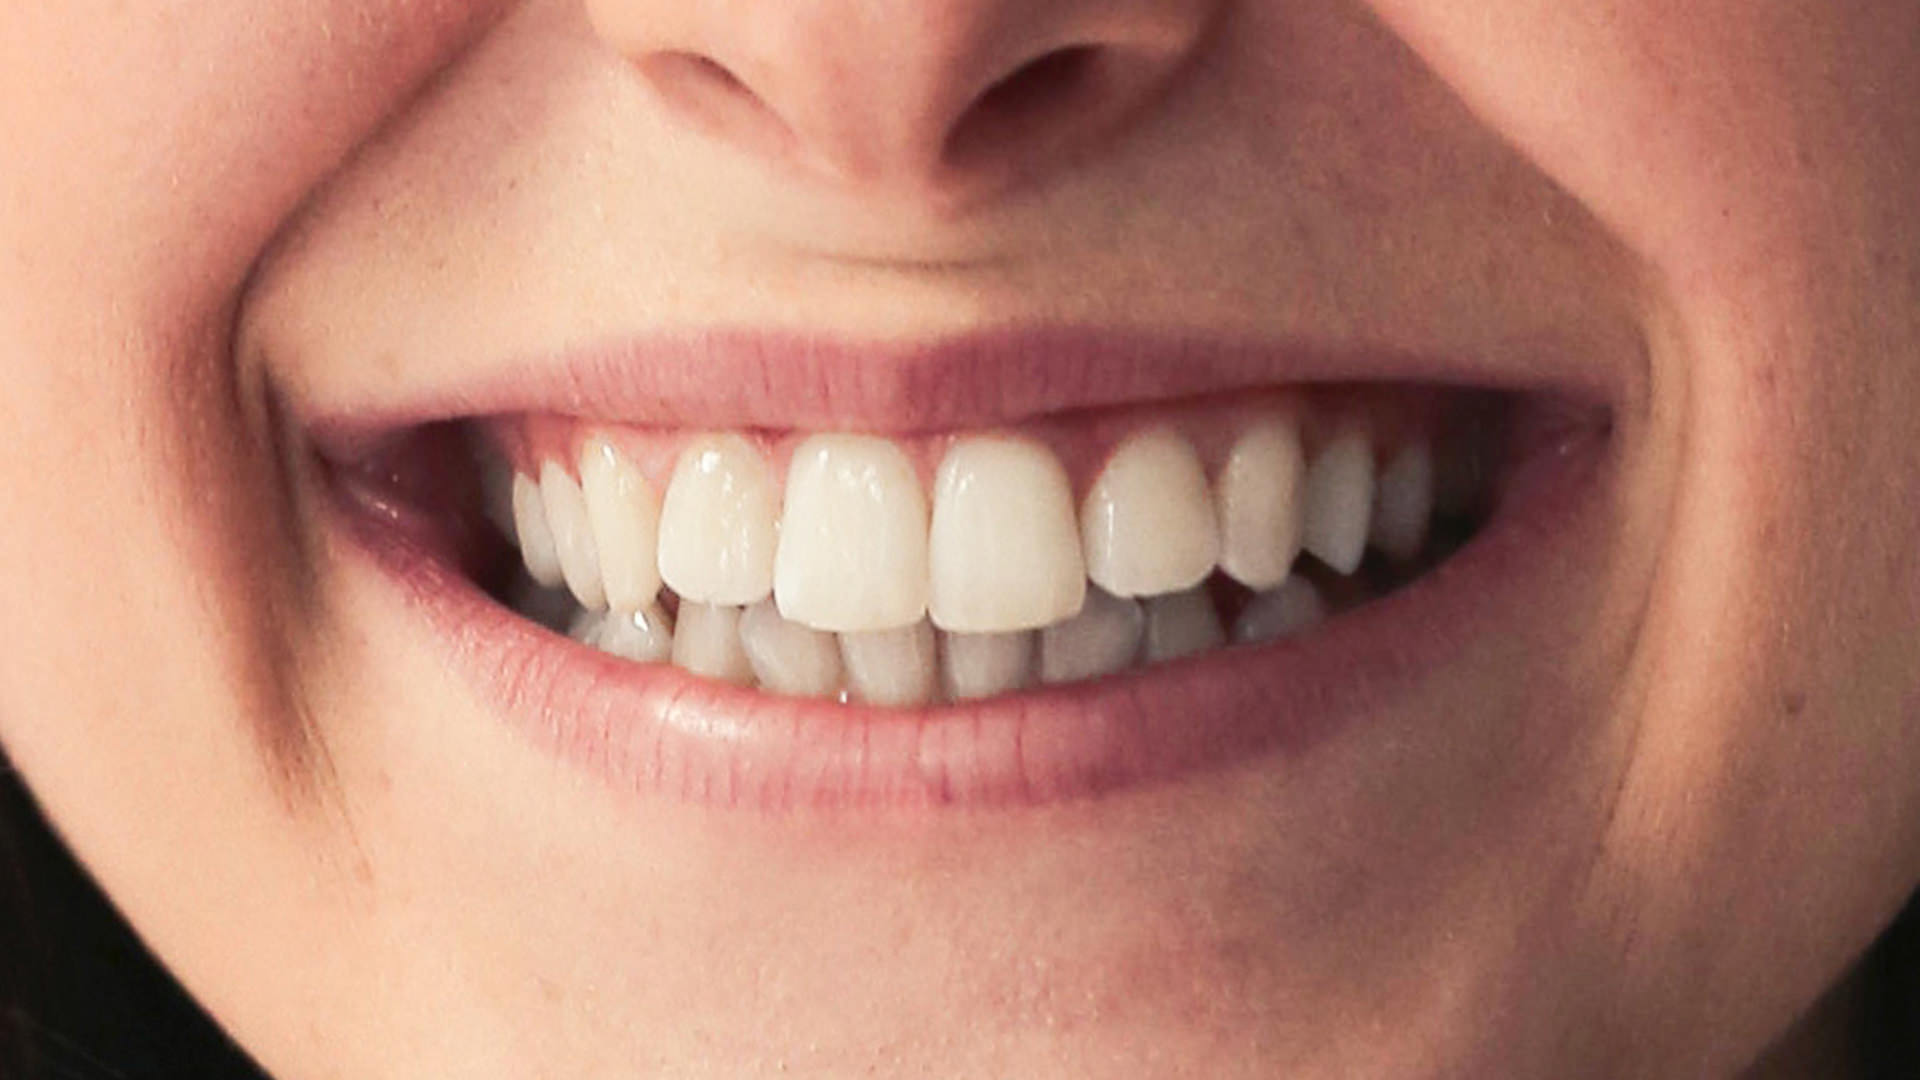
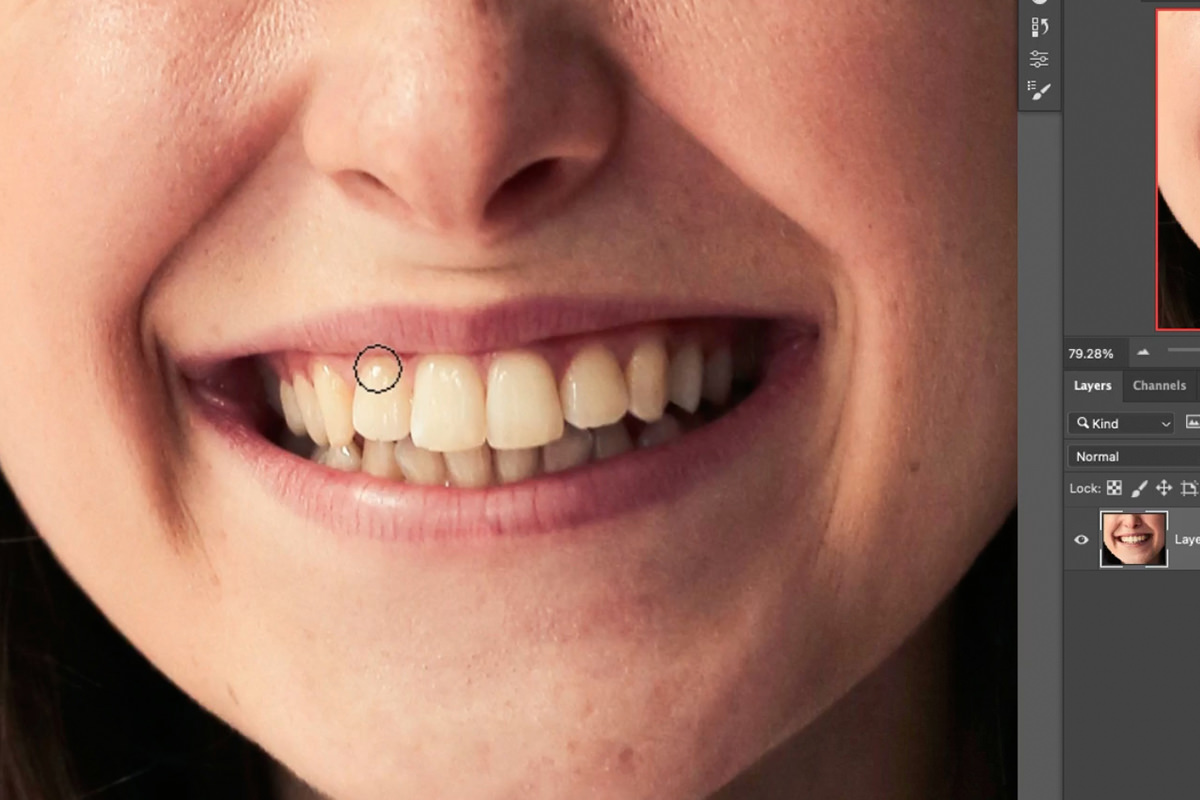
BEFORE
Quickly Whiten Teeth
Basic Retouching in Photoshop
Retouching is the art of removing common distractions from photos while helping subjects look like their best, natural selves.
There are a lot of things that go into professional retouching, from working with skin and eyes to hair and even clothing. But there are also plenty of simple techniques that can be applied to almost any portrait.
Photographers and retouchers are often asked if they can help teeth appear whiter, whether it be for wedding photos, professional headshots, or commercial work.
Fortunately, Photoshop makes this easy to do!
Selecting Teeth
In order to make adjustments to the color and appearance of teeth without affecting the entire image, we’ll need to make a selection.
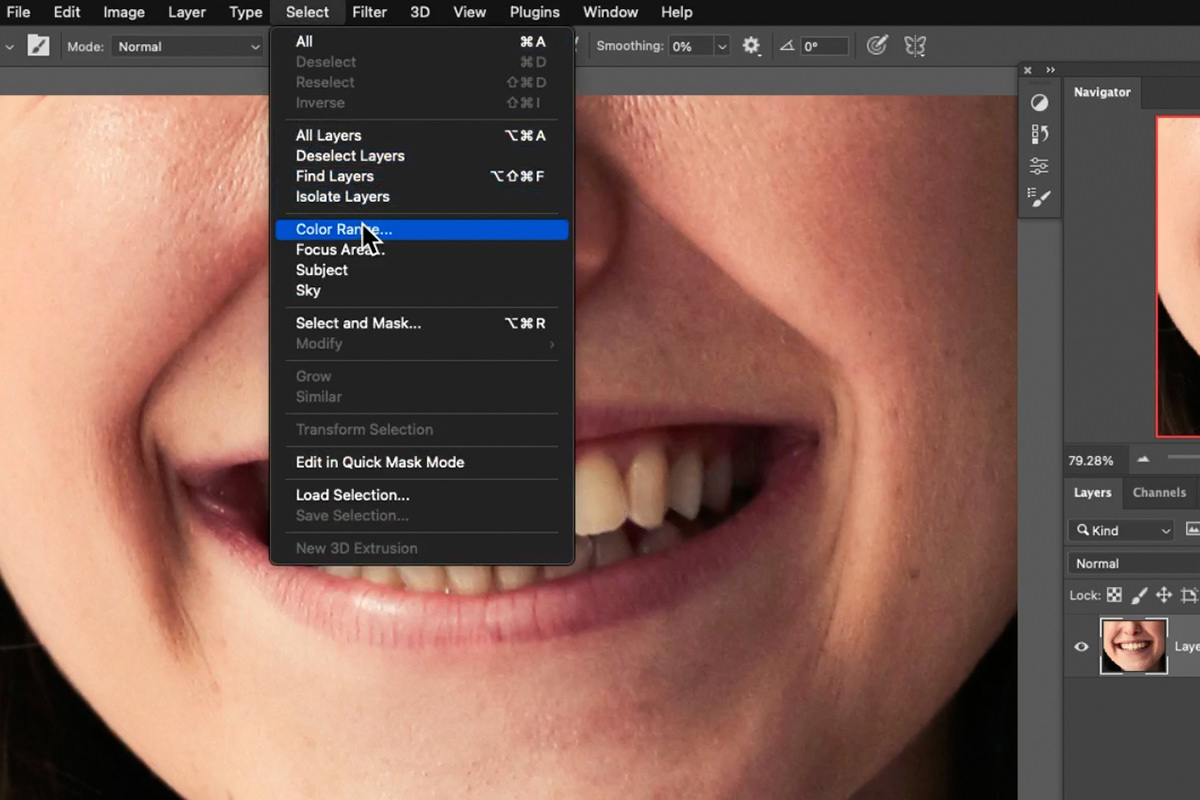
We recommend using Select Color Range. Open the Select Menu, and then choose the Color Range option.

The Select Color Range dialog will open with a number of options to help you narrow down and dial in the colors you want to select. First, use the eye dropper tools to select values from within the subject’s teeth. As more of those areas are added to the selection, they will turn to white. Anything not selected will appear as black.
As you add colors from the teeth to the selection, areas from the rest of the image will also be added. Don’t worry about this for now, we can remove unwanted elements from the selection once we’re finished. For now, we just want to capture as much detail in the teeth as possible.
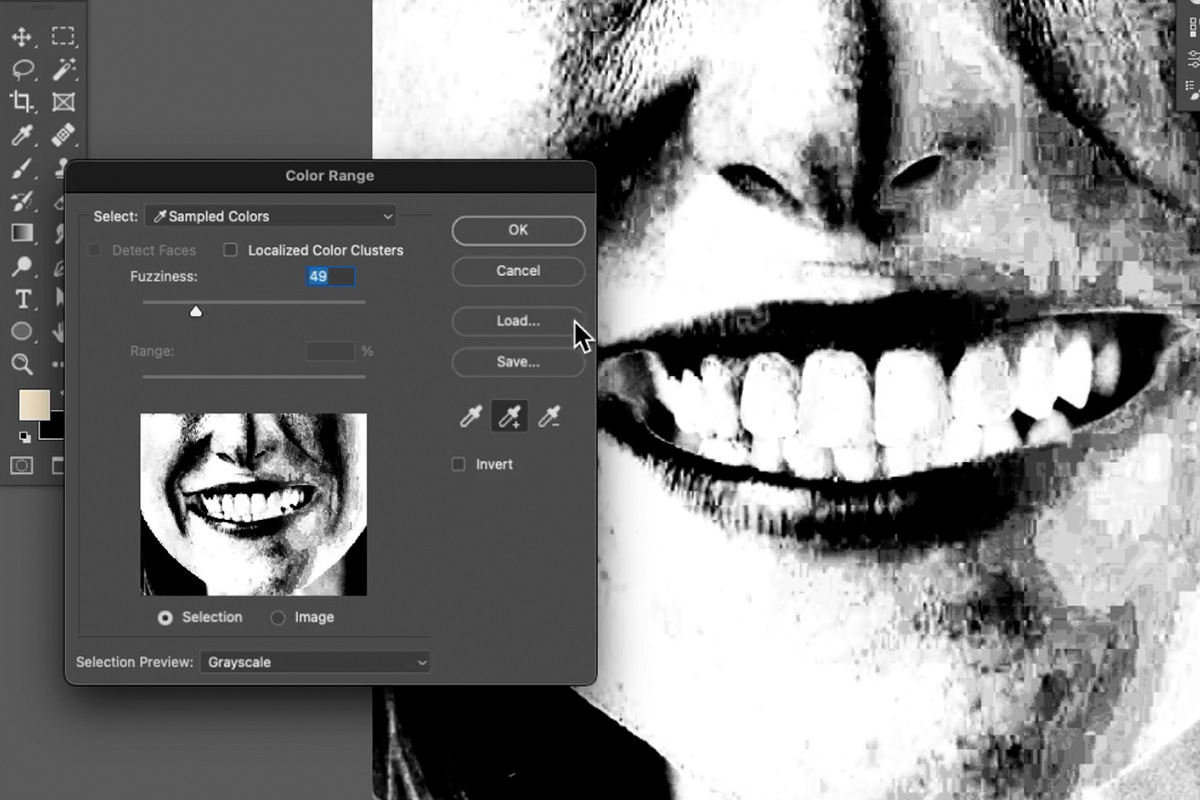
You can also adjust the Fuzziness to help refine the selection. Once you feel like you’ve captured enough definition in the teeth, hit OK.
Helping Teeth Appear Whiter
Now that we have a selection, we can start making adjustments to the teeth. Oftentimes, teeth will appear slightly yellow when photographed. We can fix this by simply removing some of the color from those areas.
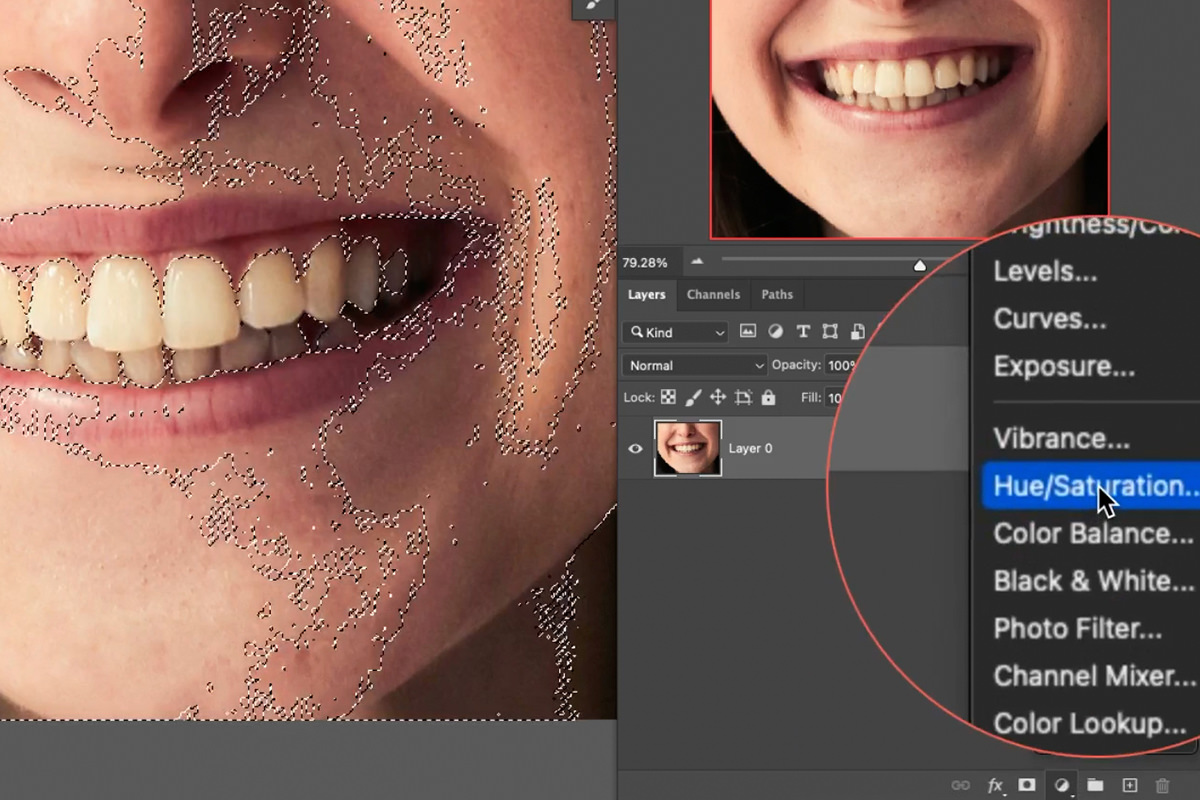
Let’s start with a Hue/Saturation Adjustment Layer. With the selection we just made still active, add Hue/Saturation Adjustment Layer to the Layer Stack. The selection will be converted into a Layer Mask for the new Hue/Saturation Adjustment Layer.
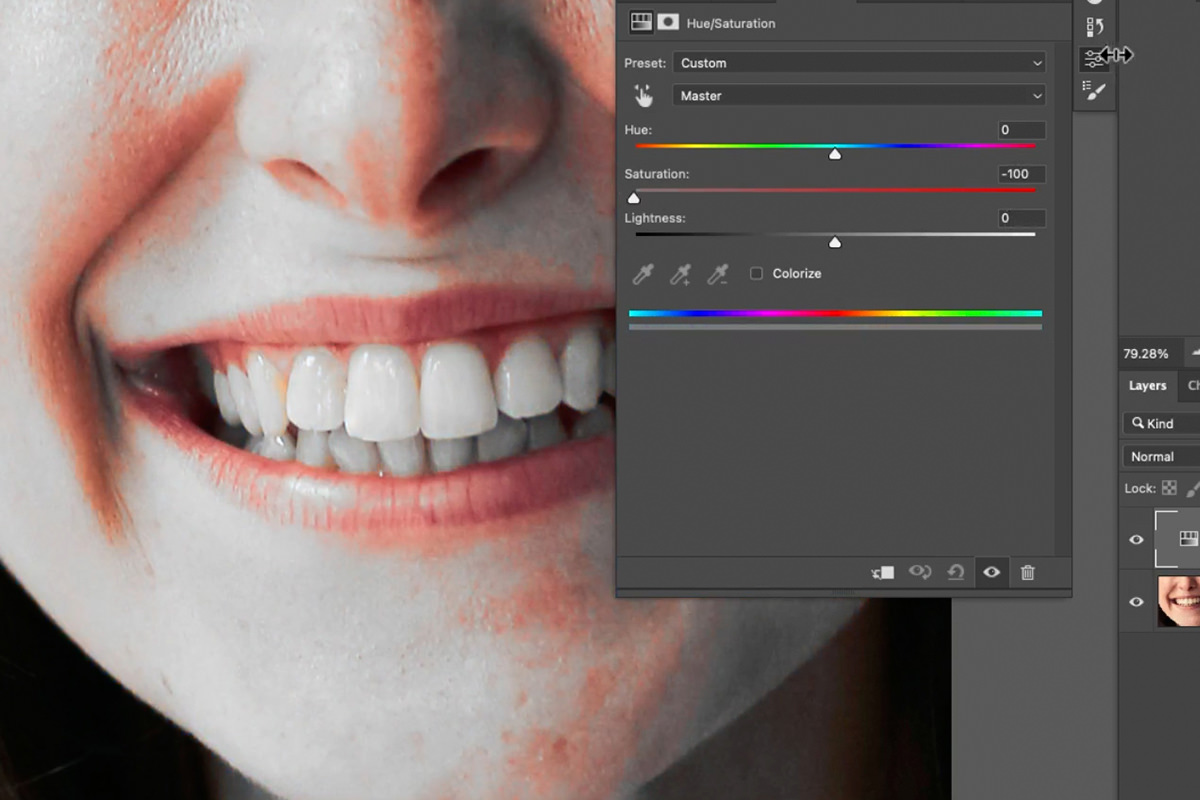
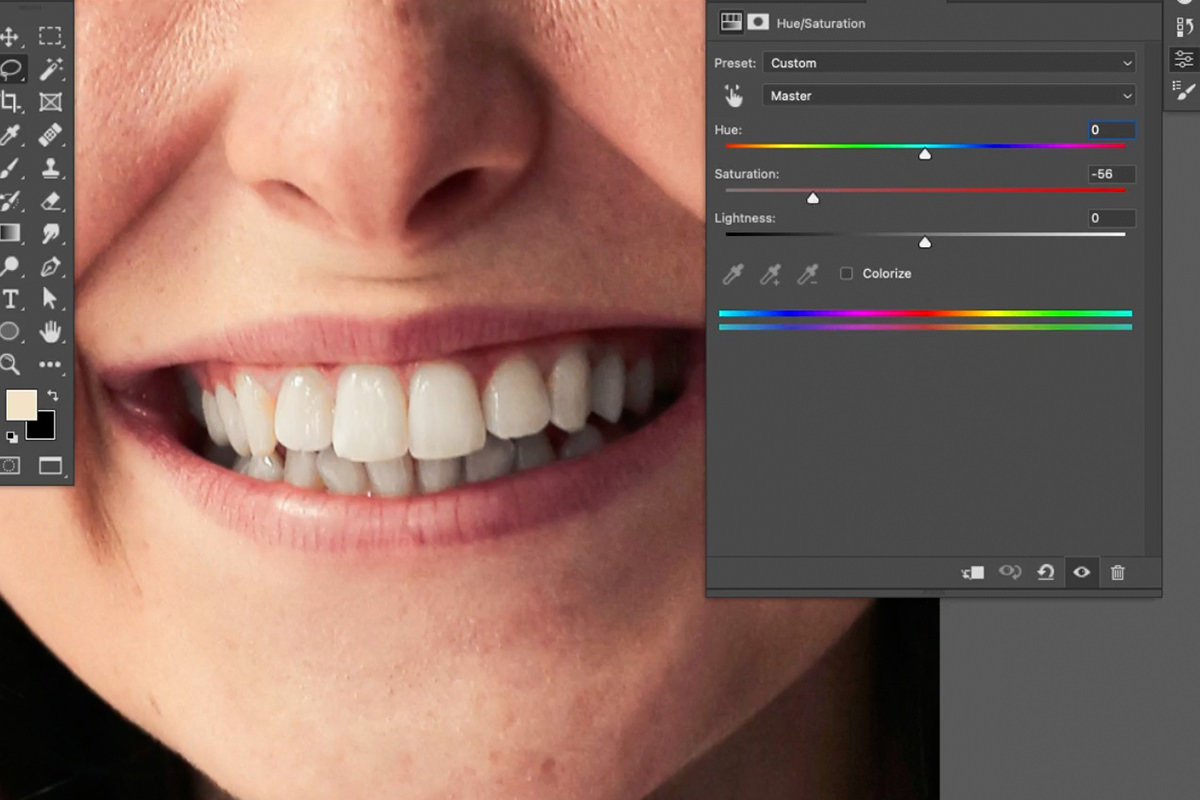
Within the Hue/Saturation dialog, lower the Saturation slider until most of the unwanted color is gone. This will help the teeth appear whiter than before.
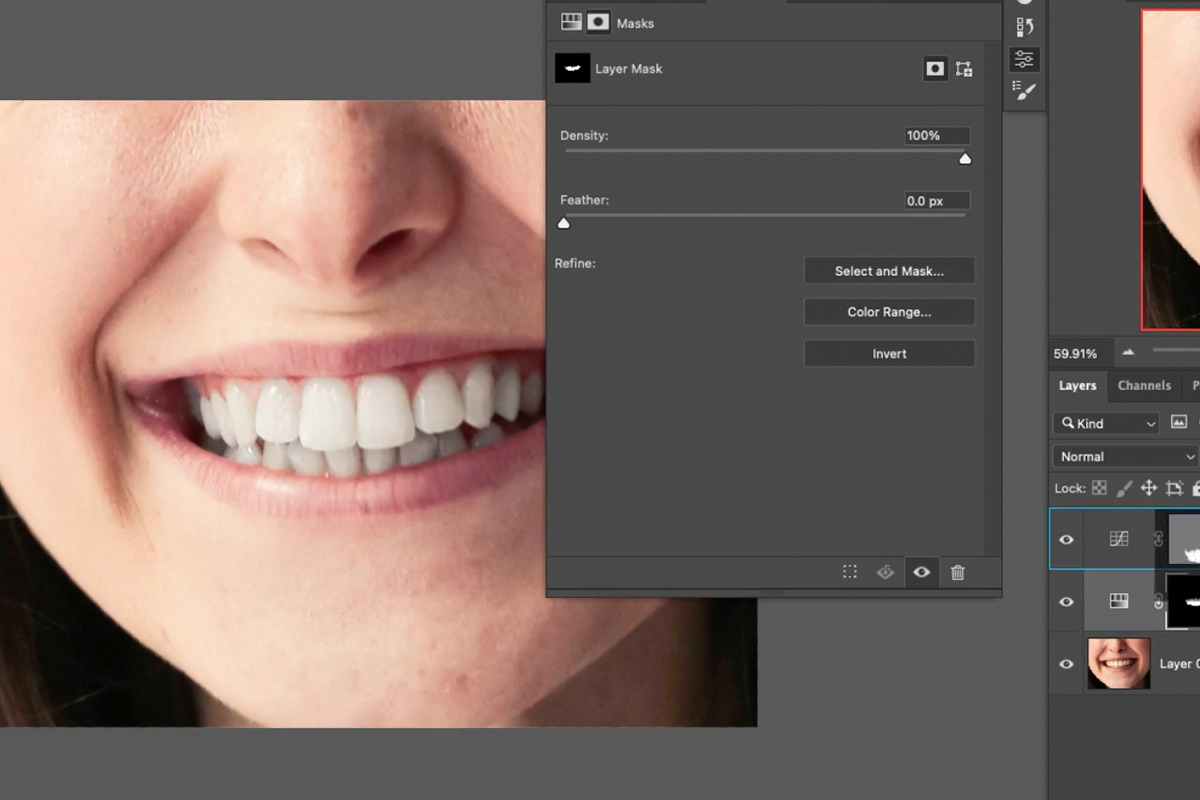
But notice that the adjustment is affecting the rest of the subject’s face. Let’s fix this by quickly adjusting the Layer Mask created from the selection we made previously.
Hold ALT or OPTN and click on the Layer Mask of the Hue/Saturation Adjustment Layer. This will allow you to see and work with the Layer Mask directly. Use the Lasso Tool to roughly draw an area around the teeth.
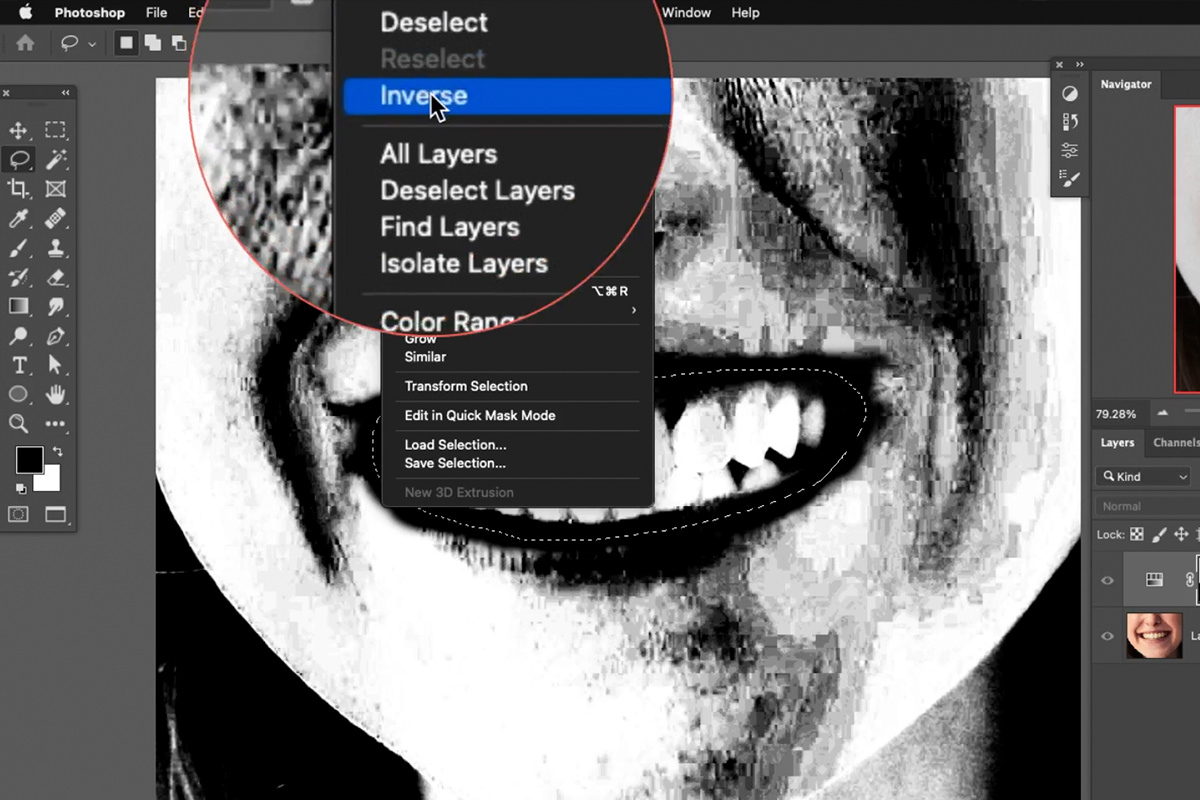
With that new selection of the mouth active, open the Select menu and choose the Inverse option. This will change the selection of the mouth into a selection of everything except the mouth.
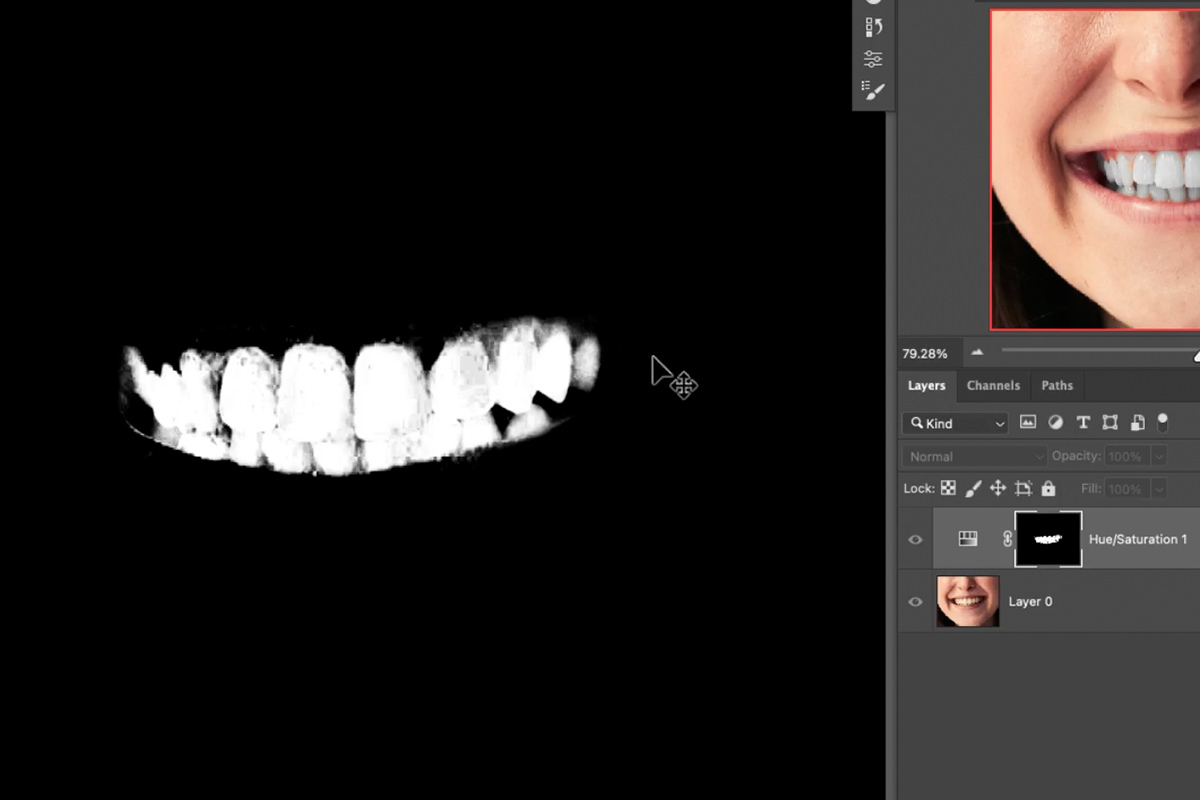
Fill the new selection with black. You should see the teeth surrounded by an area of pure black.
Again, hold ALT or OPTN and click on the Layer Mask to go back to a normal view of the image. Notice that the Hue/Saturation Adjustment Layer is now only affecting the subject’s teeth!
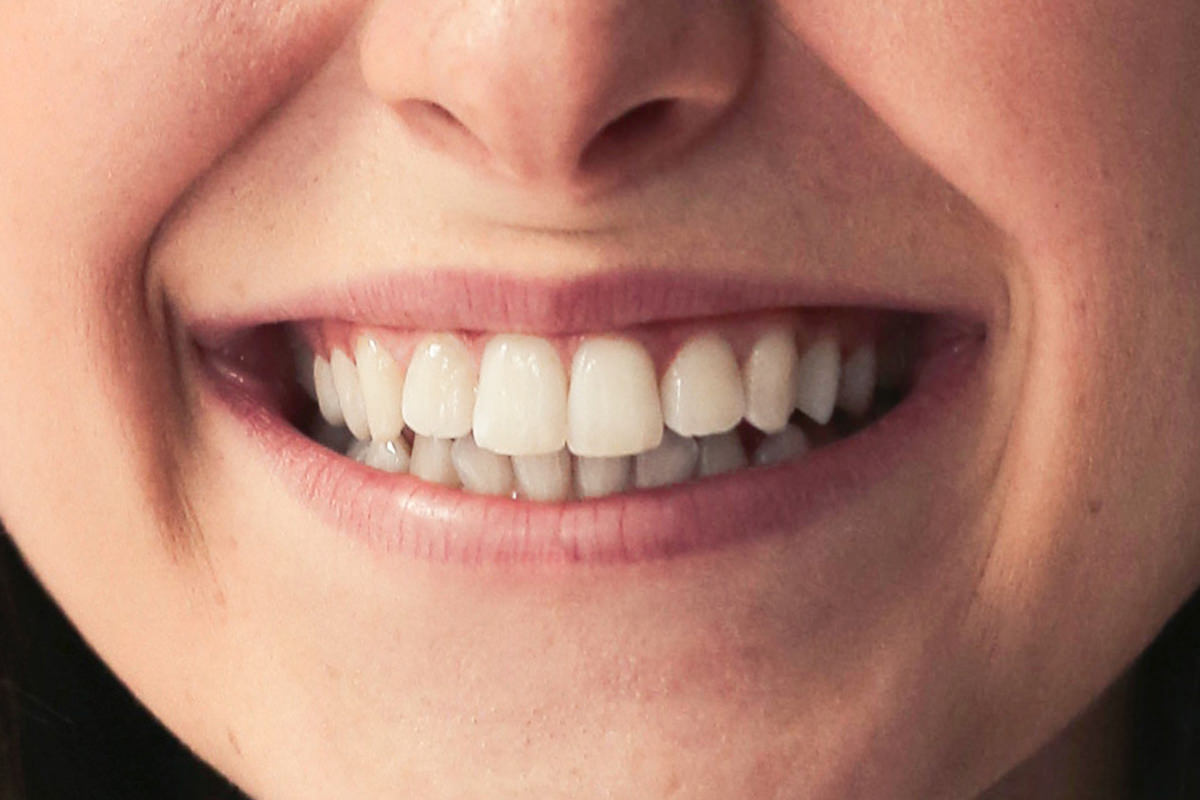
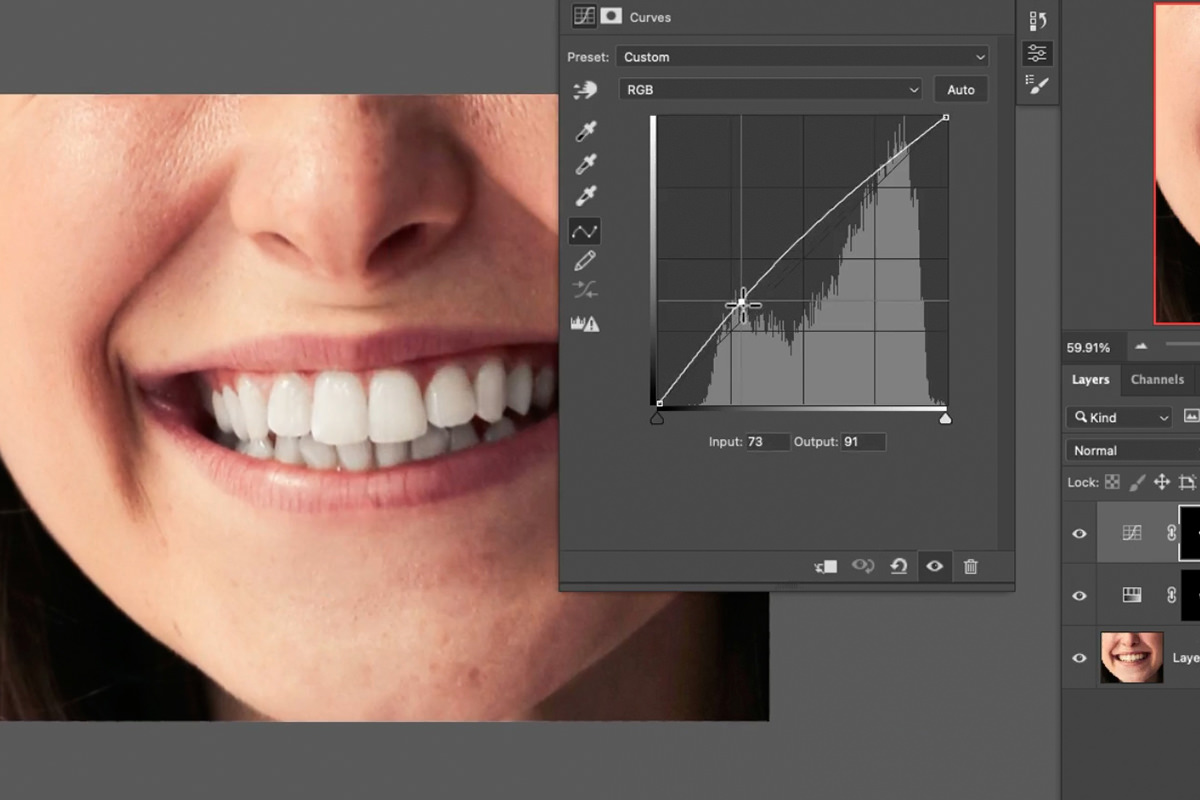
Brighter Teeth
Now that we’ve removed unwanted color from the teeth, we can help them appear a little bit brighter.
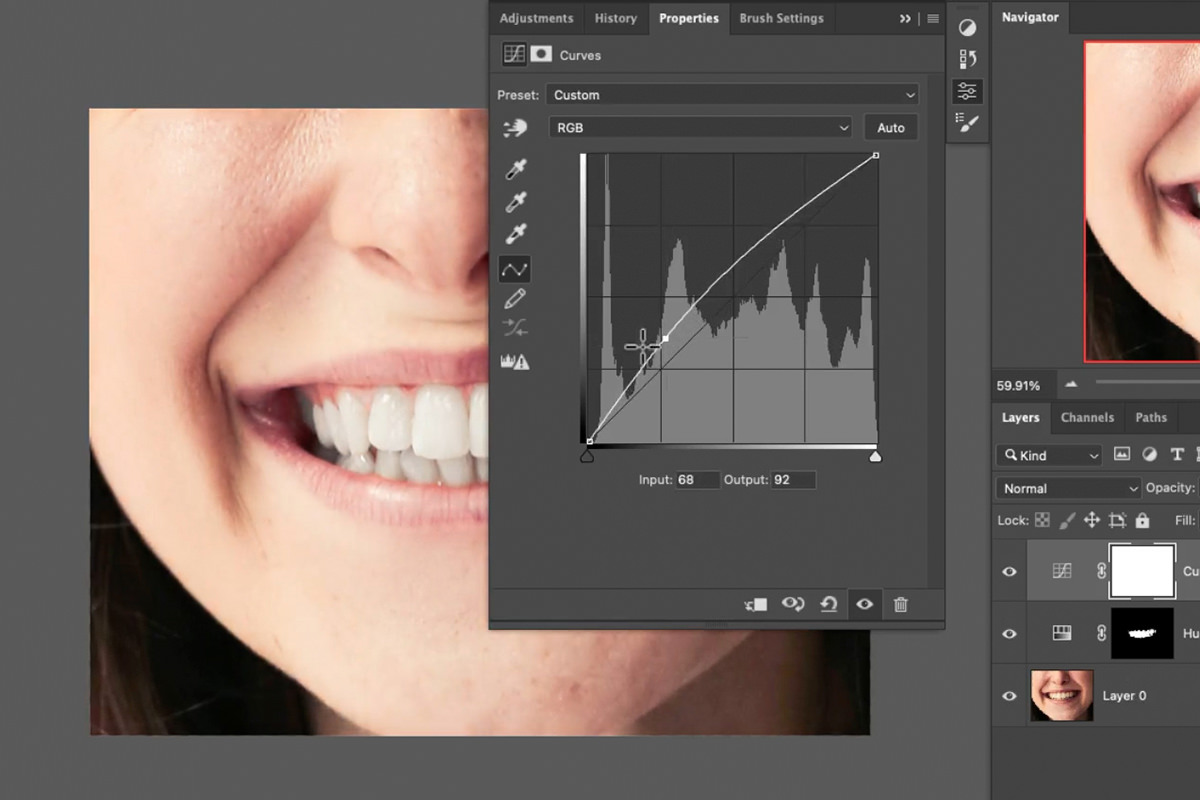
Create a Curves Adjustment Layer, create a point just below the center of the line and drag it up just a bit.
The teeth are looking brighter, but notice again that the Curves are affecting the entire image. To fix this, simply hold ALT or OPTION and click-and-drag the Layer Mask of the Hue/Saturation Adjustment Layer to the Layer Mask of the new Curves Adjustment Layer. This will copy the Layer Mask.
Perfect! We’ve removed the color from the teeth with a Hue/Saturation Adjustment Layer and made them a bit brighter using a Curves Adjustment Layer. You can go back and change the settings of either Adjustment Layer at any time.
When working with people and faces, it’s always best to keep things as subtle as possible. Small changes can make a big difference while making sure your subject looks natural!