How Joel Robison Conjured Up This Magical, Floating Great Pumpkin in Photoshop
There’s no doubt that fine art photographer Joel Robison brings out pure magic and whimsy in his conceptual portraiture on a daily basis. But when it comes to Halloween, he really lets his creativity and imagination run wild!
With everyone’s favorite night of costumes, horror movies, favorite childhood Halloween specials, tricks and treats just around the corner, we have a special How They Got the Shot story direct from Joel, himself. Joel gives us the lowdown on how he created his Charlie Brown-inspired Great Pumpkin image that will make even the anti-Halloweeners smile and giggle with delight.
Joel
Last year I was visiting a friend in Vermont just before Halloween. New England in the autumn is amazing, the leaves are incredible, and it seems like Halloween is on a different level altogether. One of my favorite stories around Halloween is the classic animation, It’s the Great Pumpkin, Charlie Brown and I really wanted to create an image that was inspired by the whimsy and the fun of that story.
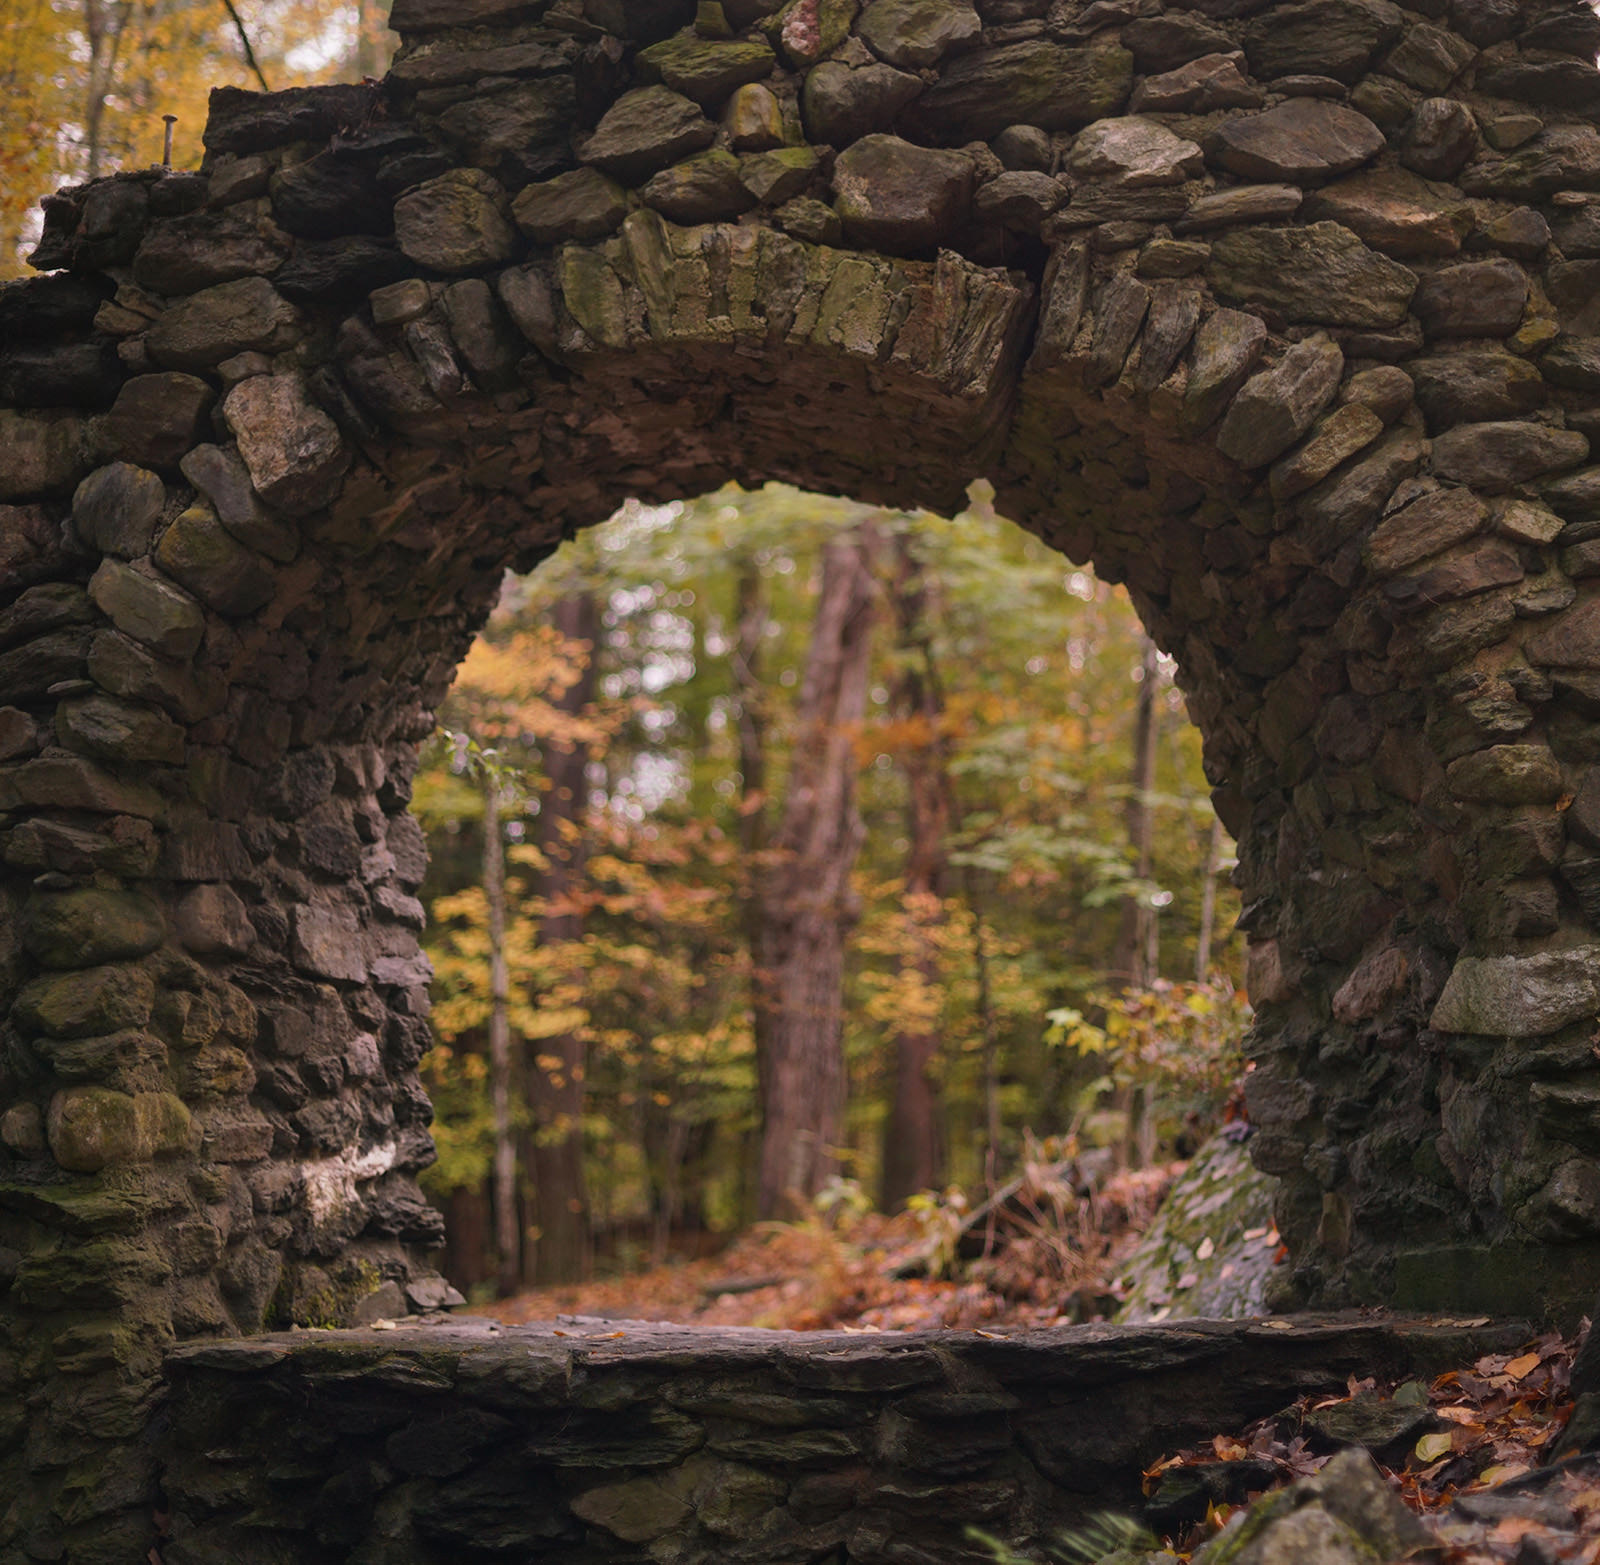
The shoot location was one of the coolest locations I’ve been able to photograph at. It’s the remains of a home, called Madame Sherri’s Castle, tucked into the woods in New Hampshire. This was the home of an eccentric woman known for hosting wild parties.
All that’s really left of the ‘castle’ now is an amazing stone staircase that rises up out of the leaves, and I knew this location would be perfect for my Great Pumpkin inspired photo. Under the stairwell were some neat little archways and that was going to play the part of my photo location.
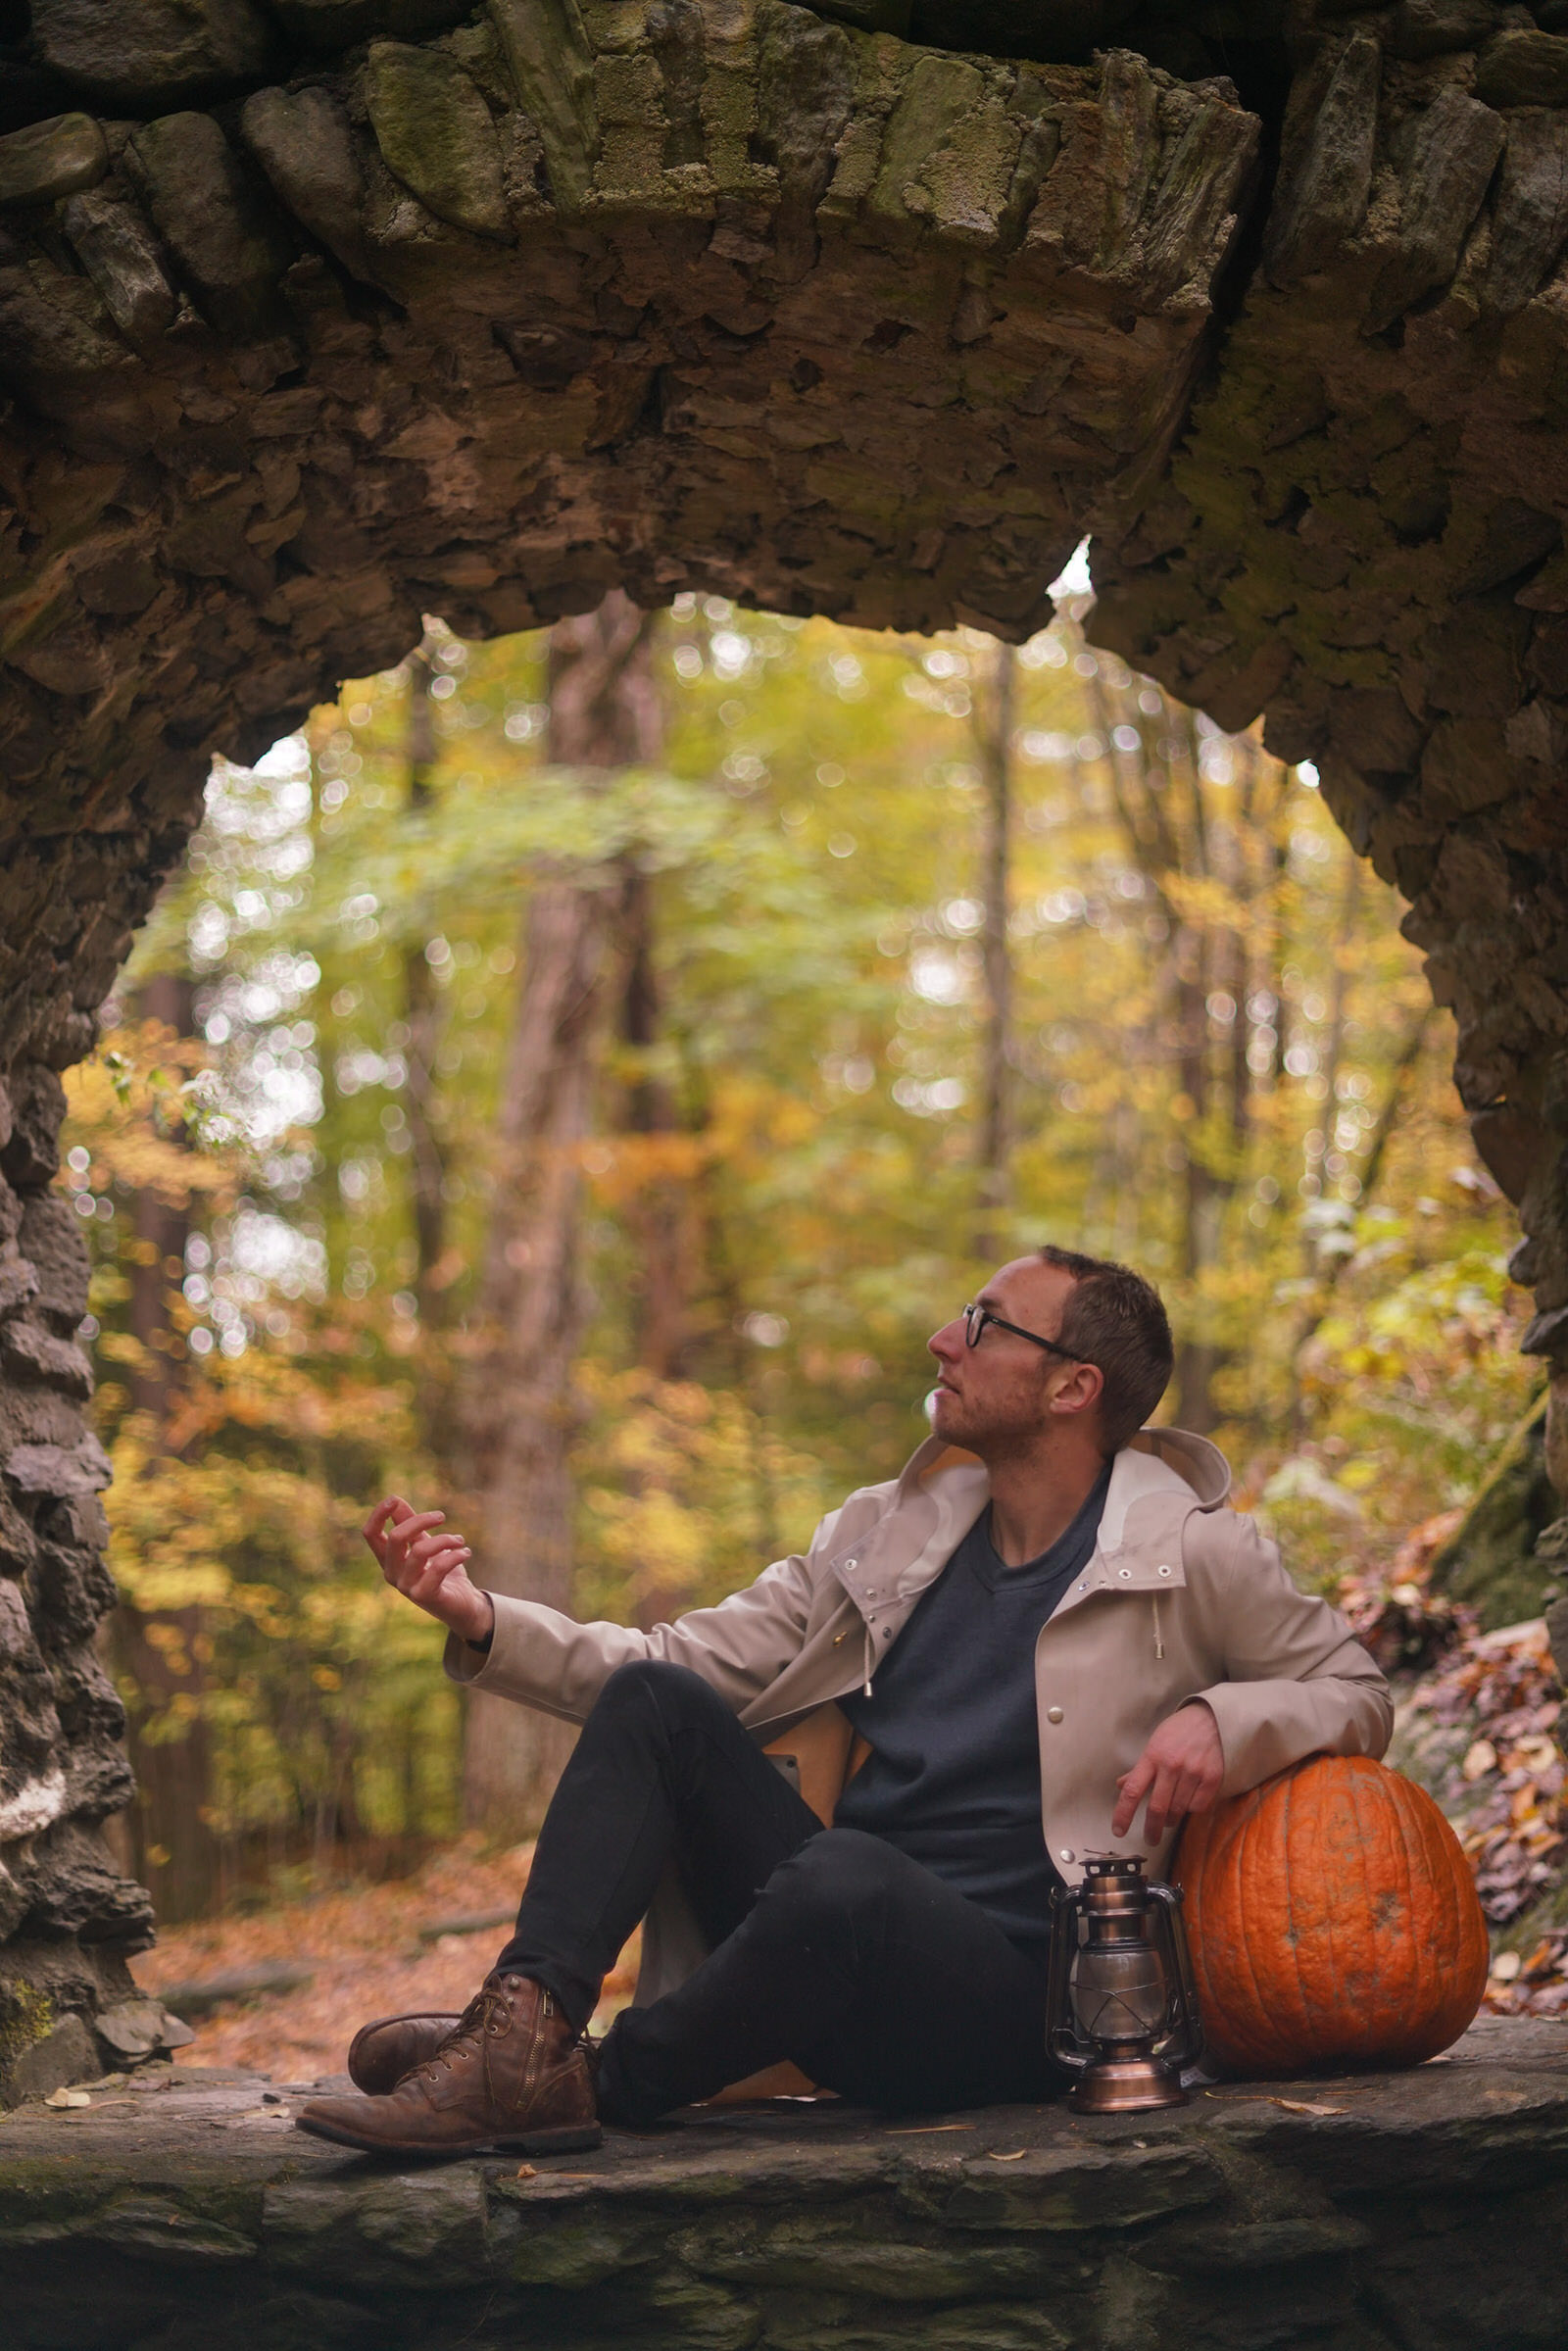
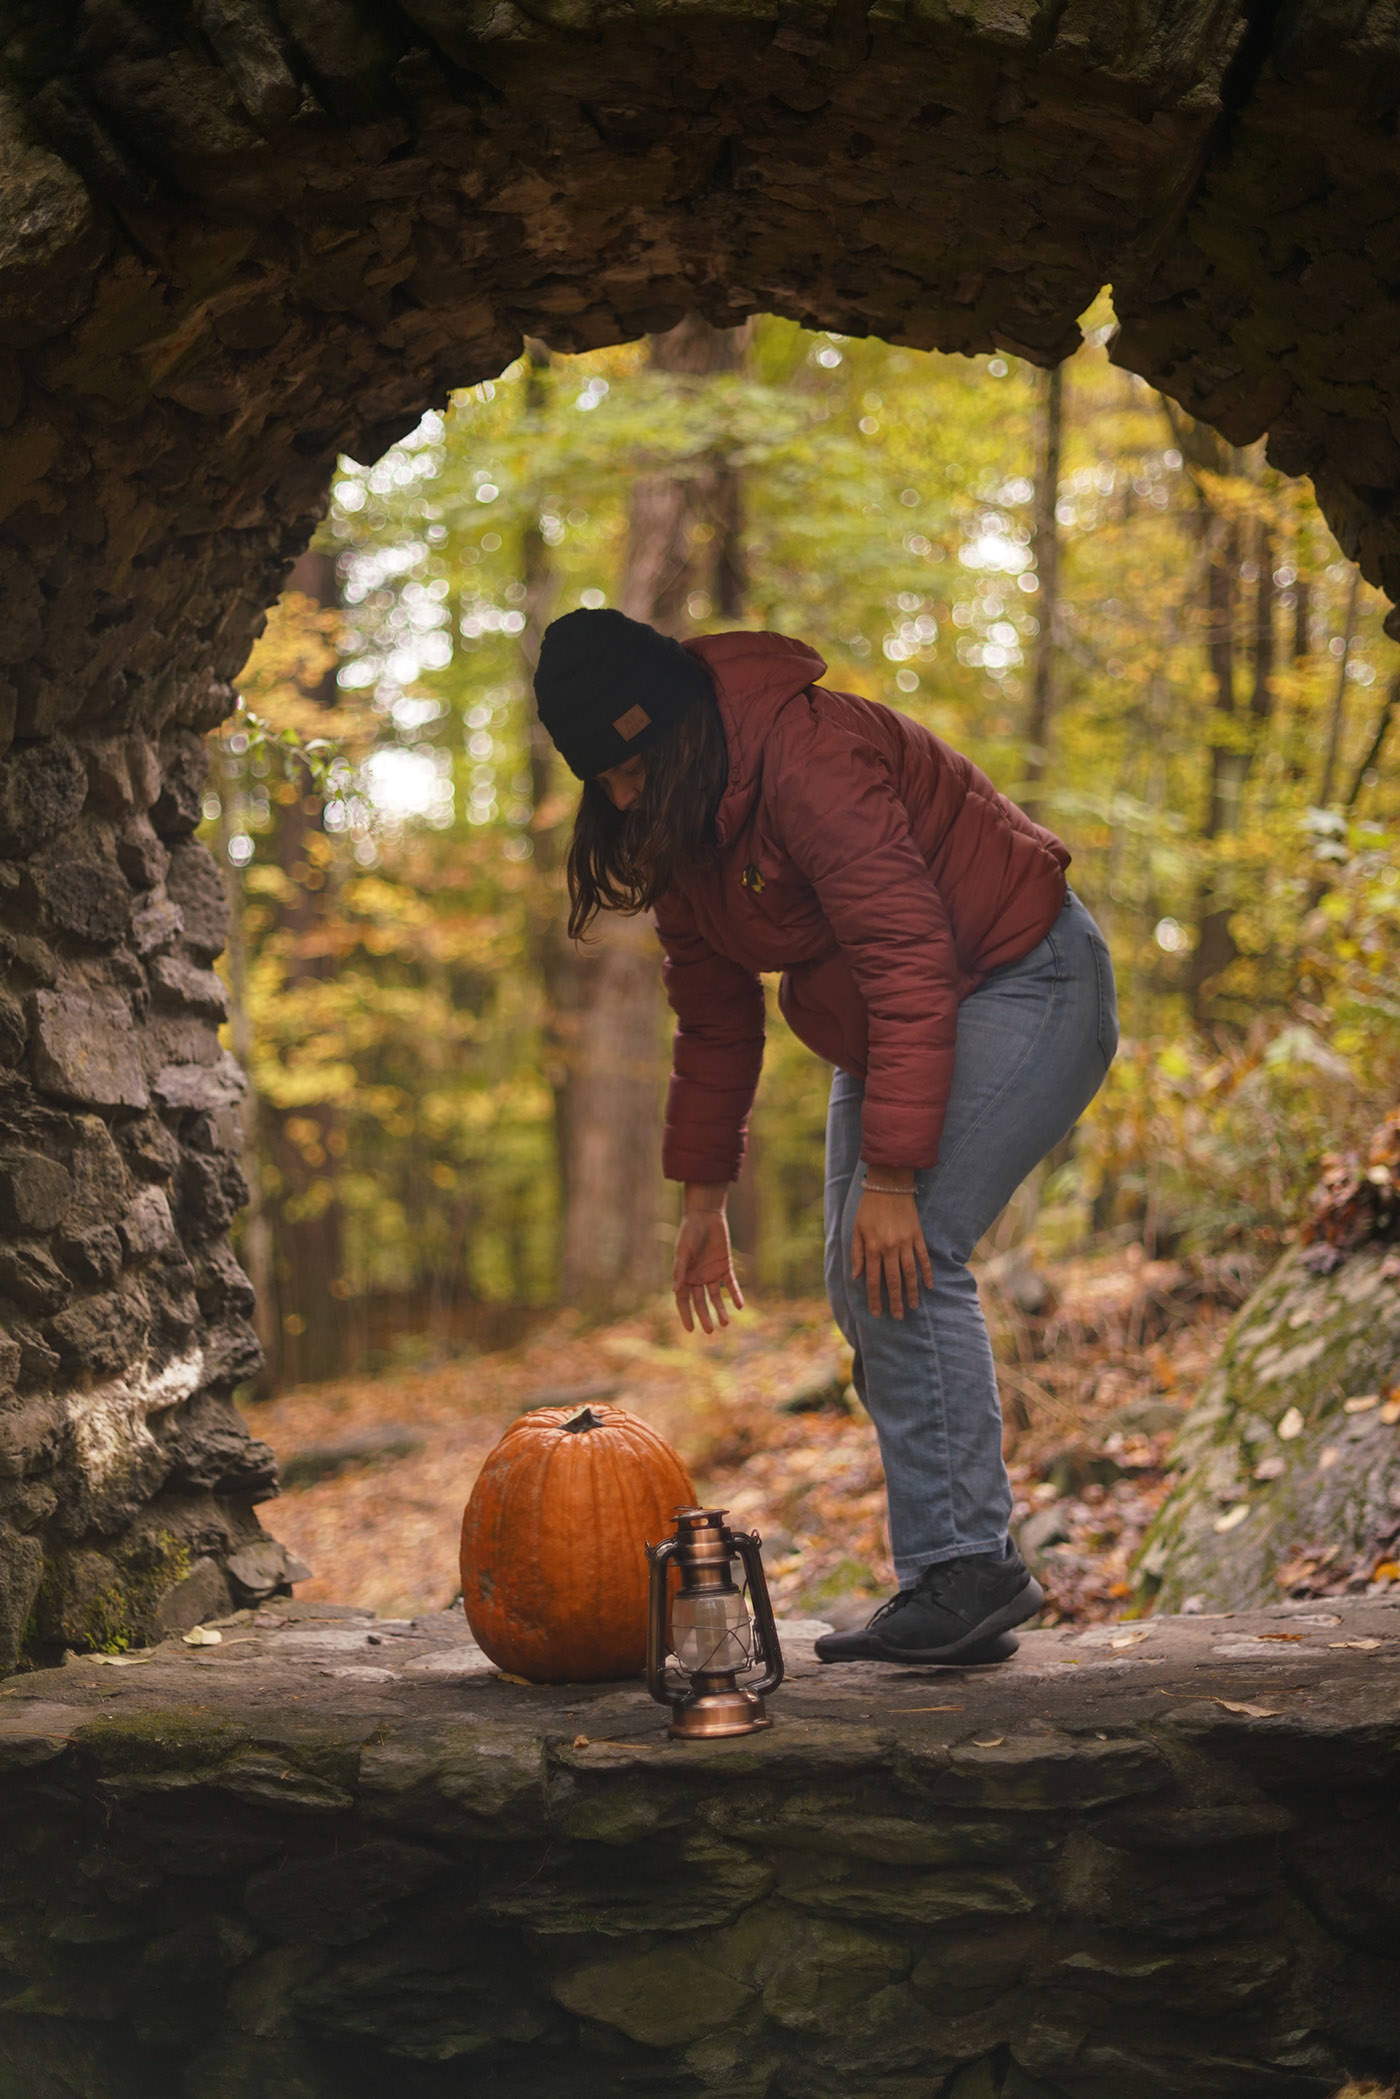
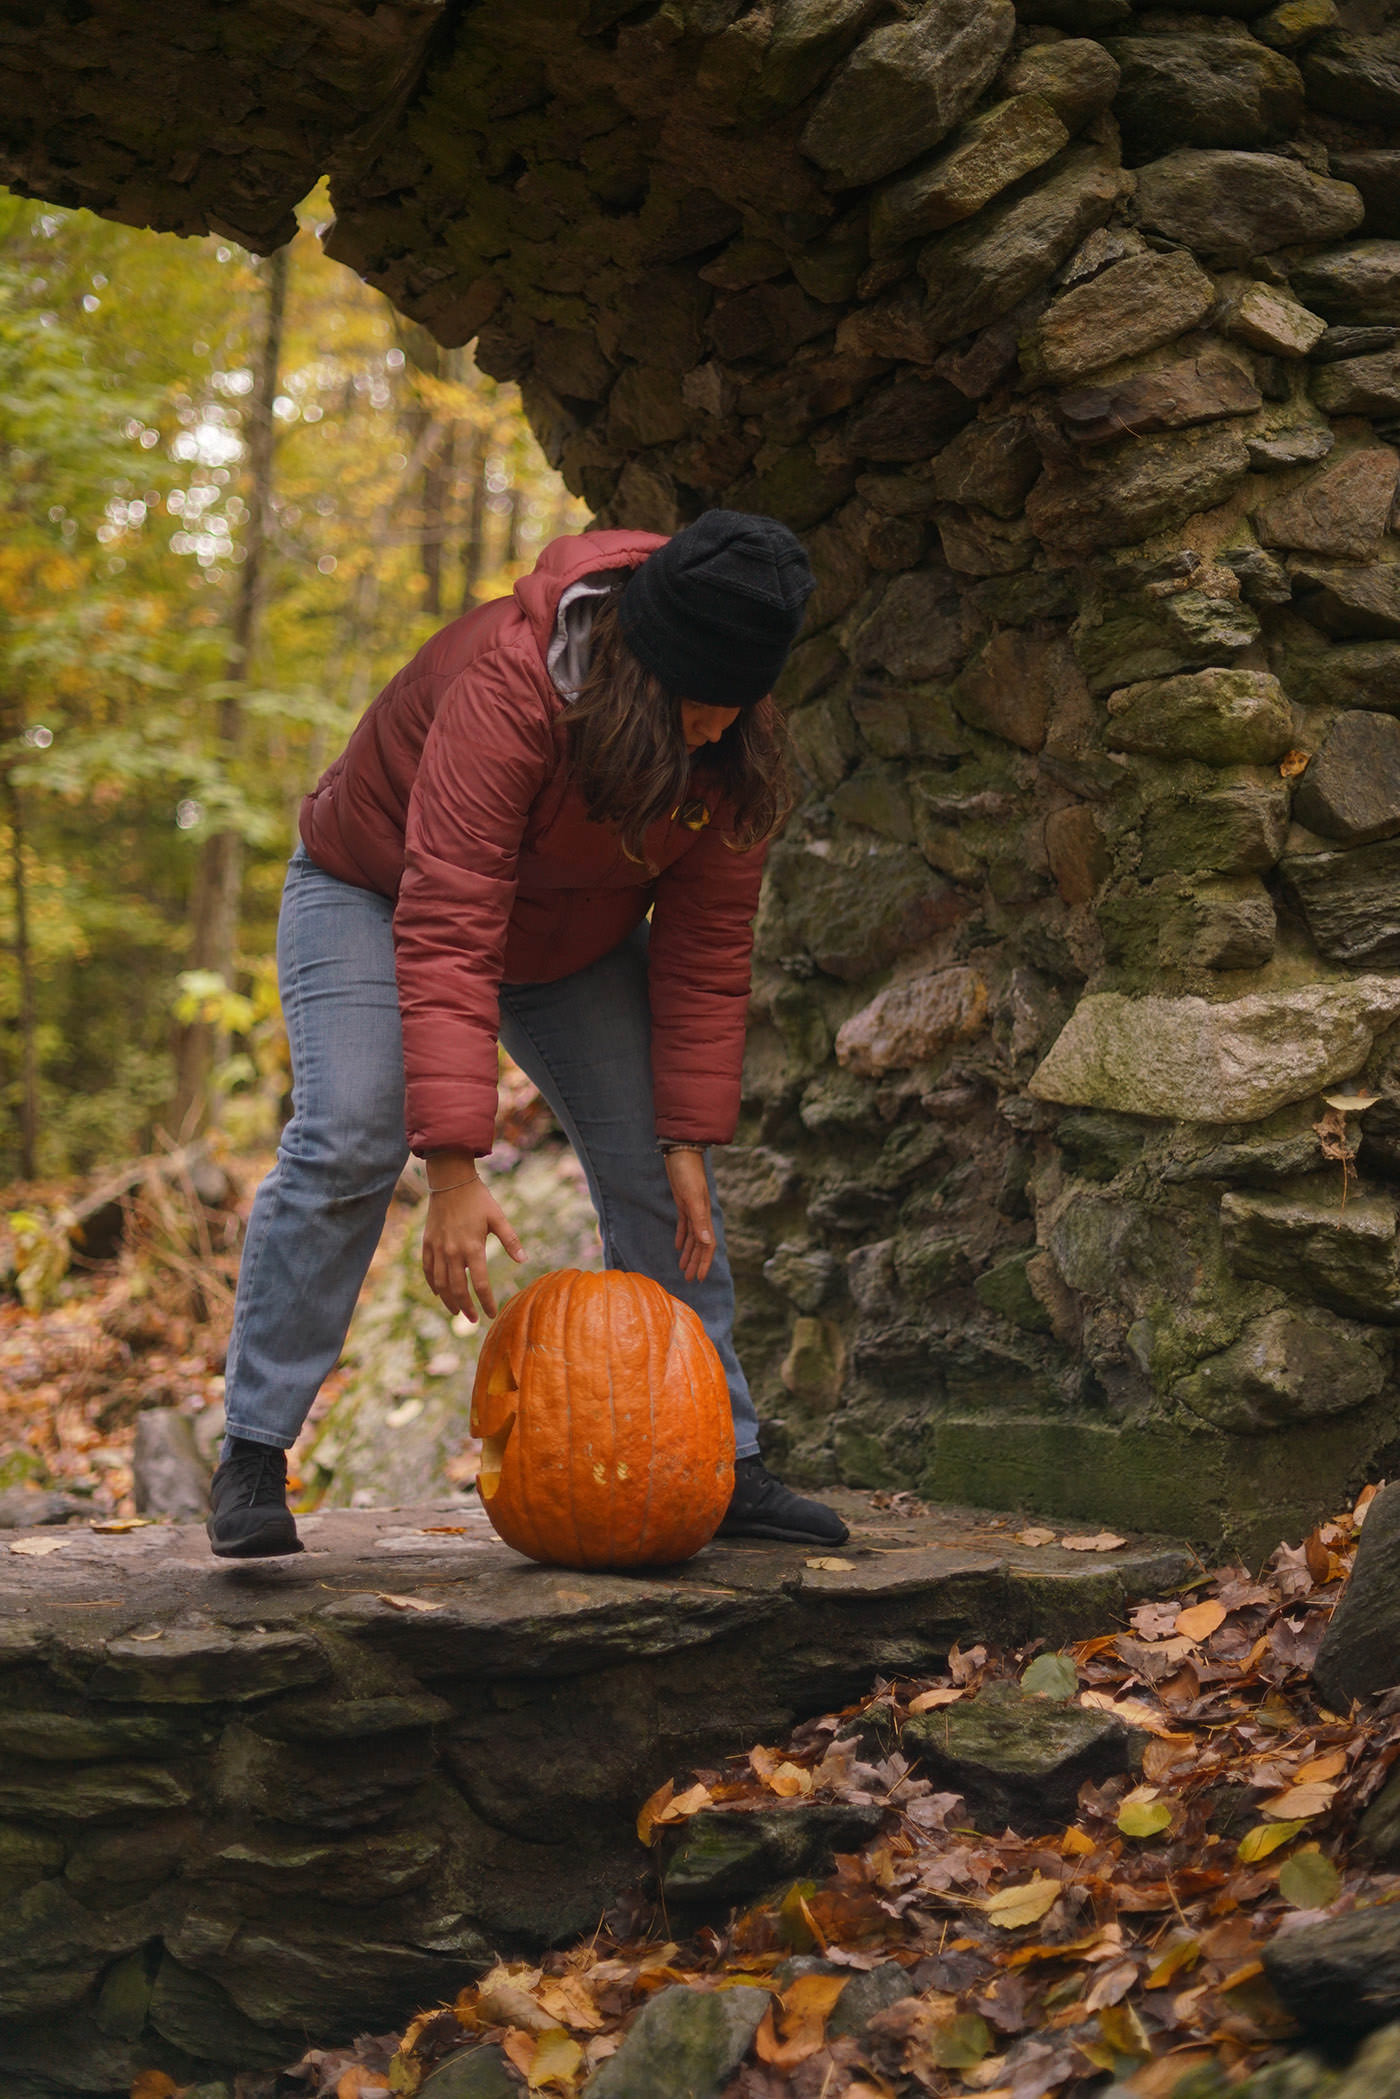
To set up the shot, I first photographed myself sitting in the archway with a pumpkin we brought as a prop. After a few different pose options, I found one I was happy with and we switched to shooting the rest of the elements for the photo. I had a friend move our pumpkin around the location so that it would be easier to composite later on. We spent about 15 or 20 minutes moving the pumpkin around and making sure we had enough to choose from later on.
Camera & Settings

Sony Alpha a7R II
5-axis in-body image stabilization optimized for 42.4MP full-frame, 4K movie recording

Sony FE 50mm f/1.4
A-Mount Lens/Full-Frame Format, Aperture Range: f/1.4 to f/22, Seven-Blade Circular Diaphragm
To capture the shot, I used a Sony a7R II camera with a 50mm f/1.4 lens, set at ISO 400, aperture f/1.4, and a shutter speed of 1/2000.
The photographing side of the image was pretty simple; I knew the direction I wanted to take everything and it was pretty easy to shoot all the elements I needed.
Taking It to Post
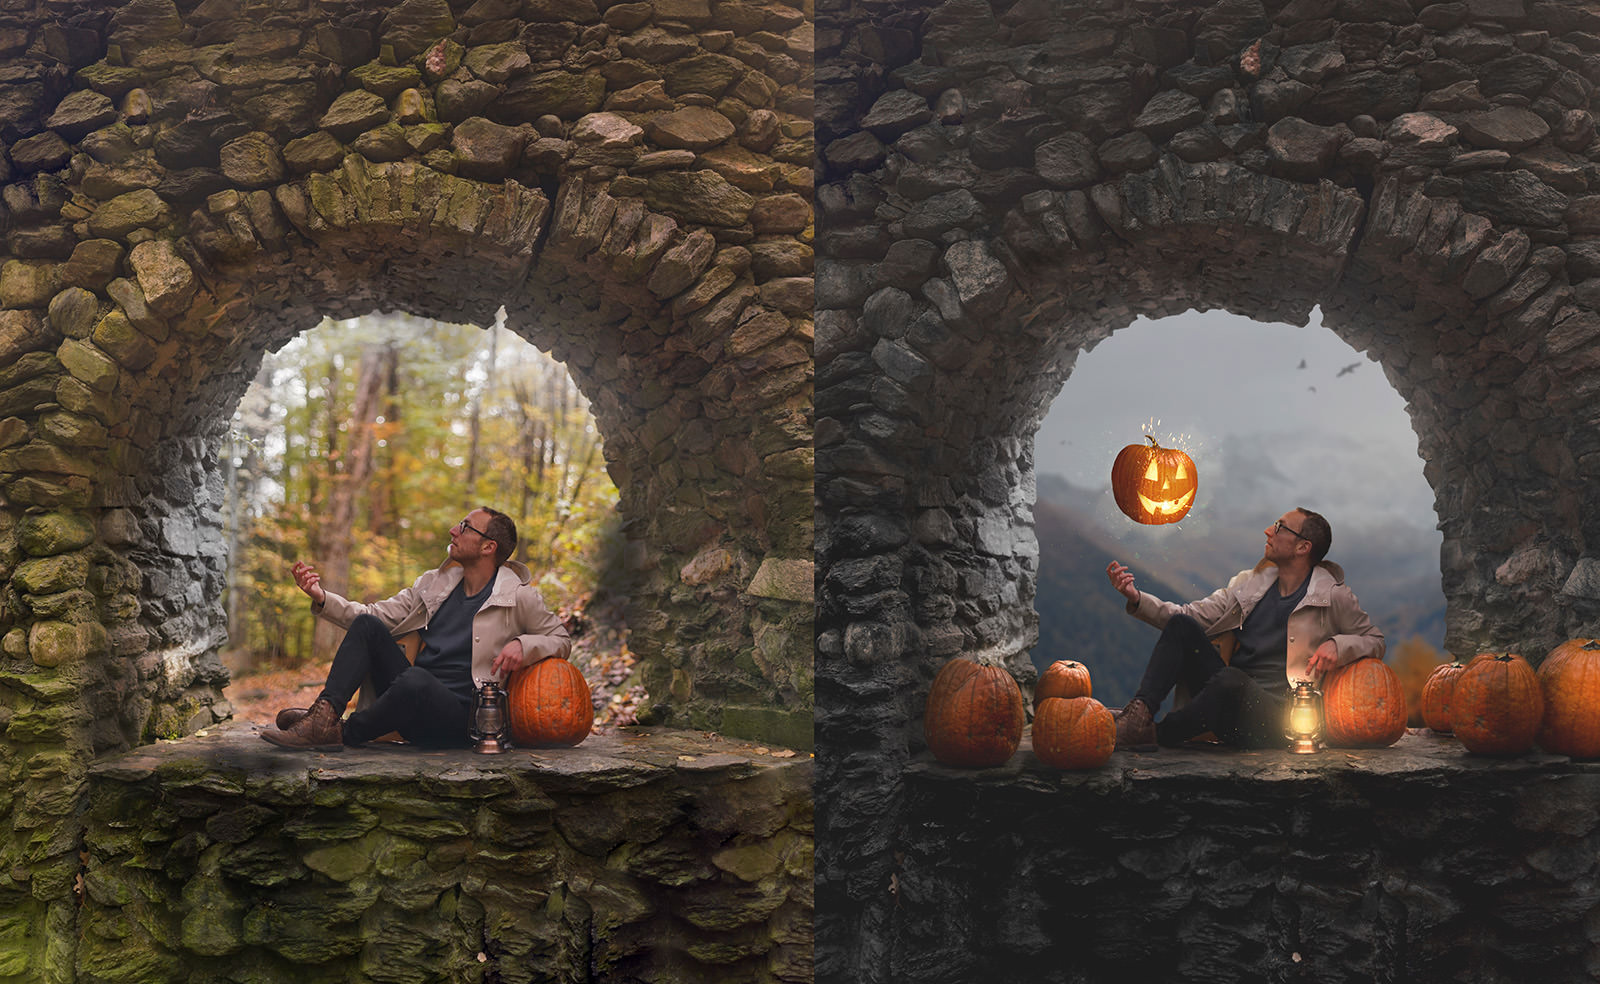
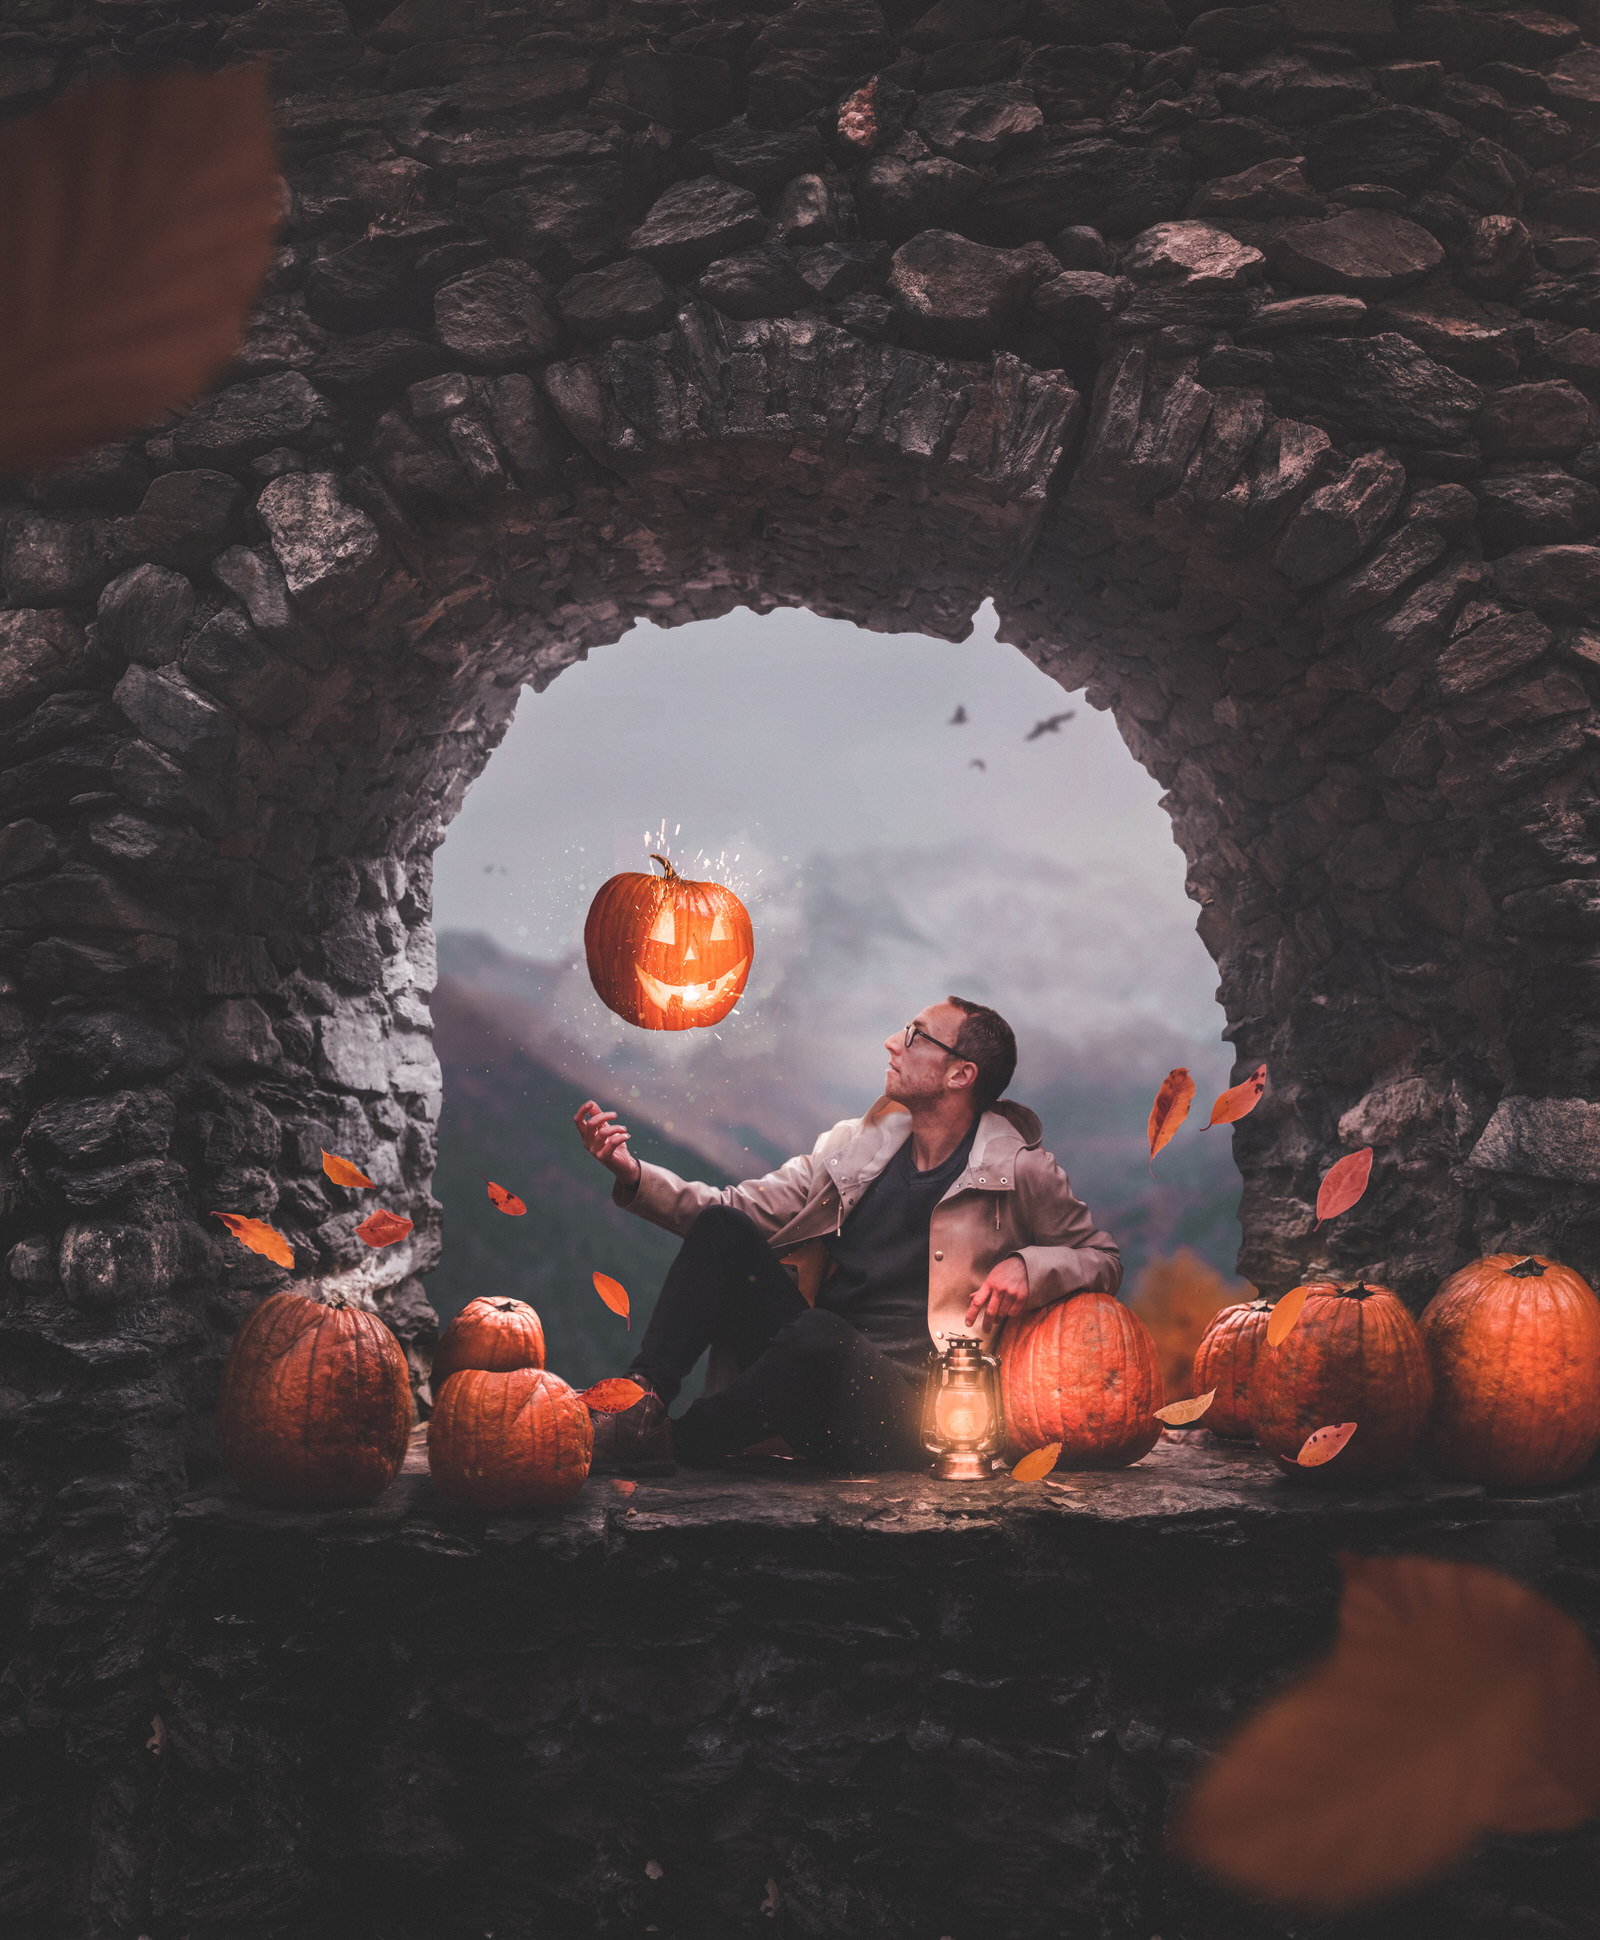
Once I got into Photoshop, it was time to put it all together. The first step in editing most of my images begins with expanding the canvas and piecing it together with all the background photos. Some call this the Brenizer Method – it simply allows you to shoot with a prime lens using a shallow depth of field and still have a wider canvas to work with. I like to have negative space in my photos and this allows me to keep a nice soft depth of field and also have a lot of space to work with.
Once I expanded the frame, I then wanted to swap out the sky that was originally behind me in the arch way. The original view of trees in the background was too busy and distracting, and it didn’t add to the magical feel that I wanted the image to have. Using the Magnetic Lasso Tool, I drew along the stonework of the archway to create a selection and then pasted a more simple sky background into that selection.
After this background swap it was time to start adding in the pumpkins to the image. Because all the elements were shot at the same time, in the same lighting, this was quite simple to do. I selected each of the pumpkin images and then pasted them into a layer. Using a Layer Mask, I brushed away the unwanted background, leaving just the pumpkins behind. Once I had all the pumpkins added in, I created some shadows where they overlapped simply by using the Burn Tool on a soft brush with low flow and gradually painting it in.
To create the glowing effect in the lantern, I added in new layer and, using a soft brush on screen and low opacity, I painted in the light, starting with a warmer, wider color first and then gradually making the brush size smaller and the color brighter and whiter to create that natural glow effect.
The face of the floating pumpkin was taken from a pumpkin we saw earlier that day while walking through town. I took a few stock photos of it to add into shots later. To create the sparks floating near the pumpkin, I used a “Sparks” Brush that I created from taking photos of birthday sparklers. The leaves were also added in one at a time, using a stock photo of a leaf I have in my personal stock collection.
One technique that I like to use to create depth in my images is to have floating images or elements closer to the edges of the frame to simulate them being closer to the viewer’s eye. To do this, I use a simple Gaussian Blur to blur them and add in depth, like you’re looking through these elements to the focus of the image.
To color my images, I tend to use the same strategy, using the HSL sliders to manipulate individual color tones – in this case, making the oranges and yellows pop and reducing the greens and other tones. I use Curves to add contrast in some areas of the image and also to add a bit of a matte effect by dragging the bottom left slider up slightly to give a more subtle toning.
The image in my mind ended up being very close to the one that was created, and to me, those are the best images to create! I hope you enjoyed learning more about the process of this image!
To see more of Joel’s creative composites and learn more about his process, follow him on Instagram or visit his website.