
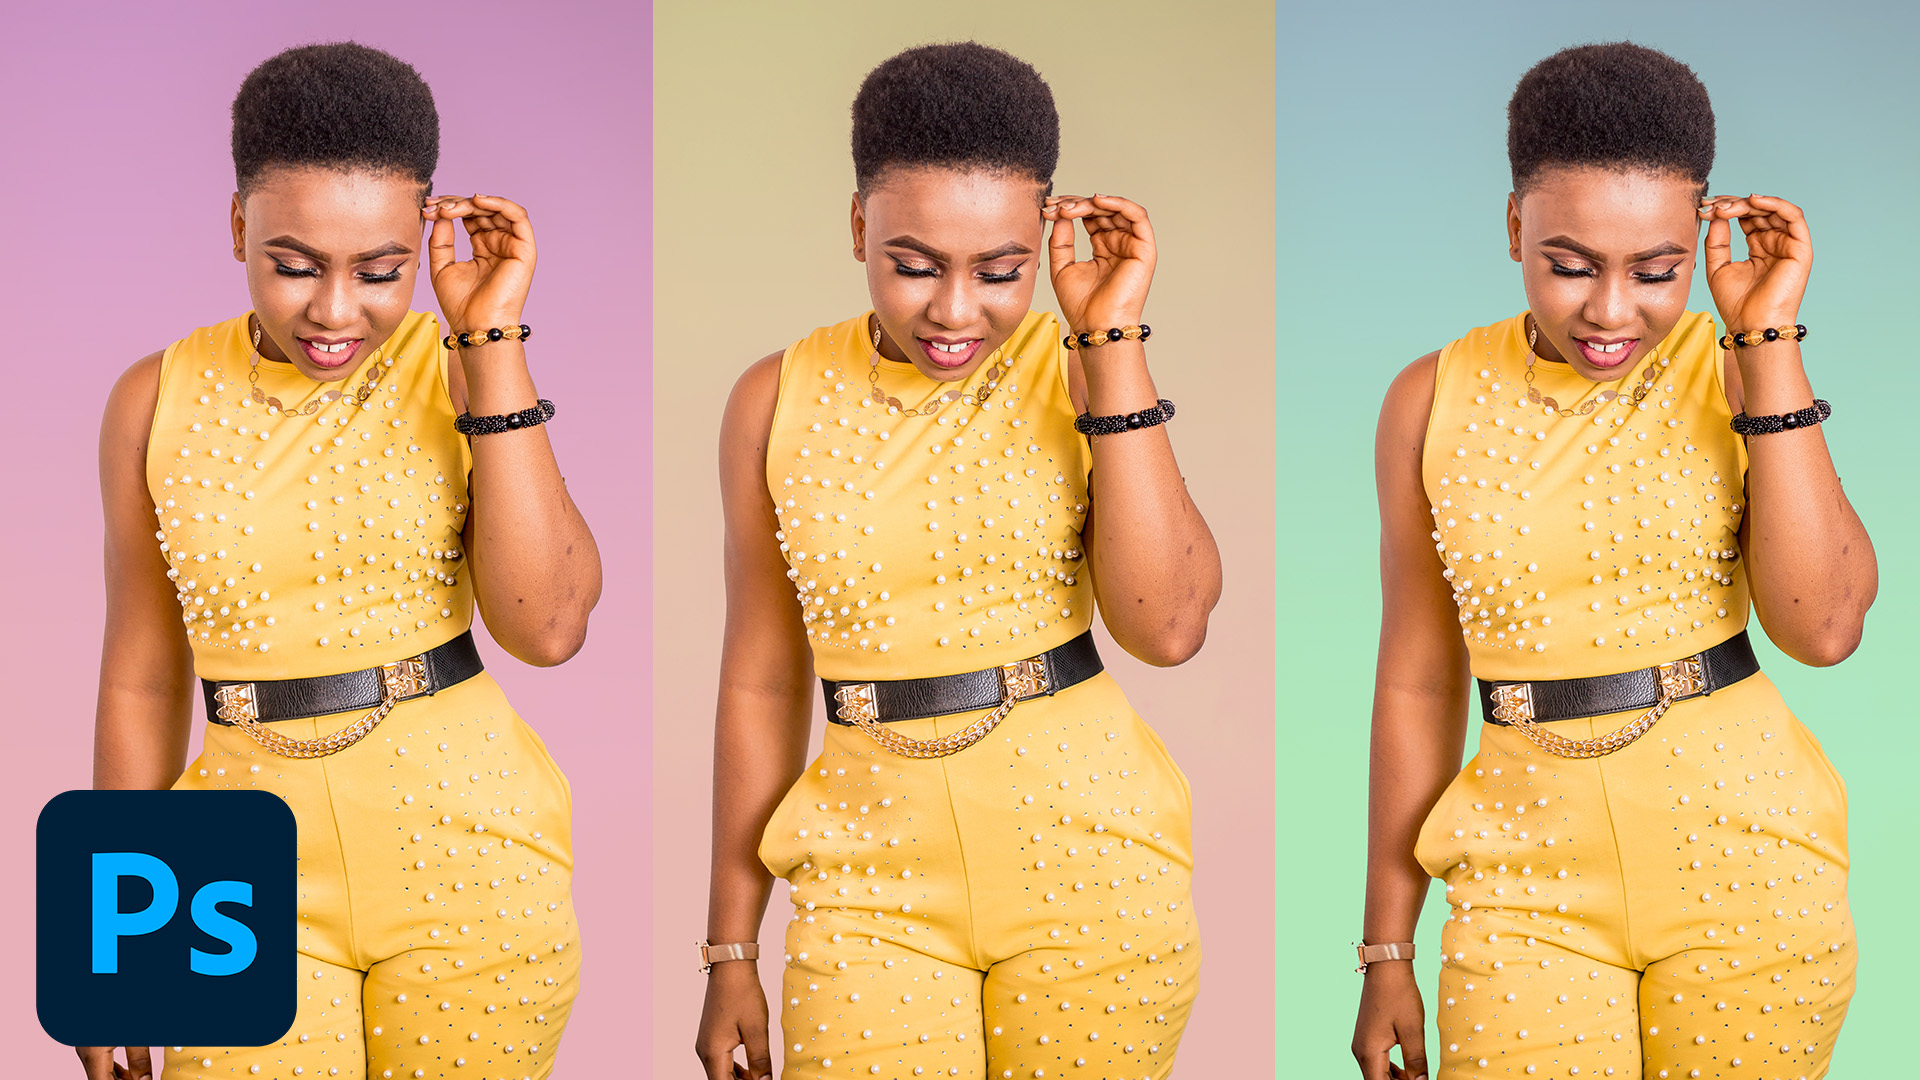

Download Assets
Download Assets
This tutorial includes 1 sample image, 1 sample PSD and 1 PDF guide. Downloads are free with a PHLEARN account.
- Download the sample images and PSDs from every free tutorial on PHLEARN
- New free tutorials published every week
- One free account — sign up once, then download anything
Free PDF Guide · 2 Pages
This Tutorial as a Step-by-Step PDF
Walks through all nine steps: Select > Subject, Layer > New Fill Layer > Solid Color, inverting the mask with Ctrl/Command+I, Multiply or Darken blending, picking the final color, duplicating with Ctrl/Command+J, a Foreground to Transparent gradient mask for two colors, and grouping as Color to compare. Keep it next to your keyboard.
description
Changing a background colour in Photoshop does not mean cutting the subject out by hand. Select > Subject does the selection for you, a Solid Color fill layer supplies the colour, and inverting the mask keeps the colour off the person. Because the colour sits on its own layer you can try as many variations as you like without touching the original file, and a blending mode change is all it takes to keep the shadows and edges looking real.
Enjoying This Free Tutorial?
We publish a new free tutorial every week, each one with sample images and PSDs you can download and follow along with. Sign up and they land straight in your inbox, along with early word on sales, events and subscriber-only offers.
Artist Credit
Photo by Charles Wundengba on Pexels


How to Change the Background Color of Any Photo in Photoshop
Changing a background color in Photoshop doesn’t require cutting anything out by hand. With Select Subject, a Solid Color fill layer, and a blending mode, you can recolor a background in about a minute, and because the color lives on its own layer you can try unlimited variations without ever touching the original photo.
Select the Subject So the Color Only Affects the Background
-
Run Select Subject
Go to Select > Subject. Photoshop analyzes the image and draws a selection around the person. On a photo with a clear subject this takes one click and needs no cleanup.
-
Add a Solid Color Fill Layer
With the selection active, go to Layer > New Fill Layer > Solid Color, click OK, and pick any starting color. Photoshop turns your selection into the fill layer’s mask automatically.
-
Invert the Mask if the Subject Got Colored Instead
If the color landed on the subject rather than the background, click the layer mask thumbnail so it shows a white border, then press Ctrl/Cmd + I (or go to Image > Adjustments > Invert). The color now covers the background and leaves the subject alone.
Blend the Color into the Background
A fill layer on its own looks flat, because it covers every shadow and highlight in the original background. A blending mode lets the new color interact with what is underneath.
-
Change the Blending Mode
With the fill layer selected, open the blending mode menu at the top of the Layers panel (it reads Normal by default). Scroll through the options and watch how each one interacts with the background. Multiply and Darken work for most photos; Color Burn gives a punchier look.
-
Pick the Final Color
Double-click the fill layer’s color thumbnail to open the Color Picker. The background updates live as you move around the picker, so you can dial in the exact shade before clicking OK.
Create Multiple Color Options
-
Duplicate the Fill Layer
Select the fill layer and press Ctrl/Cmd + J. Turn off the original by clicking its eye icon, then double-click the copy’s thumbnail and choose a different color. Repeat for as many versions as you want; each one keeps the same mask and blending mode.
Two-Tone Backgrounds with a Gradient Mask
Put a colored fill layer inside a group (Ctrl/Cmd + G) and add a layer mask to the group. Press G for the Gradient Tool, choose the Foreground to Transparent preset from the Basics set, and drag from the top of the image to the bottom. The second color fades in over the first. If the two colors are complementary, like green and magenta, they cancel each other where they overlap and turn gray, so pair colors that sit closer together on the wheel, such as a deep red over a blue, for a richer blend.
Compare Before and After
-
Group the Color Layers
Shift-click all the fill layers and press Ctrl/Cmd + G. Name the group “Color”. Clicking the group’s eye icon on and off shows you the original photo against the new background instantly.
Why This Method Works
Every part of this technique is non-destructive. The subject is protected by a mask, the color is a fill layer you can edit at any time, and the blending mode handles the shadows and highlights that make a recolored background look real instead of painted on. Try a few blend modes on each photo, because the best one depends on how bright the original background is.
Ready to learn more Photoshop? Check out The Beginner’s Guide to Photoshop and our comprehensive series of courses in our Photoshop Learning Path.
Quick Reference: Keys, Menus and Settings
- Select the subjectSelect > Subject
- Add the colorLayer > New Fill Layer > Solid Color, then OK
- Flip the maskClick the mask thumbnail, Cmd/Ctrl + I or Image > Adjustments > Invert
- Blend it inBlending mode menu above the layers: Multiply or Darken; Color Burn and Lighten also work here
- More versionsCmd/Ctrl + J, hide the original, double-click the thumbnail for a new color
- Two colorsCmd/Ctrl + G, mask the group, G for the Gradient Tool, Foreground to Transparent, drag top to bottom
- Before and afterShift-click the color layers, Cmd/Ctrl + G, name it Color, toggle its eye icon
No AI generation, no generative credits: Select Subject does the selection.

Free Downloads
Follow Along on the Same Photo
Get the portrait, the finished PSD with the color fill layers and the 2-page PDF guide with every step. Free with a PHLEARN account.
Changing Background Color: Common Questions
Do I have to cut out the subject to change the background color?
No. Go to Select > Subject and Photoshop selects the person in one click. That selection becomes the mask of the color fill layer, so the subject is protected.
Why did the color go on my subject instead of the background?
The selection was of the subject, so the fill covers the subject first. Click the mask thumbnail on the fill layer, then press Cmd/Ctrl + I or go to Image > Adjustments > Invert.
How do I add a solid color layer in Photoshop?
With the selection active, go to Layer > New Fill Layer > Solid Color, click OK and pick any starting color. You can change the color later.
Why does the new background color look flat?
A fill layer in Normal mode covers every shadow and highlight. Change its blending mode, at the top of the Layers panel, so the color interacts with the background underneath.
Which blending mode is best for recoloring a background?
Multiply or Darken work for most photos. On this image Color Burn looks good too, and Lighten gives a soft pastel look. Scroll through the modes and keep the one you like.
How do I change the color after the layer is made?
Double-click the fill layer’s color thumbnail to open the Color Picker. The background updates live as you move around the picker, so click OK when it looks right.
Can I make several color versions of the same photo?
Yes. Select the fill layer and press Cmd/Ctrl + J, hide the original with its eye icon, then double-click the copy’s thumbnail and pick a new color. Each copy keeps the same mask and blending mode.
How do I blend two colors in the background?
Put one fill layer in a group with Cmd/Ctrl + G and add a mask to the group. Press G for the Gradient Tool, choose Foreground to Transparent from the Basics set and drag from the top down.
Why do my two background colors turn gray?
Complementary colors like green and magenta cancel each other out where they blend. Change one of them, for example to a blue or a deep, dark red, for a richer mix.
Are the sample files free?
Yes, with a free PHLEARN account. You get 1 sample image, 1 sample PSD and 1 PDF guide: the portrait, the finished color PSD and a 2-page guide to every step.
From the Magazine View all
Stories, interviews and guides for photographers, new every week.
 BusinessHow to Compete With AI: Give Your Clients MoreEveryone has the same tools now, and your clients know it. The way to compete is to give them more.
 EditingLightCraft vs Lightroom: Is the Free Clone Any Good?The free clone on the same RAW files: what matches, what breaks and who should switch.
 EditingHow to Tell If a Photo Is AI, and Prove Yours Is RealThe tells that still work in 2026, why detectors disagree, and how to prove your own photos.
Master Photoshop, Lightroom and Photography
Join PHLEARN PRO for $12.99 a month, or $99.99 a year (save 36%). Cancel anytime, with a 100% money-back guarantee.





