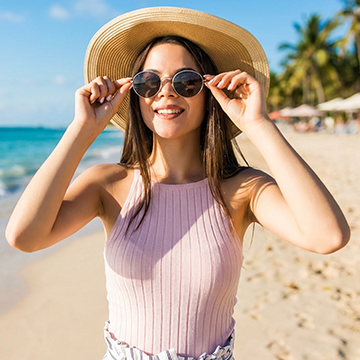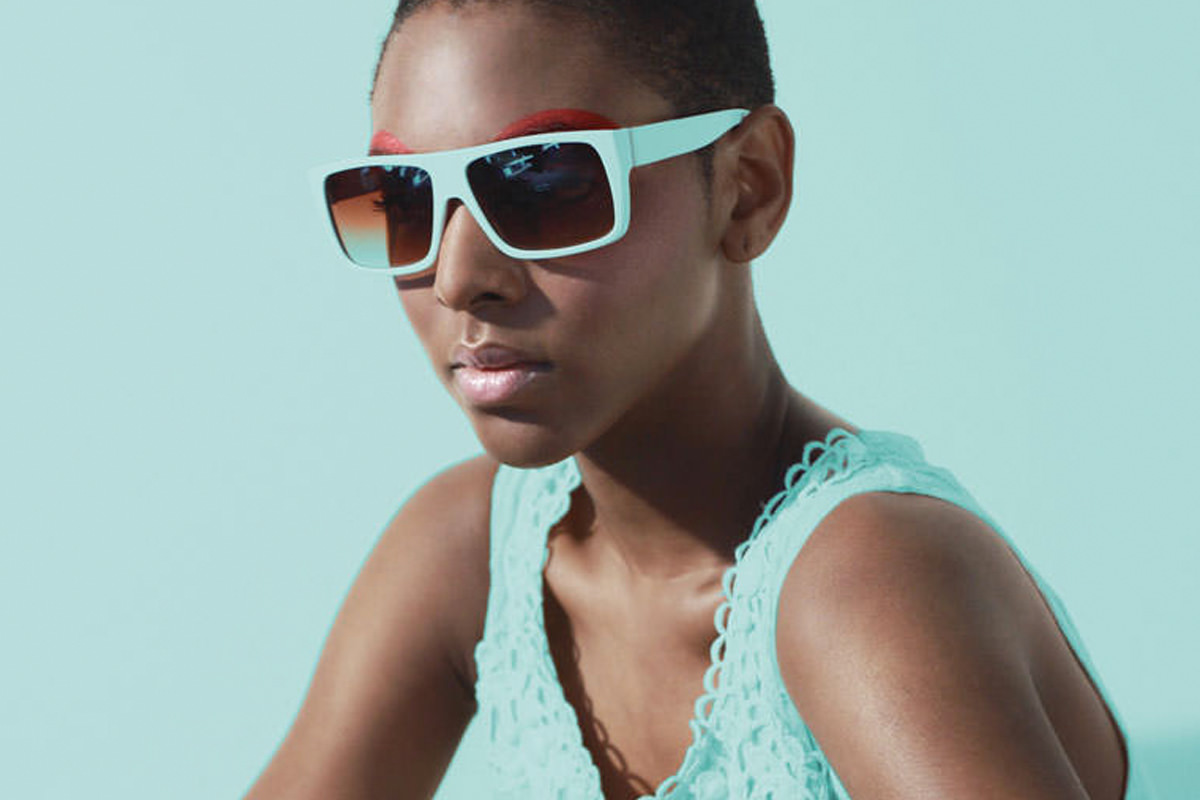

BEFORE
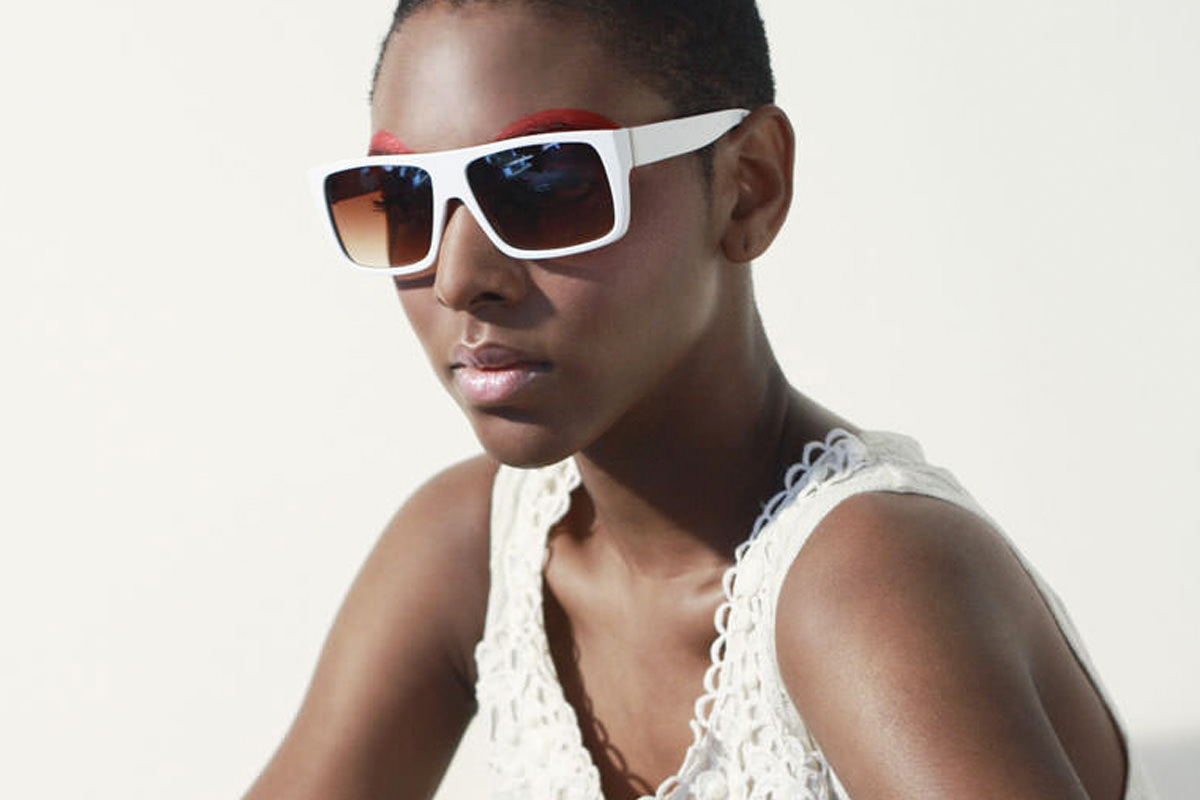
AFTER
Download Sample Images
Click the link below to download the sample images and follow along with this tutorial.
DownloadAdd a Splash of Color in Just a Few Simple Steps
This incredibly versatile technique will allow you to change any white elements in an image to any other color. In this tutorial, we’ll show you how to make extremely accurate selections using Channels and then we’ll use those selections in combination with a Hue/Saturation Adjustment Layer to replace any color that we want. Looking to edit Black & White in Photoshop instead?
Channels
By using Channels, we can make an incredibly accurate selection based off of the amount of contrast present in an image. To view the different color channels, click on the Channels tab. You’ll see three channels listed; one for red, one for green, and one for blue. Our goal is to identify the channel that has the most contrast between the light and dark areas of the photo. This will allow us to select the white areas in the photo to color change. To find the channel that has the most contrast, simply click on each and make a judgement based off of what you see.
If the image appears flat, that channel likely won’t be of much help. If the image has well-defined areas of light and dark, then it will work great.
In this case, the blue channel has the greatest amount of contrast, so we’ll use that channel to make our selection. Duplicate the blue channel and then load a Levels Adjustment Layer by hitting CTRL or CMD + L.
Let’s use the Levels Adjustment Layer to increase the amount of contrast even further. This will ensure that our selection is as accurate as possible. In the Levels dialog, drag the leftmost slider, representing the dark areas of the image, slightly to the right. Do the same for the rightmost slider, moving it to the left. This will make dark areas darker and the lighter areas lighter, creating clear distinction between the parts of the image we want to change the color of and the parts that we don’t.
Making the Selection
Now that we have a channel that identifies all of the white the image, we can turn it into a selection by holding CTRL or CMD and clicking on the copy of the blue channel that we made.
Now that we have a selection, we can load it as a Layer Mask which is ultimately what will allow us to alter the color. Click on the Layers tab and then go to Layer, New Adjustment Layer, and down to Hue/Saturation. Hold ALT OR OPTN and click on the layer mask of our new Hue/Saturation Adjustment Layer. This will load our Channel Selection into our Layer Mask.
Keep in mind; anything that appears white on a Layer Mask will be visible in that Layer and anything black will be invisible. Our goal is adjust the Layer Mask of the Hue/Saturation Adjustment Layer so that it ends up only being visible on the white areas of our image. We need to do a bit more refinement of our Layer Mask to ensure that the color change occurs where we want it.
Refining the Layer Mask
Switch to the Brush Tool by hitting B. In the options bar above change the Blending Mode from Normal to Overlay. Then paint with black over any areas of the image that you don’t want to change the color of. We only want to change the color of the background, the subject’s dress, and the frames of the sunglasses. Everything else can be painted completely black.
Once that’s finished, we’re going to do the same thing to the white areas of the image by painting white over everything that will eventually change color.
Take your time with this process! The more accurate your layer mask is, the more realistic the final color change is going to look.
Once you’re done, you should have a layer mask that consists of only pure black (the subject’s skin) and pure white (the dress, background etc).
Presto Change-O
Now that our Layer Mask is complete, open up the dialog for the Hue/Saturation Adjustment Layer and click on the Colorize box. Use the sliders above to lower the Lightness, increase the Saturation, and adjust the Hue to whatever you want. You should see the the one-white-areas completely change color as you adjust these sliders. Since we’re working from a white base, lighter colors will tend to look a little bit more realistic.