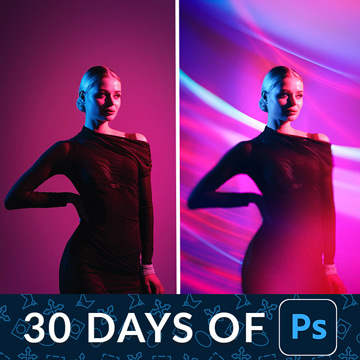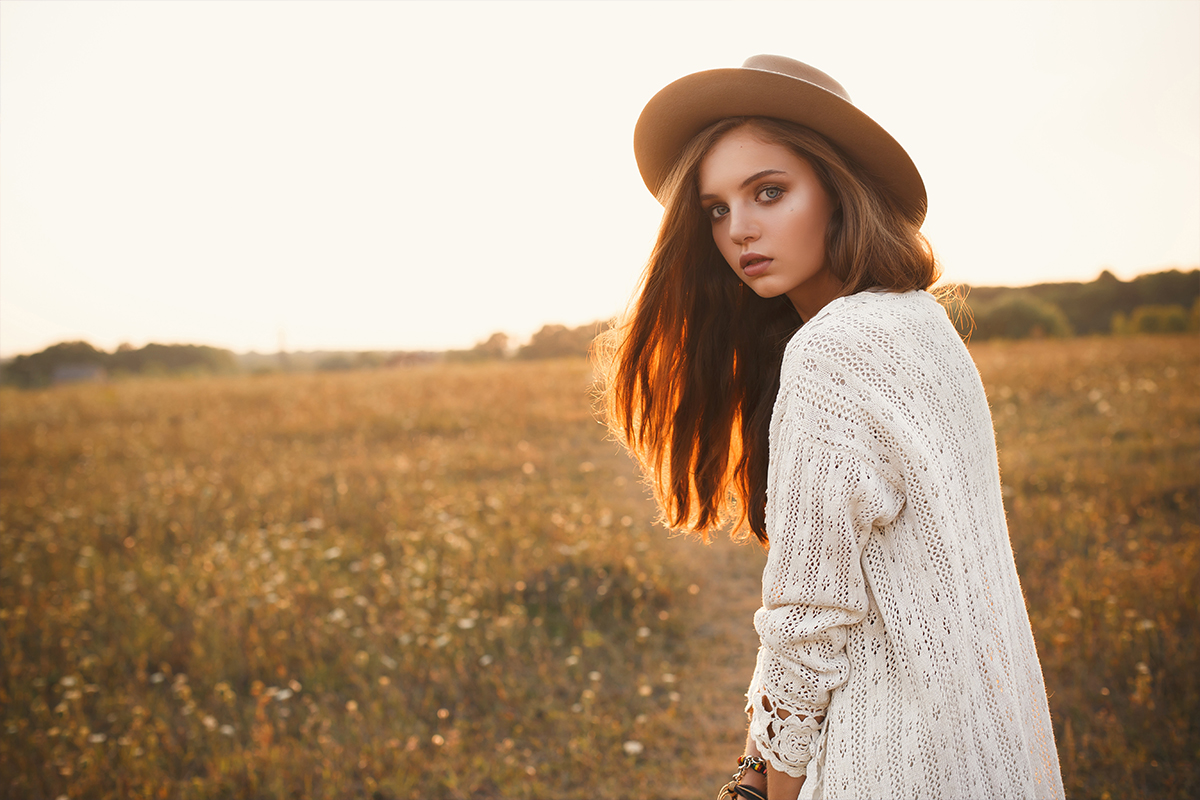
BEFORE
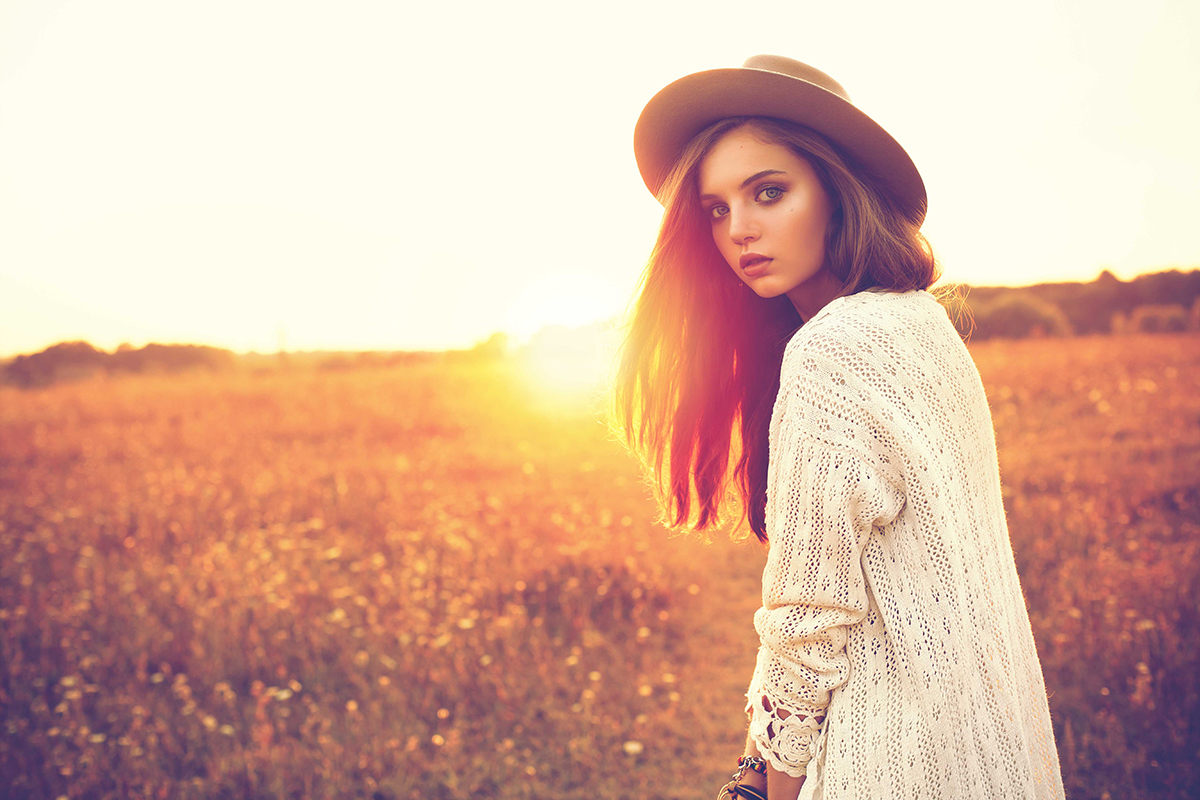
AFTER
Download Sample Images
Click the link below to download the sample images and follow along with this tutorial.
DownloadCreate that perfect sunset
Adding a sunset effect to a photo can be done in a couple of easy steps, and makes a huge difference in a back-lit image. First, make sure the image is lit from behind so the sun is visible. Next, create a custom radial gradient to mimic the sun. The gradient should go from white, to orange, to red. Then, add a layer Mask so the sun only shows up in small circle area. Blur the circle, and the sun is complete! Follow the rest of the tutorial to Color-match the image to the sunset.
Coloring the Image to Match the Sunset
After applying the sunset gradient to the photo, it is important to Color match the rest of the photo. Use a ‘Color Balance’ Adjustment Layer and click on “Highlights’ to increase red and green Levels, and to decrease blue Levels. If needed, mask in the area around the sunset for better color matching.
Add Blue to the Shadows
Blue and gold look great together, and adding Color into the Shadows of an image is a great way to introduce Complimentary Colors. To create a ‘Cross Process’ color effect, start by making a new ‘Solid Color’ Adjustment Layer and choosing a dark blue. Change the Blend Mode to ‘Lighten’ and it will only show up in the Shadows of your image. After creating the ‘Solid Color’ adjustment layer, it is easy to change the color. Double click on the adjustment layer and choose a new color from the color picker window.