
Download Assets
This tutorial includes 1 sample image, 1 Photoshop brush and 1 PDF guide. Downloads are free with a PHLEARN account.
- Download the sample images and PSDs from every free tutorial on PHLEARN
- New free tutorials published every week
- One free account — sign up once, then download anything
Free PDF Guide · 3 Pages
This Tutorial as a Step-by-Step PDF
The guide walks through painting a soft black shape and a tiny dot at about 50% Opacity, Edit > Define Brush Preset, then Brush Settings: more Spacing, Size and Angle Jitter all the way up, a little Roundness Jitter and Scatter on Both Axes. It ends with white snow and a little Motion Blur. Keep it next to your keyboard.
description
Rather than reaching for a pre-made brush pack, this builds a custom snow brush in Photoshop from scratch — a couple of painted shapes and a handful of brush settings — that can then be dropped into any photo to add falling snow. Covers creating the snow shape, defining it as a brush preset, dialing in the scatter and jitter settings that make it read as weather rather than dots, painting it on, and adding motion blur for movement.
Enjoying This Free Tutorial?
We publish a new free tutorial every week, each one with sample images and PSDs you can download and follow along with. Sign up and they land straight in your inbox, along with early word on sales, events and subscriber-only offers.
How to Create a Custom Brush in Photoshop
This tutorial builds a custom snow brush in Photoshop completely from scratch, using nothing but a couple of painted shapes and a handful of brush settings, so it can be dropped into any photo afterward to add falling snow. The finished brush and a sample image are both available as a free download on PHLEARN.com.
About This Custom Snow Brush
Rather than relying on a pre-made brush pack, this tutorial shows exactly how a usable snow brush gets built from two simple painted shapes and a set of randomizing brush settings. Once it’s built, the same brush can be reused on any photo that needs snow added in post rather than shot on location.
Creating the Snow Shape
Start by going to Layer, then New Fill Layer, then Solid Color, and make that fill layer plain white as a background. Add a new layer above it and, using the Brush tool with a soft-edged brush, paint in black to make a loosely blurred, irregular shape that reads roughly as a puff of snow.
Adding a Small Dot for Variation
On the same layer, paint a second, much smaller mark somewhere off to the side at around 50 percent opacity so there are two distinct shapes at different sizes, a larger blurred shape and one small dot, ready to become the basis of the brush.
Defining the Brush Preset
Grab the Rectangular Marquee tool and draw a selection that includes both the large shape and the small dot together. With that selection active, go to Edit, then Define Brush Preset, and name it something like “snow template.” That captures the raw shape of the brush, though it doesn’t yet have the settings that will actually make it behave like falling snow, so both of the shape layers can be turned off at this point since they’re no longer needed.
Adjusting Brush Settings for a Snow Effect
Create a new layer, press B to select the brush tool, right-click on the canvas, and scroll down to select the newly saved snow template brush, then set the color to white. Painting with it at this point still just repeats the same large and small dot in a fixed pattern, so open Window, then Brush Settings, to add randomization. Under Shape Dynamics, turn Size Jitter all the way up, turn Angle Jitter all the way up, and add some Roundness Jitter as well. Then under Scattering, enable scattering on both axes so the individual particles land in random positions rather than following a straight line, which is what starts making the brush actually look like scattered snow.
Fine-Tuning Spacing
If the particles paint too close together, go back into Brush Settings and increase the Spacing value so each stamp of the brush lands further apart, giving the snow more natural breathing room instead of clumping into a dense line.
Painting Snow onto Your Image
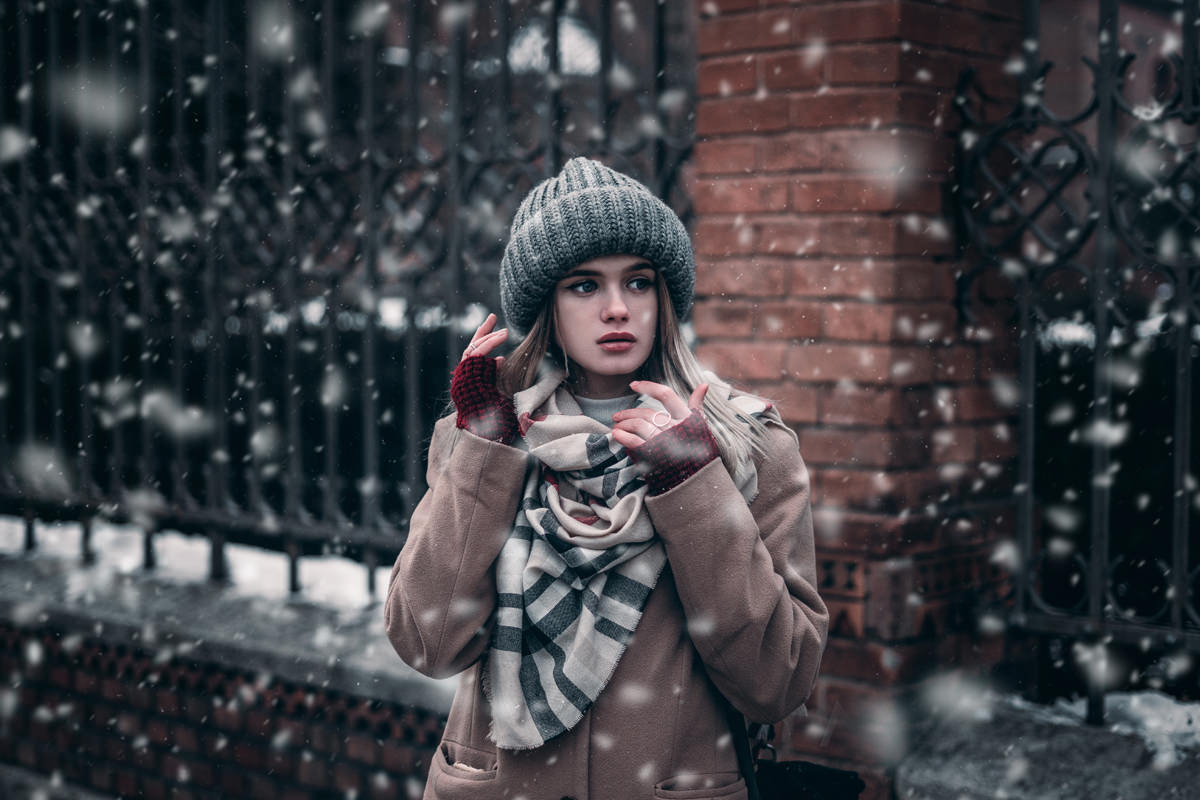
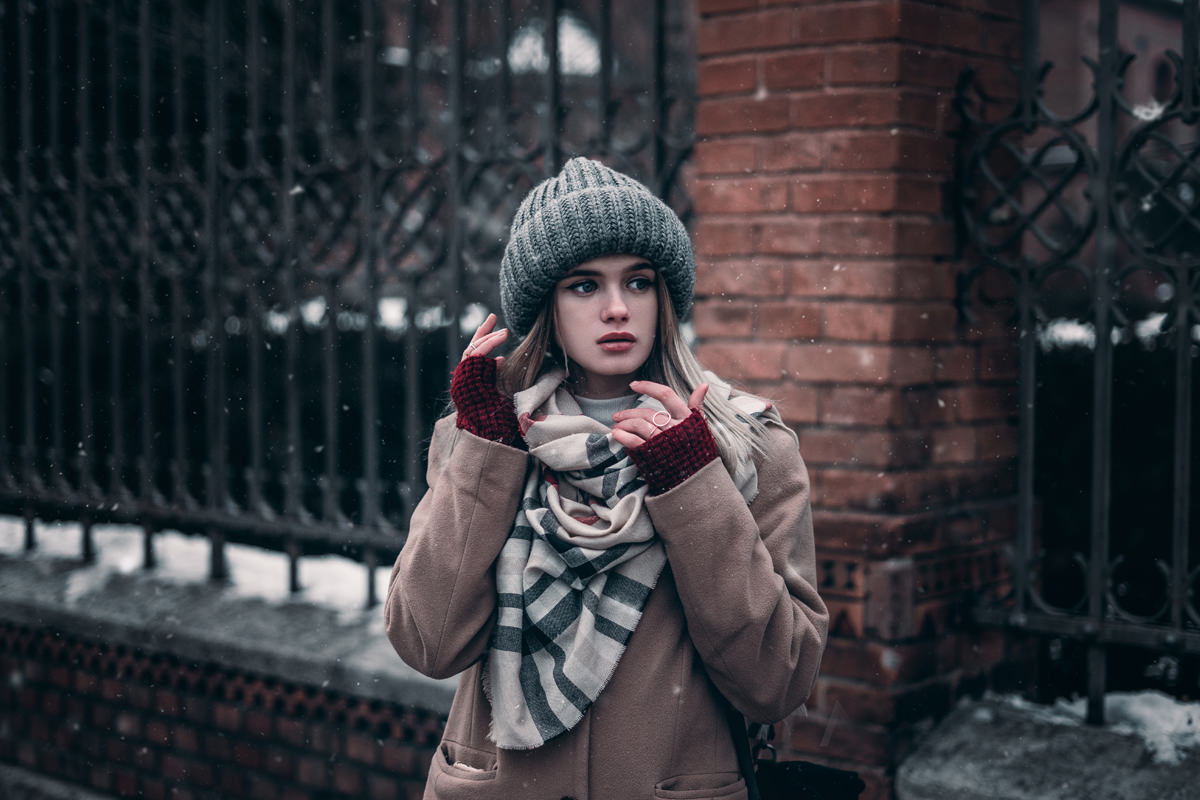
With scattering and jitter dialed in, paint with white on the new layer above the photo and the particles land with genuine randomization, some larger and some smaller, scattered unevenly the way real falling snow would look. There’s no need to manually control where every individual flake lands, since the randomized settings are doing that automatically.
Controlling Size for Depth
Right-click the brush at any time to change its overall size, or use the bracket keys on the keyboard to size it up or down on the fly. Painting with a larger brush size creates bigger flakes that read as closer to the camera, while a smaller brush size creates smaller flakes that read as farther away, and mixing both sizes across a few passes builds a sense of depth in the falling snow.
Adding Motion Blur for a Dynamic Feel
Once enough snow is painted onto the layer, go to Filter, then Blur, then Motion Blur, and apply just a small amount. A little motion gives the flakes a sense of movement and makes all of the snow appear to be falling in the same direction, while cranking the amount higher creates a more extreme, fast-moving look if that fits the photo better.
Why Custom Brushes Are Worth Building
A custom brush like this one is really just a saved shape plus a set of randomizing rules, which means the same basic approach used here for snow can be adapted to rain, dust, sparks, or any other scattered particle effect. Anyone who wants to go deeper into how far Photoshop’s brush engine can be pushed can check out The Amazing Power of the Brush Tool in Photoshop for a broader look at brush-based techniques.
Final Thoughts
Building this snow brush comes down to two ingredients: a simple painted shape saved as a brush preset, and a handful of jitter and scattering settings that turn a repetitive stamp into something that reads as genuinely random. Once those settings are dialed in and a touch of motion blur is added, the same brush can add convincing falling snow to any photo, no location shoot required.
Quick Reference: Keys, Menus and Settings
- White backgroundLayer > New Fill Layer > Solid Color, white; paint the shape in black on a new layer
- Save the shapeRectangular Marquee (M) around both marks, Edit > Define Brush Preset
- Pick the brushB, right-click and scroll to Snow Template; paint white on a new layer
- Make it snowWindow > Brush Settings: Spacing up; Size and Angle Jitter all the way up; a little Roundness Jitter; Scatter on Both Axes
- Near and far flakes[ and ], or right-click to change the size
- Add motionFilter > Blur > Motion Blur, just a little
No AI, no generative credits.

Free Downloads
Follow Along on the Same Photo
Get the sample photo, the finished snow brush from the video and the 3-page PDF guide to building it from scratch. Free with a PHLEARN account.
Custom Brushes in Photoshop: Common Questions
How do I make my own brush in Photoshop?
Paint the shape you want, draw a Rectangular Marquee selection around it and go to Edit > Define Brush Preset. Then give it its character in Window > Brush Settings.
What colors do I paint the brush shape in?
Make a white Solid Color fill layer (Layer > New Fill Layer > Solid Color) as the background, then paint the shape in black on a new layer above it with a soft-edged brush. When you paint the snow onto the photo, switch to white.
Why paint a small dot next to the main shape?
The brush stamps everything inside the selection as one tip. A large soft shape plus a really small dot at about 50% Opacity gives you two sizes of flake in every stamp. Make sure both are inside the marquee.
Why does my new brush paint a row of identical dots?
That’s expected. Define Brush Preset only captures the shape. The snow behavior comes from Spacing, Shape Dynamics and Scattering in Window > Brush Settings.
Which Brush Settings make it look like snow?
Raise Spacing, turn Size Jitter and Angle Jitter all the way up under Shape Dynamics, add a little Roundness Jitter, and under Scattering check Both Axes and raise Scatter. Aaron sets these by eye, so match the look rather than a number.
My snow looks clumped together. How do I fix it?
The flakes are too close. Go back to Window > Brush Settings, bring Spacing up, clear the layer and paint again.
How do I make some snowflakes look closer to the camera?
Change the brush size as you paint, by right-clicking or with the [ and ] keys. A larger brush gives big flakes that read as close; a smaller one gives small snow farther away.
Should I paint the snow straight onto the photo?
No. Paint with white on a new, empty layer above the photo. Motion Blur then goes on that snow layer only, and the photo underneath stays sharp.
How do I make the snow look like it’s falling?
With the snow layer selected, go to Filter > Blur > Motion Blur. Just a little bit of motion gives it a dynamic feel and makes all the snow fly the same way; give it a lot if you want it to look really fast.
Are the sample files free?
Yes, with a free PHLEARN account. You get 1 sample image, 1 Photoshop brush and 1 PDF guide: the photo, the snow brush built in the video and a 3-page guide to making it.
Master Photoshop, Lightroom and Photography
Join PHLEARN PRO for $12.99 a month or $99.99 a year. Cancel anytime, with a 100% money-back guarantee.





