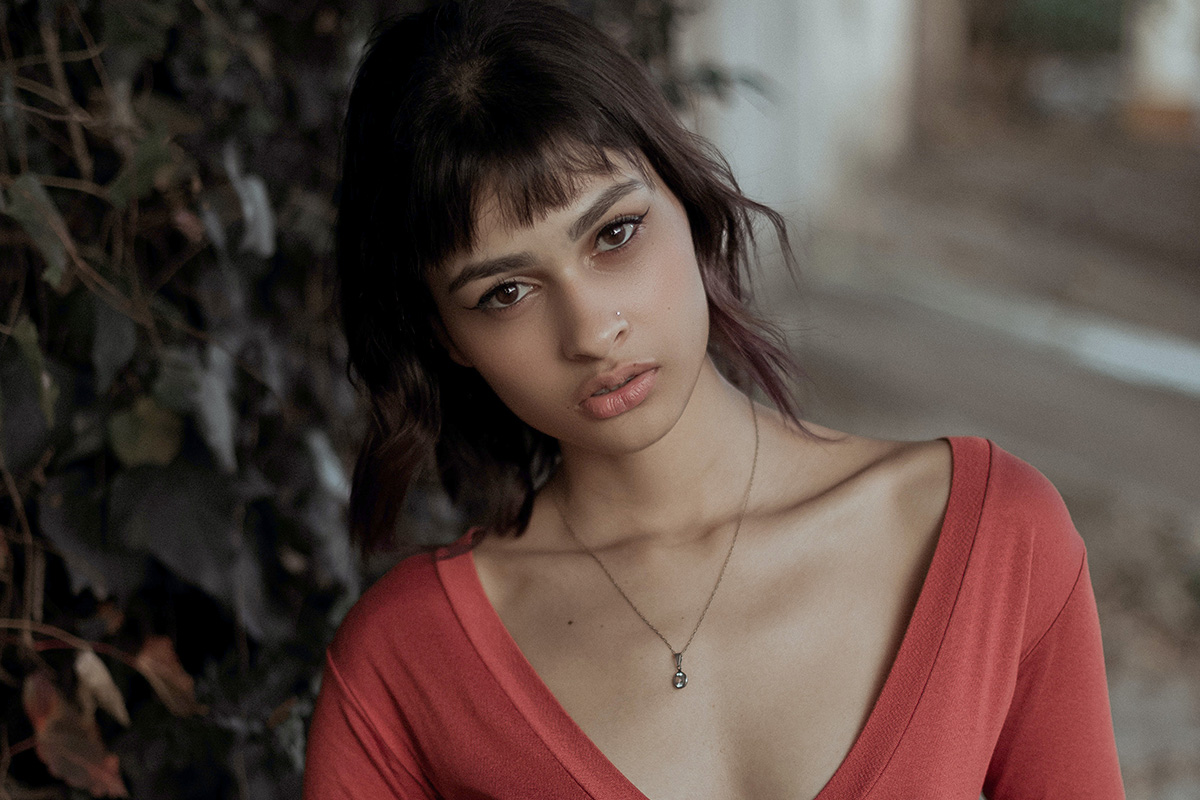

Download Sample Images
Download Assets
This tutorial includes 1 sample image and 1 PDF guide. Downloads are free with a PHLEARN account.
- Free sample files with every tutorial on PHLEARN
- New tutorials published every week
- Unlimited downloads with your free PHLEARN account
Free PDF Guide · 4 Pages
This Tutorial as a Step-by-Step PDF
A reference to both adjustment layers: the shared histogram and three eyedroppers, the Levels input sliders and Output Levels, the Red, Green and Blue channels, how every Levels control maps to a Curves point, and the Curves hand tool, Pencil, Smooth and Auto. Keep it next to your keyboard.
description
Looking for the best tool to fix exposure, correct colors, or add stylistic coloring to a photo? Well, look no further than Curves and Levels. But which one is better? Watch to find out!
Learn all about the Curves and Levels dialogs and how to use each to take your images to the next level.
Enjoying This Free Tutorial?
We publish a new free tutorial every week, each one with sample images and PSDs you can download and follow along with. Sign up and they land straight in your inbox, along with early word on sales, events and subscriber-only offers.
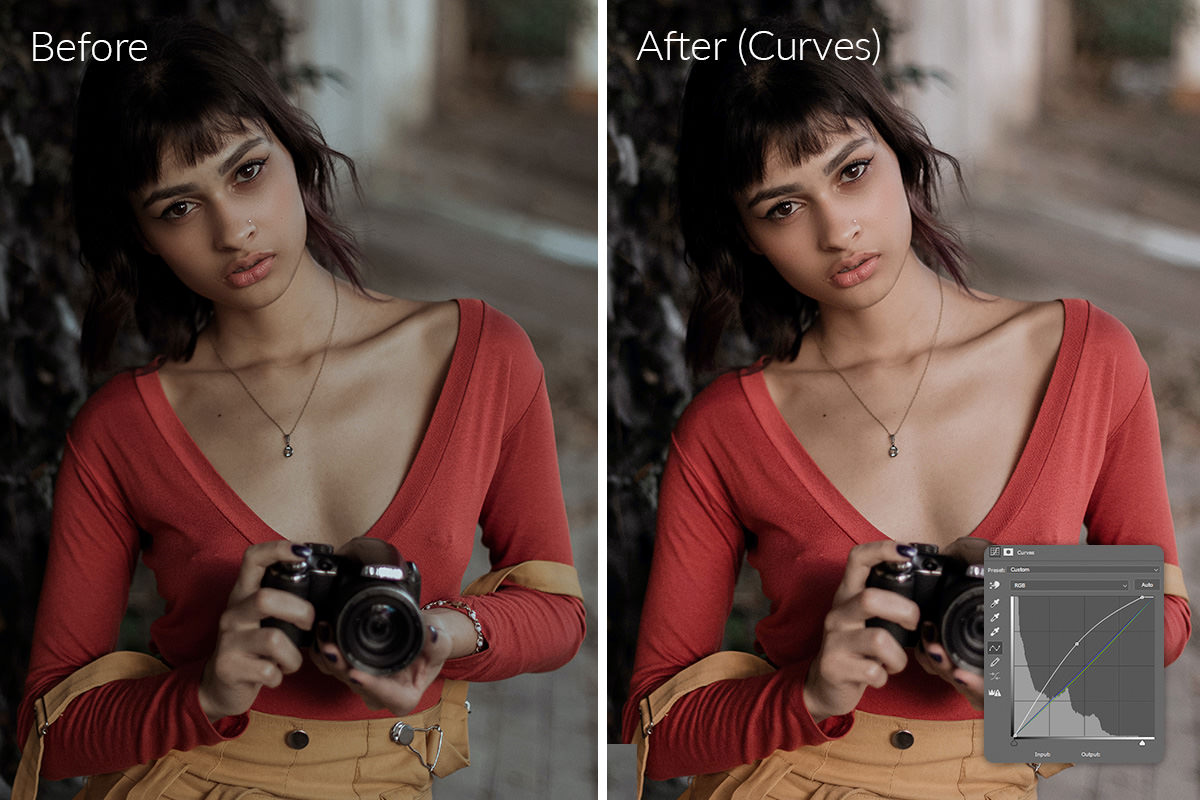
Same Job, Different Amount of Control
Curves and Levels are the two adjustment layers most people reach for to fix exposure and color, and the usual advice — “Curves is the professional one” — isn’t very helpful.
The accurate version: Curves can do everything Levels does, plus one thing Levels fundamentally cannot. Levels is simpler, and simpler is genuinely better for a lot of work. Knowing exactly where the extra capability lies tells you which to reach for.

Both Show You the Same Histogram
Add both from Layer › New Adjustment Layer and the first thing to notice is that they display identical information.
That chart in each panel is your image’s histogram. Dark tones are plotted on the left, bright tones on the right, and the height at any point is how many pixels sit at that brightness. A tall spike on the left means a predominantly dark image — which you can confirm just by looking at the photograph.
Curves stretches the same histogram vertically to fit a square, but it is the same data. Window › Histogram shows the full version including per-channel color.
The Eyedroppers Are Identical in Both

Both panels carry three eyedroppers, and they behave the same way in each.
-
Black point
Click something that should be pure black. Everything darker becomes black.
-
White point
Click something that should be pure white. Everything brighter becomes white.
-
Gray point — the white balance one
Click something that should be neutral gray and Photoshop removes whatever color cast it finds there. Click a red object and Photoshop assumes red is wrong and pushes the whole image cyan to compensate; click yellow and it goes blue. It must be an actually neutral area or you’ll wreck the color rather than fix it.
Used together, three clicks can correct both exposure and white balance on a photograph. That’s often all a straightforward image needs.
The Levels Sliders
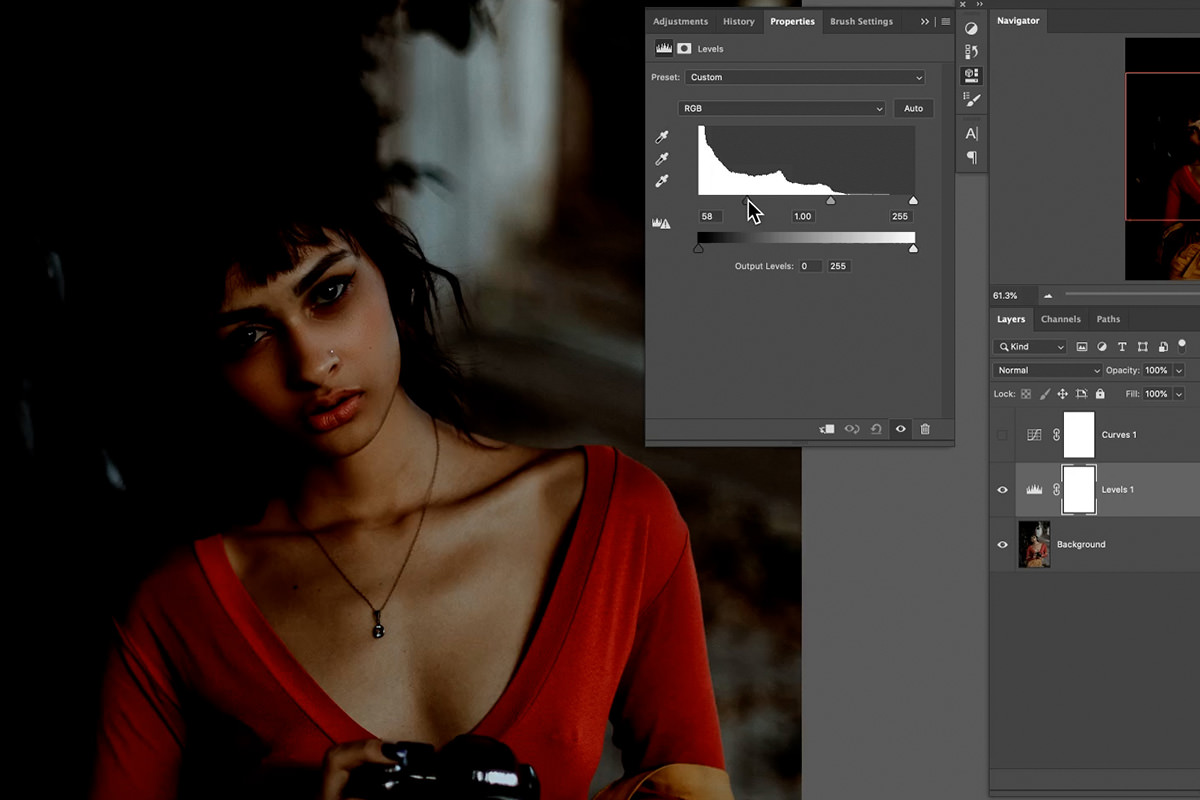
Levels gives you two rows of sliders, and the second row is the one people forget.
Input levels — expanding contrast
Three handles under the histogram. Drag the black handle right and everything to its left is crushed to black. Drag the white handle left and everything beyond it is blown to white. The middle handle brightens or darkens the midtones without moving either end.
Output levels — compressing contrast
The bottom bar does the opposite. Pull its black handle right and your darkest tone becomes gray instead of black; pull the white handle left and your brightest becomes off-white.
Darks get lighter and lights get darker, which is why the Output row matters: Input expands the tonal range, Output compresses it. You can use both at once — deepen the blacks with Input while capping how dark they’re allowed to go with Output.
Color Channels — Also in Both
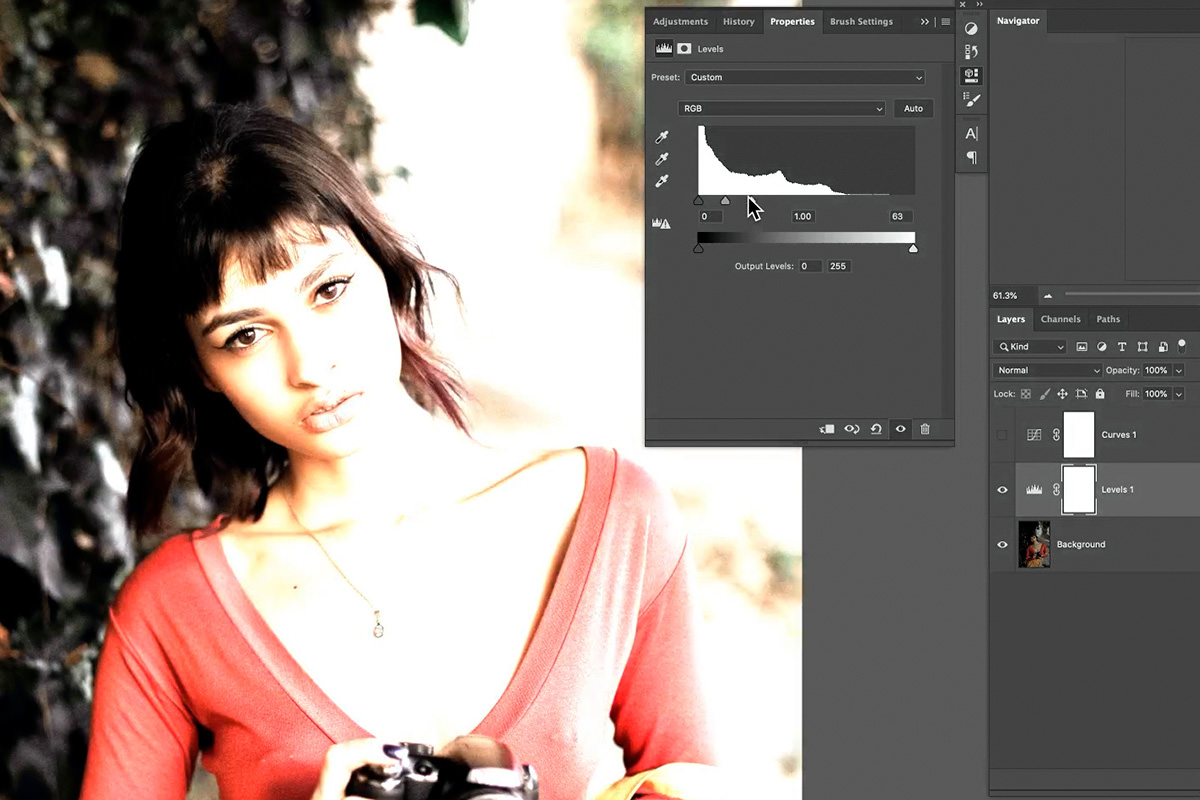
The dropdown reading RGB at the top of either panel switches to the individual Red, Green and Blue channels. On RGB you’re changing brightness; on a single channel you’re changing color.
Each channel works as a pair of opposites, which is the piece that makes this intuitive rather than trial-and-error:
- Red — add red, or take it away and get cyan.
- Green — add green, or take it away and get magenta.
- Blue — add blue, or take it away and get yellow.
And because the sliders are separated into shadows, midtones and highlights, you can put warmth into the highlights while cooling the shadows — the basis of most color grading. Used gently this is excellent for toning; used heavily it’s a fast way to make a mess.
Everything Maps Directly Between the Two
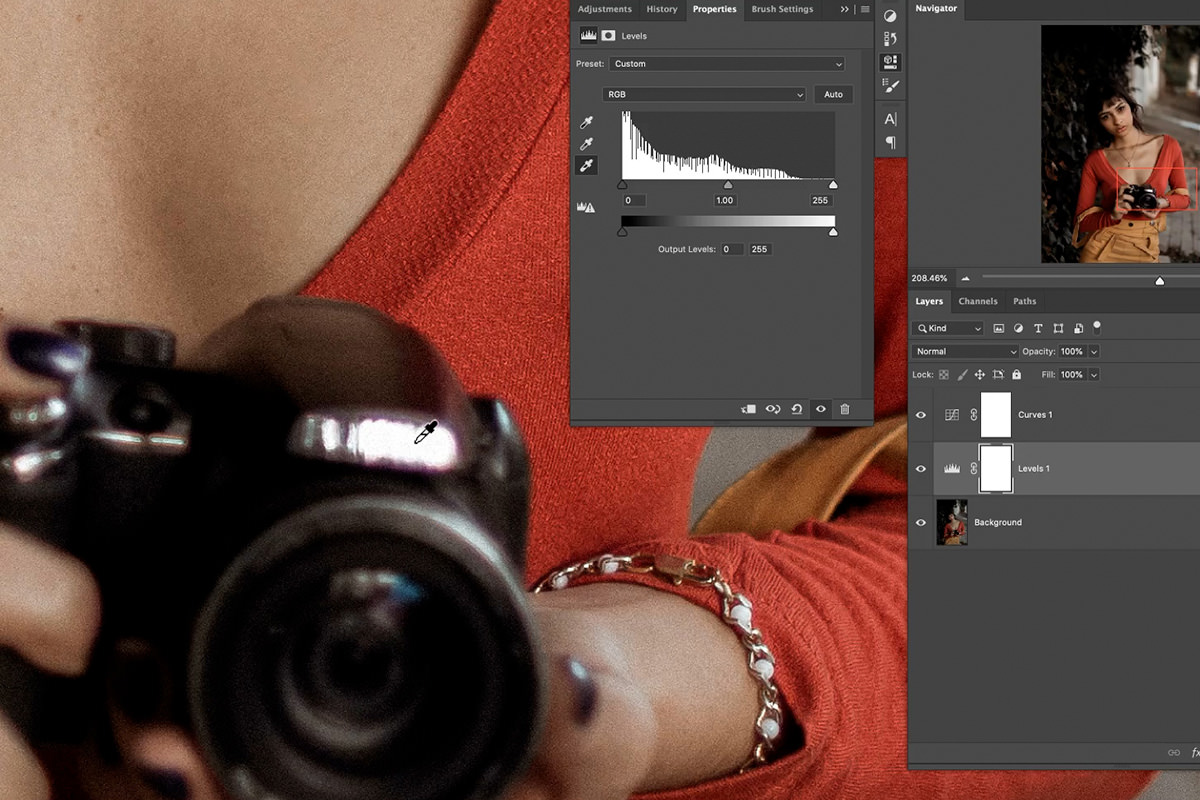
Every Levels control has an exact Curves equivalent, which is worth seeing laid out because it removes most of the mystery:
- Levels’ black input = dragging the bottom-left point of the curve to the right.
- Levels’ white input = dragging the top-right point to the left.
- Levels’ midtone slider = clicking the center of the line and dragging up or down.
- Levels’ output black = dragging the bottom-left point straight up.
- Levels’ output white = dragging the top-right point straight down.
- The eyedroppers and channel dropdown are the same in both.
So the two aren’t different tools with different philosophies. Curves is a superset.
The One Thing Only Curves Can Do
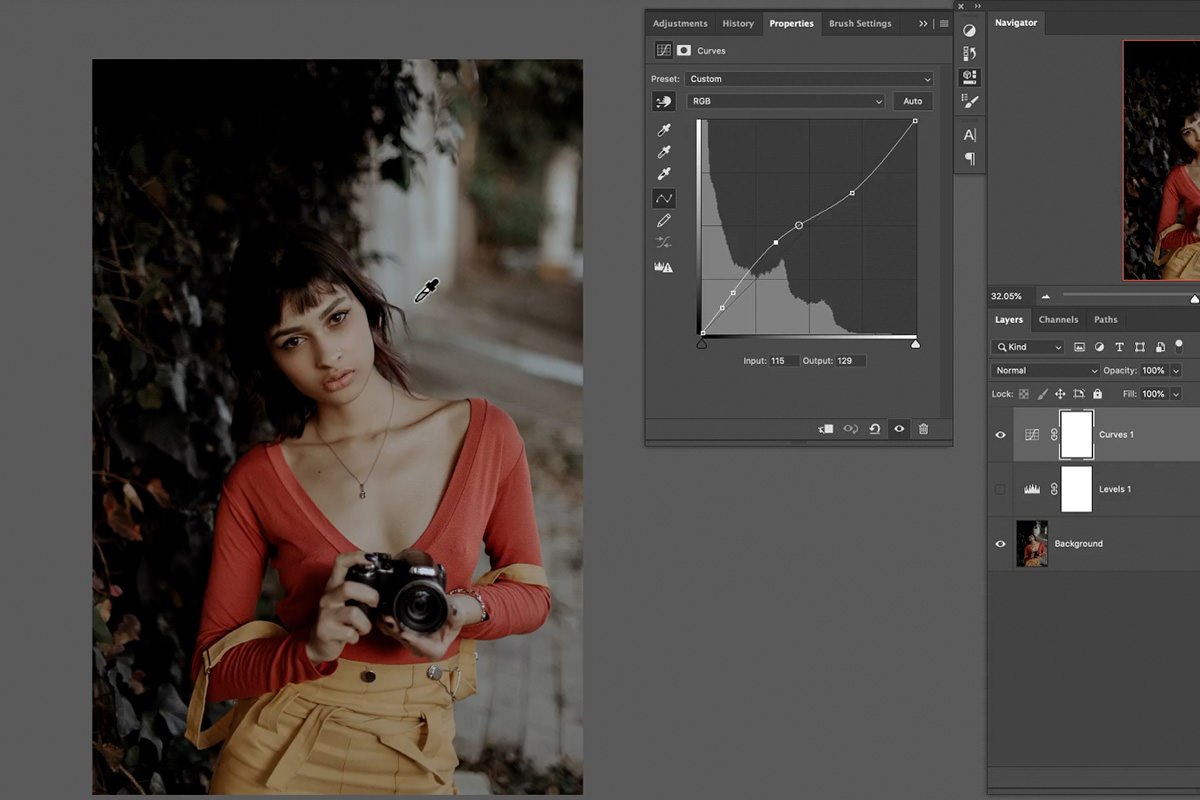
Here is the whole difference. Levels gives you one midtone control for the entire tonal range. Curves lets you add as many points as you like.
With Levels you cannot say “brighten the darker midtones but leave the lighter midtones alone” — there’s one handle covering everything between black and white. With Curves you place a point at each tonal region and move them independently, so you can lift the shadows, hold the midtones, and pull the upper midtones down, all in one adjustment.
That’s the reason to reach for Curves: targeted control over a specific slice of the tonal range. Everything else the two do identically.
The Hand Tool Makes Curves Easy
The graph is what puts people off Curves, and there’s a control that means you can largely ignore it.
The small hand icon with up and down arrows at the top left of the Curves panel is the targeted adjustment tool. Hover over your image and watch the graph: the point marker follows your cursor, moving right over bright areas and left over dark ones. It’s showing you where anything you’re looking at sits on the curve.
Then click and drag directly on the photograph — up to brighten that tonal range, down to darken it. Photoshop places and moves the control point for you.
-
Click the hand tool
Top left of the Curves properties panel.
-
Drag on the area you want to change
Dark background too heavy? Drag up on it. A highlight too hot? Drag down on it.
-
Repeat on other areas
Each drag adds a point, building a curve shaped around your actual image.
-
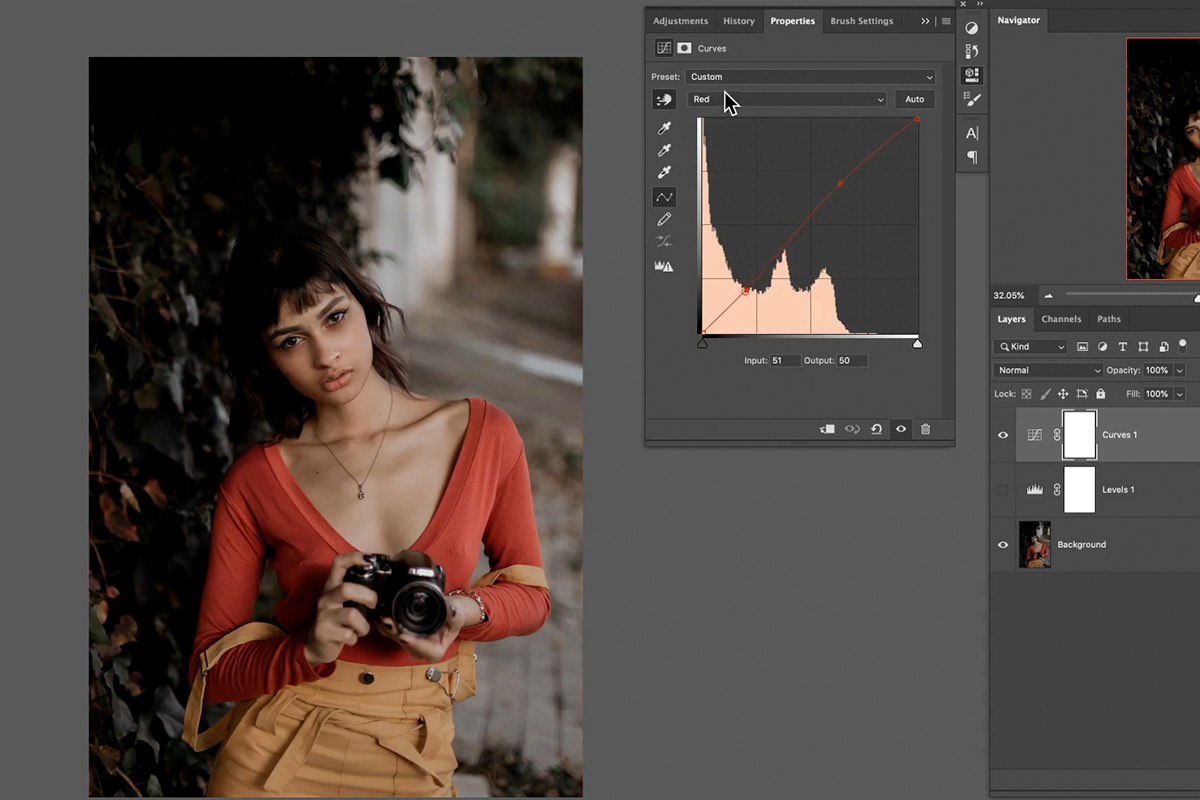
Switch channels for color
Choose Red, Green or Blue and drag on skin to remove a cast — in Red, drag up on the skin for a little more red and down in the shadows for less; in Green and Blue, drag down on the skin. Far more direct than guessing on the graph.
If Curves has never clicked for you, this one control is the reason to try again.
The Rest of the Curves Toolbar
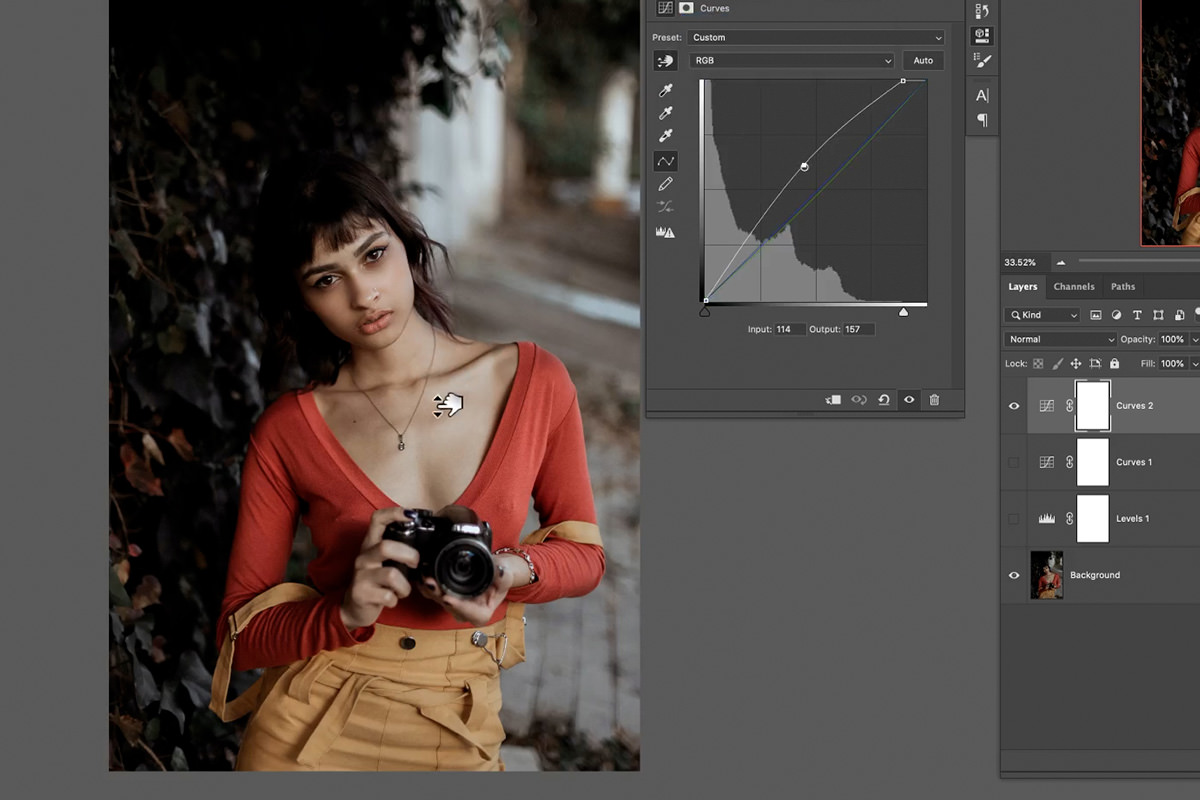
- Point tool — the default; click on the line to add points by hand.
- Pencil tool — draw the curve freehand. Useful for deliberately extreme, posterised effects.
- Smooth — the icon just below the pencil; it rounds off whatever you drew. Click it repeatedly to soften further.
- Auto — present in both Curves and Levels, and genuinely a decent starting point. Click it, then correct from there. After Auto, Aaron switches to the Green channel and uses the hand tool to pull green down in the skin, then pulls Red and Blue down just a tiny bit.
- Reset — the circular arrow at the bottom, at any time.
Where These Adjustments Go Wrong
Using the gray eyedropper on something that isn’t neutral
It assumes whatever you clicked should be gray and shifts everything to make it so. On a colored object that ruins the image.
Confusing Input with Output
Input expands contrast, Output compresses it. Reaching for the wrong row is why an adjustment sometimes does the opposite of what you expected.
Heavy channel adjustments for correction
Per-channel curves are better suited to toning than to correcting. For a color cast, start with the gray eyedropper.
Adding too many curve points
Every point is somewhere the curve can kink. Three or four well-placed points beat ten.
Ignoring the hand tool
Most of the difficulty people have with Curves disappears the moment they stop looking at the graph.
Reaching for Curves out of habit
If you only need one midtone adjustment and a white point, Levels is faster and there is no prize for using the complicated one.
So Which Should You Use?
Use Levels when the correction is straightforward — set a black point, set a white point, brighten the midtones. It’s quicker and the layout is easier to read.
Use Curves when you need to treat different parts of the tonal range differently, or when you want the hand tool’s directness on the image itself.
Honestly, most photographs are fine with either. Pick whichever panel makes sense to you and learn it properly — that matters far more than the choice.
Learn the Hand Tool and the Rest Follows
If you take one thing from this: click the hand icon in the Curves panel and adjust your image by dragging on the image itself. It turns an intimidating graph into something you steer by looking at the photograph.
Open a flat image, drag on the shadows, drag on the highlights, then switch to the Red channel and drag on some skin. Five minutes of that will teach you more about Curves than any diagram.
Quick Reference: Menus and Settings
- Add both layersLayer > New Adjustment Layer > Levels, then Curves
- Full histogramWindow > Histogram, with color information
- EyedroppersBlack point, gray point on a neutral gray for white balance, white point; same in both
- Levels slidersInput: black, midtone, white under the histogram; Output Levels bar below
- Color channelsRGB menu > Red, Green or Blue: red or cyan, green or magenta, blue or yellow
- Curves hand toolHand with up and down arrow at the top of the panel; drag up or down on the photo
- Other Curves toolsPoint, Pencil, Smooth (below the Pencil), Auto, Reset
No AI, no generative credits.

Free Downloads
Follow Along on the Same Photo
Get the portrait Aaron corrects with Levels and Curves in the video, plus the 4-page PDF guide to both adjustment layers. Free with a PHLEARN account.
Curves vs Levels: Common Questions
What is the difference between Curves and Levels?
Curves does everything Levels does, plus one thing more. Levels has a single midpoint you can only slide; in Curves you can add as many points along the line as you need, so one area can go brighter while another goes darker.
What is the chart in the Levels and Curves panels?
It is your image’s histogram, the same data in both: darks on the left, lights on the right. Curves just stretches it vertically. Window > Histogram shows the full version with color information.
What do the three eyedroppers do?
Click something that should be pure black with the black point, something that should be white with the white point, and a neutral gray with the gray point to white balance. They work the same way in Levels and Curves.
Why did the gray eyedropper turn my photo cyan?
You clicked something red, so Photoshop compensated with cyan; clicking yellow makes the image blue. Click an area that is actually gray and it fixes the white balance instead.
What do Output Levels do?
The reverse of the input sliders. The left handle makes your darkest point lighter and the right handle makes your lightest point darker. Use both rows together, for example more blacks from the input but not as dark from the output.
How do I change color with Levels or Curves?
Click the RGB menu and pick Red, Green or Blue. Each channel adds its color or pulls it out toward the opposite: red and cyan, green and magenta, blue and yellow. Keep it subtle; Aaron uses the channels more for toning than correction.
What does the hand icon in Curves do?
Click the little hand with the up and down arrow at the top of the Curves panel, then click and drag on the photo: up makes that tonal range lighter, down makes it darker. Each drag adds a point to the curve for you.
What are the Pencil, Smooth and Auto buttons in Curves?
The Pencil paints your own curve line, and Smooth, the icon below it, smooths out what you drew. Auto is in both Curves and Levels and is a good place to start before making changes. Reset starts over at any time.
Should I use Curves or Levels?
At the end of the day it does not matter; both are great tools. Levels keeps things simple and does the job most of the time, Curves gives a little more control. In Curves, click the hand icon.
Are the sample files free?
Yes, with a free PHLEARN account. You get 1 sample image and 1 PDF guide: the portrait from the video and a 4-page reference to both adjustment layers.
Master Photoshop, Lightroom and Photography
Join PHLEARN PRO for $12.99 a month or $99.99 a year. Cancel anytime, with a 100% money-back guarantee.





