Download Sample Images
description
Instantly add depth and atmosphere to any photo using the Depth-Aware Haze Neural Filter in Photoshop!
Share
Add Depth and Atmosphere
Neural Filters in Photoshop
Depth-Aware Haze is one of the latest features introduced to Photoshop’s growing suite of Neural Filters. Powered by machine learning with Adobe Sensei, Neural Filters help to take otherwise complicated workflows and simplify them to just a few clicks.
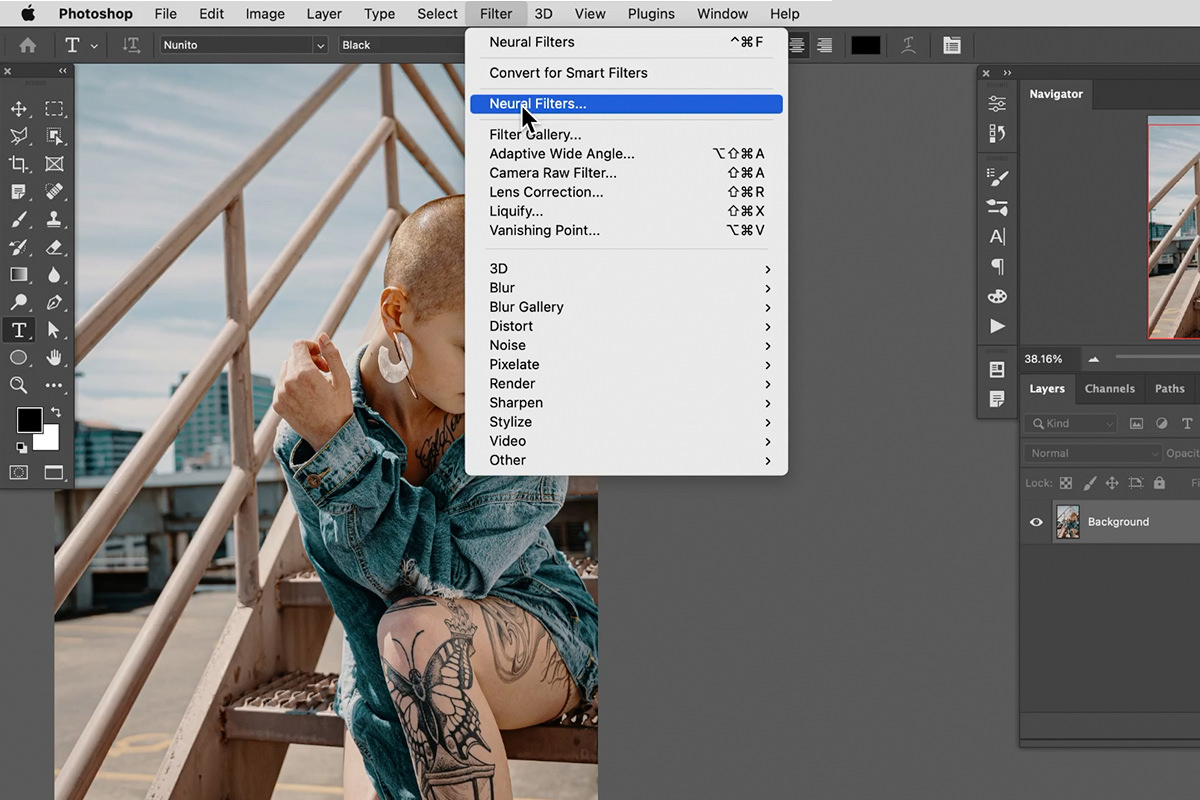
You can find the Neural Filters under the Filter Menu.
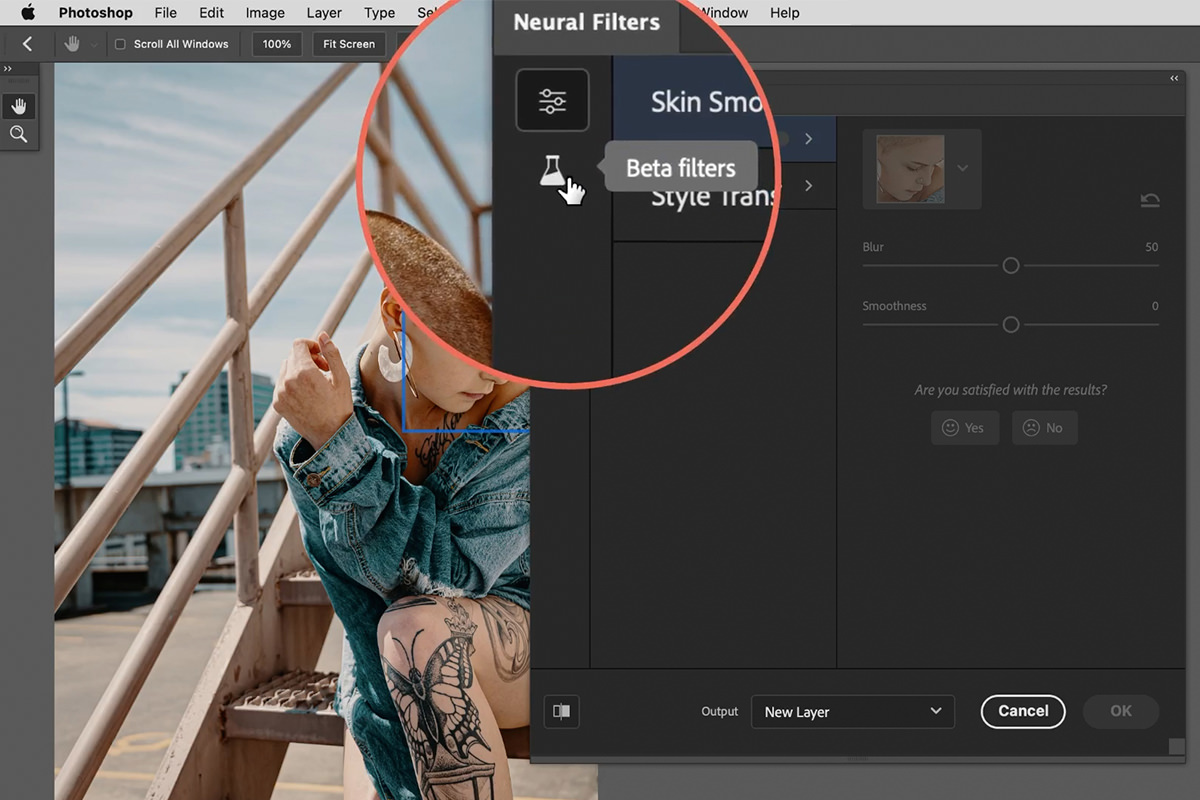
Since many of the Neural Filters are still works on progress, most are located under the Beta Filters tab. Each Filter can be downloaded locally to use at any time, but some require an active network connection as they utilize cloud-based services. Depth-Aware Haze is one such Filter, so make sure that you’re connected to the internet if you want to give it a try.
What is Depth-Aware Haze?
It may not be obvious what Depth-Aware Haze offers just by hearing the name of the tool. Haze is a feature found in many photo editors, but it often affects the image as a whole. The main benefit of haze is that it can help add depth and atmosphere to a photo that might otherwise have felt a little flat.
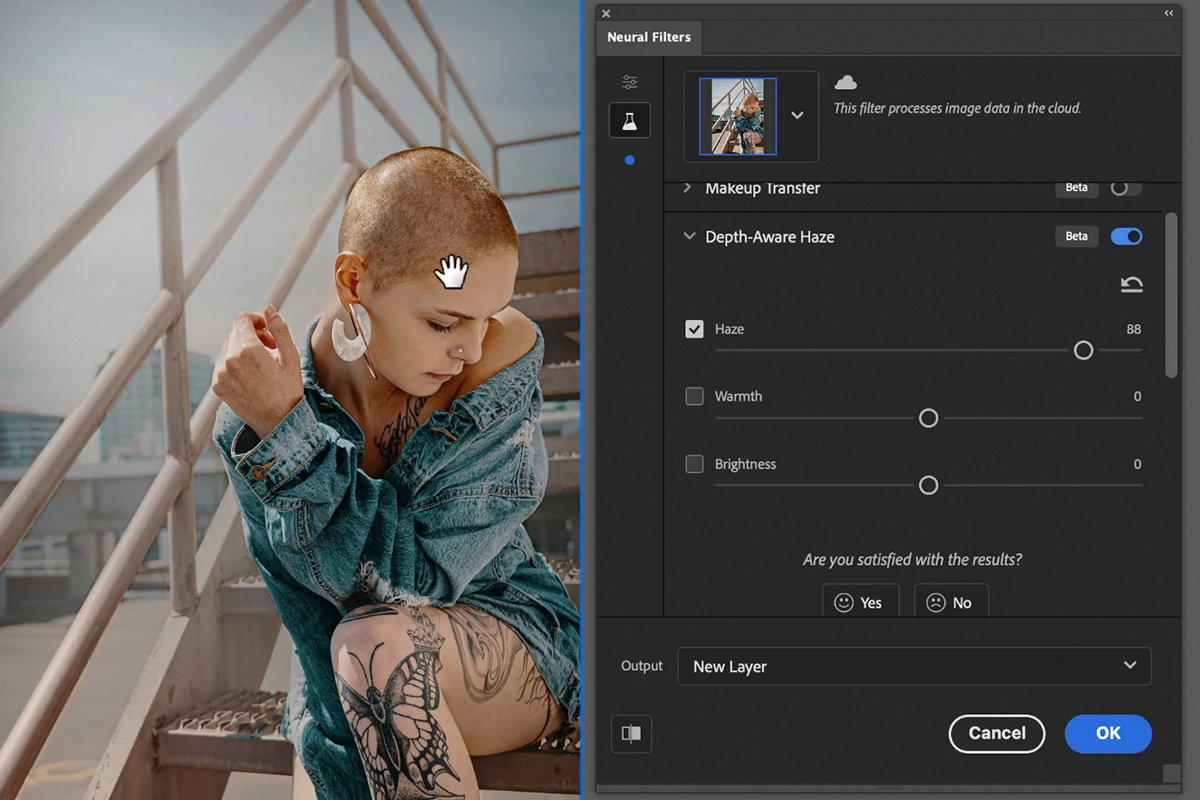
In order to add depth realistically, elements in the foreground should be relatively unaffected by the haze while elements in the background should be more obscured the further back they are. Depth-Aware Haze attempts to mimic this depth using Adobe’s A.I. tools.
Let’s see it in action!
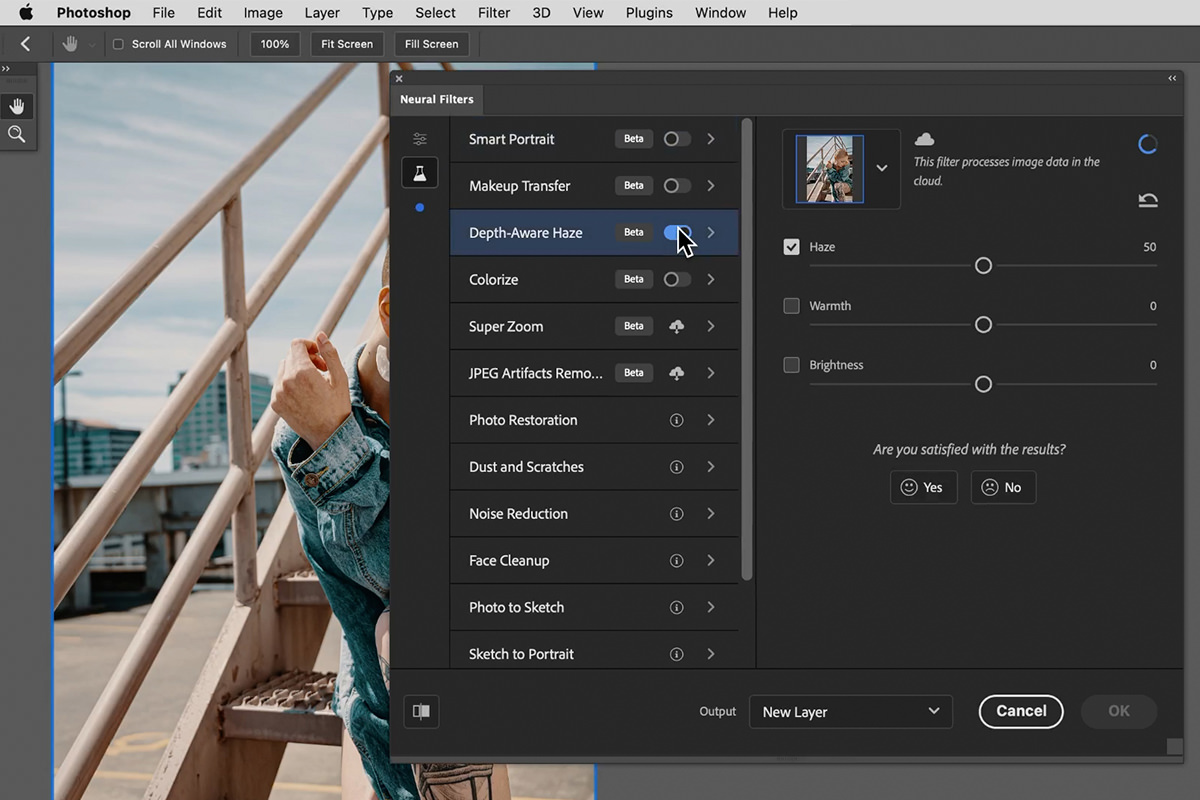
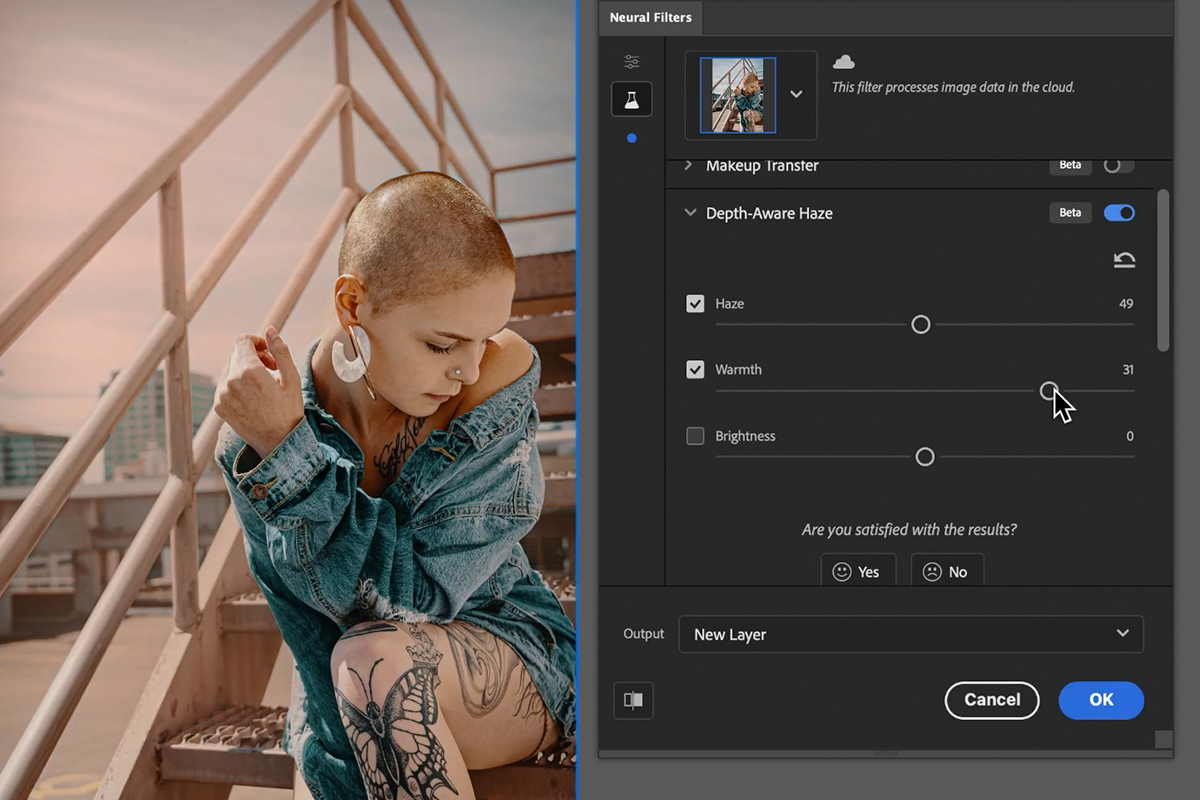
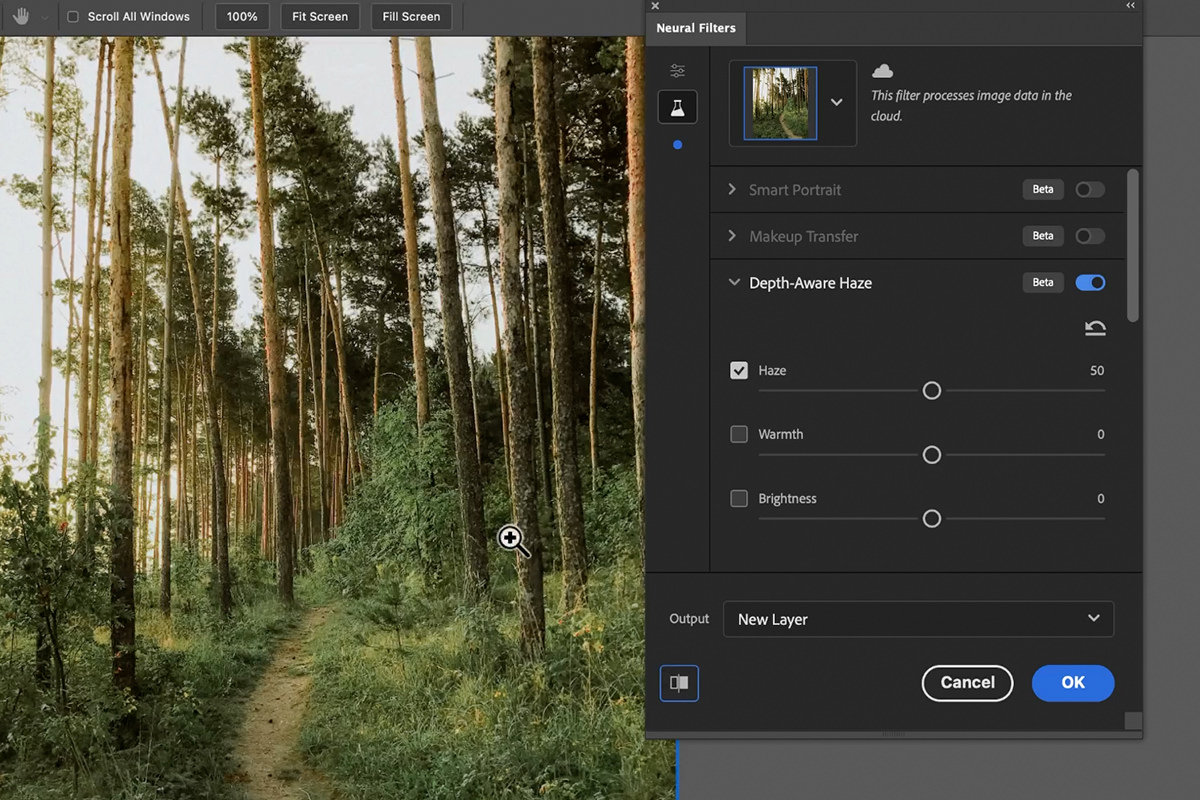
Toggle the Depth-Aware Haze option within the Neural Filters dialog.
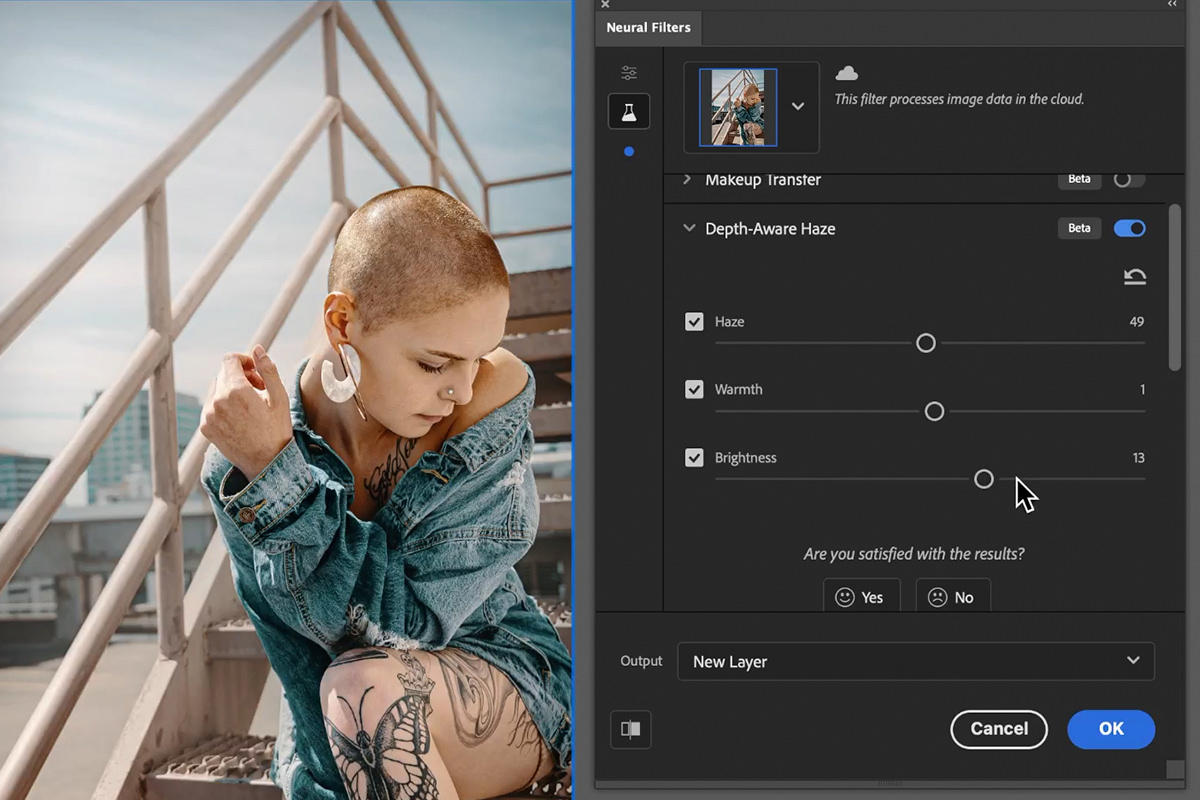
The tool offers a few simple adjustments to help refine the effect within an image: Haze, Warmth, and Brightness. Haze controls the density of the haze effect in the photo.
Warmth allows you to adjust how warm or cool the haze effect appears. Moving this slider to the right will warm the image. Moving it to the left will cool the image.
While this adjustment can be mildly helpful to help tie everything together, we recommend keeping this effect relatively subtle and then using other Adjustment Layers to change colors and color temperature once the haze has been applied.
Lastly, Brightness affects the overall brightness of the image. Brighten the effect by moving the slider to the right. Darken the effect by moving the slider to the left. Again, try to keep this adjustments subtle and rely on other Photoshop tools to get a more effective result.
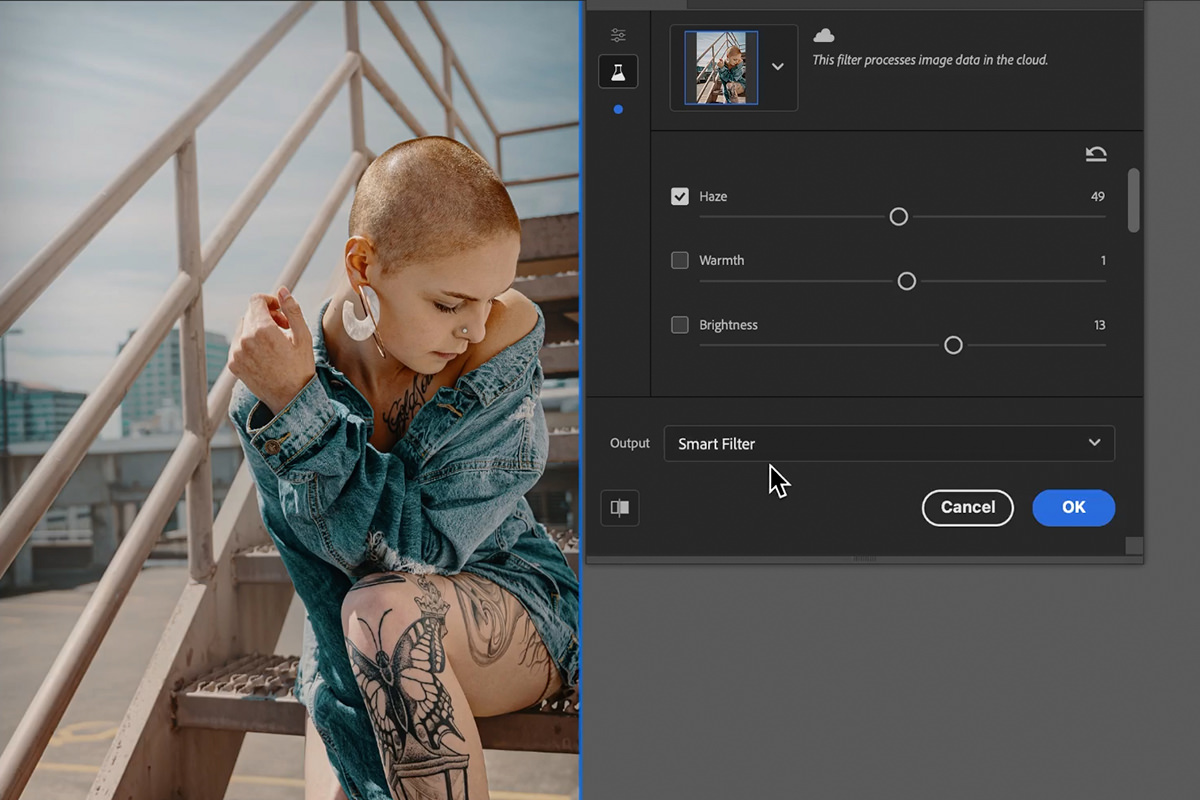
What makes Neural Filters especially handy is that they can be applied to an image in a variety of ways depending on your preferred workflow.
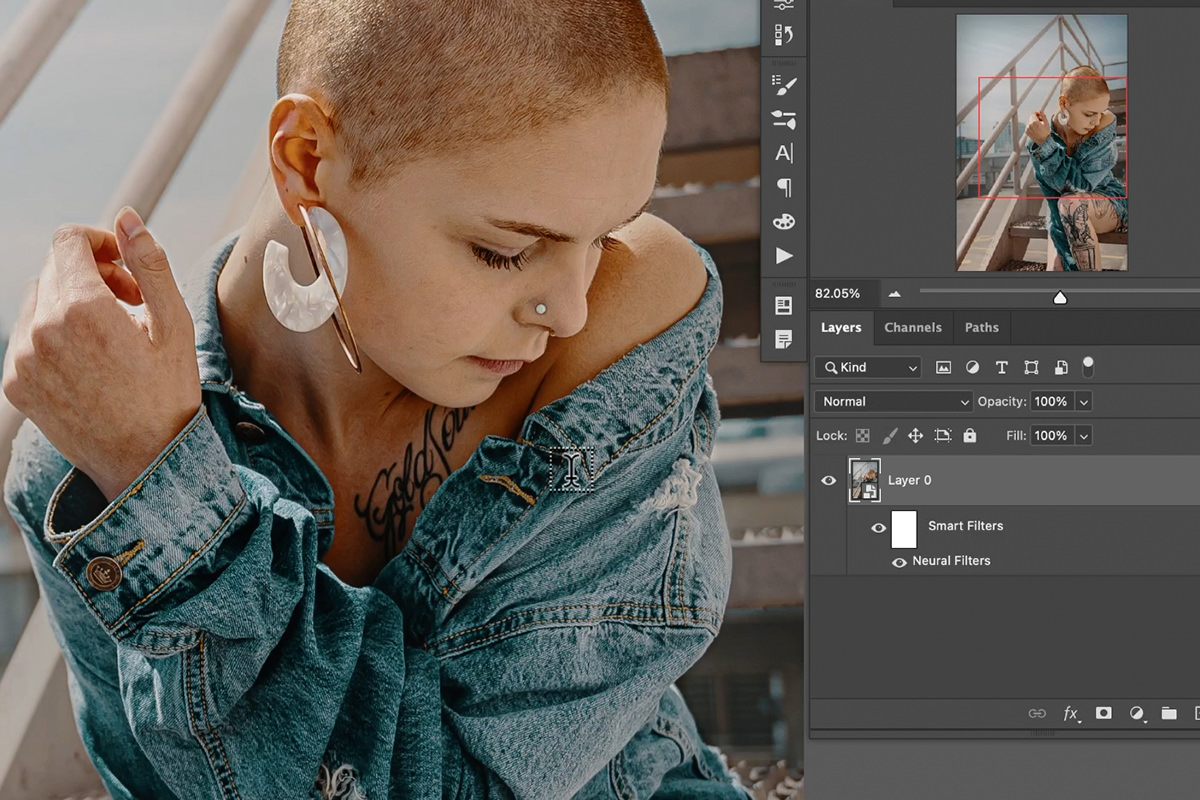
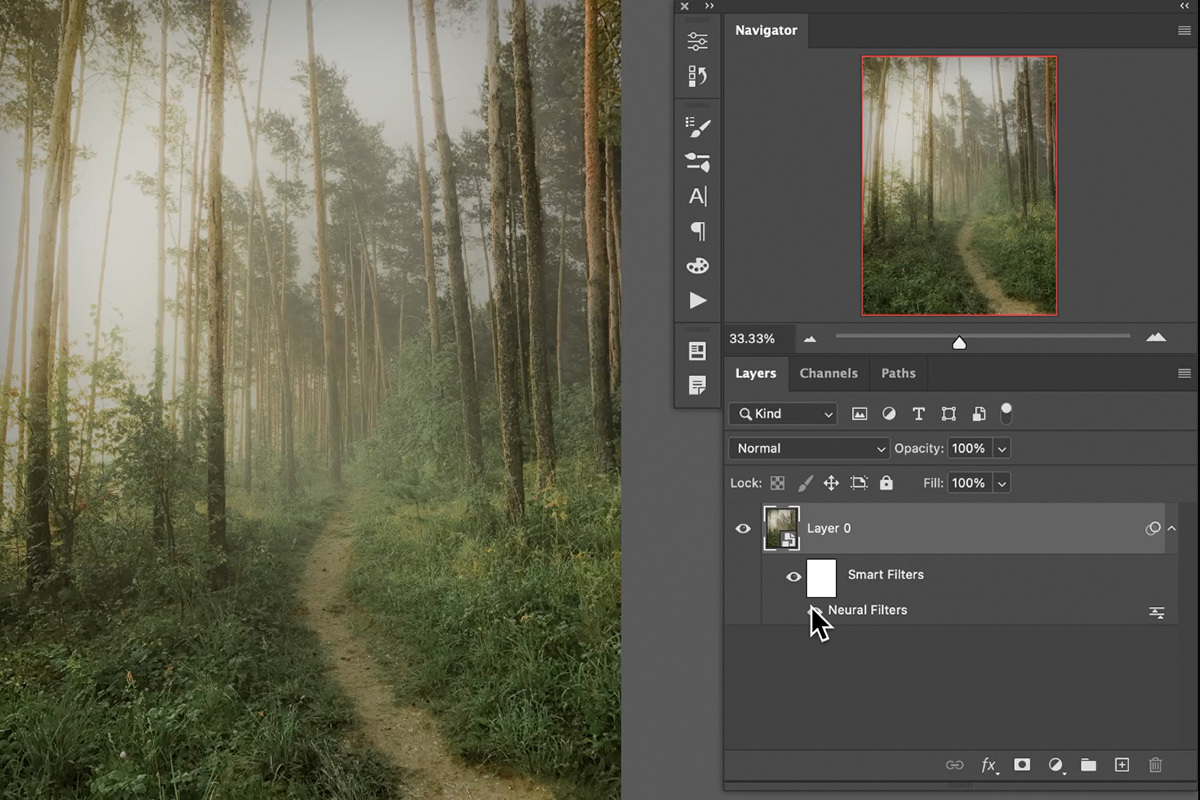
You can output the effect as a new Layer, output the effect directly to the original Layer, or, our preferred method, output the effect as a Smart Filter which will be applied to the original Layer and can be changed, adjusted, or removed at any time.
Once applied, you can continue editing the image as usual. And, as a Smart Filter, you can simply double-click on the Depth-Aware Haze effect at any time to make further adjustments.
Try it for Yourself!
Neural Filters are designed to be fast and easy to use. We recommend experimenting with a variety of images with each to see just what they can do and what their limitations might be.
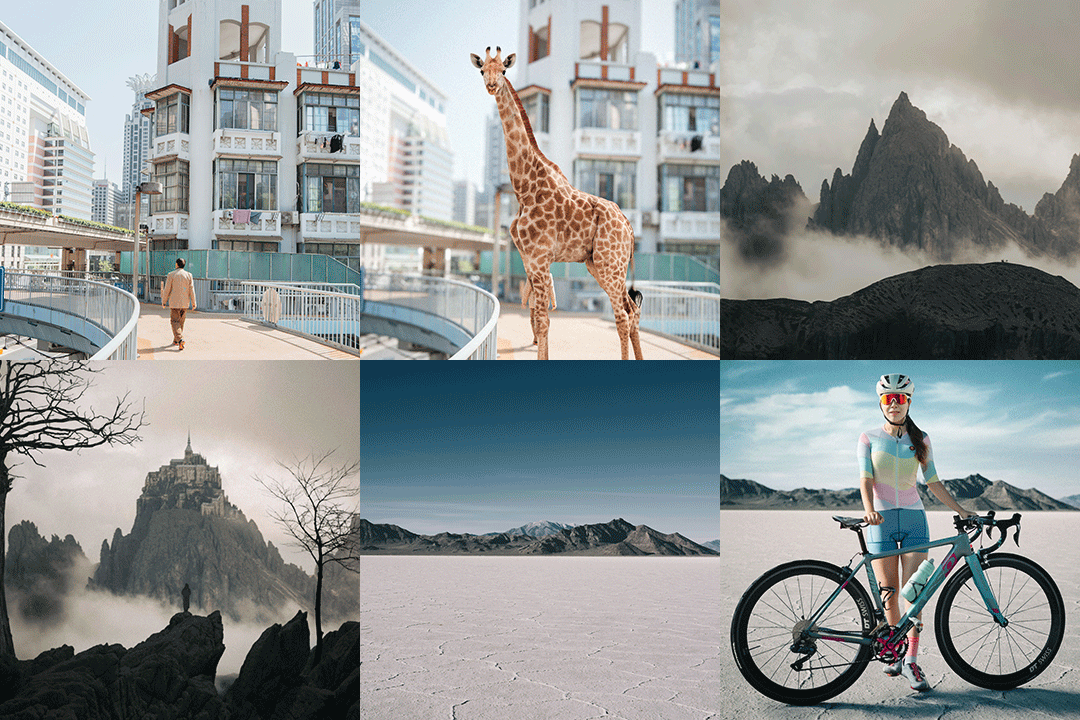
We tried Depth-Aware Haze on a handful of images and were pleased by the results.
Combining this and other Neural Filters with your existing workflows can open up creative options that you might not have had the time to explore before. Try them out and let us know what you think!


