Download Assets
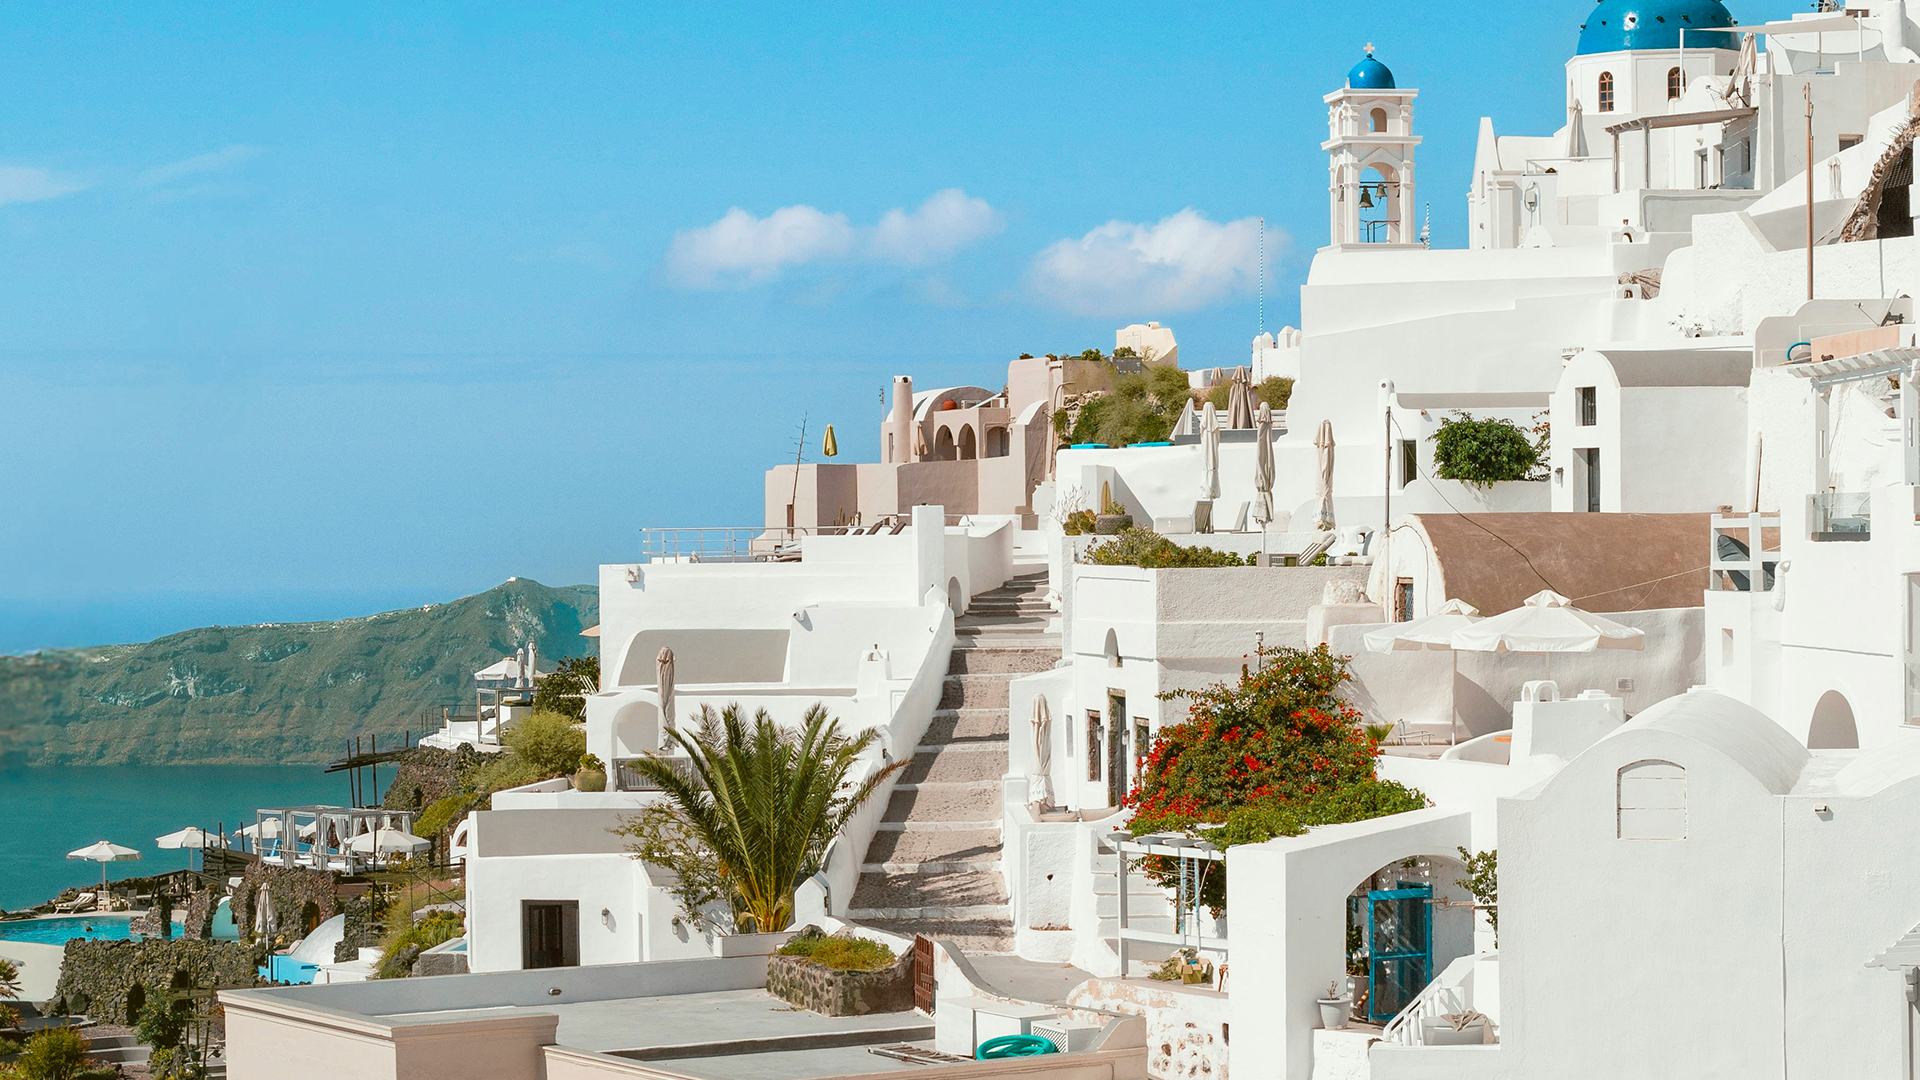
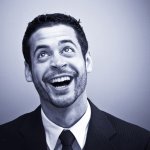
This tutorial includes 2 sample images, 1 sample PSD and 1 PDF guide. Downloads are free with a PHLEARN account.
- Download the sample images and PSDs from every free tutorial on PHLEARN
- New free tutorials published every week
- One free account — sign up once, then download anything
Free PDF Guide · 4 Pages
This Tutorial as a Step-by-Step PDF
Every step from the video in order: Masking > Landscape in Lightroom Classic with six separate masks, the sky, mountain, architecture, vegetation and water moves, Point Color on the trees, then the same panel in Camera Raw with Select People for clothes and face, the radial glow with the subject subtracted, and the vignette. Keep it next to your keyboard.
description
AI landscape masking finds the sky, the land and the water for you in Lightroom and Camera Raw! This tutorial will guide you through automatically identifying and enhancing elements like skies, mountains, water, and vegetation, transforming your images in no time.
Enjoying This Free Tutorial?
We publish a new free tutorial every week, each one with sample images and PSDs you can download and follow along with. Sign up and they land straight in your inbox, along with early word on sales, events and subscriber-only offers.
Image Source
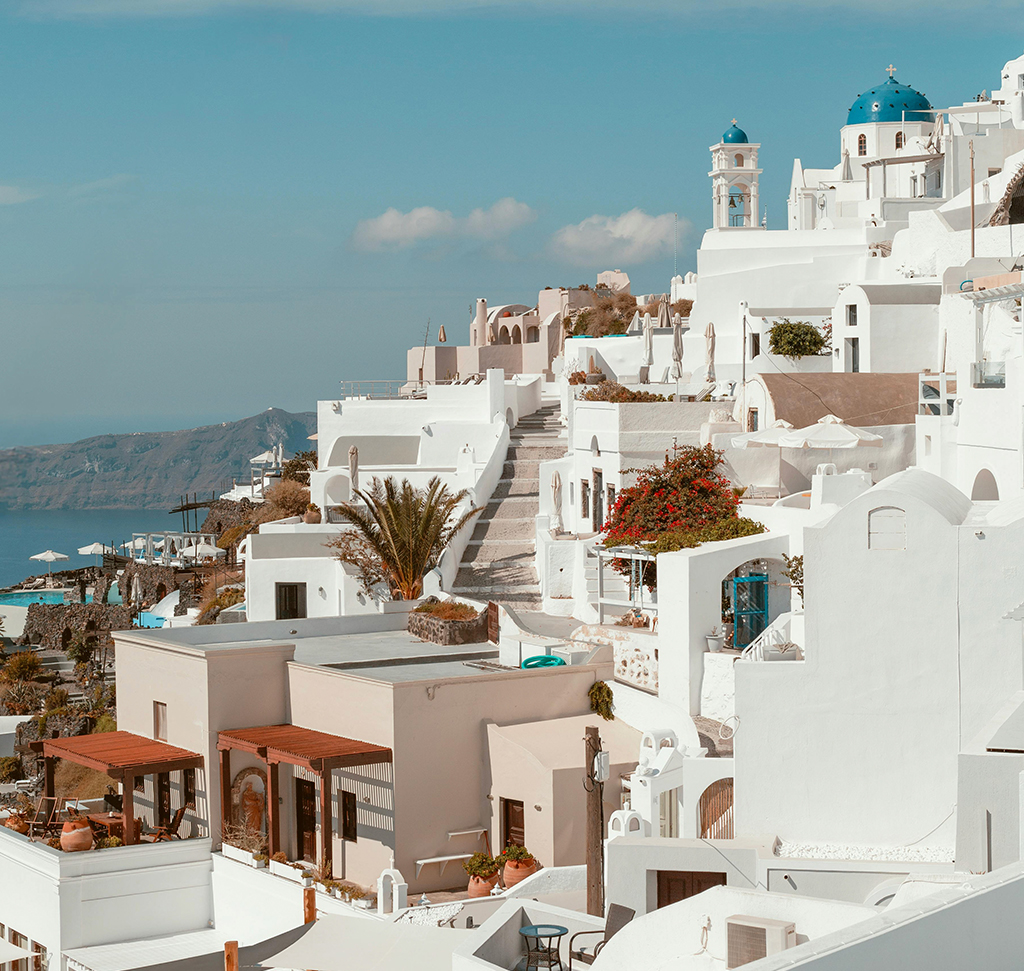
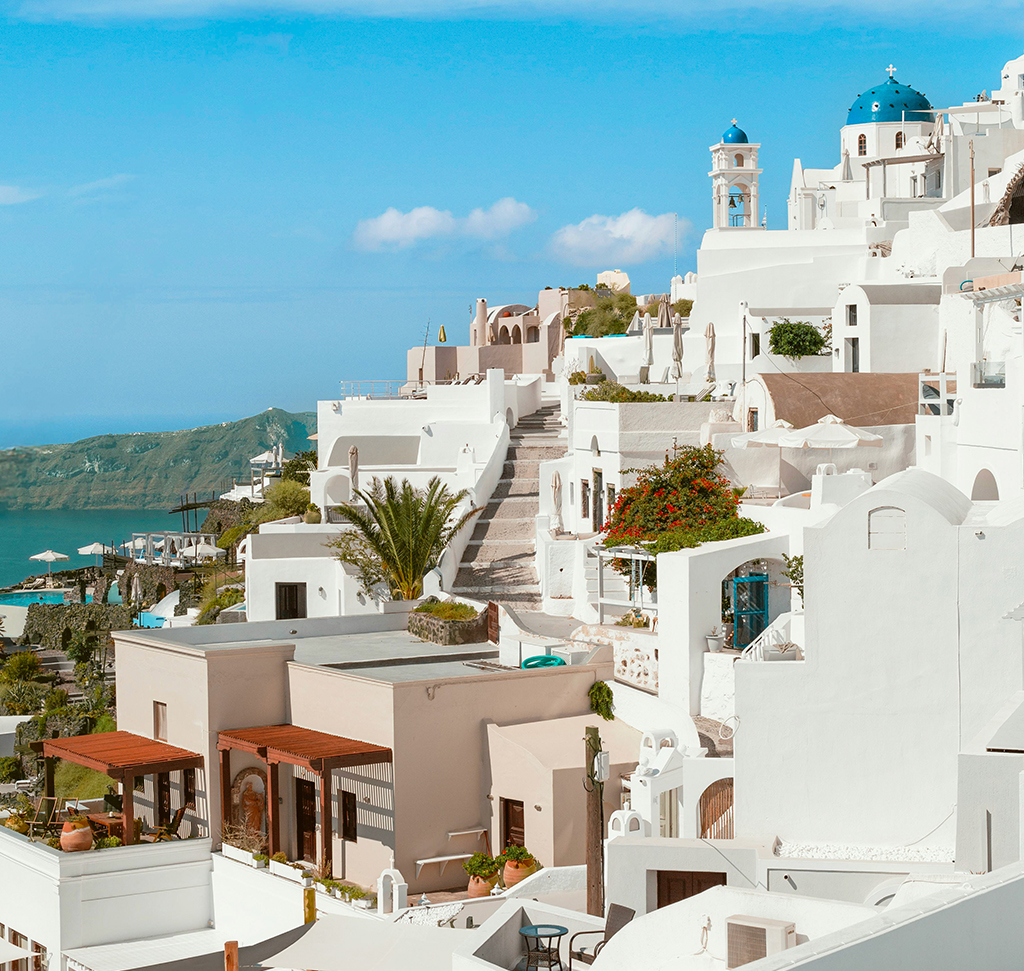
How to Use AI Landscape Masking in Lightroom and Camera Raw
Landscape masking identifies the parts of a scene automatically — sky, mountains, architecture, vegetation, water, natural ground — and builds a separate editable mask for each. You get every element of a landscape as its own adjustable region without drawing a single selection.
It is worth saying what this is not: it does not generate anything. It recognizes what you photographed and hands you control over it. That distinction matters, because it means the tool assists your editing rather than inventing content.
The feature is identical in Lightroom Classic and in Camera Raw inside Photoshop. This tutorial covers a pure landscape in Lightroom, then a landscape with a person in Photoshop.
In Lightroom Classic
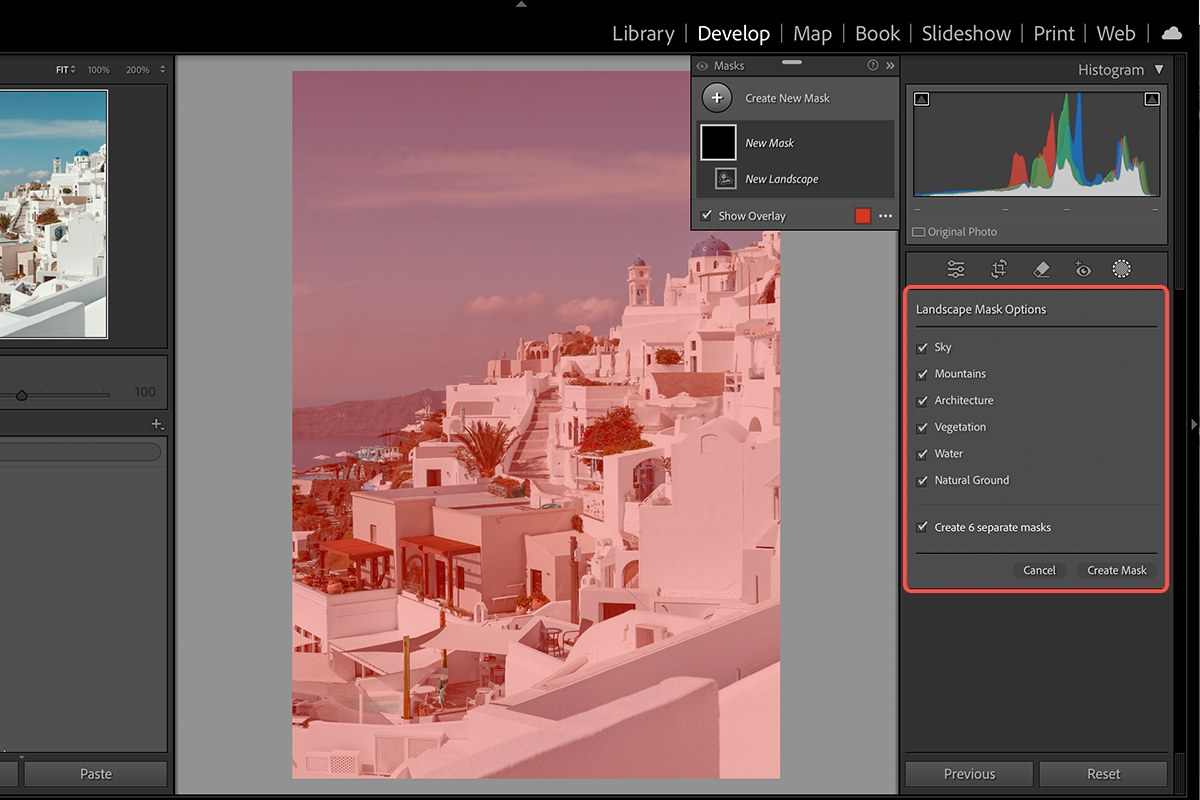
Open the image in the Develop module and open the Masking panel. Choose Landscape.
Lightroom analyzes the frame and returns only the elements it actually finds — so the list differs from image to image. A mountain scene might offer sky, mountains, architecture, vegetation, water and natural ground.
Create Separate Masks, Not One
Select the elements you want, and make sure to tick the option to create separate masks.
This is the important choice. Combined into one mask, you can only apply the same adjustment to everything. As separate masks, each region is independently editable — which is the entire point, since sky and ground almost never want the same treatment. Lightroom names each one for you.
Edit Each Region
Click a mask and adjust it with the full set of sliders. A reasonable pass on a landscape:
Sky — lift exposure slightly, raise saturation, cool the temperature toward blue.
Mountains — increase contrast to bring out texture, and warm or green them depending on what is growing there.
Architecture — more contrast, to make built elements the focal point.
Vegetation — use Point Color to sample the actual green and shift its hue and saturation, which is far more precise than a global saturation lift.
Water — saturation, usually little else.
Natural ground — exposure and contrast.
Check Your Work
Each mask has an eye icon — press and hold for a before and after of that region alone. There is also a master toggle at the top of the Masking panel for the whole set.
Use the individual toggles constantly. It is easy to over-edit one region without noticing, and comparing it in isolation is the only reliable check.
The colored overlay showing mask coverage can be switched off with the checkbox if it gets in the way; it disappears on its own once you start moving sliders.
Every mask stays live. Return to the sky an hour later and all its settings are still there to adjust.
In Photoshop, With a Person in the Frame
Same tools, reached through Camera Raw.
First, Layer > Smart Objects > Convert to Smart Object. Then Filter > Camera Raw Filter, which opens what is essentially Lightroom inside Photoshop.
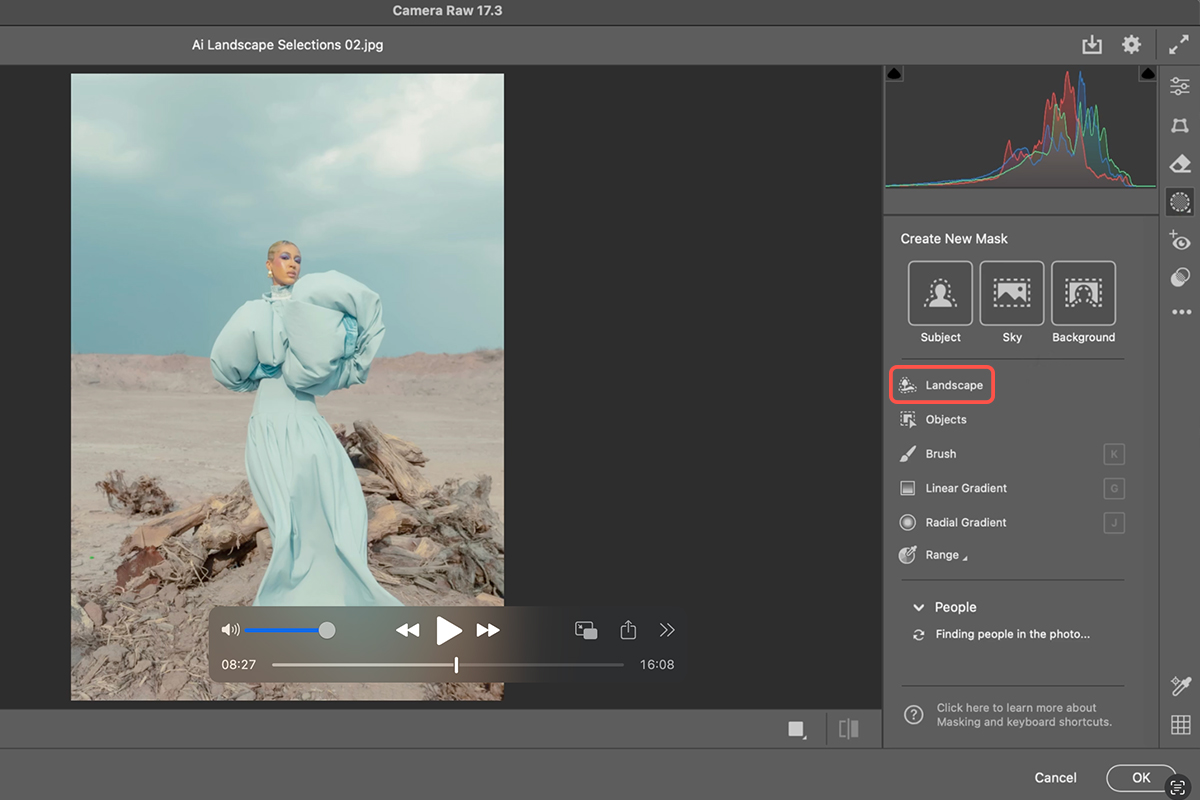
Open Masking and choose Landscape as before — sky, vegetation, natural ground, whatever this particular image contains — and again create separate masks.
A useful combination on ground and sky: cool the sky’s temperature while warming the ground and adding a little magenta. Pushing them in opposite directions creates separation that a global adjustment cannot.
Add People Masks Alongside
Landscape masking handles the scene. For the person, create a new mask and choose Select People, which breaks a subject into components — clothing, face, hair, and more.
Clothing: shifting its temperature toward the background’s is a quick way to tie subject and setting together.
Face and hair: usually a small exposure lift, nothing more.
Because these are separate masks from the landscape ones, you can treat the environment boldly while keeping the person restrained.
Two Masks Worth Adding by Hand
A Glow Behind the Subject
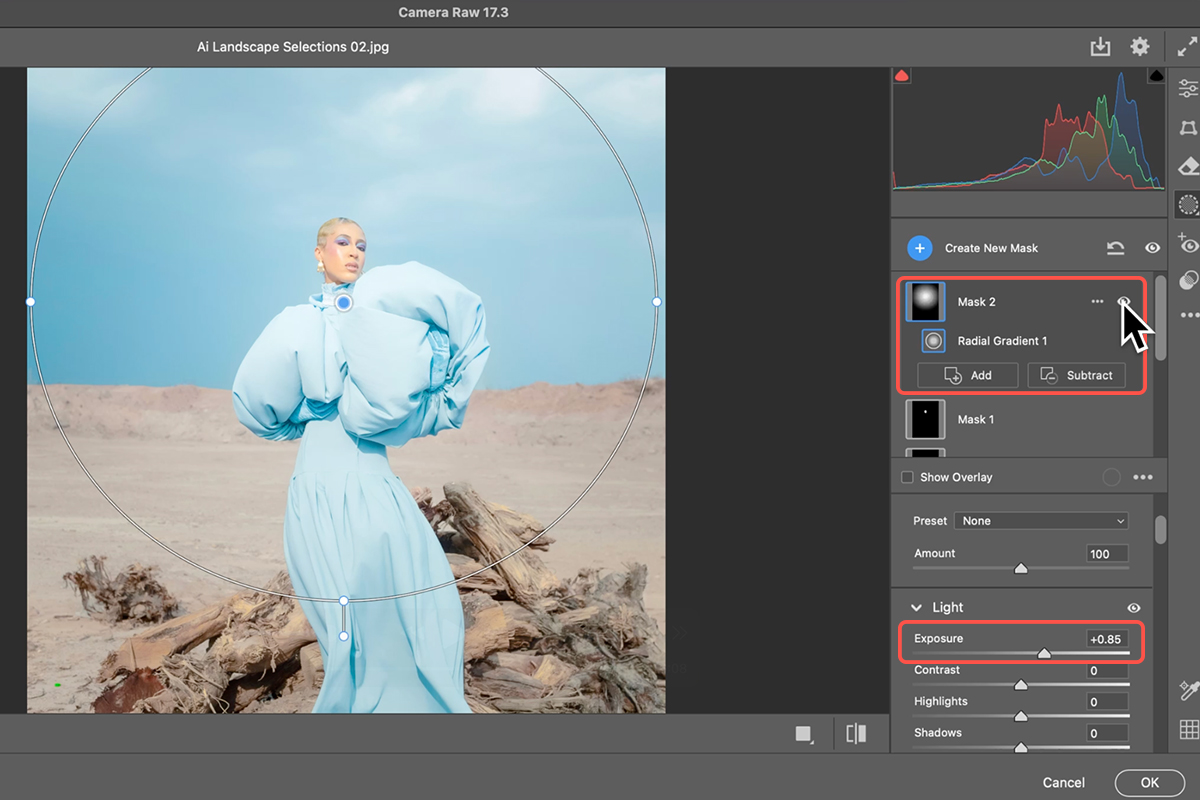
Create a new mask, choose Radial Gradient, and drag out from behind your subject. Raise the exposure inside it.
Then subtract Select Subject from that mask, so the brightening falls behind the person rather than on them. Adjust the feathering so it reads as light in the scene rather than a visible circle.
This is the technique worth taking away: automatic masks can be combined with manual ones, and subtracted from each other, to build something neither could do alone.
A Vignette
Another radial gradient, this time dragged from the center outward and then inverted, with the exposure pulled down. Darkening the edges draws the eye inward.
Built this way rather than with the global vignette slider, it can be positioned and shaped exactly where you want it.
Everything Stays Editable
Click OK and Camera Raw applies as a Smart Filter. Double-click Camera Raw Filter in the Layers panel and it reopens with every mask intact — each region still separately adjustable, days later.
That is why the Smart Object step at the start matters. Without it, all of this masking work would be flattened into the pixels and gone.
Summary
Open Masking, choose Landscape, tick separate masks, and edit each region on its own. Add Select People masks for a subject. Combine with radial gradients — subtracting Select Subject where you want light behind rather than on someone. Convert to a Smart Object first in Photoshop so every mask survives.
What makes this genuinely useful is that it is recognition rather than generation. Nothing is invented; you are simply given precise control over what you actually photographed.
Quick Reference: Keys, Menus and Settings
- Lightroom ClassicDevelop > Masking > Landscape; tick every part, tick Create separate masks, Create Masks
- SkyExposure up, Saturation up, Temperature toward blue
- Mountains and groundHue toward green and yellow, Contrast up, Exposure up
- VegetationPoint Color: pick the leaf color, shift Hue toward green, Saturation up
- CompareHold the eye on a mask, or the eye at the top of the Masks panel for all of them
- PhotoshopLayer > Smart Objects > Convert to Smart Object, Filter > Camera Raw Filter, Masking > Landscape
- The personCreate New Mask > Select People > Clothes (Temperature cooler, Contrast up); again for Face and Hair (Exposure up)
- Glow and vignetteRadial Gradient, Exposure up, Subtract > Select Subject, raise Feather; a second Radial Gradient inverted with Exposure down
- Change it laterDouble-click Camera Raw Filter under Smart Filters; all masks stay
The masks use AI to find the areas but make no pixels, so no generative credits.

Free Downloads
Follow Along on the Same Photos
Get the Greek hillside and the portrait from the video, the PSD with the Camera Raw masks, and the PDF guide. Free with a PHLEARN account.
AI Landscape Masking: Common Questions
What does the Landscape mask do?
It finds the parts of a scene (sky, mountains, architecture, vegetation, water, natural ground) and offers a mask for each. The list changes per photo. Tick what you want and Lightroom builds and names the masks.
Why create separate masks?
So each area gets its own sliders: a bluer sky, warmer ground, greener trees, more contrast on the buildings. Tick the Create separate masks box before you click Create.
How did you make the trees greener?
Point Color inside the Vegetation mask. Pick the leaf color, shift its hue toward green and raise the saturation. Only that color in that mask changes.
Is this in Photoshop too?
Yes, through the Camera Raw Filter, which has the same Masking panel. Convert the layer to a Smart Object first so the filter stays editable.
What about photos with people in them?
Combine Landscape with Select People. The video masks the sky, ground and vegetation, then adds masks for the subject’s clothes and for face and hair to match the colors and lift the exposure.
How did you light the background behind her?
A radial gradient with more exposure, then Subtract > Select Subject so it only brightens behind her. Feather it until it looks like light, not a circle. A second inverted radial gradient with less exposure makes the vignette.
Can I change a mask later?
Yes. In Lightroom the masks stay in the panel. In Photoshop, double-click Camera Raw Filter under the layer and every mask is still there.
Does it use generative credits?
No. The AI only identifies areas; nothing is generated. Aaron calls it the good kind of AI.
Are the sample files free?
Yes, with a free PHLEARN account. You get both sample images, the PSD and the PDF guide.
Master Photoshop, Lightroom and Photography
Join PHLEARN PRO for $12.99 a month or $99.99 a year. Cancel anytime, with a 100% money-back guarantee.





