Download Sample Images
description
In the last episode of our Intro to Lightroom series, we covered the basics of photo editing. This week we’re taking it a step further using the advanced tools and techniques in Lightroom Classic to take our images to the next level.
Basic adjustments are all about making small changes to an image as a whole. Want a photo to be a little bit brighter overall? Move the Exposure slider to the right, and watch the entire photo change. But what if we only want the subject to be brighter? That’s where the advanced editing tools in Lightroom Classic can help. Follow along and learn how to add precision into your editing workflow with powerful tools like the Graduated and Radial Filters, the Adjustment Brush, Spot Healing, and Range Masking!
If you’re ready to take a deep-dive into everything Lightroom Classic has to offer, try our PRO tutorial The Beginner’s Guide to Lightroom Classic!
Free Lightroom Preset Sample 10 Pack
Lightroom Presets are a great way to quickly add style and charm to your photos. Try our custom-made PHLEARN Lightroom Presets with our free sample 10 pack of some our favorite bright and beautiful looks!
Watch Next
This episode is part of our FREE Intro to Lightroom Classic series.
Share
LEARN TO USE LIGHTROOM CLASSIC
Advanced Editing in Lightroom Classic
What is Advanced Editing?
We began the editing process in the last episode, covering some of the basic adjustments you can make in Lightroom. So what separates basic adjustments from the more advanced tools and features we’re covering today?
Precision.
As you get more familiar with Lightroom Classic, and with photo editing in general, you’ll find yourself wanting to make changes to specific areas of an image rather than the entire image as a whole. For example, if you’re working with an outdoor portrait, you might want to make certain edits to only the subject, and certain edits to only the background. This would allow you to get the most amount of detail out of the background, while still making sure the subject is the center of attention.
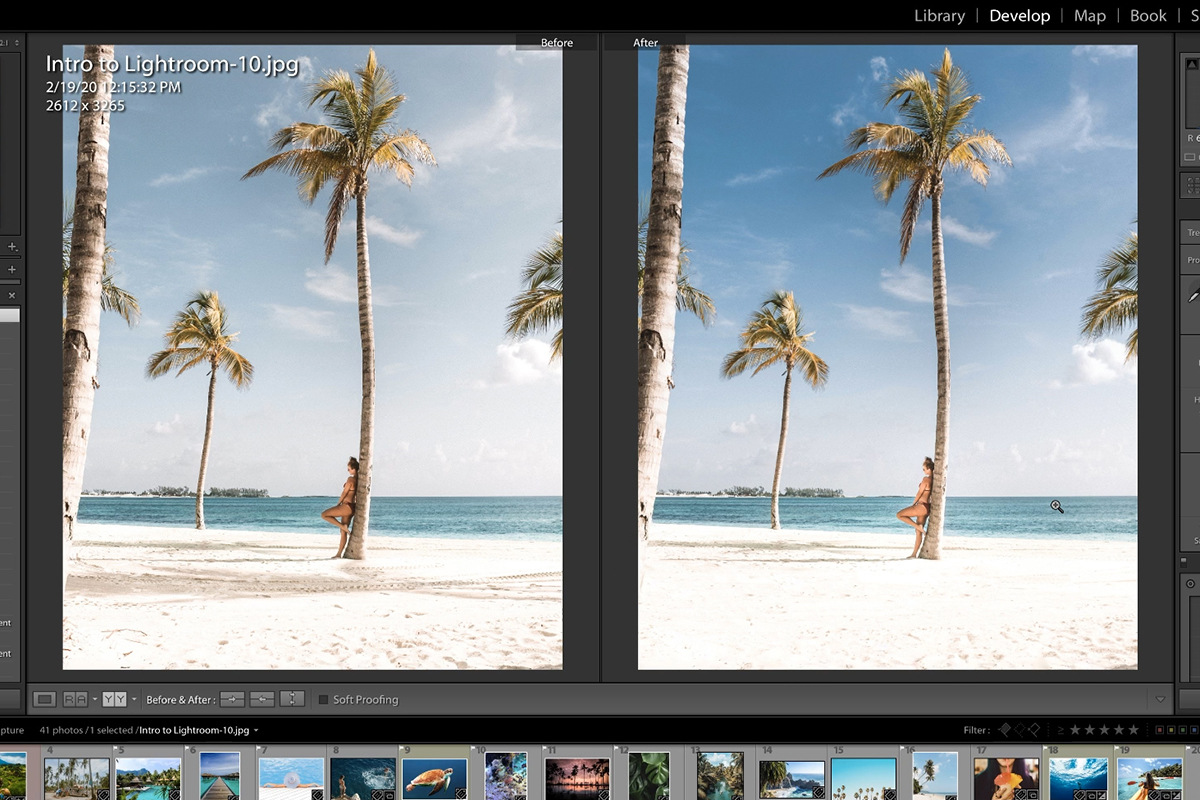
Here is the before and after of the adjustments we made to our example image. If you look closely, you can see that we made a lot of adjustments, each to a particular part of the photo. We added a dark-to-light gradient to the sky, without affecting the palm tree or the subject. We made the subject a bit brighter while adding some sharpness and contrast to draw more attention to them. And we removed some distracting shadows below the subject to help simplify the frame.
All of the tools we’re going to cover allow editors to carefully pick and choose parts of a photo to adjust. By the time we’re through, you’ll be able to apply edits to specific areas of an image (like the subject or the background), specific tonal ranges (like the highlights, midtones, or shadows), or even specific colors (like the blues in a sky or the reds and oranges in skin).
These tools will give you complete control over your edits and adjustments and will allow you to get the absolute most out of your photos.
Local Editing & Global Editing
Photo editors use the terms local editing and global editing to describe where and how they make adjustments to an image. Global edits are adjustments that change the entire image as a whole. Local edits are adjustments that affect only a portion of an image.
For example, if you open an image and move the exposure slider up a bit, that’s a global edit; as you move the slider up, every pixel in the photo will get a little bit brighter at the same rate. On the other hand, if you were to use the Graduated Filter to create a gradient from the top of the image to the bottom, and then move the exposure slider up, that would be a local edit. You’re brightening up some parts of the image more than others.
This episode is all about local edits, so let’s take a closer look at some of the more advanced tools in Lightroom and how they can help you target specific parts of an image.
Advanced Photo Editing Tools
The advanced tools we’ll be covering can be found in the right-hand sidebar of the Develop Module in between the Histogram and the Basic Adjustment Panel.
- Crop Tool
- Spot Healing
- Red-Eye Removal
- Graduated Filter
- Radial Filter
- Adjustment Brush
Cropping
This isn’t quite an advanced adjustment, but cropping is an important first step to any edit. Composition can make or break a photograph, and the Crop Tool allows you to quickly dial-in the perfect framing and aspect ratio. It also allows for some practical fixes, like straightening the horizon line in a landscape photo. We recommend cropping as early as possible in your editing process, as the composition of an image can inform a lot of the decisions you’ll be making around adjustments to light and color.
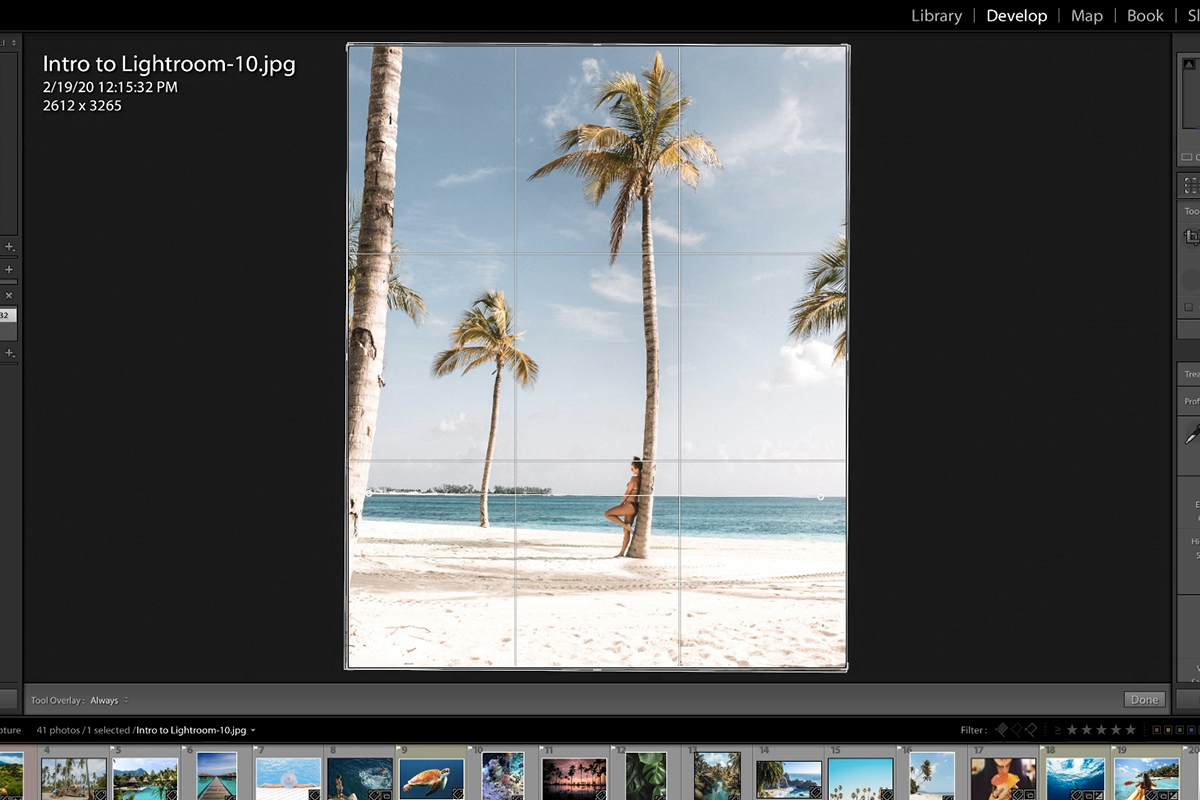
In our example, the horizon line was slightly crooked. Using the Crop Tool, we were able to straighten it while also adjusting our composition.
Reduce & Remove Distractions
Photoshop is normally our go-to for reducing and removing distractions, but Lightroom Classic is equipped with a Spot Healing Tool that is surprisingly effective.
With both Clone (make an exact copy of another area) and Heal (blend a target area with another sampled area) options, you have the tools you need to remove many common objects and distractions from an image. Whether it be blemishes in skin, distracting signs in a landscape, or friendly photobomb in the background of a portrait, try to identify any elements in an image that draw attention away from the main subject.
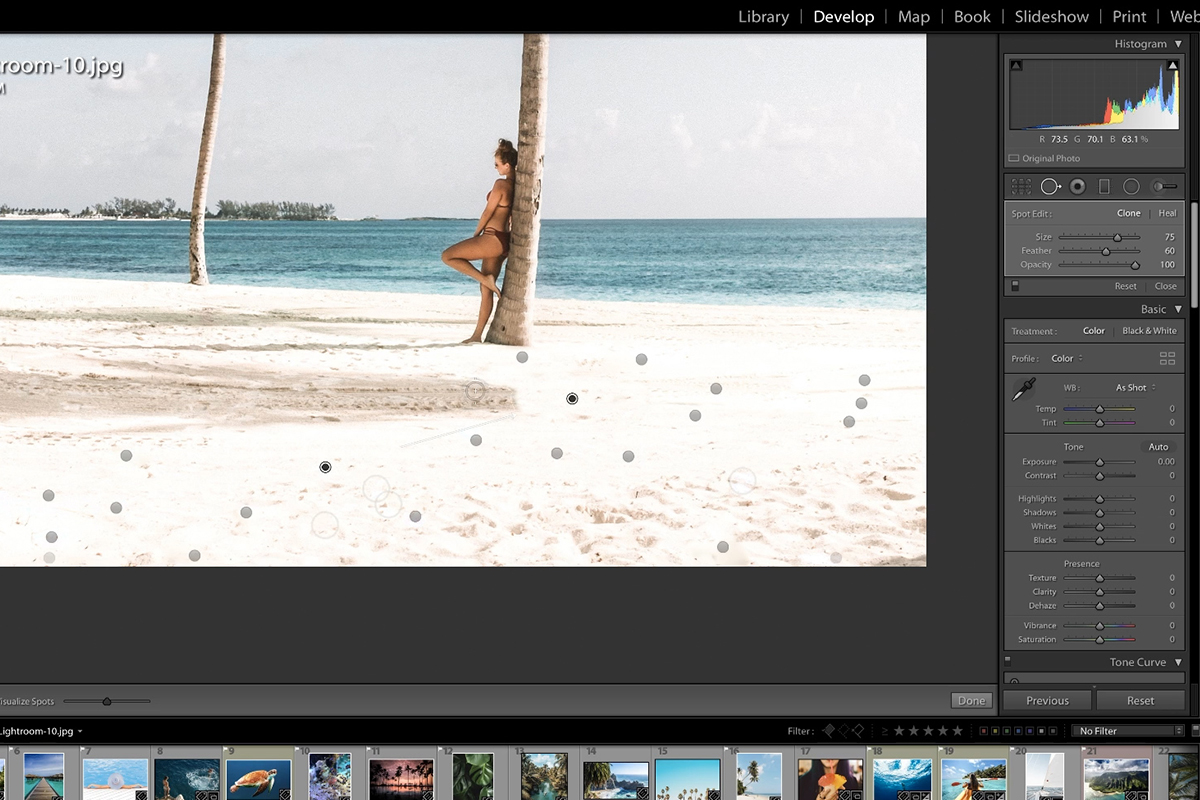
In our example image, we decided that the shadows below the subject were a bit too distracting. Now, normally this would be a job for the Healing Tools in Photoshop, but we wanted to see what Lightroom Classic could do! It took some time, but we were able to pretty seamlessly remove all of the shadows and replace those areas with patches of bright, textured sand.
Red-Eye
While not as common an issue as it once was, red-eye can still pop up in portraits from time to time. The Red-Eye Removal Tool in Lightroom makes quick and easy work of restoring eyes to their natural color and shine.
It works great when we need it, but it’s not a tool that we use very often.
Graduated & Radial Filters
The Graduated and Radial Filters are probably the most powerful tools of the bunch. Each tool allows you to apply adjustments as a gradient.
The Radial Filter creates a gradient in the shape of an ellipse. In the example above, we created an adjustment that lowers the exposure of the image using the Radial Filter. The darker exposure is most visible near the center of the filter and becomes less visible near the edges. This creates a spotlight-like effect for applying adjustments.
Now this particular edit is just for demonstrating how the Radial Filter works. Let’s move on to the Graduated Filter to apply an real adjustment to the sky of our photo.
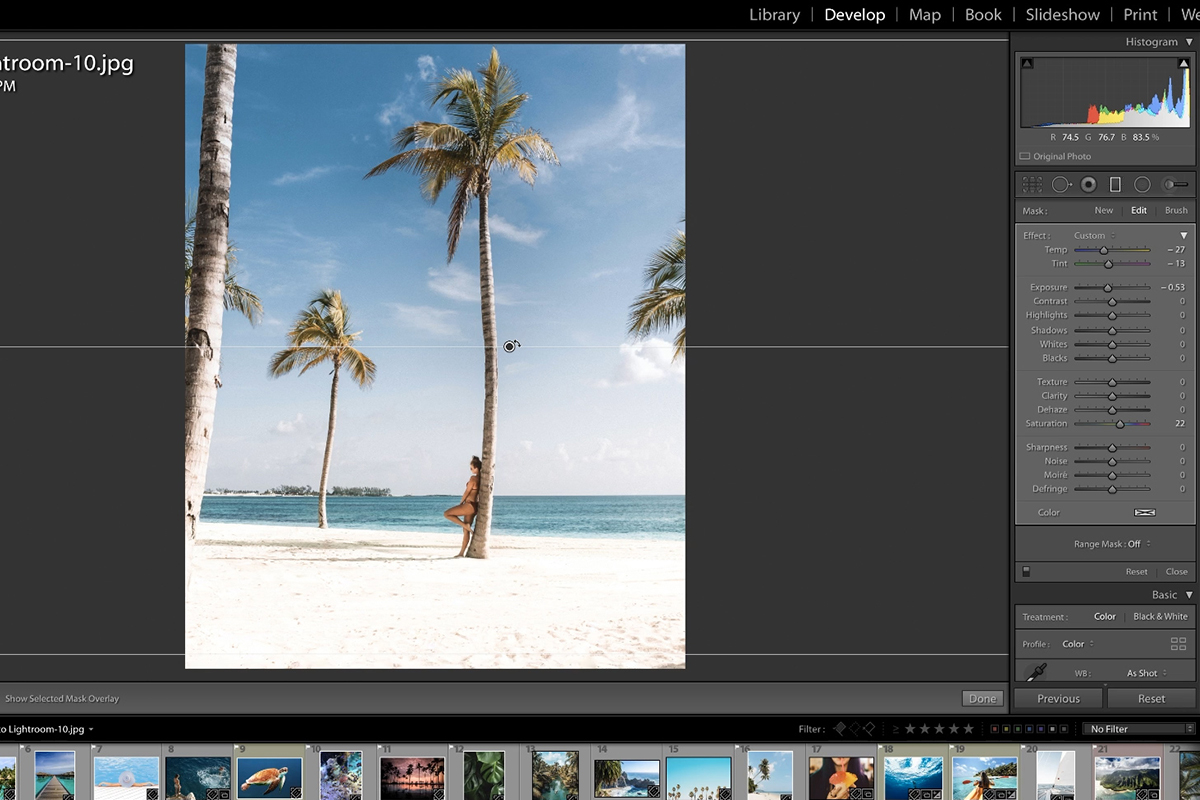
The Radial Filter works with circular and elliptical gradients. The Graduated Filter works in lines, rectangles, and squares. This filter is perfect when you want an adjustment that spans the entire width or height of an image and then tapers off as it approaches the opposite side.
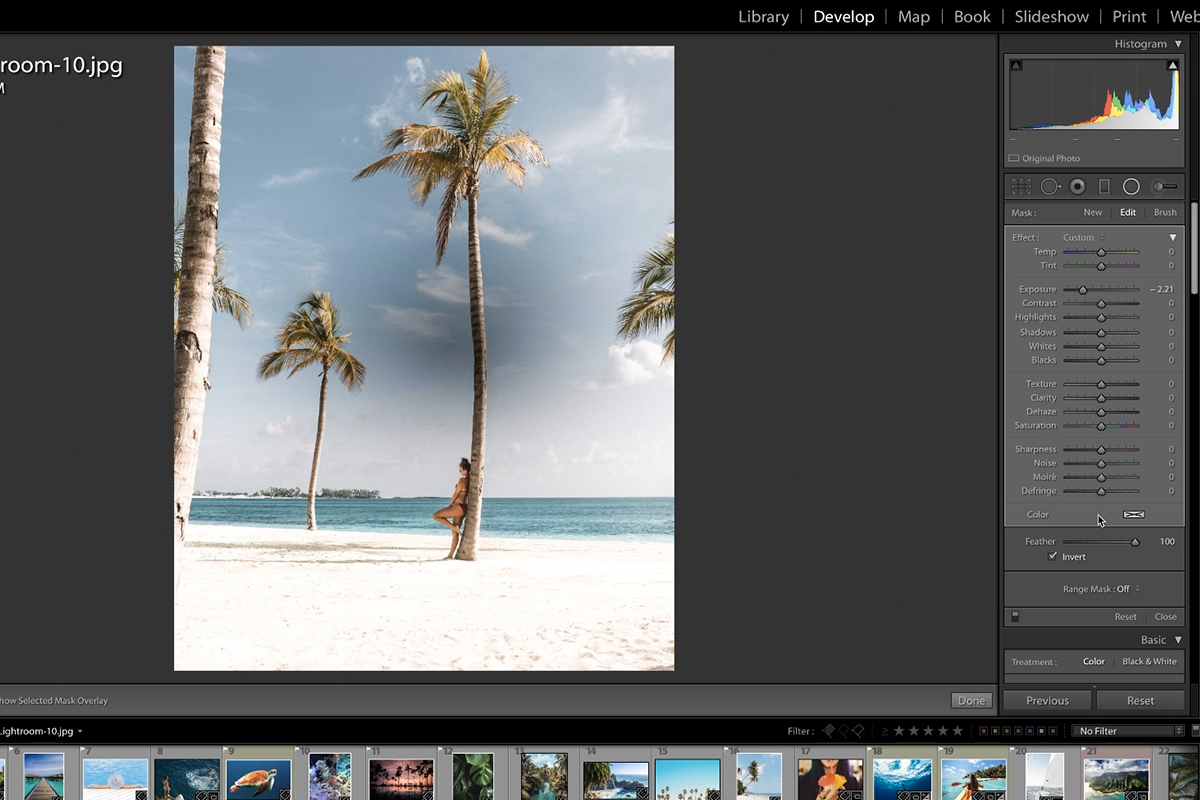
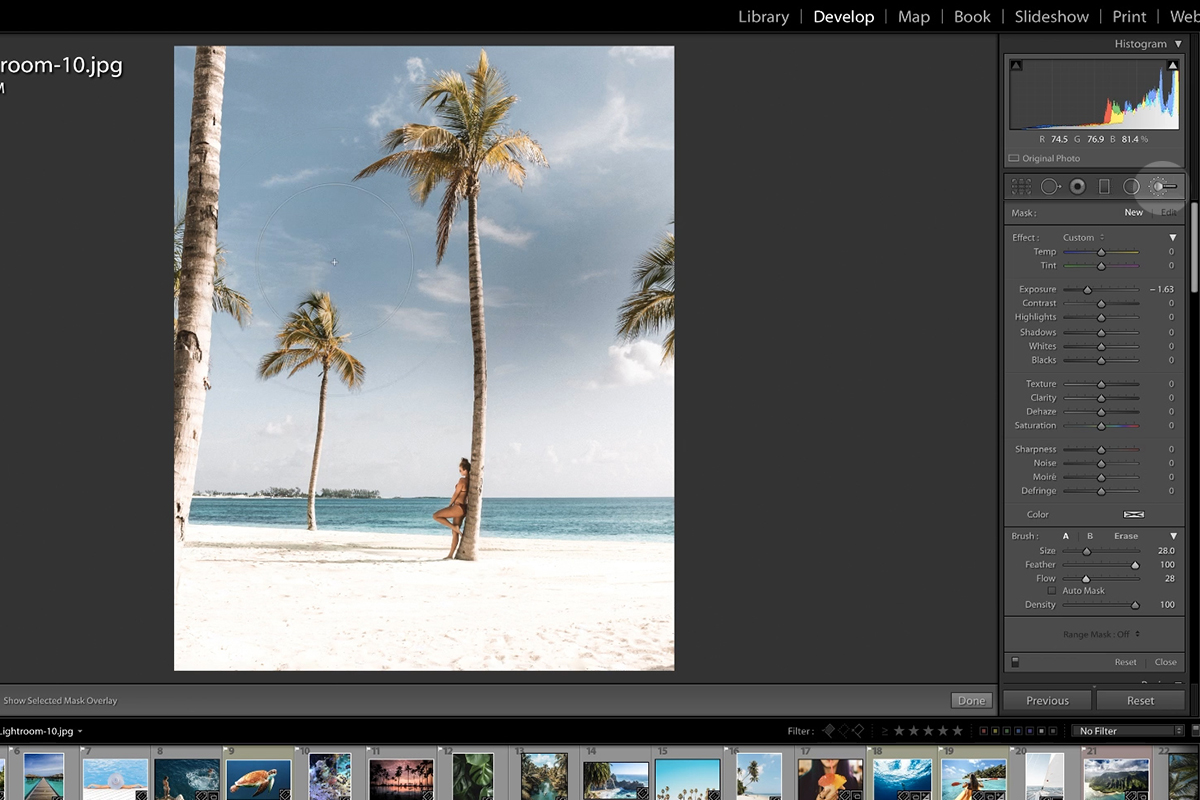
In our example image, we wanted the sky to have a bit more detail. So we made a new Graduated Filter, lowered the exposure, and then positioned the gradient near the top of the image and spread the effect down to the bottom of the image. This created a gradient from dark (near the top of the image) to light (near the bottom of the image), and adds some nice variation to the exposure of the sky.
Perfect, right? Well, almost. We got the effect that we wanted in the sky, but the lowered exposure is also affecting some foreground elements like the trees, ground, and the subject. Fortunately, we can get even more precise!
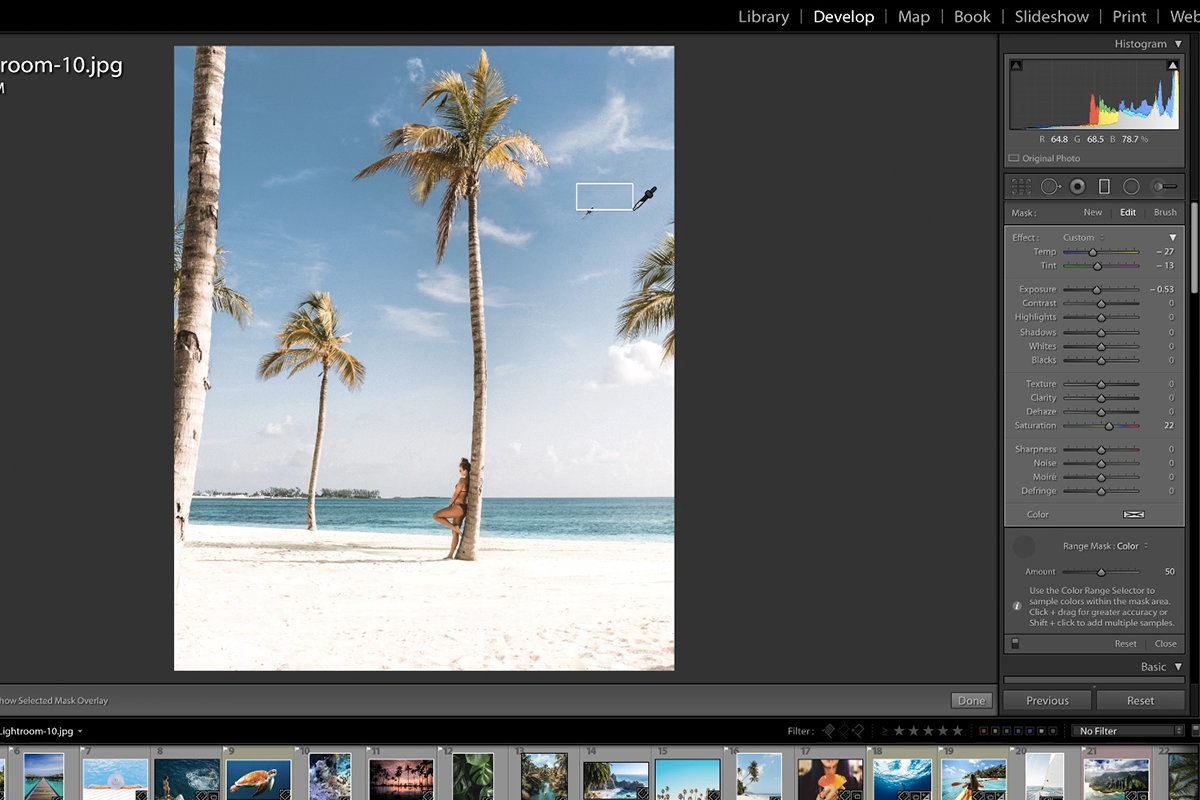
Range Masking takes it a step further. Not only can you use Graduated and Radial Filters to define an area to edit, you can combine them with Range Masking to also limit it to specific color ranges. We can take our Graduated Filter we used to add a dark gradent to the sky and use Range Masking to limit that effect to only blue colors. Now our sky has all the beautiful variation we wanted and the foreground elements are still look bright and natural.
The Graduated Filter and Radial Filter are both powerful and flexible, but there’s another tool that gives us the same ability to apply adjustments to specific areas but with even more control.
The Adjustment Brush
Similar to Graduated and Radial Filters, the Adjustment Brush also lets you define an area to edit, but this time you can paint where you want the effects to be visible.
We can get a similar dark-to-light gradient in using the Adjustment Brush instead of the Graduated Filter. Instead of using Range Masking to have the effect not appear in foreground elements, we can just paint around the areas we want it to appear and avoid the areas we don’t. Either option is totally acceptable, and they both can achieve the exact same result. Often there are multiple methods to getting the job done, we just recommend going with the tools and workflow that you’re most comfortable with.
Goals of Advanced Editing
With so many options and tools, it can be easy to lose track of your editing goals. Remember to always keep the subject in mind, no matter what adjustments you’re making. Will a change draw more attention to the subject, or will it take attention away? Also, be sure to look at the image as a whole first, and then break it down into pieces that you want to edit separately.
As you edit more and more, you’ll learn how to simplify your images and make sure that every edit helps to guide the eyes of the viewer to the things you want them to see.


