
Download Sample Images
description
Whether you’re creating hundreds of retouched photos for your client, or want to see all your vacation photos in the same style, batch editing is the one workflow that makes it all possible.
Learn how to apply an edited look to as many photos as you want with just a few clicks. Then, follow along as Aaron teaches how to use virtual copies to quickly create different looks for your client, such as black and white. This will allow you to edit your images in no time at all and create multiple versions with minimal effort, even if you have hundreds of photos.
If you’re ready to take a deep-dive into everything Lightroom Classic has to offer, try our PRO tutorial The Beginner’s Guide to Lightroom Classic!
Free Lightroom Preset Sample 10 Pack
Lightroom Presets are a great way to quickly add style and charm to your photos. Try our custom-made PHLEARN Lightroom Presets with our free sample 10 pack of some our favorite bright and beautiful looks!
Watch Next
This episode is part of our FREE Intro to Lightroom Classic series.
Share
QUICKLY EDIT HUNDREDS OF PHOTOS
Edit Hundreds of Photos in Seconds
Correcting Common Mistakes
Imagine you get back from an evening of shooting sunsets or a day shooting products in the studio and begin looking at some of your photos, only to realize that something’s off. Maybe your white balance was incorrect, or maybe every image is a bit underexposed, and now you have hundreds of photos that need to be edited.
This can happen all the time, and knowing how to batch edit your photos can fix common mistakes like this in mere seconds.
Lightroom Classic gives you the power to make adjustments to one image and then apply those adjustments to any number of images in your collection. You can even continue to edit your images after the batch edit process.
Be Your Client’s Hero
Not sure which look to go with? Why not both! Combining the batch editing process with the use of virtual copies will turn you into your client’s hero in no time at all. Create multiple looks for a single image, and then use batch editing to apply that look to all of your photos. Virtual copies will allow you to save each of those looks in an organized way, allowing you to export, for instance, a color and a black and white version of all of your photos in just a few clicks.
Double the deliverables without doubling the work. Don’t worry, it’ll be our secret.
Batch Editing
Before you can batch edit you need to edit one of your images, which we covered in the third episode of this series. If you’re interested in learning even more about using Lightroom Classic to create stunning images, check out our PRO tutorial The Beginner’s Guide to Lightroom Classic.
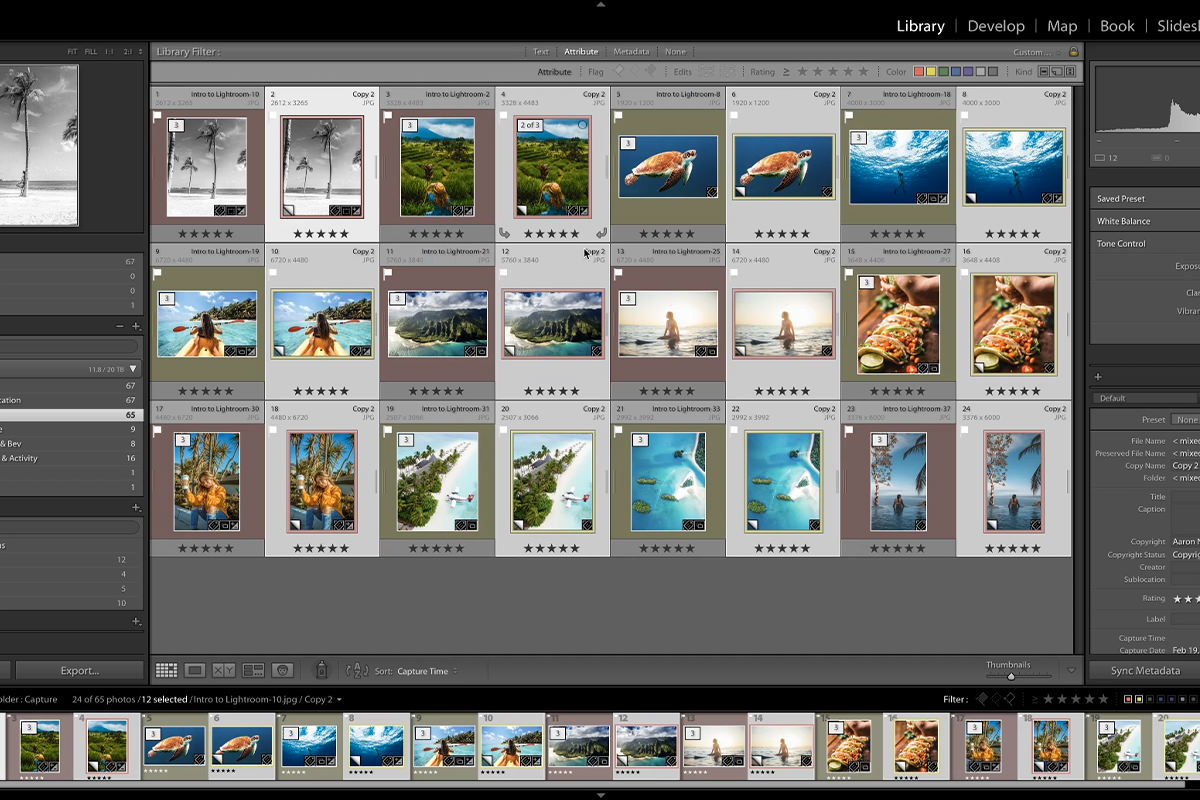
Choose an image and make any adjustments you wish until you’re happy with how it looks. When you have your image where you like it, it’s time to apply those adjustments you just made to the rest of your images. Within your grid view, you’ll want to select the edited image first, then select all additional images you wish to apply those adjustments to, and click Sync Settings, located on the bottom right.
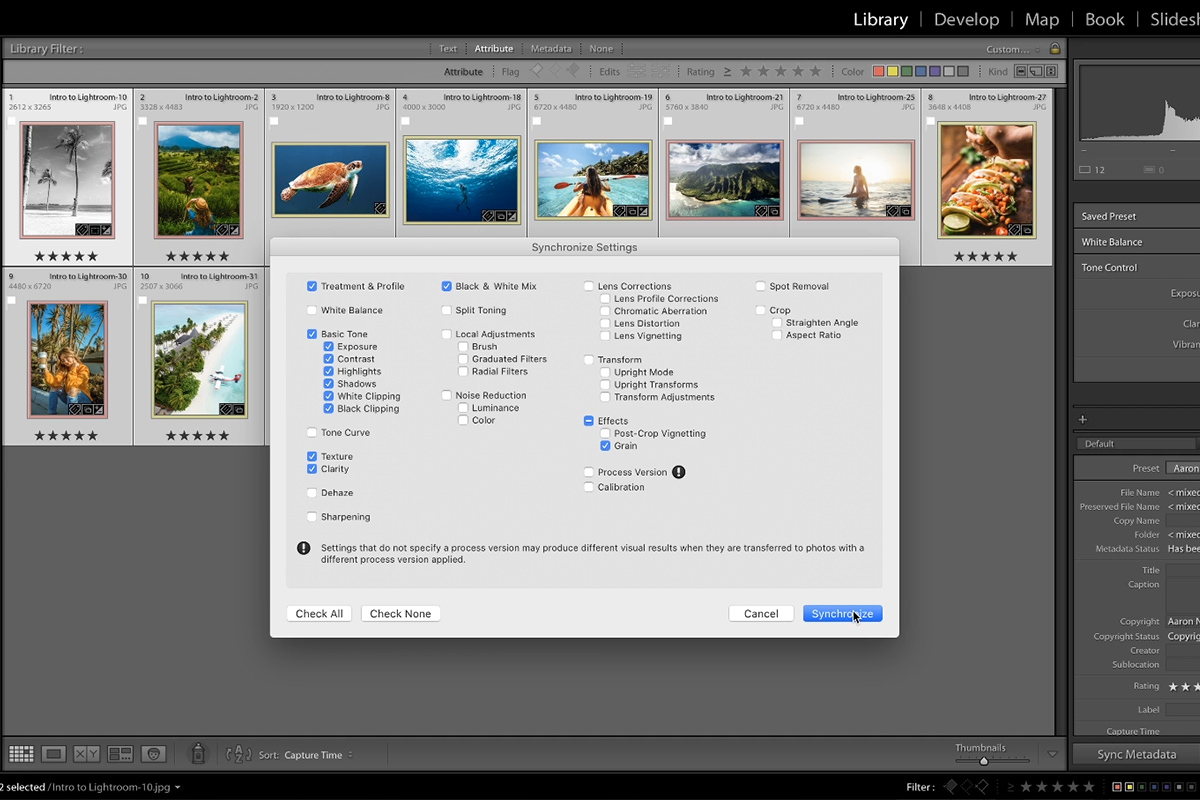
You’re just about done! Now we know this part can be a bit daunting, but these settings give batch editing its power and versatility. On this screen you can select each setting that you wish to copy over from your edited image, and any setting you do not select will remain unaffected.
You can select Check All but we suggest only selecting the settings that you changed. Some settings like Spot Removal are likely to be specific to each image. But the primary reason to do this is to prevent overwriting settings you may have already changed in your other images.
Once you’ve selected your settings click Synchronize and Lightroom takes care of the rest, applying the adjustments to the rest of the images in seconds.
Continue to Edit
Good news! Batch editing can be done at any point in your editing process. Imagine you’ve already edited a dozen images, increasing exposure, adding some grain, cropping them in, but then you realize you need to change the white balance on all of them. We can change the white balance on one, and then only sync the white balance setting, leaving all those other settings unaffected.
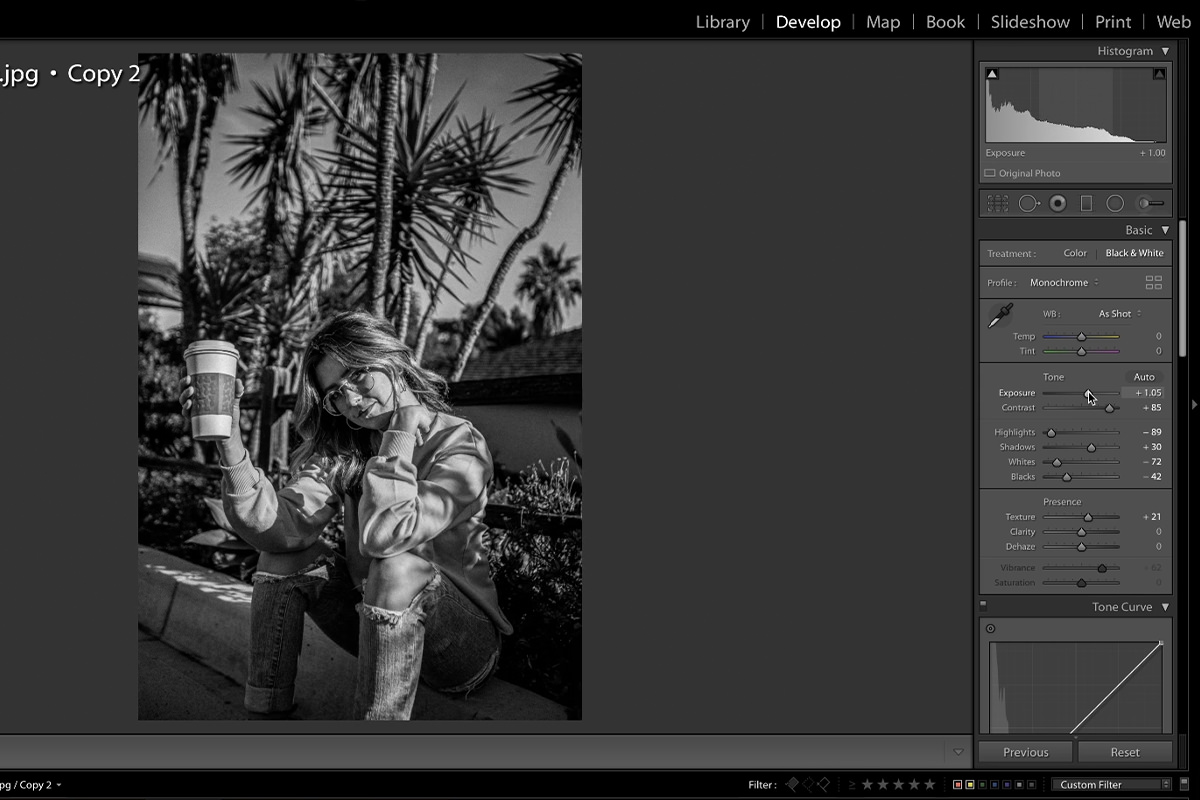
After batch editing you can also further refine those adjustments. Most of the time, the settings you sync won’t work for all of your photos: you may have a couple that need further adjustment. Entering the Develop tab on those images will allow you to pick up where you left off and further fine tune the adjustments you already made.
Virtual Copies
Welcome to the Virtual World! The virtual copies world that is. One of Lightroom Classic’s most powerful features is creating virtual copies of your images, allowing you to stay organized and preserve file space while making multiple versions of your edits.
To create virtual copies simply select the images you would like to copy, right click on any one of them, and select Create Virtual Copies. From here you essential have two versions of your image and can edit each any way you wish! You can even create virtual copies again to have any number of copies to work with.
Having multiple versions of your images may look a bit cluttered, but there are a few things we can do to stay organized while working with virtual copies. The two main ways to stay organized are Filters and Stacks, and within our workflow we tend to use both from time to time.
Filters
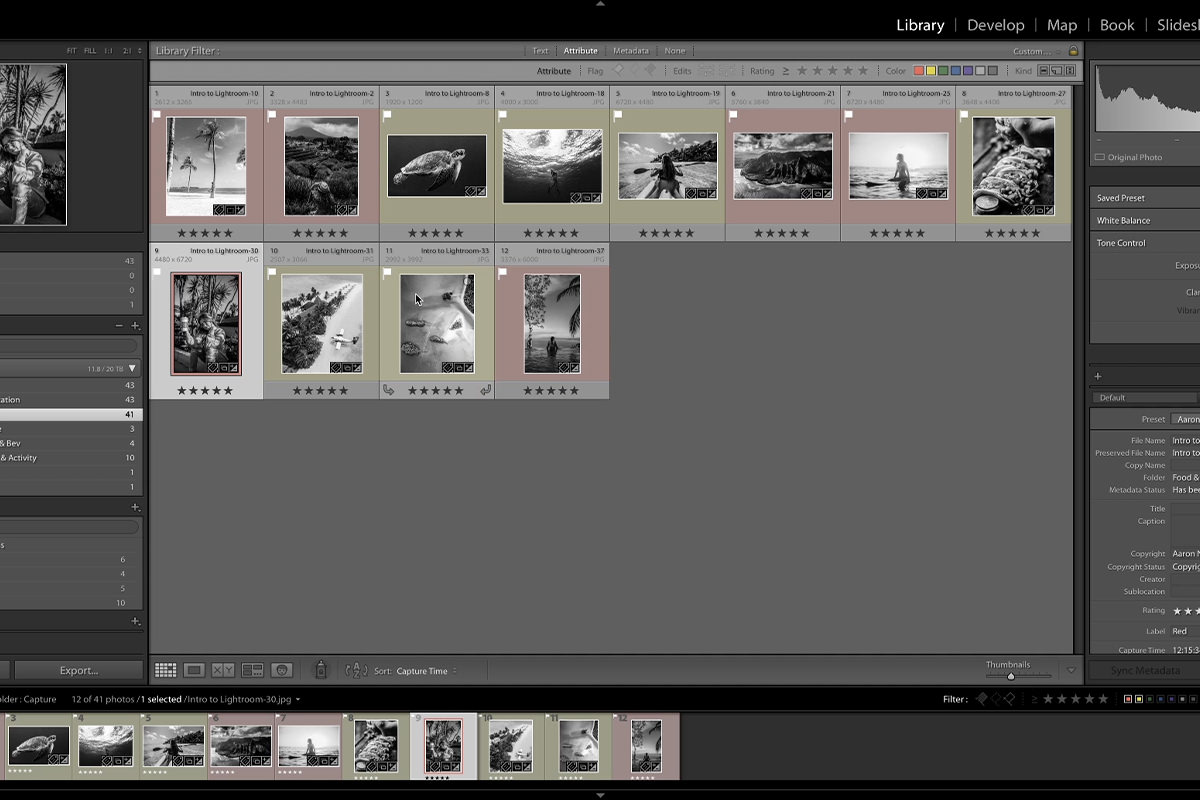
If you want to see all your virtual copies temporarily, without moving them around, filters are the way to go. At the top of your Library module is the Filter bar, where you have a ton of options for filtering your images. Remember, if you don’t see the filter bar you might have to enable it by going to View > Show Filter Bar (or by clicking the \ key). Select the Attribute tab and all the way on the right you have options for showing Kind.
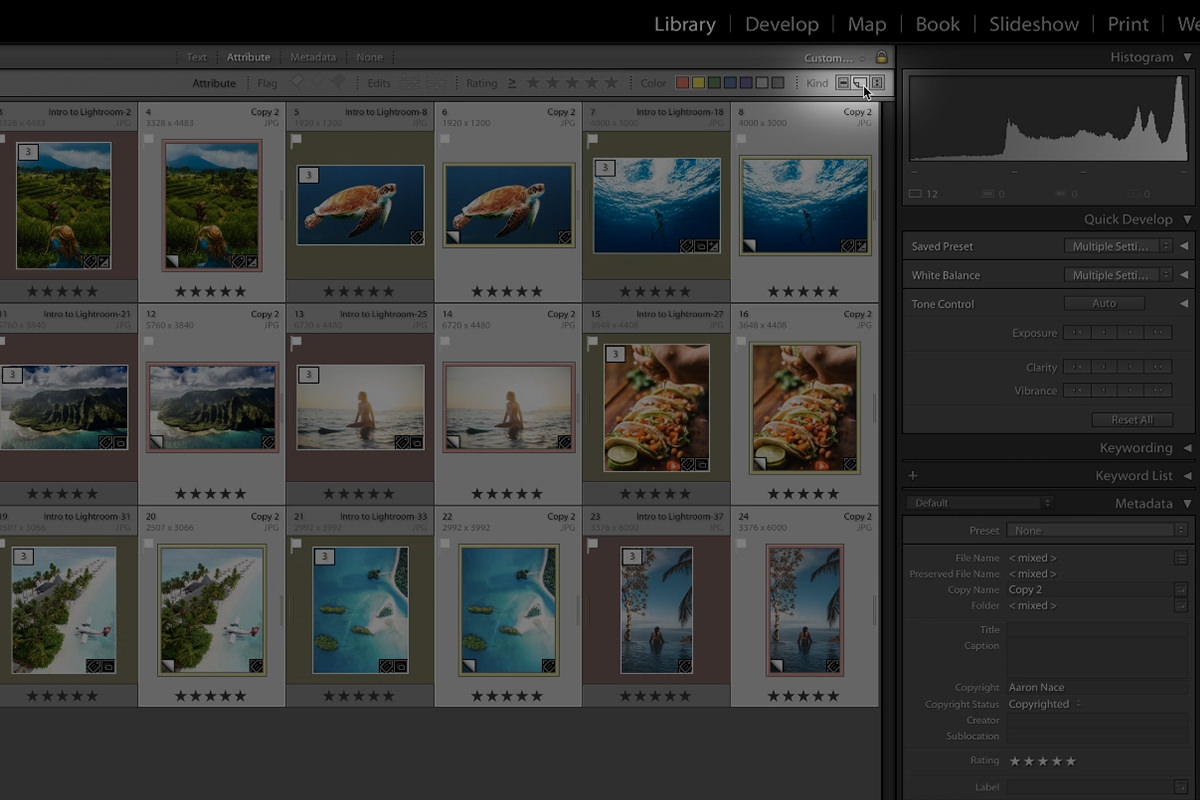
Toggle the Virtual Copy icon and Lightroom will only display images that are virtual copies. We use this feature to quickly batch edit only our virtual copies, turning them black and white.
Stacks
Lightroom Classic has a handy feature called stacking that allows us to clean up our catalog visually, staying more organized and effective while editing. You can combine any number of images into a stack, but Lightroom Classic can automatically detect virtual copies and stack them with their originals. In the Library module, simply select Photo > Stacking > Collapse All Stacks.
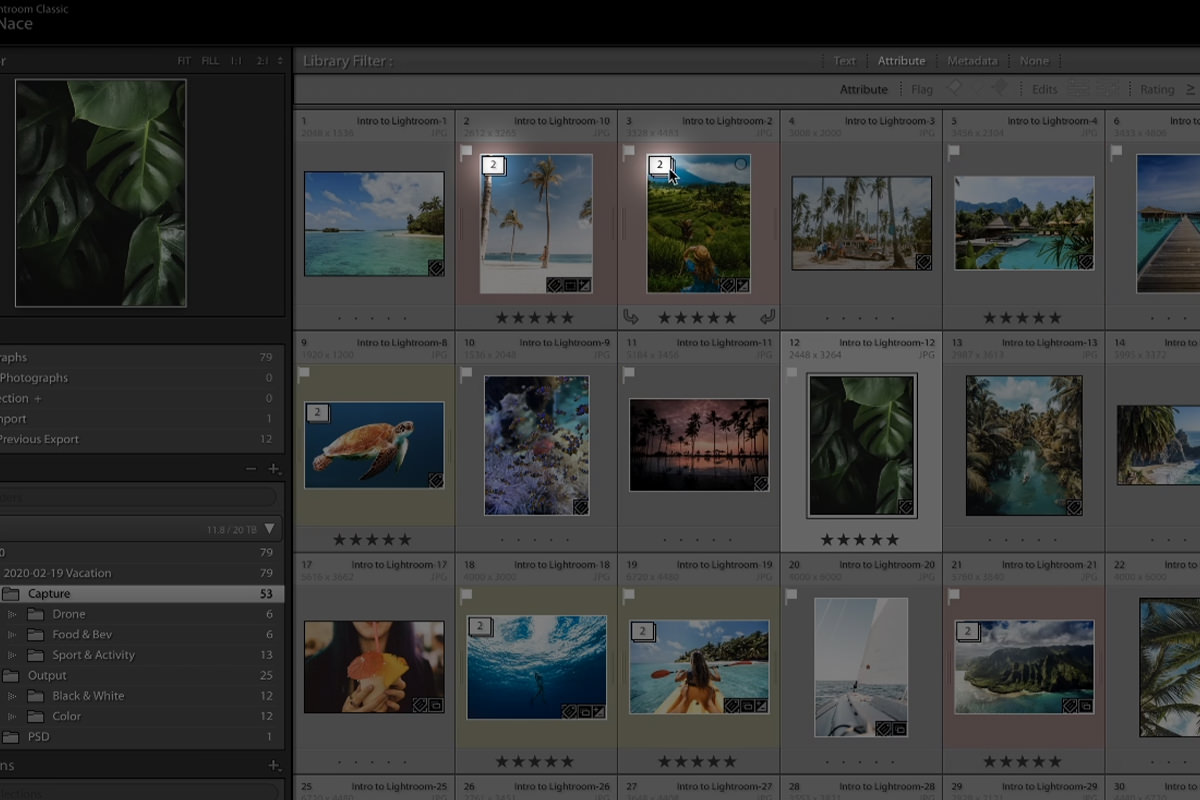
A stack icon with a number of how many images are in each stack will appear on each original image, hiding all of your virtual copies under their originals. Clicking that icon expands the stack, showing all the virtual copies for that image, and selecting Photo > Stacking > Expand All Stacks will show all your virtual copies again.
No Additional Hard Drive Space
Virtual copies are just that: virtual. They only exist within Lightroom Classic and each reference the same original file on your computer, meaning you aren’t actually duplicating your images at all. This saves you storage space on your hard drive and doesn’t clutter up your image folders with additional files. As long as you stay organized in Lightroom, virtual copies are the easiest and cleanest way to create multiple versions.
And once you have all your versions where you like them, you can export them to your computer for use on the web, to send to the printer, or to give to your client. It’s that simple.
Next Steps
Batch editing and virtual copies are powerful techniques that will allow you to edit your images faster and with additional variation. Remember to include them in your workflow to correct issues affecting all of your images, apply the same look across hundreds of photos with a click, and quickly create additional deliverables for yourself or your client. And if you are interested in more ways to quickly edit your photos, we suggest you watch the next episode in this series on creating your own Lightroom Presets. You should also check out our ever expanding library of Lightroom Presets, available for download to all PRO members.


