
Download Sample Images
description
Photo editing is the most fun and satisfying part of the post-production workflow, but where do you start? Follow along as we break down all of the editing tools in Lightroom Classic that will help you fix exposure, recover detail, correct colors, color tone, and more!
If you’re ready to take a deep-dive into everything Lightroom Classic has to offer, try our PRO tutorial The Beginner’s Guide to Lightroom Classic!
Free Lightroom Preset Sample 10 Pack
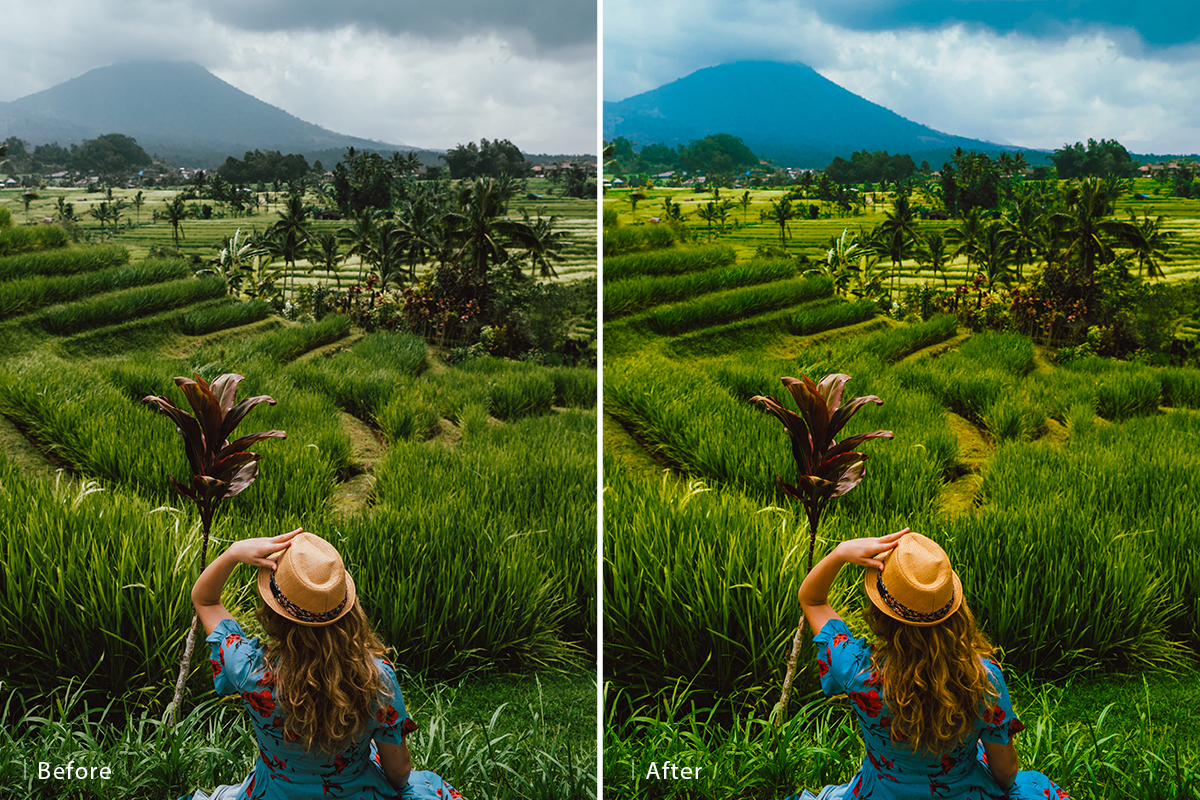
Lightroom Presets are a great way to quickly add style and charm to your photos. Try our custom-made PHLEARN Lightroom Presets with our free sample 10 pack of some our favorite bright and beautiful looks!
Watch Next
This episode is part of our FREE Intro to Lightroom Classic series.
Share

LEARN TO USE LIGHTROOM CLASSIC
Light. Color. Detail.
The Basics of Photo Editing
We began by importing and organizing our photos in Lightroom. Then we went through and selected our favorites. Now we’re ready to move on to the most satisfying step of the Lightroom Classic workflow–photo editing!
Before we get into it, let’s ask the big question: what is the goal of photo editing? Ask two different photographers and you’ll likely get two very different answers. Some photographers prefer to edit very lightly, believing that the photography should stand on its own. Others go all out, using post-production to explore new creative ideas that weren’t possible with just a camera. No matter where you fall on the spectrum, we’re here to help you get started and show you what’s possible.
What to Look for
When it comes to photo editing, there are no rules and endless creative possibilities. This tutorial is mostly focused on small adjustments that will have a powerful cumulative effect on your images. You can certainly take each edit as far as you want, but we recommend starting simple, building a strong foundation upon which you can make more advanced style choices.
Before making any basic adjustments, there are some question you can ask yourself that might help guide your editing decisions.
- Do the colors look natural? Do the skin tones look natural?
- Are there details missing in the brightest highlights and/or the darkest shadows?
- Does the subject of the photo stand out?
- Are there any distracting elements in the photo that draw attention away from the subject?
There are countless other questions you could consider, but we find that these apply to almost any photo and immediately help get us on the right track. We want colors to look natural, we want as much detail as possible throughout the highlights, midtones, and shadows, and we want the subject of the image to be clear. Once we’ve checked those boxes, we can move on to some more creative decisions.
Now that we have some direction, it’s time to start editing! Let’s take a look at the interface where the post-production magic happens in Lightroom: the Develop Module.
The Develop Module
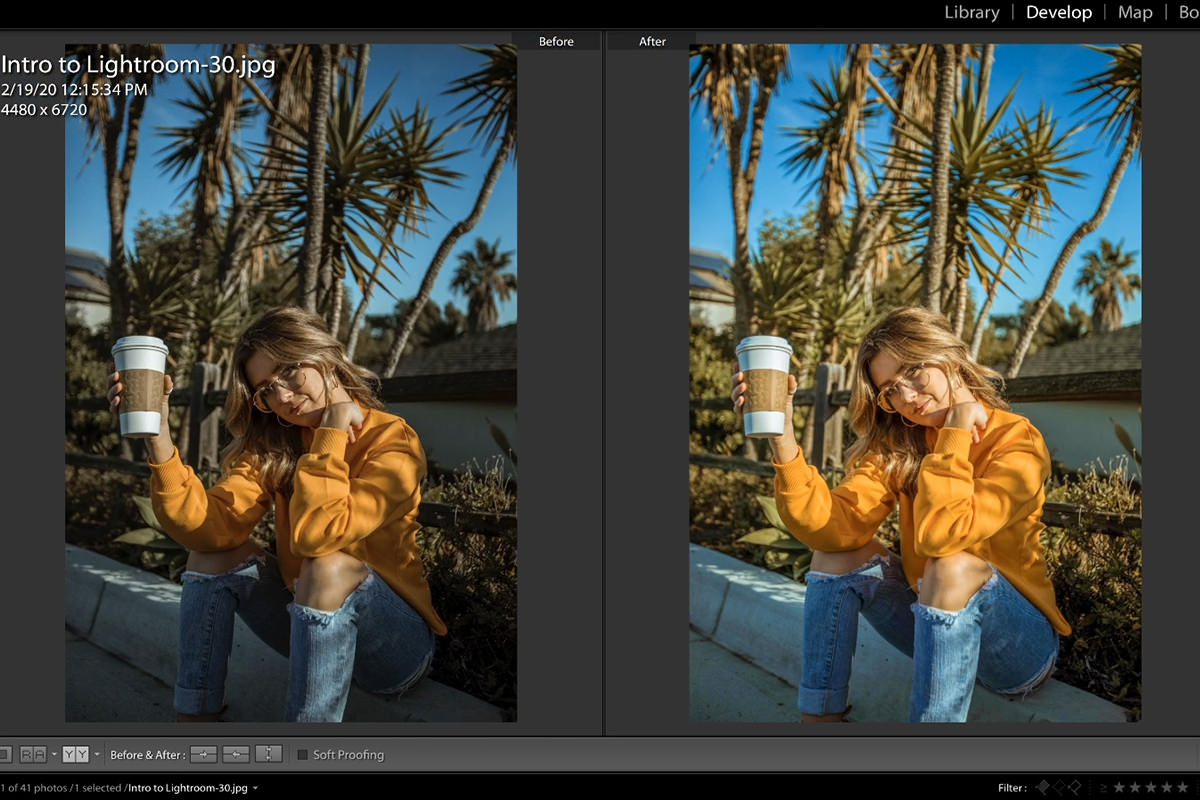
Up until now we’ve spent almost all of our time in the Library module, organizing and prepping our photos for the edit. Now that we’re ready to start making some edits, it’s time to turn our attention the Develop Module.
The Develop Module is powered by Adobe Camera RAW, Adobe’s software for processing RAW files (although it does work on most other image file types like JPEGs). Equipped with tools to fix exposure, color tone, fix lens issues, and more, it has everything we need to take our photos to the next level. Best of all, all of the adjustments we make in Lightroom are completely non-destrucive! That means we can reset any individual settings, or get back to our unedited original image at any time.
Let’s dive in!
Basic Adjustments in Lightroom
The majority of the editing features in Lightroom can be found in the right-hand sidebar of the Develop Module. We’ll cover many of these tools later in the series when we get into advanced editing. For now let’s look at the options within the Basic menu.
White Balance
Even if you’re not familiar with the photo editing process, you’ve probably seen the white balance setting on your camera. White balance is a tool that helps the camera’s sensor adjust colors according to the environmental lighting conditions.
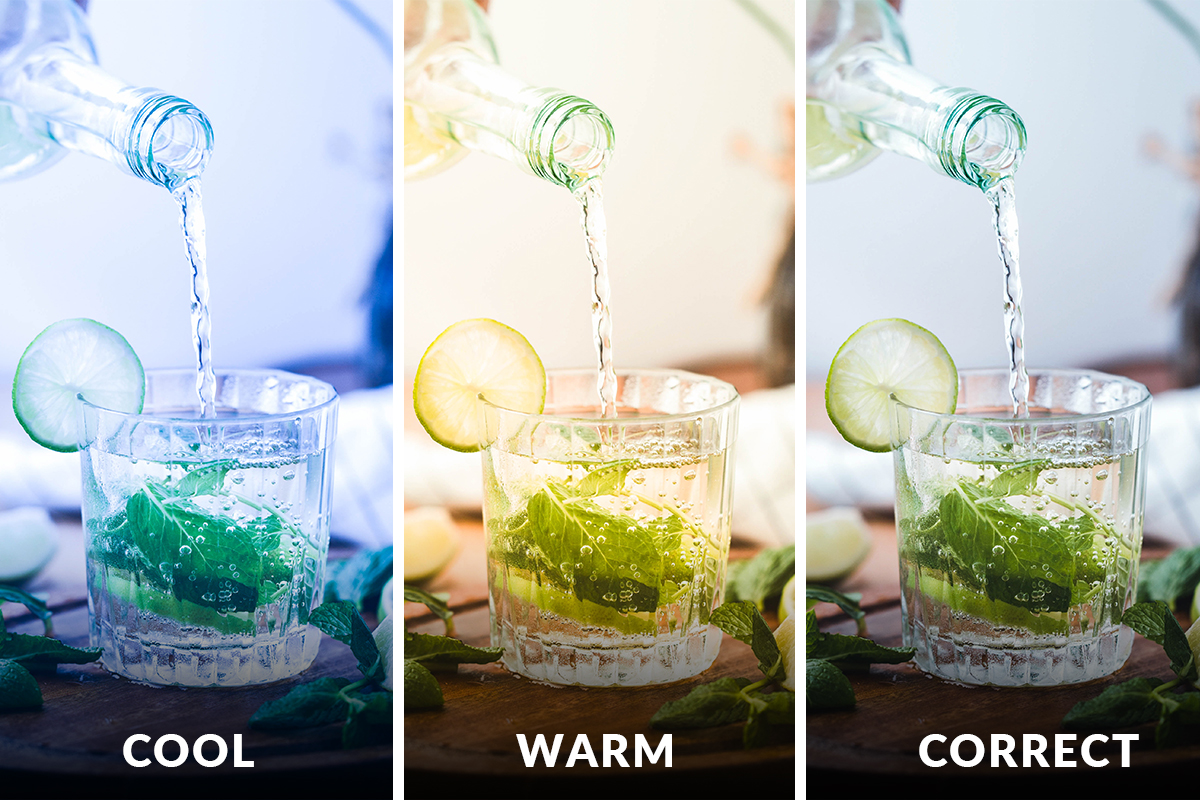
We’ve all taken photos where the white balance was off, resulting in a blue color cast (a cool color temperature) or an orange color cast (a warm color temperature). The white balance sliders in Lightroom give you the same control as if you were adjusting the white balance setting on your camera (especially if you’re working with RAW files.) Not only can you adjust color temperature, but you can also shift the tint to compensate for lighting that appears too green or too magenta. The goal is to get colors to be as true-to-life as possible.
Tone
This section is focused on adjusting the tonal (light) values in a photo. Oftentimes unpredictable lighting conditions can cause highlights to be too bright or shadows to be too dark, resulting in the loss of information.
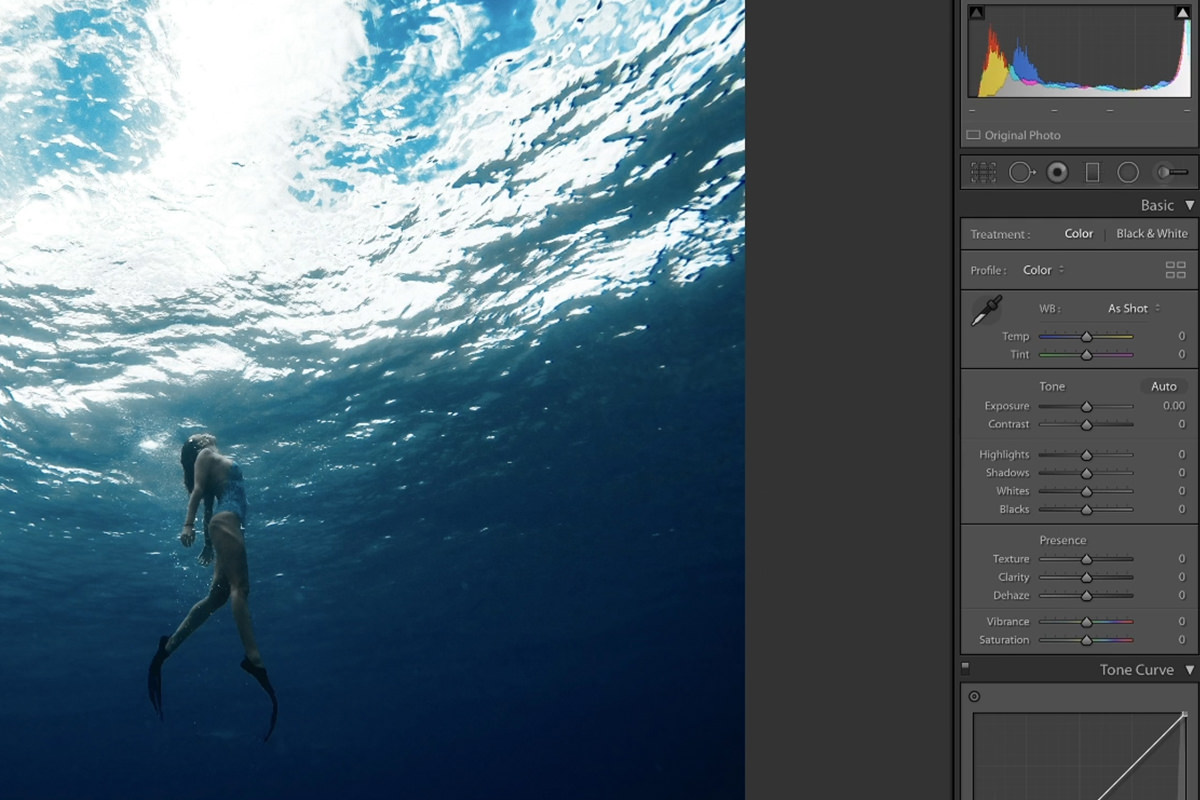
In the image above, there are spots of bright highlights above the subject where we’ve lost a bit of detail. We can try to recover some of that detail by bringing the highlights down using the Highlights slider.
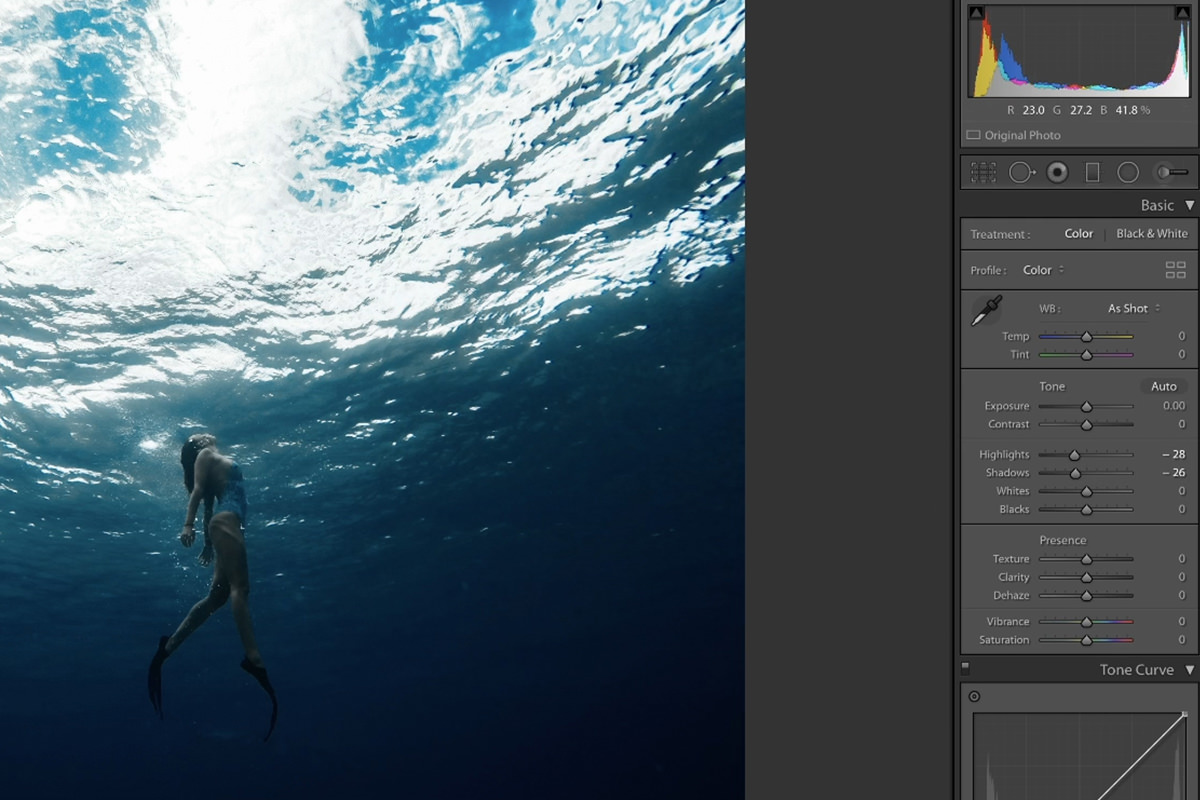
After lowering the highlights we can see a little more of the texture from the water’s surface. All cameras have a limit in dynamic range which prevents them from capturing perfect detail throughout the highlights, midtones, and shadows. But we’re still able to recover some detail, and make overexposed areas a little less distracting.
The most powerful part about the Tone adjustments in Lightroom is that we can specifically target the highlights or the shadows. This gives us some much-needed control, allowing us to fix one area without worrying about messing up another.
Presence
The Presence Panel gives us tools to make colors and textures more pronounced. We’ll talk more about sharpening in a bit, but we prefer to do any texture enhancements in Photoshop. That being said, the Texture and Clarity sliders can be used to increase contrast in and around areas of fine detail in a photo. If you want textures and details to be more pronounced, try experimenting with these two settings.
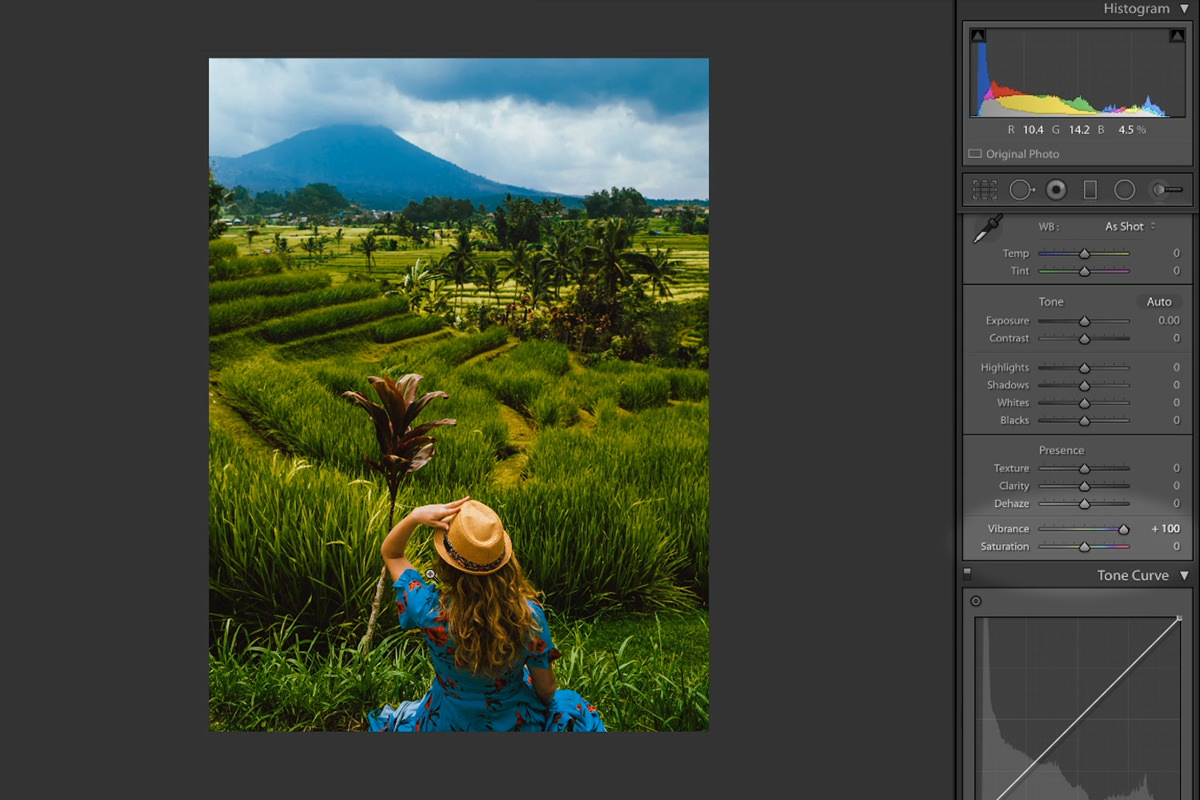
The more useful tools in the Presence Panel are Saturation and Vibrance. Both will allow you to control how rich and vivid the colors appear in a photo, but with one key difference. The Vibrance slider will allow you to increase Saturation while protecting skin tones (reds and oranges). If there’s a person in your image and you want to dial up the colors, use Vibrance. Otherwise, Saturation will do the trick!
A Little More Advanced
The White Balance, Tone, and Presence Panels form the core of our basic adjustments. Tweaking just a handful of those sliders can make a huge difference in our images. But it doesn’t end there!
Lightroom has a huge array of tools that provide more precision, and that allow us to get a little more creative in our edits.
The Tone Curve
The Tone Curves is a powerful tool, but a bit more complicated to use than the sliders in the Tone Panel. If you’re familiar with Curves in Photoshop, the Tone Curve works in almost the exact same way. You can create points along the line, and then move them up or down to make parts of an image brighter or darker.
Points closer to the bottom-left corner will affect the shadows, and points close to the top-right will affect the highlights. Moving a point up will make those parts of the image brighter, and moving it down will make those parts darker.
You can also use the Tone Curve for more than just changing light levels. By selecting a particular color channel, you can color tone an image by adding or subtracting certain colors from the highlight, midtone, and shadow areas. If you’re looking for power and precision for making exposure and color adjustments, the Tone Curve should be your go-to!
HSL/Color
The HSL/Color Panel is another precision tool that allows you to target specific color ranges in an image. You can shift the hue of a particular color. For example if you wanted the reds in sky at sunset to appear more magenta. You can raise the saturation of a particular color. For example, if you wanted to make the leaves of a tree rich and vivid. And you can adjust the luminance of a color range. For example, if you wanted to make a subject’s skin tones a little brighter.
Split Toning
Now we’re getting into some of the more creative stuff. Split Toning is an age-old technique that involves coloring the shadows of an image with one color, and then coloring the highlights of the image with (usually) the complement of the shadow color.
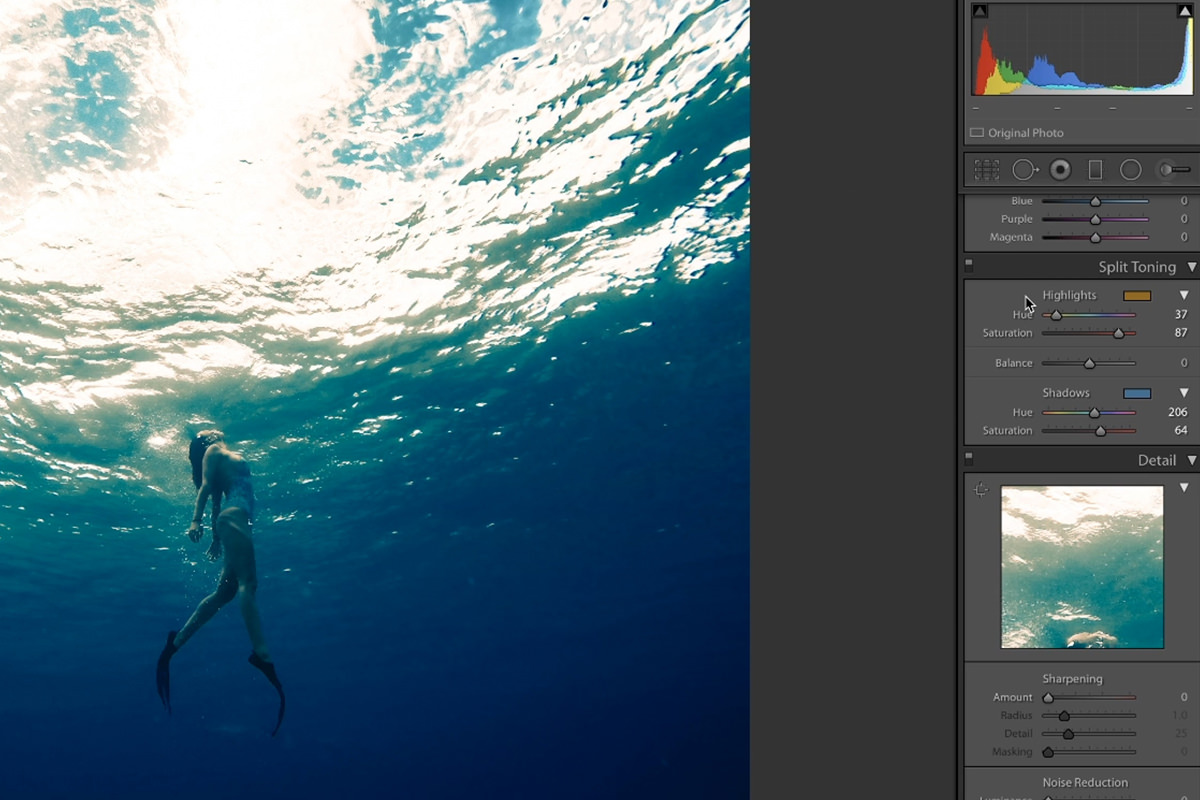
In the example above, we’ve recreated a common coloring style by enhancing the blues in the shadows of the image while adding yellows and oranges into the highlights.
Split Toning is a powerful coloring effect that would normally have to be done manually, but Lightroom has a tool that makes it easier than ever to pull off.
Detail
The Detail Panel is all about increasing the contrast of details in an image, otherwise known as sharpening. Sharpening is one of the most important steps in the editing process, which is why we recommend doing it in Photoshop over Lightroom.
The sharpening tools in Lightroom are great for some subtle and general sharpening effects, but to do it right, we think you’ll want the control and flexibility that Photoshop provides. Why, you ask?
Well, not everything in a photograph should get the same level of sharpening. Your subject’s eyes should be sharpened at a much different level than some object in the background. The eye is drawn to areas of detail and high-contrast, which is exactly what a sharpening effect creates. Use it to draw more attention to the things that matter most, to the areas where you want the viewer to look.
There are also tools for reducing noise which can be handy for images shot at a higher-than-usual ISO.
Lens Corrections
Even if you’re packing the highest-end camera and lens combination, there’s a good chance some of your photos end up with a little bit of distortion or color fringing. Fortunately, Lightroom Classic has automated tools that can make quick work of any issues.
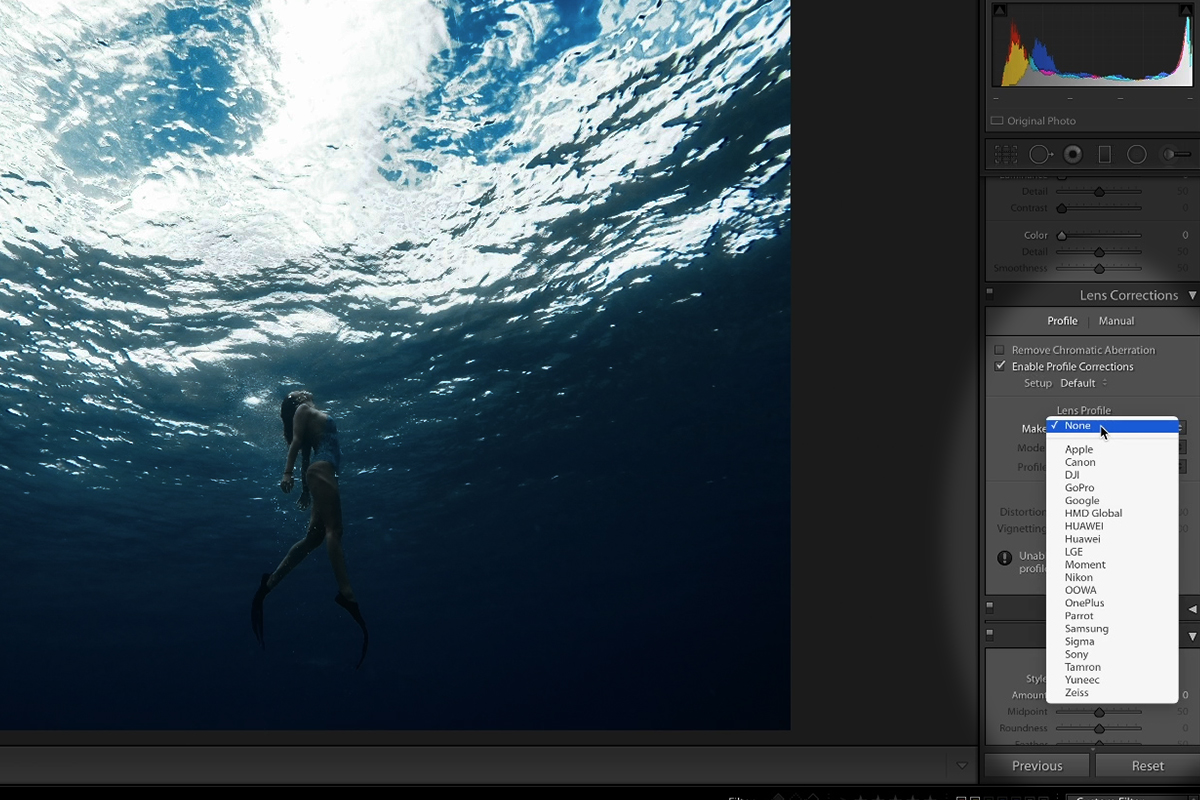
By detecting what camera and lens you used to photograph an image, Lightroom can apply adjustments to remove lens distortion in just a couple of clicks.
If you ever notice thin green or magenta outlines around objects in a photo, that’s a common optical issue known as chromatic aberration. Again, Lightroom offers tools that can quickly reduce or remove any unwanted color fringing.
What’s Next?
If you were hoping for some more advanced and stylistic editing, don’t worry! In the next episode, we’ll start to level-up our editing game with some of the more powerful adjustment tools in Lightroom Classic.


