

Download Assets
This tutorial includes 2 sample images, 1 sample PSD and 1 PDF guide. Downloads are free with a PHLEARN account.
- Download the sample images and PSDs from every free tutorial on PHLEARN
- New free tutorials published every week
- One free account — sign up once, then download anything
Free PDF Guide · 4 Pages
This Tutorial as a Step-by-Step PDF
Every step from the video in order: the Frame tool’s shape menu and Append Default Shapes, Edit > Define Custom Shape from a rounded rectangle, Import Image and Generate Image, moving the image versus the frame, grouping to add a layer mask, Cmd/Ctrl+I to invert it, a clipped Levels layer and the stroke. Keep it next to your keyboard.
description
Use the Frame Tool in Photoshop and a shape becomes a placeholder: drop an image in, move the frame or the photo independently, and swap the contents later without rebuilding a mask.
Enjoying This Free Tutorial?
We publish a new free tutorial every week, each one with sample images and PSDs you can download and follow along with. Sign up and they land straight in your inbox, along with early word on sales, events and subscriber-only offers.


How to Use the Frame Tool in Photoshop
The Frame Tool solves a problem that used to take three or four steps: putting an image inside a shape. Draw the shape, drop a photo in, and the photo is masked to that shape automatically — with the image and the frame remaining independently adjustable afterward.
It began as a rectangle-and-circle tool and became considerably more useful once it gained custom shapes and the ability to generate its own content.
A note on versions: this was recorded when the expanded Frame Tool arrived. Adobe has continued developing it, so your panel may differ slightly. The workflow and the layer-mask caveat below still apply.
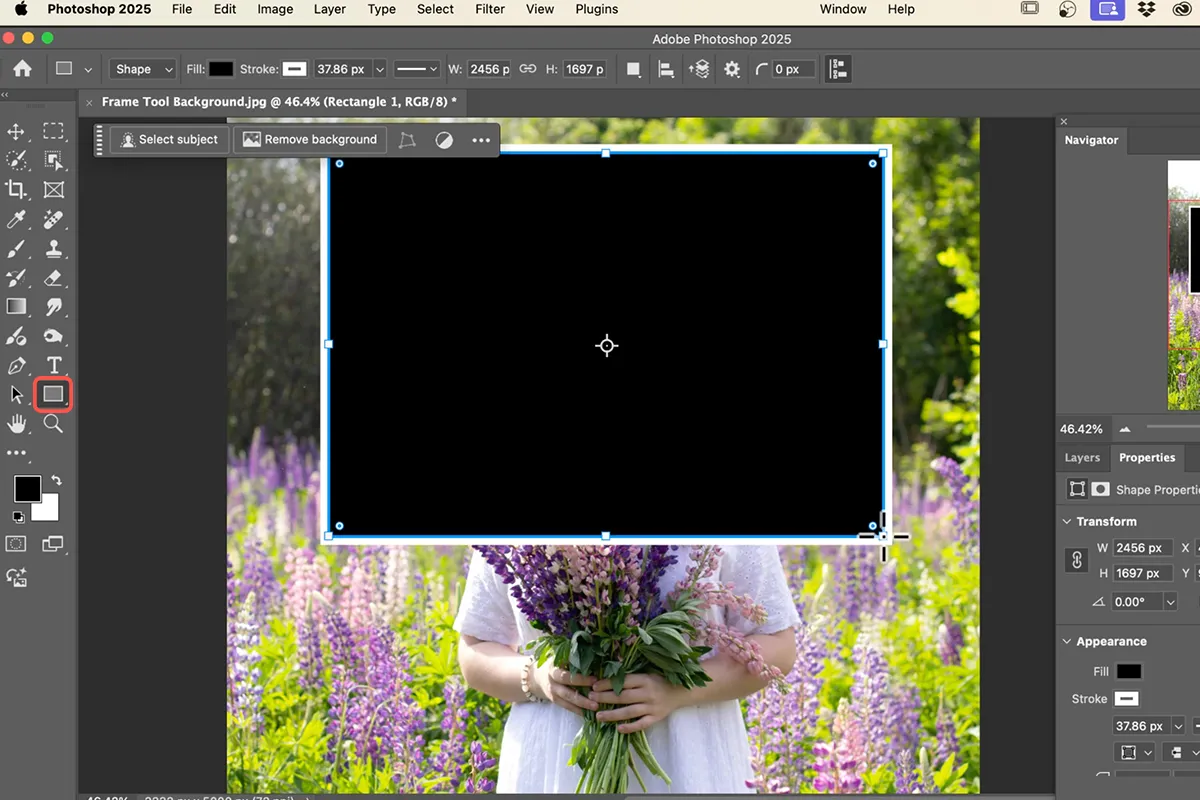
Creating a Frame
-
Select the Frame Tool from the toolbar
It sits with the other shape tools.
-
Choose a shape in the options bar
Rectangle and ellipse are the defaults, with a shape library alongside them.
-
Click and drag on the canvas
An empty frame appears, shown as a crossed placeholder.
-
Fill it
Either place an existing image or generate one — both covered below.
Custom Shapes
The built-in library
The shape selector includes Photoshop’s shape sets — animals, leaves, ornaments and so on. Picking one gives you a frame in that silhouette, so an image can be masked into something considerably more interesting than a rectangle.
Defining your own
This is the more practical route for design work. Build the shape you want using the Rectangle or Ellipse tools — a rounded rectangle, say, or several shapes combined — then go to Edit, then Define Custom Shape and name it.
It joins the shape library permanently and is available to the Frame Tool from then on. If you use a particular card or panel shape repeatedly, defining it once saves rebuilding it every time.

Filling the Frame
Placing an image
Use the Import Image option, or simply drag a file from Finder or Explorer straight onto the frame. Photoshop scales it to fill and masks it to the shape automatically.
Generating one
The Generate Image option builds content with AI directly inside the frame from a text prompt. There is usually a style choice — photo, illustration and similar — which affects the result more than most prompt wording does.
Because the generation is tied to the frame, it can be regenerated or replaced at any point from the Properties panel without rebuilding anything. That makes it genuinely useful for layout work, where you want something plausible occupying a space while the design is still moving.
Moving the Frame Versus Moving the Image
This is the part that confuses people, and it is worth understanding clearly. A frame layer has two components: the frame itself, and the content inside it.
Click the frame thumbnail in the Layers panel and you are working on the shape — move it, resize it, and the image inside stays put while more or less of it shows through.
Click the content thumbnail and press Ctrl or Cmd + T, and you are transforming the image within a fixed shape — reposition or scale it to choose which part of the photo the frame reveals.
Both remain editable indefinitely. Nothing is baked in, which is what makes this better than masking a layer by hand.
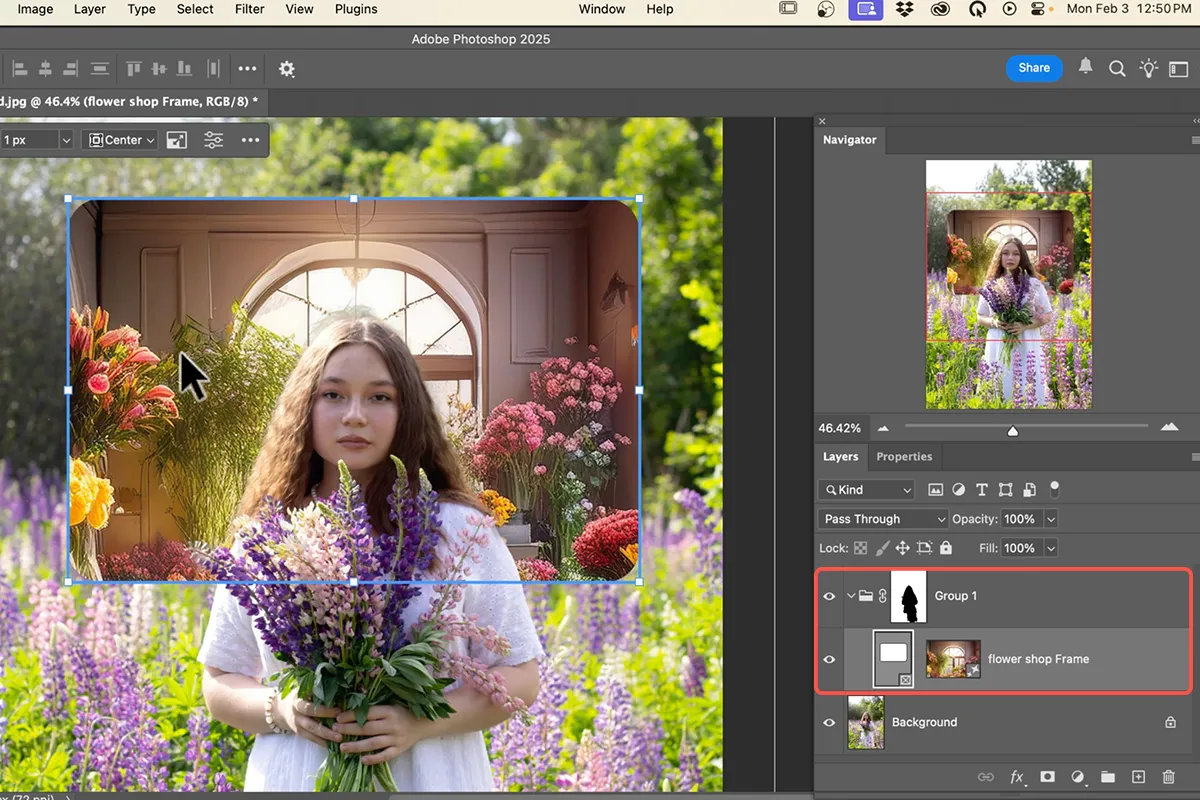
The Layer Mask Gotcha
You cannot apply a layer mask directly to a frame layer. The frame is already acting as a mask, and Photoshop will not stack a second one on top.
The workaround is simple once you know it:
-
Select the frame layer and press Ctrl or Cmd + G
This puts it inside a group, even on its own.
-
Add the layer mask to the group instead
Groups accept masks normally.
-
Paint on the group mask as usual
Press Ctrl or Cmd + I to invert it if you want to start hidden and paint the frame in.
This is how you fade a framed image out at one edge, or blend it into a background — neither of which is possible on the frame layer alone.
Adjustment Layers on a Frame
Adjustment layers work normally, but clip them to the frame or they will affect everything beneath.
Add the adjustment above the frame layer, then hold Alt or Option and click the boundary between the two layers — or use the clip button in the Properties panel. The adjustment now applies only to the framed image.
A Levels or Curves layer clipped this way is the tidiest method for matching several framed images to each other in a layout, since each keeps its own correction.
Adding a Stroke
A stroke is available in the options bar while the Frame Tool is active, which gives you a border following the frame’s shape — including custom shapes, where drawing an accurate outline by hand would be tedious.
This is what turns the tool into a quick way to build cards, badges and picture-frame effects without any manual path work.
Where It Earns Its Place
The Frame Tool is a layout tool more than a photography one, and it is at its best in three situations.
Repeating layouts. Building a grid of images at consistent sizes and shapes — a contact sheet, a moodboard, a set of profile cards. Draw the frames once, drop images in, adjust each independently.
Design work with shaped imagery. Anything where photography sits inside a non-rectangular form. Much faster than clipping masks, and far easier to revise.
Placeholder-driven design. Frames can sit empty while a layout takes shape, or hold generated content that stands in until the real photography arrives.
For straightforward photo editing it adds little — a clipping mask does the same job in a familiar way. But for anything with repeated shapes or a layout that keeps changing, the fact that frame, content, stroke and adjustments all stay independently editable is a real saving.
Quick Reference: Keys, Menus and Settings
- The toolFrame tool (K): rectangle, circle, triangle, or Custom Shape from the shape menu; the gear > Append Default Shapes adds more
- Your own shapeDraw it (Rectangle tool with rounded corners, or the Pen), Edit > Define Custom Shape, then pick it at the bottom of the frame shape list
- Fill itImport Image > Place, or Generate Image with a prompt (Properties > Generate for more)
- Move whatClick the image to move or scale it inside the frame (Cmd/Ctrl + T); click the frame to move the frame
- No layer mask on a frame?Cmd/Ctrl + G to group it with itself, mask the group; Cmd/Ctrl + I to invert after Select Subject
- Adjust only the frameLevels adjustment layer, clip it (the clip icon or Alt/Option-click between)
- BorderStroke in the frame’s Properties
- Swap laterReplace Image > Import or Generate
Only Generate Image spends credits; the frame itself doesn’t.
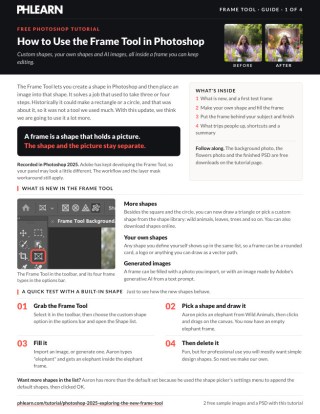
Free Downloads
Follow Along on the Same Photos
Get the portrait and the flower image, the PSD with the custom frame, the generated flower shop and the masked group, and the PDF guide. Free with a PHLEARN account.
Frame Tool: Common Questions
What does the Frame tool do?
It draws a shape and clips an image into it. The update adds triangles and custom shapes, plus Generate Image to fill the frame with AI.
How do I use my own shape as a frame?
Draw it with any vector tool (the video uses a rounded rectangle), choose Edit > Define Custom Shape, then pick it from the bottom of the Frame tool’s shape list. A logo or pen path works the same way.
Why do you have more shapes than I do?
Click the gear in the shape picker and choose Append Default Shapes. That adds the animals, leaves and other built-in sets.
How do I fill the frame?
Import Image to place a photo, or Generate Image with a prompt. The flower shop in the video is generated; click Generate in Properties for more options and swap any time with Replace Image.
Why does the whole thing move when I only want to move the photo?
You clicked the frame. Click the image thumbnail instead, then move or Cmd/Ctrl+T to scale; it stays clipped inside. Click the frame thumbnail to move the frame.
Why is Add Layer Mask grayed out on a frame?
Frames can’t take a mask directly. Press Cmd/Ctrl+G to group the frame with itself and mask the group. Select Subject on the background, mask the group, invert with Cmd/Ctrl+I, and the frame sits behind the subject.
How do I brighten just the frame?
Add a Levels adjustment layer and clip it to the frame with the clip icon or Alt/Option-click between the layers. The down arrow means it affects only the frame.
Does the Frame tool use credits?
Only when you choose Generate Image. Importing your own photo is free.
Are the sample files free?
Yes, with a free PHLEARN account. You get both sample images, the layered PSD and the PDF guide.
Master Photoshop, Lightroom and Photography
Join PHLEARN PRO for $12.99 a month or $99.99 a year. Cancel anytime, with a 100% money-back guarantee.





