


Download Assets
This tutorial includes sample images. Downloads are free with a PHLEARN account.
- Free sample files with every tutorial on PHLEARN
- New tutorials published every week
- Unlimited downloads with your free PHLEARN account
description
Hue/Saturation cannot put colour into a pixel that is pure black, because there is no brightness for a hue to attach to. This Quick Tip fixes the sequencing: lasso the black object, brighten its highlights and midtones with a masked Levels adjustment, darken the shadows back down for depth, then apply Hue/Saturation with the saturation kept modest.
Enjoying This Free Tutorial?
We publish a new free tutorial every week, each one with sample images and PSDs you can download and follow along with. Sign up and they land straight in your inbox, along with early word on sales, events and subscriber-only offers.
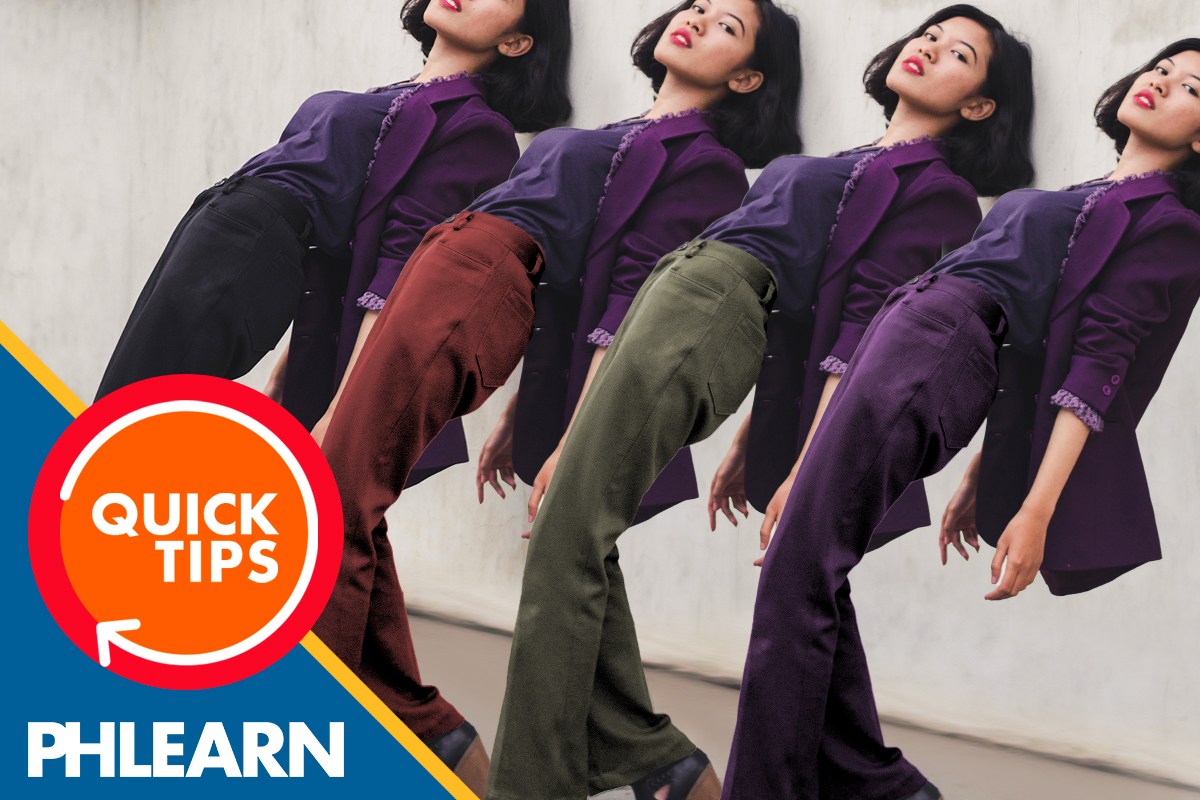
How to Turn Black into Any Color in Photoshop
This Quick Tip recolors a solid black object, lifting it out of pure black with a masked Levels adjustment first, then applying Hue/Saturation so it can actually take on a new hue.
Converting to a Smart Object First
Right-clicking the layer and converting it keeps the adjustments that follow editable, so the brightening, shadow, and color work can all be revisited later without redoing any of it from scratch.
Isolating the Black Object with the Lasso
Pressing L selects the Lasso tool, used here to draw a rough selection around just the black object that’s being recolored, leaving the rest of the photo untouched.
Subtracting to Refine the Selection
Switching the Lasso to subtract mode removes any extra area that shouldn’t be included, trimming the selection down until it covers just the black object and nothing else.
Masking a Levels Adjustment to the Selection
With that selection active, adding a layer mask to a new adjustment layer confines everything that follows to just the black object, leaving the rest of the image unaffected.
Brightening Highlights and Midtones
The highlights and midtones are brightened first, since a color can’t show up on something that’s rendered as pure black. Lifting these tones gives the object enough underlying brightness for a hue to actually become visible on it.
Working Inside the Masked Selection
Because the adjustment is masked to just the black object, brightening it this aggressively has no effect on the rest of the photo, which stays exactly as it was.
Darkening Shadows for Realism
After brightening the highlights and midtones, the shadows are darkened back down. Without this step the object would look flat and washed out; darkening the shadows restores a believable sense of depth and fabric folds once color is added.
Adding a Hue/Saturation Adjustment
With the object no longer pure black, a Hue/Saturation adjustment layer, opened with CTRL + U on a PC or CMD + U on a Mac, is added above it to introduce the actual color change.
Adjusting the Hue
The Hue slider is moved to whatever color the object should become, whether that’s red, olive, purple, or any other shade, now that there’s enough tonal range underneath for the color to register clearly.
One Slider, Many Outcomes
The same masked setup can be pushed to any point on the Hue slider, which is why this technique works equally well for turning the object red, olive, or purple, as shown across the comparison photos, without changing anything else in the process.
Keeping Saturation Low
Saturation is kept relatively low rather than pushed to a fully vivid color, since a formerly black object rarely reads as realistic in a bright, highly saturated hue; a more muted saturation level keeps the new color believable against the rest of the photo.
Revisiting the Levels Adjustment
Double-clicking back into the earlier Levels adjustment reopens it for further tuning, letting the highlight, midtone, and shadow balance be refined again after seeing how the final color actually looks.
More Free Photoshop Tutorials
- Photoshop Basics: Change Black to Any Color
- Change Any Color into a Specific Color in Photoshop
- Change the Color of Foliage in Photoshop
Why This Technique Works
Hue/Saturation can’t introduce color into a pixel that’s rendered as pure black, since there’s no brightness for a hue to attach to. Brightening the object with Levels first, then restoring some shadow depth for realism, is what makes the object capable of holding a new hue at all, and keeping saturation modest afterward is what keeps that new color from looking artificial.
Final Thoughts
Turning a black object into any other color comes down to sequencing: lift it out of black with a masked Levels adjustment, rebuild some shadow depth, then apply Hue/Saturation with the saturation kept in check, so the final color looks like it belongs in the photo rather than pasted on top of it.
Related Tutorials
From the Magazine View all
Stories, interviews and guides for photographers, new every week.
 BusinessHow to Compete With AI: Give Your Clients MoreEveryone has the same tools now, and your clients know it. The way to compete is to give them more.
 EditingLightCraft vs Lightroom: Is the Free Clone Any Good?The free clone on the same RAW files: what matches, what breaks and who should switch.
 EditingHow to Tell If a Photo Is AI, and Prove Yours Is RealThe tells that still work in 2026, why detectors disagree, and how to prove your own photos.
Master Photoshop, Lightroom and Photography
Join PHLEARN PRO for $12.99 a month, or $99.99 a year (save 36%). Cancel anytime, with a 100% money-back guarantee.





