

Download Assets
This tutorial includes sample images. Downloads are free with a PHLEARN account.
- Free sample files with every tutorial on PHLEARN
- New tutorials published every week
- Unlimited downloads with your free PHLEARN account
description
A real glass reflection is additive light sitting on top of whatever is behind the glass, which is exactly what Screen blend mode reproduces. This Quick Tip layers photographed reflections from the free pack over a portrait in Screen mode, paints black onto a group mask so the reflection fades unevenly the way a real one does, then stacks a second image and darkens the result with Levels.
Enjoying This Free Tutorial?
We publish a new free tutorial every week, each one with sample images and PSDs you can download and follow along with. Sign up and they land straight in your inbox, along with early word on sales, events and subscriber-only offers.
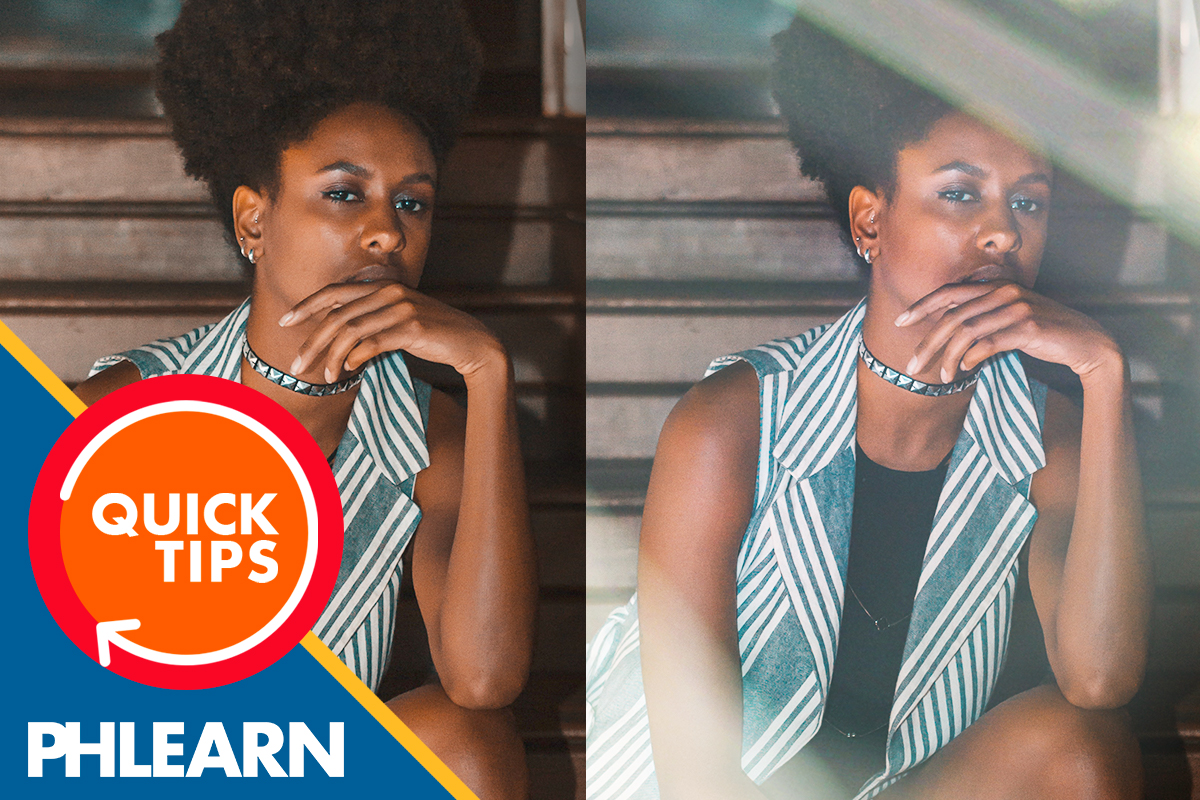
How to Create a Window Reflection Effect in Photoshop
This Quick Tip layers a photographed glass reflection over a portrait to fake the look of shooting through a window, using Screen blend mode and a hand-painted mask to control exactly where the reflection shows.
Downloading the Free Reflection Pack
The technique starts with the free reflection image pack included in this tutorial’s download, a set of photographed glass reflections and light streaks ready to layer over any portrait.
Choosing and Placing a Reflection Image
One image from the pack is chosen and placed into the document above the portrait, positioned so its streaks of light and glass texture fall across the areas of the frame where a real window reflection would land.
Setting the Blend Mode to Screen
The reflection layer’s blend mode is set to Screen, which lets its bright areas shine through onto the portrait while its dark areas have little to no visible effect, rather than sitting on top as an opaque image.
Why Reflections Read Better in Screen Mode
Real glass reflections are additive, brightness layered on top of whatever is behind the glass, which is exactly what Screen mode simulates, unlike Normal mode, which would simply cover the portrait underneath.
Masking the Reflection Group
The reflection image is grouped, and a layer mask is added to that group so the effect can be controlled and hidden in specific areas rather than applying evenly across the whole frame.
Painting Black to Mimic a Shadow
With the Brush tool, selected with the B key, black is painted onto that mask in places where the reflection should fade out, mimicking the way a real window reflection naturally grows weaker or disappears across parts of a scene rather than staying uniformly bright everywhere.
Layering a Second Image for More Depth
A second image from the reflection pack is added above the first, in the same Screen blend mode, building up more visual depth than a single reflection layer can provide on its own.
Why One Layer Isn’t Always Enough
A single reflection image can look thin or one-dimensional on its own; stacking a second one adds overlapping streaks and glass texture that reads as a more complex, believable window surface.
Darkening with Levels for Subtlety
A Levels adjustment is used to darken the combined reflection layers slightly, pulling the effect back from full intensity so it reads as a subtle, believable window reflection rather than an obviously overlaid effect.
More Free Photoshop Tutorials
- Remove Reflections from Faces in Photoshop
- Create a Lens Flare Effect in Photoshop
- How to Create Realistic Light Rays in Photoshop
Why This Technique Works
Screen mode is what makes a photographed reflection behave like light passing through glass instead of a flat image pasted on top, and masking that reflection with hand-painted shadow keeps it from looking perfectly even, which is exactly how a real window reflection behaves. Layering a second image and darkening the result with Levels adds the kind of subtle complexity that separates a convincing effect from an obviously artificial one.
Final Thoughts
Building a window reflection effect comes down to Screen blend mode, a mask painted to mimic natural shadow, a second layered image for added depth, and a final Levels pass to keep the whole thing subtle rather than overpowering the portrait underneath it.
Related Tutorials
New Free Tutorials View All »












Enjoying This Free Tutorial? Go Further with PRO.
Unlock Full Sample Files, PSDs, and Hundreds of Masterclasses!

Download full project assets, original PSDs, and RAW images for every lesson
Unlimited access to our complete library of PRO Photoshop & Lightroom courses
Instant 4K Ultra HD streaming on all devices, anytime, anywhere
Full access to our entire library of Photoshop Actions, Presets, and LUTs
Flexible monthly and annual membership plans
Cancel anytime with zero hassle or commitments