
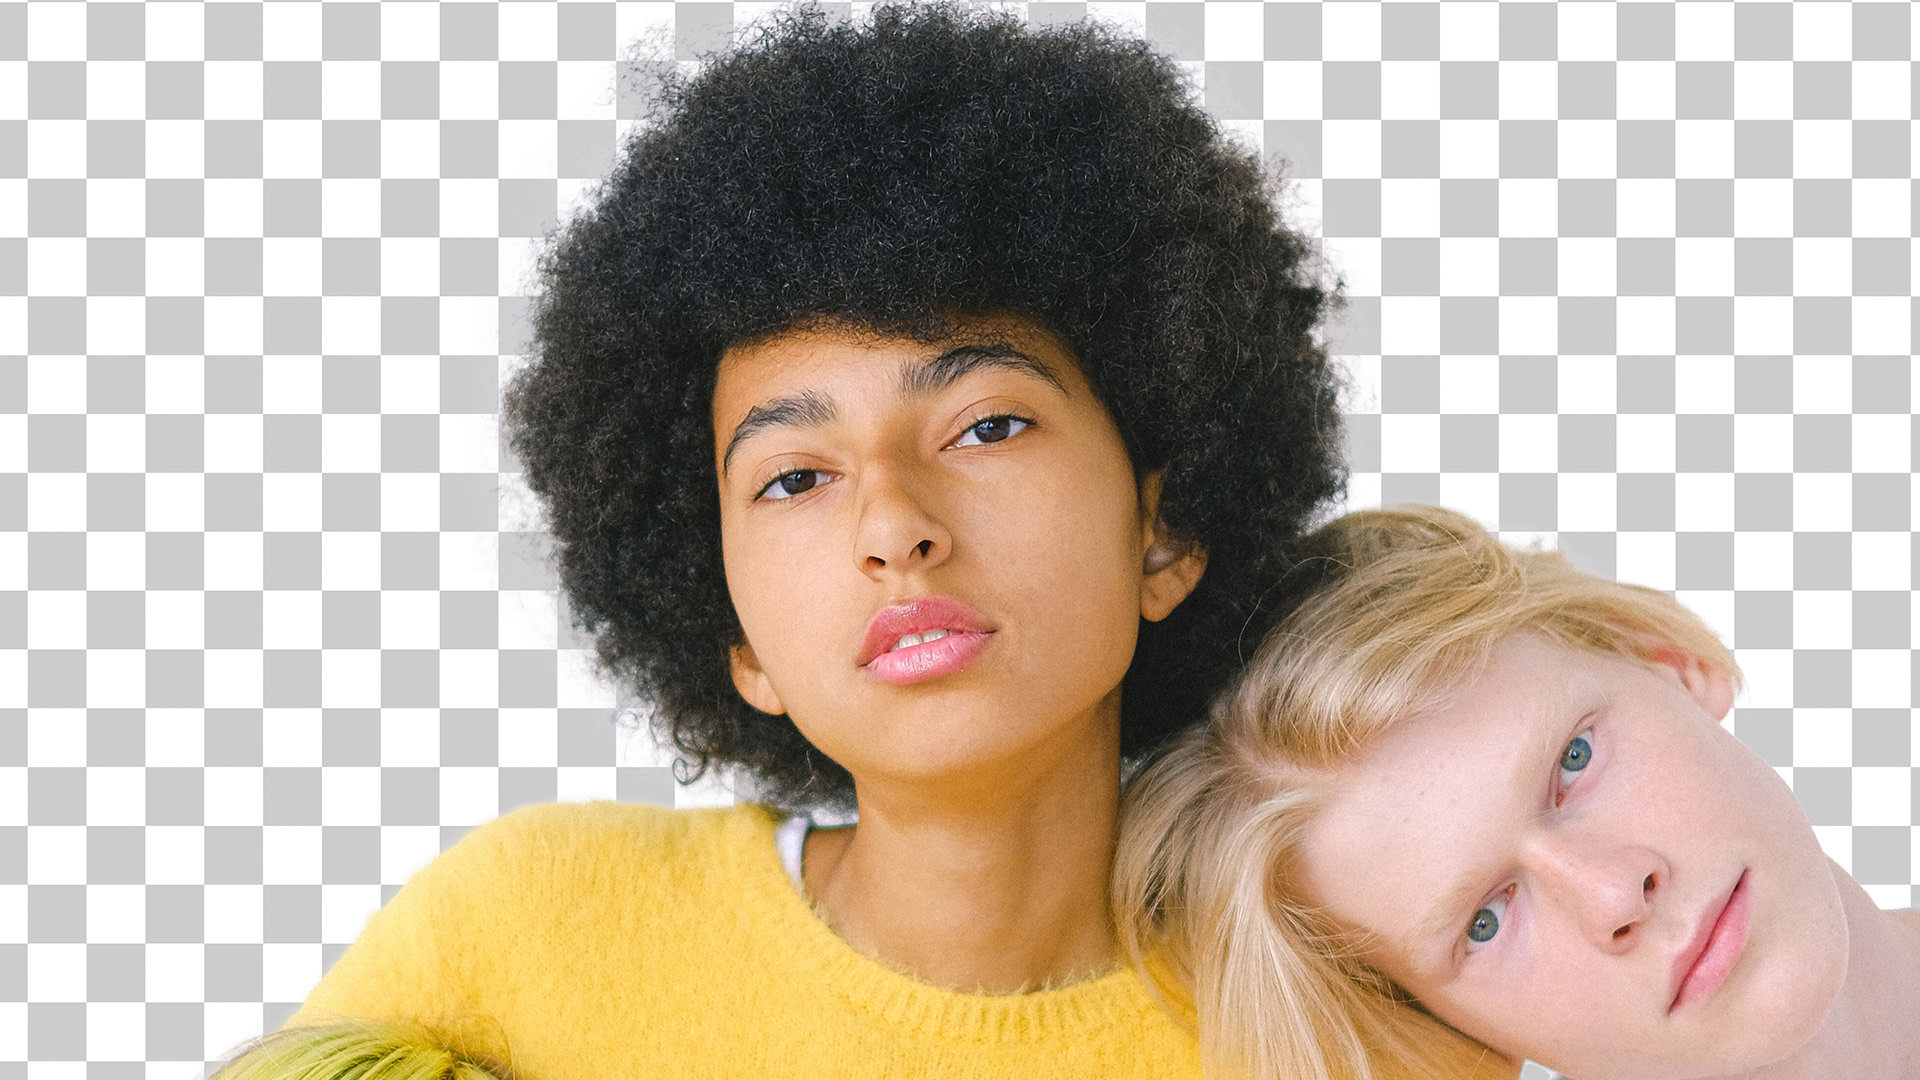

Download Sample Images
Download Assets
This tutorial includes 1 sample image, 1 sample PSD and 1 PDF guide. Downloads are free with a PHLEARN account.
- Free sample files with every tutorial on PHLEARN
- New tutorials published every week
- Unlimited downloads with your free PHLEARN account
Download the Sample PSD
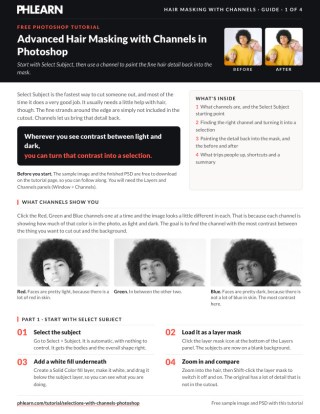
Free PDF Guide · 4 Pages
This Tutorial as a Step-by-Step PDF
The guide starts with Select > Subject and a white Solid Color fill, then compares the Red, Green and Blue channels, duplicates Blue, boosts it with Levels, loads it as a selection, inverts it and paints the hair back into the mask. Keep it next to your keyboard.
description
Learn how to make ultra-detailed selections of hair using Channels in Photoshop! Perfect cutouts, every time.
Enjoying This Free Tutorial?
We publish a new free tutorial every week, each one with sample images and PSDs you can download and follow along with. Sign up and they land straight in your inbox, along with early word on sales, events and subscriber-only offers.
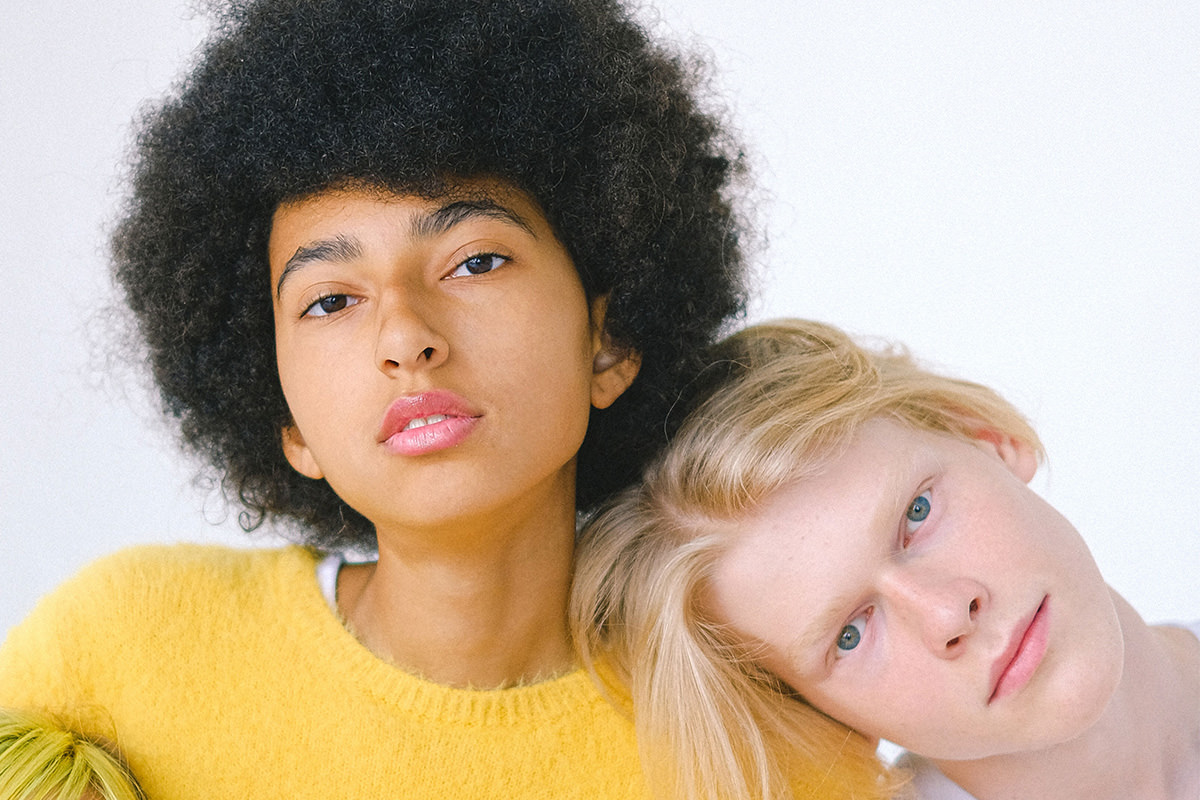
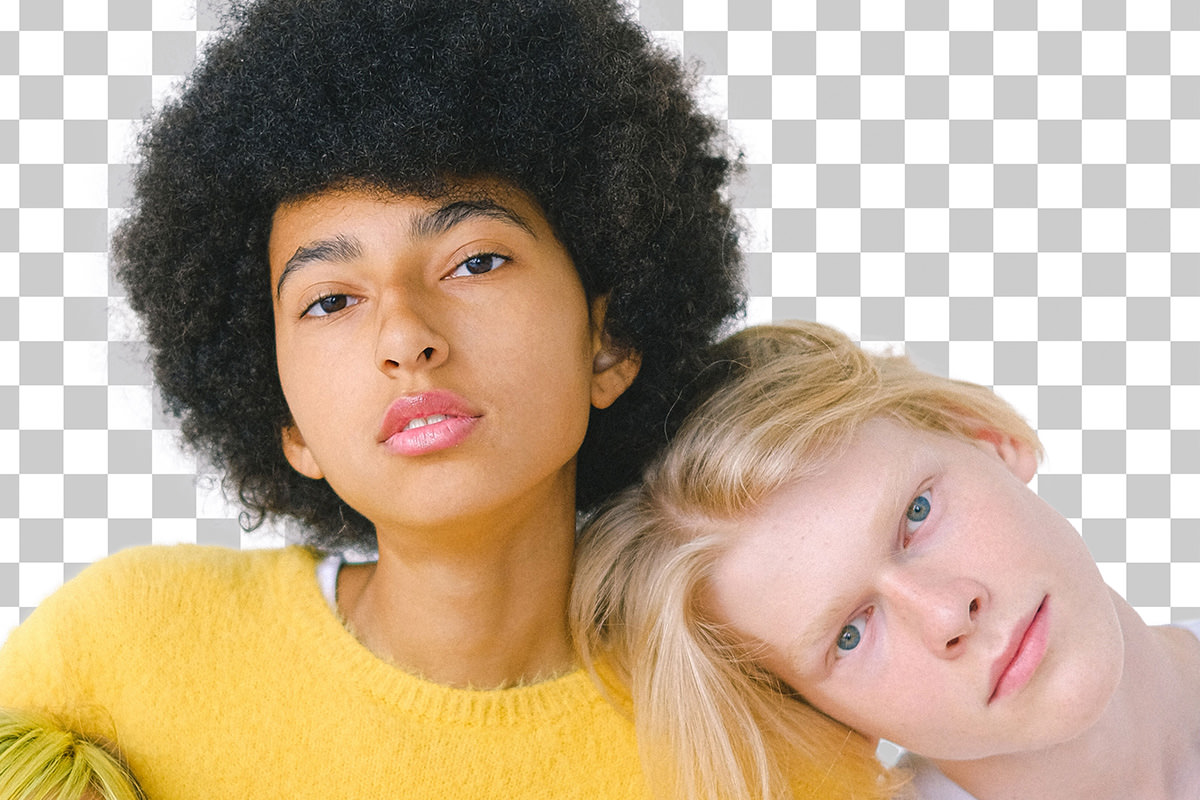
Select Subject Gets You Started. Channels Get You the Hair.
Photoshop’s Select Subject is genuinely good and takes one click. It also has a characteristic failure: hair comes back crisp and crunchy, with all the fine strands that make a cut-out believable simply gone.
The fix isn’t a better automatic tool — it’s Channels, and the technique is far less intimidating than its reputation. You’re doing one thing: finding the grayscale version of your image with the most contrast between subject and background, and turning that contrast into a selection.
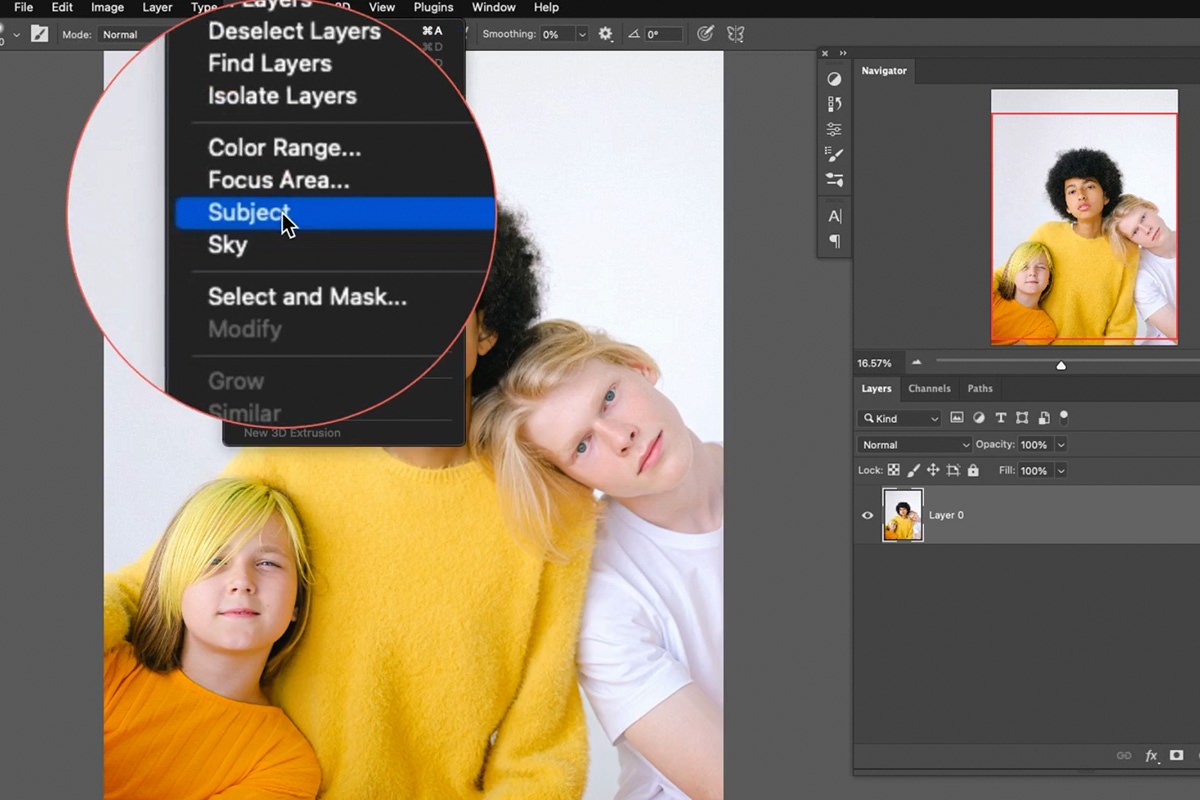
Start with Select Subject Anyway
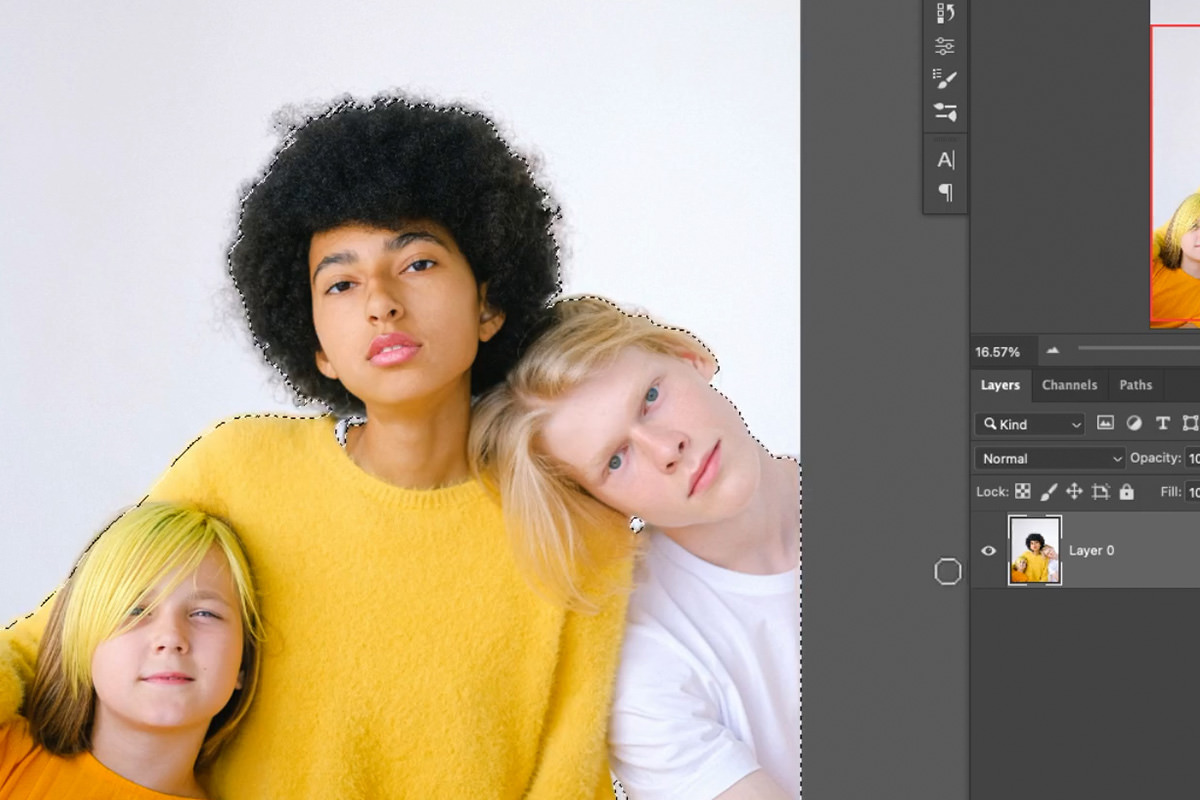
It’s still the right opening move — it does the body, the clothing and the broad shape in a second, and channels only need to fix the edges.
-
Select › Subject
Fully automatic, no settings.
-
Click the layer mask icon
The selection becomes a mask.
-
Put a white Solid Color fill layer underneath
So you can actually see the edges you’re about to fix. Against the original background, mask flaws are invisible.
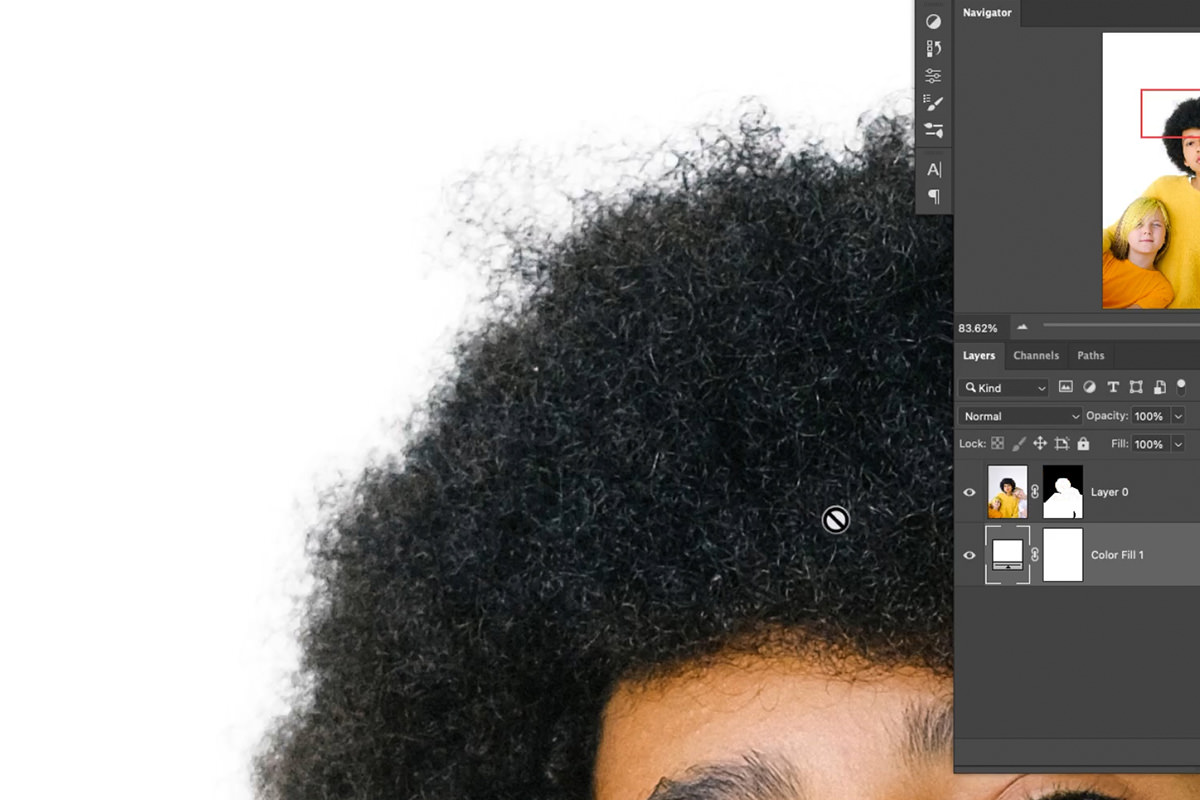
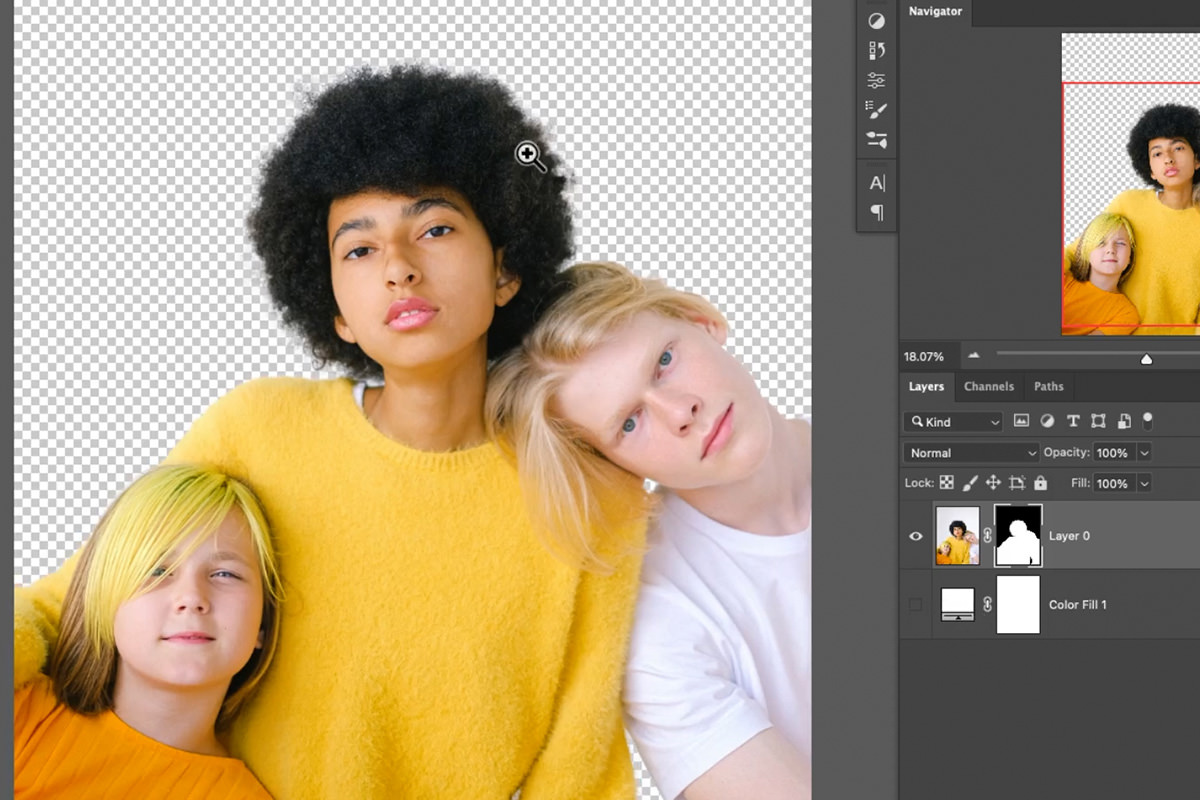
Zoom into the hair and the problem is obvious: a hard edge where there should be hundreds of individual strands.
What Channels Actually Are
Every RGB image already contains three grayscale images — the Red, Green and Blue channels — each showing how much of that color is present, as light and dark values.
Because different subjects contain very different amounts of each color, one of those grayscale versions is usually far closer to a finished mask than the others. You aren’t creating anything; you’re choosing the version Photoshop already has.
Finding the Right Channel
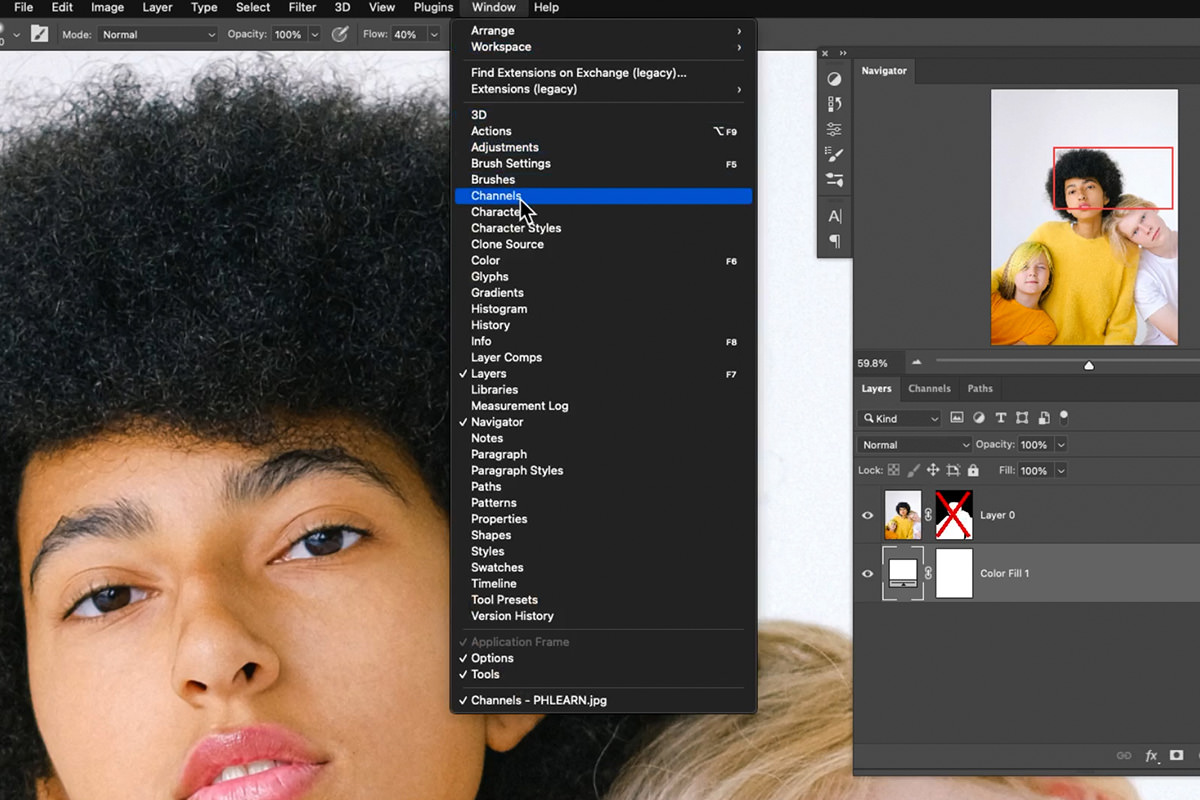
First, temporarily switch the existing mask off: Shift-click the layer mask thumbnail and a red X appears over it. That disables the mask without deleting it, so you can see the original image while you work — and Shift-click again to bring it back.
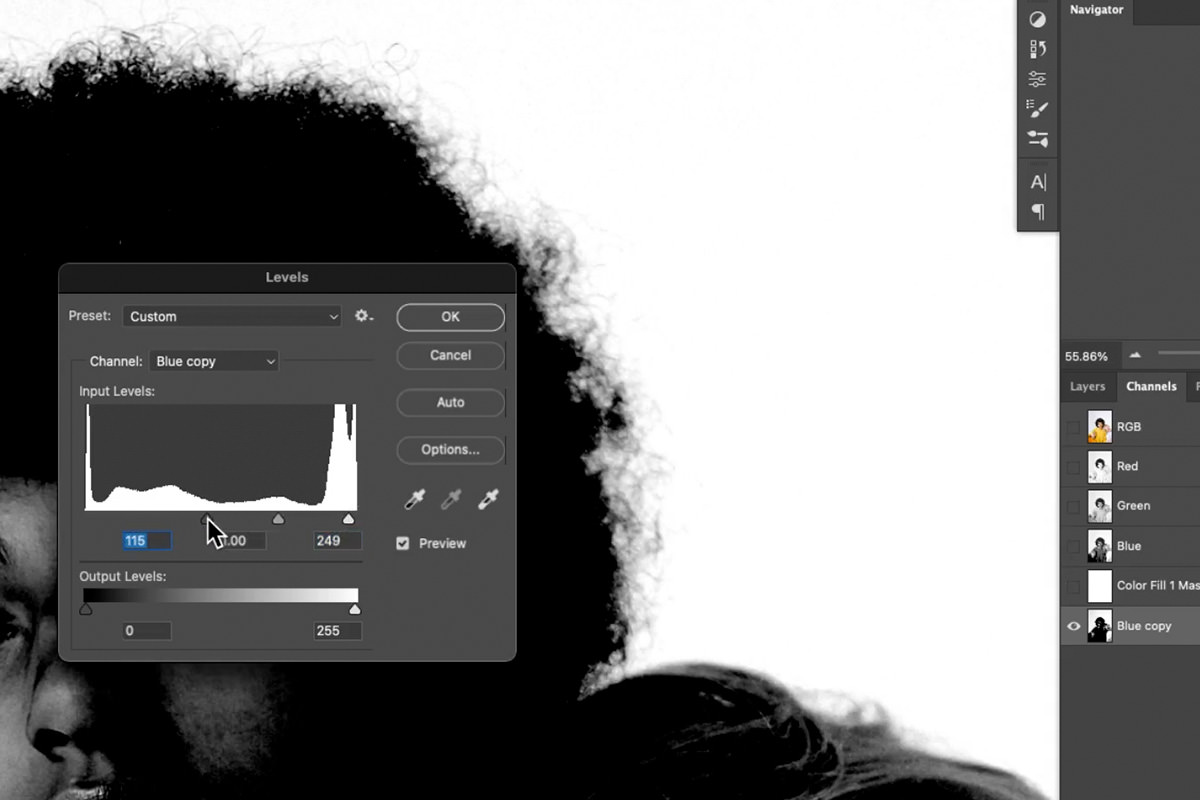
Then open Window › Channels and click Red, Green and Blue in turn.
You’ll see something consistent on portraits: faces are bright in the Red channel and dark in the Blue channel, because human skin contains a great deal of red and very little blue. That’s not a quirk of one image, it’s true of essentially every photograph of a person.
Pick the channel with the greatest contrast between what you want to keep and what you want to lose. For dark hair against a light background that’s usually Blue, where the hair goes nearly black and the background stays bright.
Duplicate It and Push the Contrast
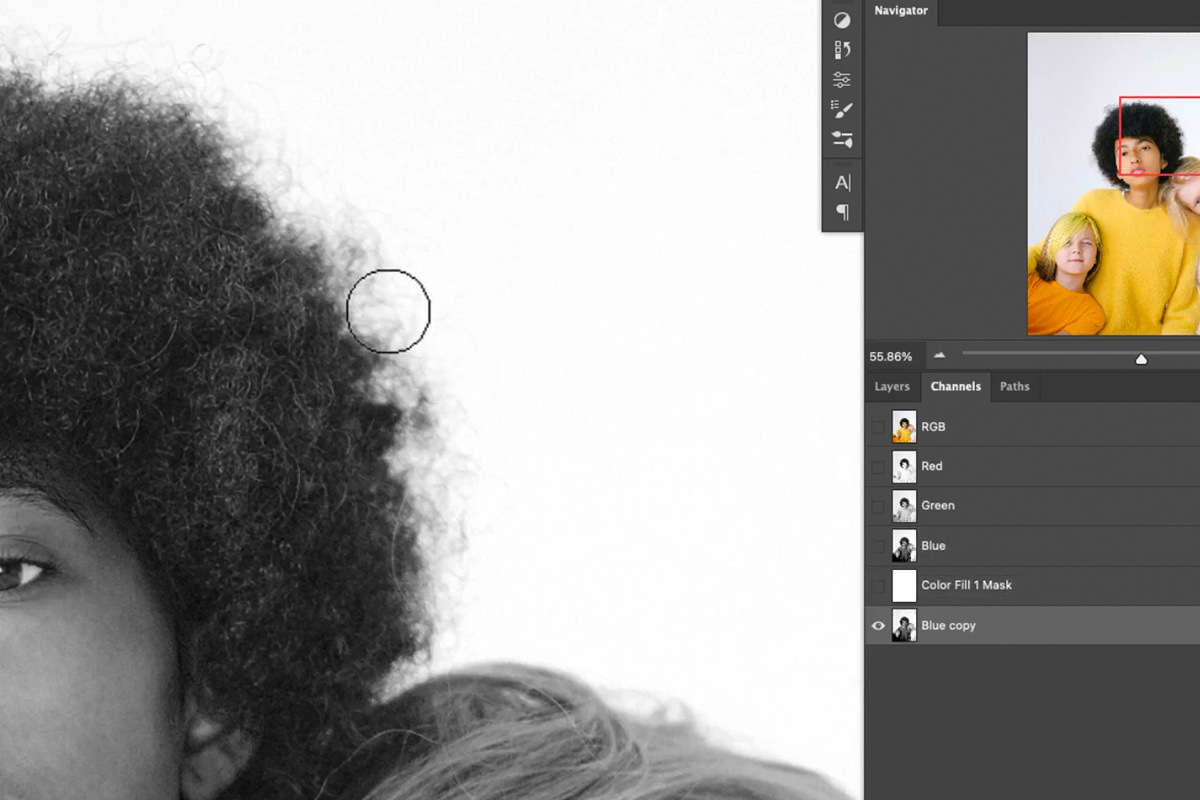
-
Duplicate the channel you chose
Drag it onto the new-channel icon at the bottom of the panel. Always work on the copy — editing a live channel changes the image itself.
-
Press Cmd/Ctrl + L for Levels
Drag the black input handle right to deepen the dark areas, and the white handle left to brighten the background.
-
Don’t push it to pure black and white
This is the important difference from a hard cut-out. Individual hair strands are semi-transparent — they should stay gray, because gray becomes a partial selection, which is exactly what makes hair look soft rather than cut out. Crushing everything to black and white throws away the very detail you’re here for.
The channel will look like a strange, harsh photograph. That’s fine — it’s a mask, not an image.
Turning the Channel Into a Selection
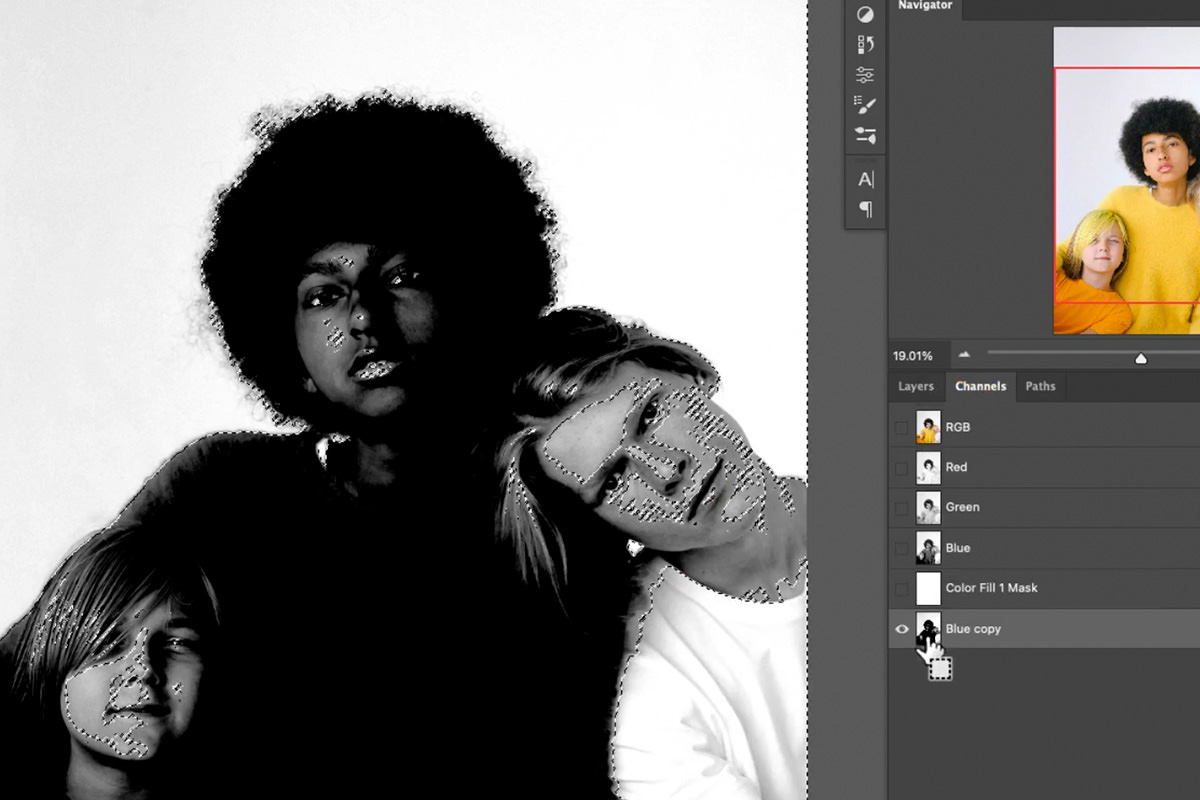
Hold Cmd/Ctrl and click the channel’s thumbnail, or click the dotted-circle icon at the bottom of the Channels panel.
One rule to hold onto: a channel selection always selects the light areas. White becomes selected, black unselected, gray partially selected.
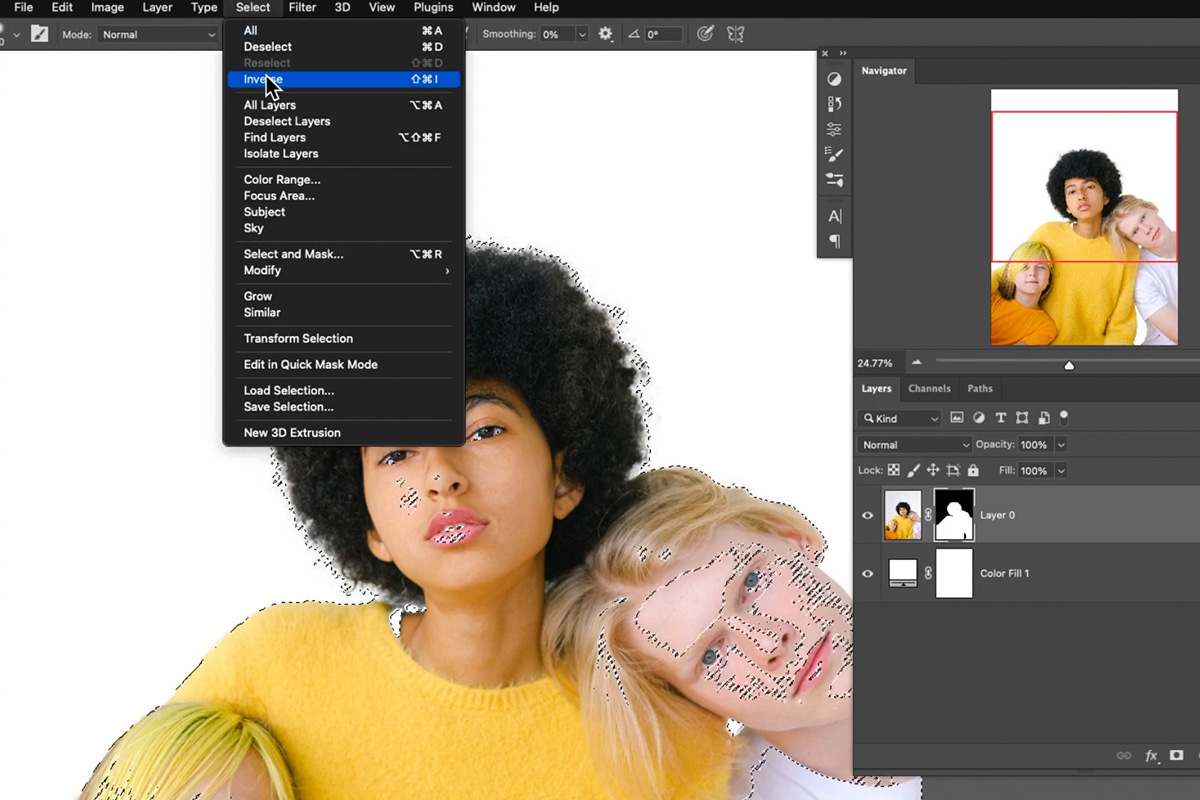
So having chosen a channel where the hair is dark, you’ve just selected the background. Go to Select › Inverse and now the hair, the clothing and everything darker than the background is selected instead.
Painting the Detail Back In
Return to the Layers panel, re-enable your mask by Shift-clicking it, and here’s the part that feels like magic.
-
Click the layer mask to make it active
Alt/Option-click the thumbnail if you want to watch the mask itself while you work.
-
Press Cmd/Ctrl + H to hide the marching ants
This hides the selection without deselecting it — the constraint is still active, you just can’t see the outline. Press it again to bring the ants back. If Photoshop asks, choose Hide Extras.
-
Paint white on the mask over the hair
Because the selection is still live, your brush physically cannot paint outside the hair. Strands appear as you paint, at the partial opacities the gray values dictated.
-
Work along every edge
Hair first, then the shoulders and clothing. A smaller brush along a sweater edge softens the crunchy automatic boundary considerably. Finally, deselect and look over the mask for anything inside the subjects that should be visible but got cut out, like a bit of shirt, and paint those areas white on the layer mask.
This is the whole idea: the channel selection acts as a stencil, so a loose brush produces a precise result. You’re not tracing hair — you’re painting broadly inside a selection that already knows where the hair is.
The Before and After
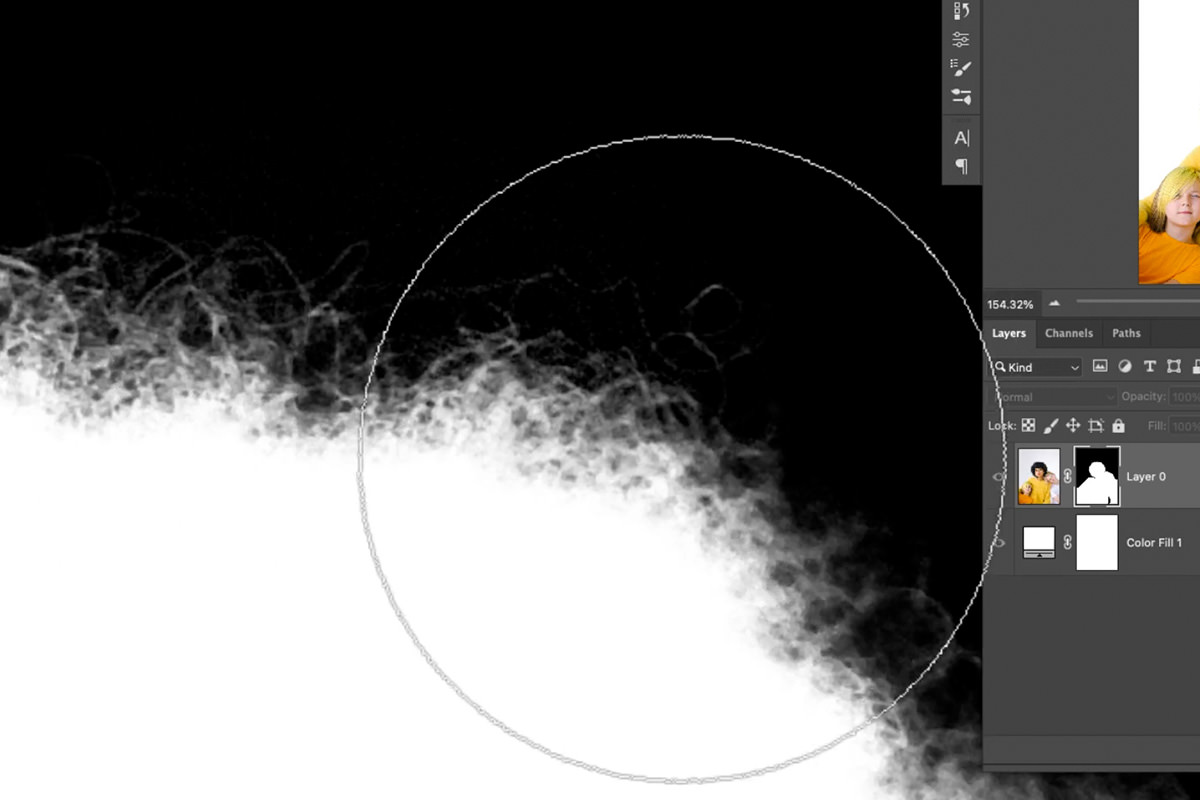
Duplicate the layer and run Select Subject on the copy for a fair comparison. The automatic version has hard, crisp edges — hair reduced to a silhouette, sweater outlines that look cut with scissors.
The channel version has strands, soft transitions and edges that read as photographic. On a white background the difference is unmistakable; composited onto a new background it’s the difference between believable and obviously pasted.
Where Channel Selections Go Wrong
Editing the original channel
Levels on a live channel alters the image itself. Duplicate first, every time.
Crushing everything to black and white
Right for hard-edged graphics, wrong for hair. Semi-transparent strands need to stay gray.
Forgetting to inverse
Channel selections take the light areas. If your subject is dark, you’ve selected the background.
Choosing a channel by habit
Blue often wins for portraits, but it depends entirely on the background color. Check all three every time.
Working against the original background
Put a plain fill layer underneath or you cannot see what you’re fixing.
Expecting it to work on a low-contrast image
Dark hair against a dark background gives the channels nothing to separate. This technique needs contrast — and it’s worth remembering on set.
Look for Contrast, Wherever It Is
Channels have a reputation for being advanced, and the underlying idea is simple enough to state in a sentence: find contrast, turn it into a selection.
Once that clicks, you’ll start noticing it everywhere — a bright sky against a dark treeline, a light dress against a dark wall. Anywhere one of the three channels separates your subject from its background, you already have most of a mask.
Quick Reference: Keys, Menus and Settings
- Rough cutoutSelect > Subject, then the layer mask icon; a white Solid Color fill layer underneath
- Switch the mask offShift-click the layer mask thumbnail (red X); again to turn it back on
- Pick a channelWindow > Channels, click Red, Green and Blue; drag the one with the most contrast onto the plus icon
- Boost the contrastCmd/Ctrl + L Levels: darks a little darker, lights a little lighter
- Channel to selectionCmd/Ctrl-click the Blue copy thumbnail, then Select > Inverse
- Paint the detailCmd/Ctrl + H hides the outline; paint white on the mask; Alt/Option-click to view the mask
- FinishDeselect and paint white over anything inside the subjects that got cut out
Free Downloads
Follow Along on the Same Photo
Get the sample portrait, the finished masked PSD and the 4-page PDF guide that walks through every step. Free with a PHLEARN account.
Hair Masking with Channels: Common Questions
Why use channels if Select Subject already works?
Select Subject is fast and usually does a very good job, but it leaves hair crisp and misses the fine strands. Channels turn the contrast between the hair and the background into a selection, which you use to paint that detail back into the Select Subject mask.
Which channel should I use for hair?
Open Window > Channels, click Red, Green and Blue in turn and pick the one with the most contrast between the subject and the background. With people on a light background that is often Blue, where the hair and faces go dark.
Why are faces light in the Red channel and dark in Blue?
Each channel shows how much of that color is in the photo, as light and dark. Skin has a lot of red and not much blue, so faces look light in Red and dark in Blue.
Why duplicate the channel before Levels?
Adjusting the real Blue channel changes the image itself. Drag it onto the plus icon at the bottom of the Channels panel and work on Blue copy instead.
How far should I push Levels on the channel?
Press Cmd/Ctrl + L and make the darks a little darker and the lights a little lighter, not too far. Fine strands that stay gray become a partial selection, which is what lets hair come back soft.
Why did the channel select the background instead of my subject?
A channel always selects the lighter areas. When your subject is the dark part, go to Select > Inverse so the hair, the sweater and everything darker than the background is selected.
Does Cmd/Ctrl + H deselect?
No. It only hides the marching ants, and the selection still limits where you paint. Press it again to bring the outline back. If Photoshop asks the first time, choose Hide Extras.
How do I paint the hair back in?
Click the layer mask and paint white along the hair while the selection is active. The brush can only add detail where the channel found it. Alt/Option-click the mask to watch the mask itself while you paint.
Part of my subject is still cut out. How do I fix it?
Deselect, then paint white on the layer mask over anything inside the subjects that should be visible, like the bit of shirt in the video.
Are the sample files free?
Yes, with a free PHLEARN account. You get 1 sample image, 1 sample PSD and 1 PDF guide: the portrait from the video, the finished masked PSD and a 4-page step-by-step guide.
From the Magazine View all
Stories, interviews and guides for photographers, new every week.
 EditingHow to Color Grade Photos in Photoshop and LightroomCorrect the photo first, then put color in the shadows, midtones and highlights. Aaron Nace on the order, the tools and skin.
 BusinessHow to Compete With AI: Give Your Clients MoreEveryone has the same tools now, and your clients know it. The way to compete is to give them more.
 EditingLightCraft vs Lightroom: I Edited the Same RAW Files in BothThe free clone on the same RAW files: what matches, what breaks and who should switch.
Master Photoshop, Lightroom and Photography
Join PHLEARN PRO for $12.99 a month, or $99.99 a year (save 36%). Cancel anytime, with a 100% money-back guarantee.





