
Download Assets
Download Assets
This tutorial includes 2 sample images and 2 sample PSDs. Downloads are free with a PHLEARN account.
- Download the sample images and PSDs from every free tutorial on PHLEARN
- New free tutorials published every week
- One free account — sign up once, then download anything
Watch the Full Series
30 Days of Photoshop · 2025 EditionOur most-watched series, updated for 2025 — watch all 30 free
description
Select Subject has quietly become one of the most useful buttons in Photoshop, and most people are running it in the wrong mode. There is a setting that sends the job to Adobe’s cloud instead of your own machine, and the difference in edge quality is not subtle.
Day 9 turns that on, then uses one click twice: once to light a subject with a curves layer, and once inverted, to build a warm flare into the background behind them.
This is Day 9 of 30 Days of Photoshop, 2025 Edition — our most-watched series, rebuilt from the ground up for today’s tools.
Continue Watching 30 Days of Photoshop
JOIN 30 DAYS OF PHOTOSHOP (FOR FREE!)
Ready to jump in? Sign up and we’ll email you a printable calendar and daily class schedule so you can get started right away!
Image Source
Select Subject Is the Most Useful Button in Photoshop
Everything in this series that starts with “make a selection” got dramatically easier when Select Subject moved to cloud processing. It is one button, it takes a couple of seconds, and it produces edges that used to take real work.
Two examples here, both built on the same single click: one that improves the subject, and one that inverts the same selection to improve everything around them.
Switch It to Cloud Processing First
This is the step that matters and almost nobody knows about it. Photoshop can run Select Subject locally on your machine or send the image to Adobe’s servers, and the cloud version is significantly better at hair, edges and fine detail.
-
Open Settings (Preferences) > Image Processing
On macOS it is under the Photoshop menu; on Windows, under Edit > Preferences.
-
Set Select Subject and Remove Background to Cloud
The panel labels it as the highly detailed option. It needs an internet connection and takes a moment longer to run. It is worth both.
Select Subject itself lives in the contextual task bar whenever a layer is active, in the options bar when a selection tool is chosen, and under Select > Subject. If the task bar is missing, turn it on under Window > Contextual Task Bar.
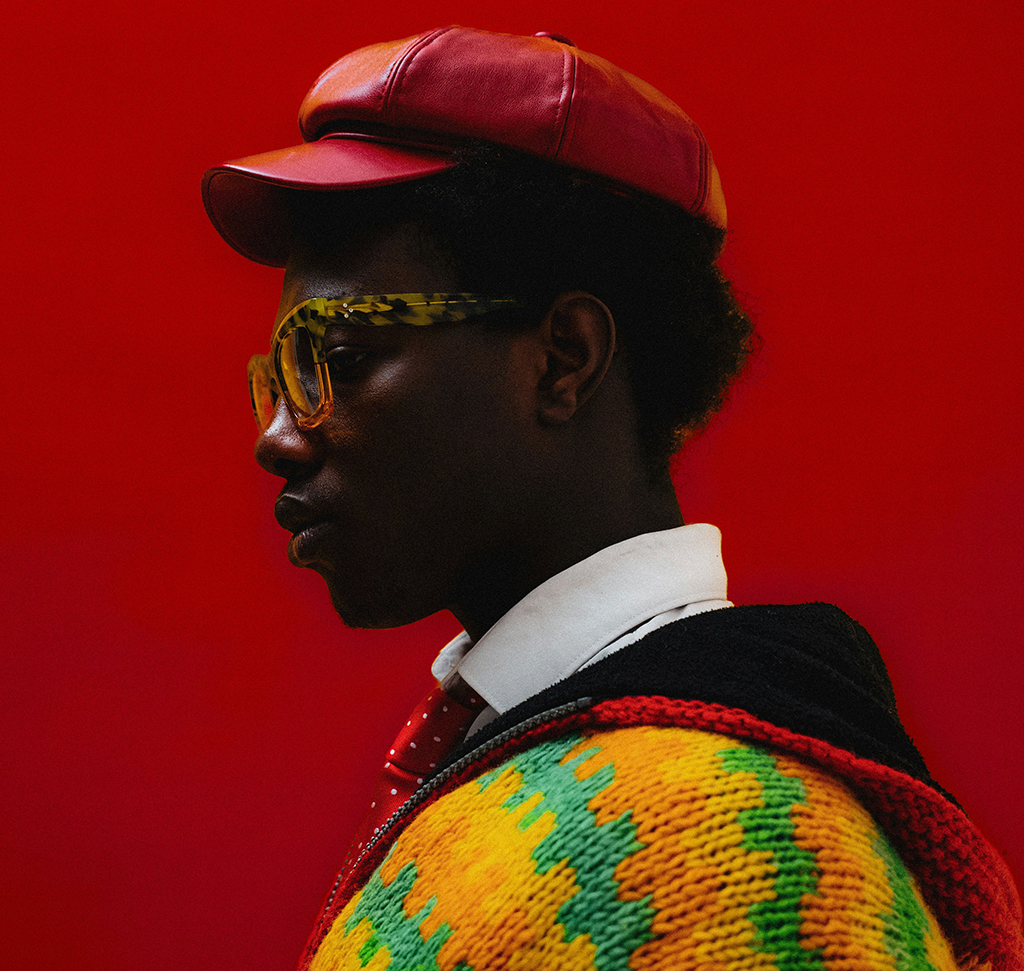
Example One: Light the Subject With Curves
-
Click Select Subject
With the background layer active. A few seconds later the subject is selected, edges and all.
-
Add a Curves Adjustment Layer
Because the selection is live, it becomes the layer’s mask automatically. There is no separate masking step — that is the entire trick to this workflow.
-
Lift the Midtones, Protect the Highlights
Click the middle of the curve and pull up to brighten. Lift the shadow end a little so the darkest parts of the subject open up. Then put a point in the upper section and pull it back down so the brightest areas do not blow out.
-
Toggle It On and Off
The background is completely untouched, which is exactly the point — the subject is now correctly exposed for their own lighting rather than for the scene’s.

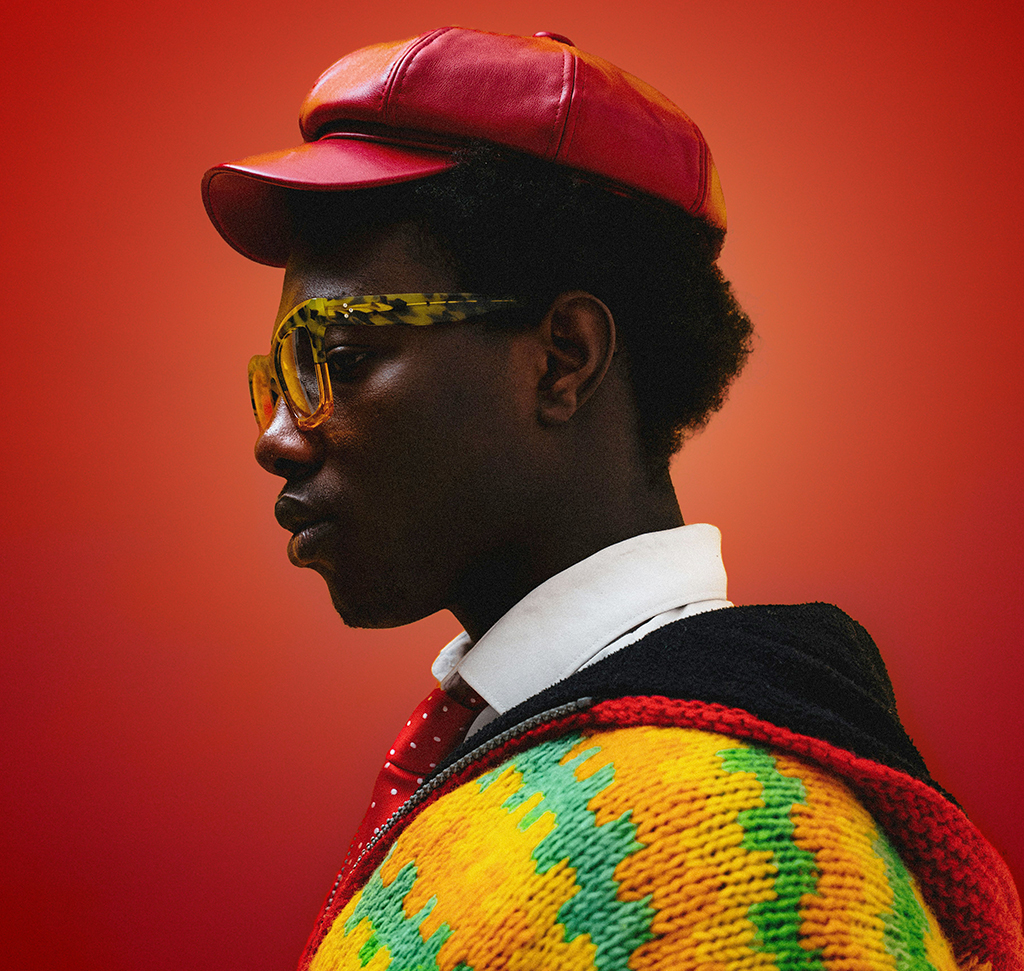
Add a Sunset Flare With a Masked Levels Layer
The second layer on this image builds warm light into the frame, using the per-channel controls from Day 7.
-
Add a Levels Layer and Switch to the Red Channel
Drag the left-hand output slider to the right. That lifts the darkest red value, which puts red into the shadows rather than brightening the whole image.
-
Do the Same on the Green Channel
A little green alongside the red gives you warm orange rather than a flat magenta cast. The combination is what reads as low sun.
-
Mask It to Where the Light Should Come From
Click the mask, take the Gradient tool with the black-to-white radial preset, and drag out from wherever the sun would be. The color pools there and falls away across the frame.
-
Go Back and Push It Further
Double-click the adjustment thumbnail and pull the channel sliders again while looking at the masked result. Judging the strength once the flare is confined to one corner is much easier than judging it across the whole picture.
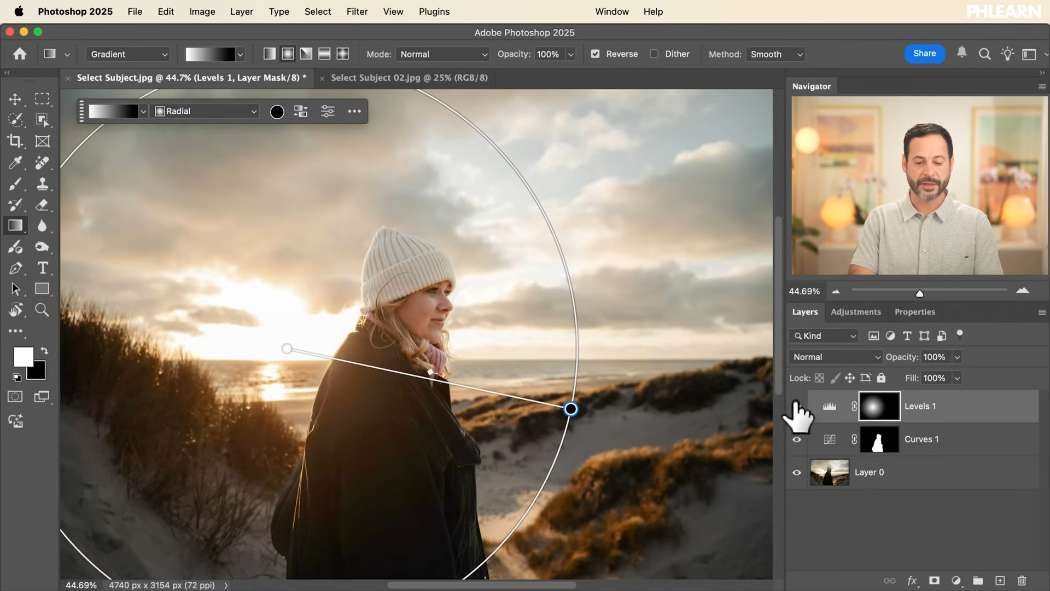
Example Two: Invert the Selection to Reach the Background
Select Subject only ever selects the subject — but the background is just the inverse of that, which makes it a two-click selection as well.
-
Brighten the Subject First
Run Select Subject, then add a Brightness/Contrast layer. Curves, levels and exposure all work here; brightness/contrast is two sliders and often enough. Raise brightness, ease the contrast down.
-
Run Select Subject Again on the Background Layer
Adding the adjustment layer dropped the selection, so make it again from the original layer.
-
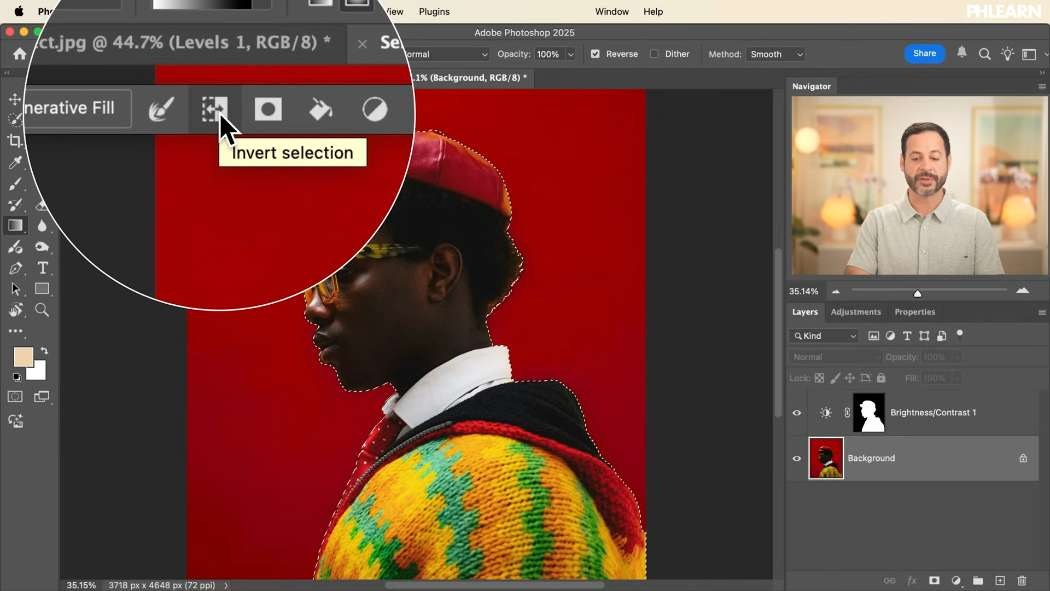
Invert the Selection
Click the invert icon in the contextual task bar (or Shift + Ctrl/Cmd + I). Everything except your subject is now selected.
-
Drag a Colored Gradient Into the Background
Take the Gradient tool, choose foreground to transparent from the Basics group, set the foreground color to a warm orange, and pick the radial type. Drag out from just behind your subject’s head. Tick Reverse if it comes out inside-out.
Because the selection was active, the gradient stops dead at the subject’s outline. It reads as light behind them rather than paint over them — and it is two layers and about ninety seconds of work.
Why This Beats Selecting by Hand
The Selection Becomes the Mask for Free
Add any adjustment layer while a selection is live and Photoshop writes the selection into its mask. Select, adjust, done.
One Selection, Two Jobs
Subject and background are the same boundary seen from either side. Inverting costs one keystroke.
Nothing Is Committed
Every result above is an adjustment layer with a mask. Change the curve, repaint the mask, delete the layer — the original pixels never moved.
When Select Subject Struggles
Low Contrast Between Subject and Background
A dark coat against a dark wall gives the model very little to work with. Cloud mode helps; a manual pass with the Refine Edge Brush in Select and Mask helps more.
Hair Against Busy Detail
Flyaway strands over foliage or brick are the classic hard case. Expect to refine rather than accept the first result.
More Than One Possible Subject
With several people or objects in frame, Photoshop makes its own decision about what “the subject” means. When it guesses wrong, the Object Selection tool from Day 8 lets you point at exactly what you meant.
Two Images, Four Layers
Download both sample images and run each edit. The habit worth taking away is the order: select, then add the adjustment. Do it that way and you never mask anything by hand; do it the other way round and you make work for yourself every single time.
Tomorrow, Day 10 gets into Adobe Camera Raw — a full raw processor living inside Photoshop as a filter.
Quick Reference: Keys, Menus and Settings
- Cloud processingSettings > Image Processing: Select Subject and Remove Background set to Cloud
- Select the subjectSelect Subject in the Contextual Task Bar, or Select > Subject
- Brighten the subjectAdd Curves with the selection live; lift the middle, pull the highlights back down
- Sunset flareLevels > Red, then Green: left output slider right; mask with G, Black to White, Radial
- Select the backgroundSelect Subject, then the invert icon, or Shift + Cmd/Ctrl + I
- Glow behind the subjectG, Foreground to Transparent, orange, Radial; Reverse if inside-out
Free Downloads
Follow Along on the Same Photos
Get both sample photos, one subject to brighten with a sunset flare and one background to light, plus a layered PSD of each finished edit. Free with a PHLEARN account.
Select Subject: Common Questions
How do I turn on cloud processing for Select Subject?
Open Settings (Preferences) > Image Processing and set Select Subject and Remove Background to Cloud, the highly detailed option. It needs an internet connection and takes a moment longer.
Where is the Select Subject button?
In the Contextual Task Bar when a layer is active, and under Select > Subject. If the task bar is missing, turn it on under Window > Contextual Task Bar.
Do I have to make a mask after selecting my subject?
No. Add any adjustment layer while the selection is live and Photoshop loads the selection into that layer’s mask for you.
How do I brighten only my subject?
Run Select Subject, add a Curves layer and drag the middle of the curve up. Lift the shadows a little and pull the highlights back down so they don’t blow out.
How do I add a warm sunset flare?
Add a Levels layer, switch to the Red channel and drag the left output slider right, then do a little of the same on Green. Mask it with a black-to-white radial gradient dragged out from where the sun would be.
How do I select the background instead of the subject?
Run Select Subject, then click the invert icon in the Contextual Task Bar. Everything except your subject is now selected.
Why did my selection disappear after I added an adjustment layer?
It went into that layer’s mask. To use it again, click the background layer and run Select Subject once more.
How do I add a glow of light behind my subject?
With the background selected, take the Gradient tool, choose Foreground to Transparent with an orange foreground color and the Radial type, and drag out from behind the subject. Tick Reverse if it comes out inside-out.
What if Select Subject picks the wrong thing or misses edges?
It struggles with low contrast, hair over busy detail and frames with several possible subjects. Refine the edge with the Refine Edge Brush in Select and Mask, or use the Object Selection tool to point at what you meant.
Are the sample files free?
Yes, with a free PHLEARN account. You get 2 sample images and 2 sample PSDs: both photos from the video and a layered file of each finished edit.
Master Photoshop, Lightroom and Photography
Join PHLEARN PRO for $12.99 a month or $99.99 a year. Cancel anytime, with a 100% money-back guarantee.





