


Download Assets
This tutorial includes 2 sample images, 1 sample PSD and 1 PDF guide. Downloads are free with a PHLEARN account.
- Download the sample images and PSDs from every free tutorial on PHLEARN
- New free tutorials published every week
- One free account — sign up once, then download anything
Free PDF Guide · 4 Pages
This Tutorial as a Step-by-Step PDF
The guide walks through what a selection does, the Rectangular and Elliptical Marquee with Shift, Alt/Option and Spacebar, filling a layer mask with Edit > Fill > Black, the three Lasso tools, the Magic Wand’s Tolerance and Contiguous settings, and a final Feather and Shift Edge pass in Select and Mask. Keep it next to your keyboard.
description
Learn how to replace a sky with simple selection tools in Photoshop. This first episode of the selections series walks through the Rectangular and Elliptical Marquee tools, the three Lasso tools, and the Magic Wand one at a time on a real landscape photo, showing how to add, subtract, and intersect selections with the same modifier keys, load a selection into a layer mask, combine several tools on one cutout, and finish the edge with Select and Mask.
Free Selection Series
- Replace a Sky with Simple Selection Tools (This Episode!)
- Add Logos & Graphics to a Photo with Advanced Selection Tools
- Refine Selections with Select & Mask
Enjoying This Free Tutorial?
We publish a new free tutorial every week, each one with sample images and PSDs you can download and follow along with. Sign up and they land straight in your inbox, along with early word on sales, events and subscriber-only offers.
Image Source
Photo by Joyston Judah via Pexels
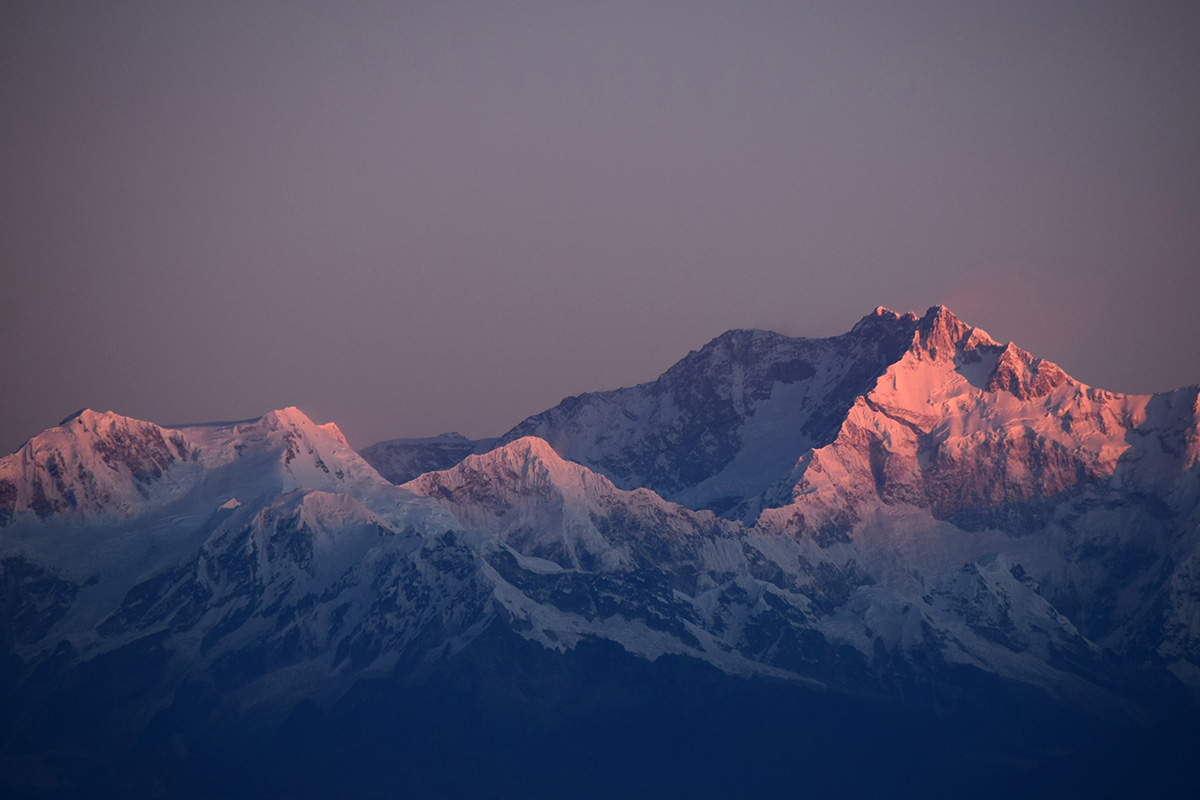
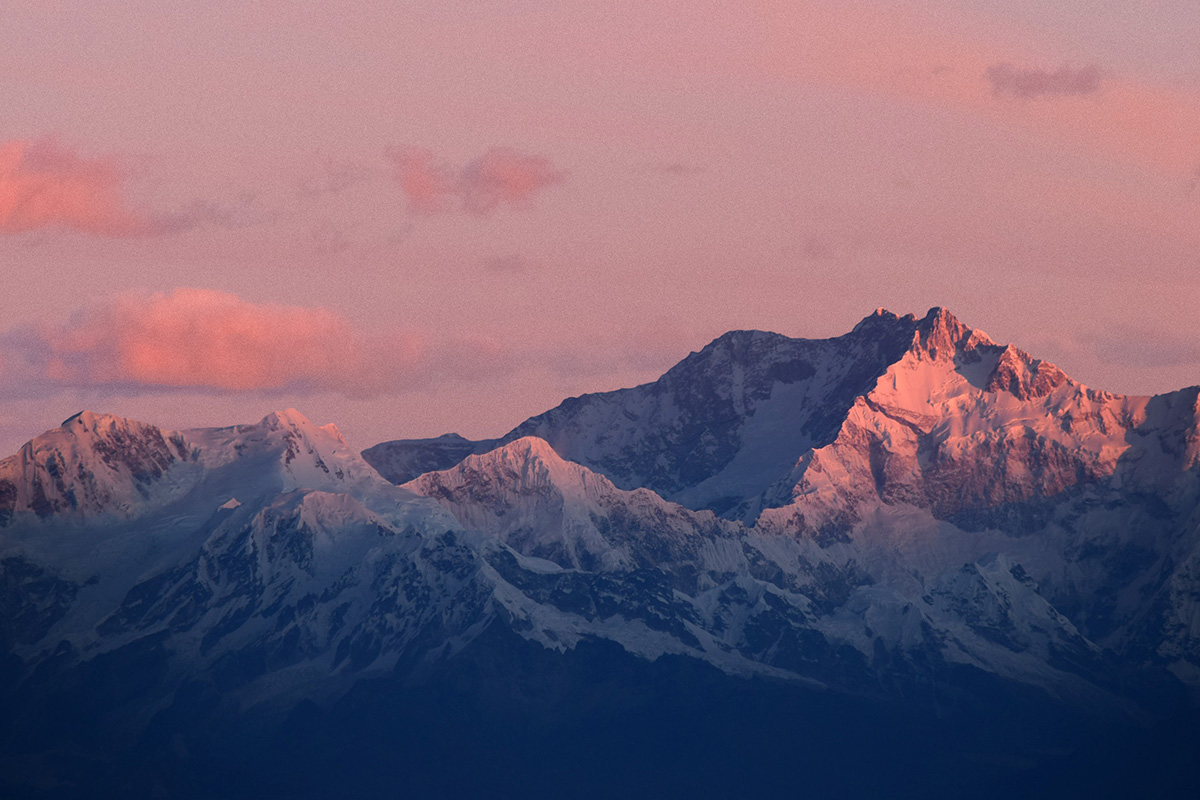
How to Replace a Sky Using Simple Selection Tools in Photoshop
This is the first entry in a three-part series on selections, one of the most fundamental and powerful concepts in Photoshop. Rather than jumping straight to a single “best” tool, this tutorial walks through Photoshop’s simple selection tools one at a time on a real sky-replacement project, showing where each one is strong and where it starts to struggle.
Understanding What a Selection Does
Before touching any specific tool, it helps to see exactly what an active selection changes about how you can edit an image.
-
Bring In a New Sky
Use the Move tool to click and drag a new sky image into your document, then press Ctrl/Cmd + T to scale it to fit.
-
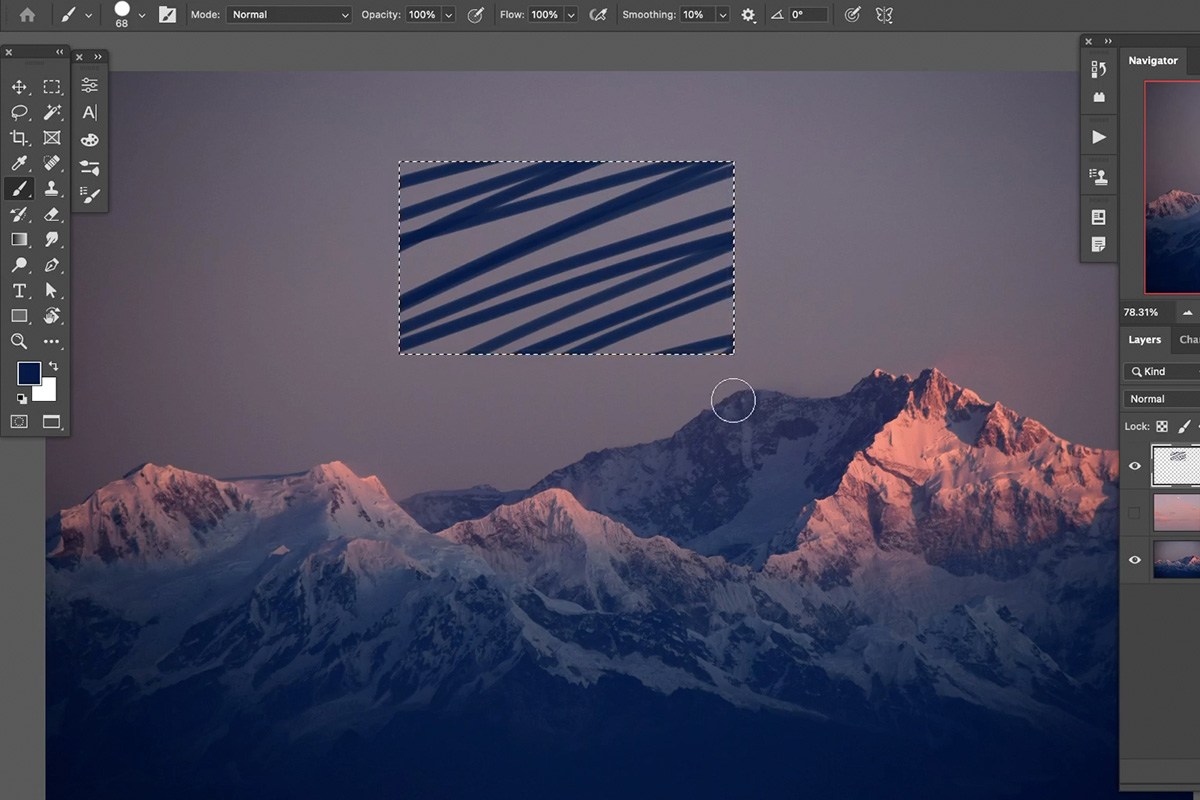
Make a Selection and Paint Inside It
Create a new layer, use the Rectangular Marquee tool to draw a selection, then paint with the Brush tool anywhere on the canvas — the paint only appears inside the selected area.
-
Deselect to Compare
Press Ctrl/Cmd + D to deselect, then paint again to see that without an active selection, paint shows up everywhere you click.

Using the Rectangular and Elliptical Marquee Tools
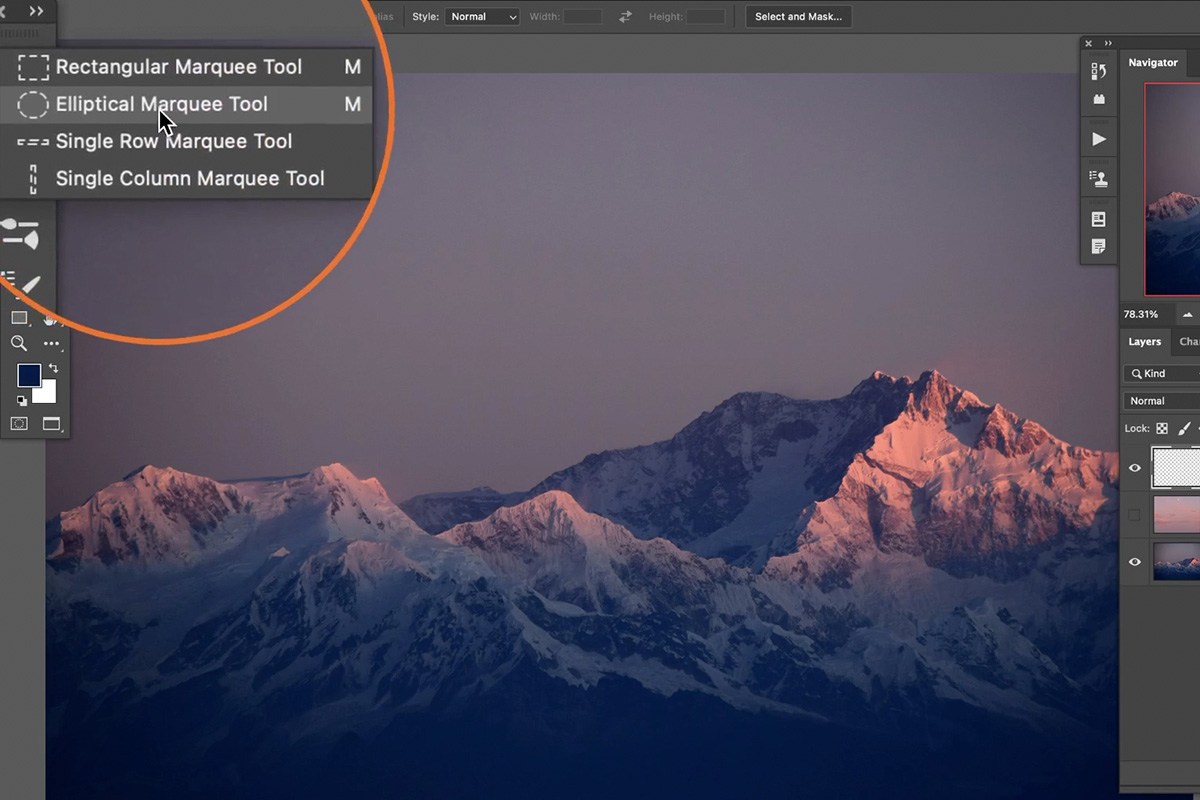
The Marquee tool group includes a rectangular option and an elliptical option, and both support the same modifier keys for building more complex selections.
-
Draw a Rectangle or Square
Click and drag with the Rectangular Marquee tool for a rectangle, or hold Shift while dragging to constrain it to a perfect square.
-
Reposition While Dragging
Hold the spacebar while a selection is still being drawn to move it into place, then release spacebar to continue resizing.
-
Add, Subtract, and Intersect Selections
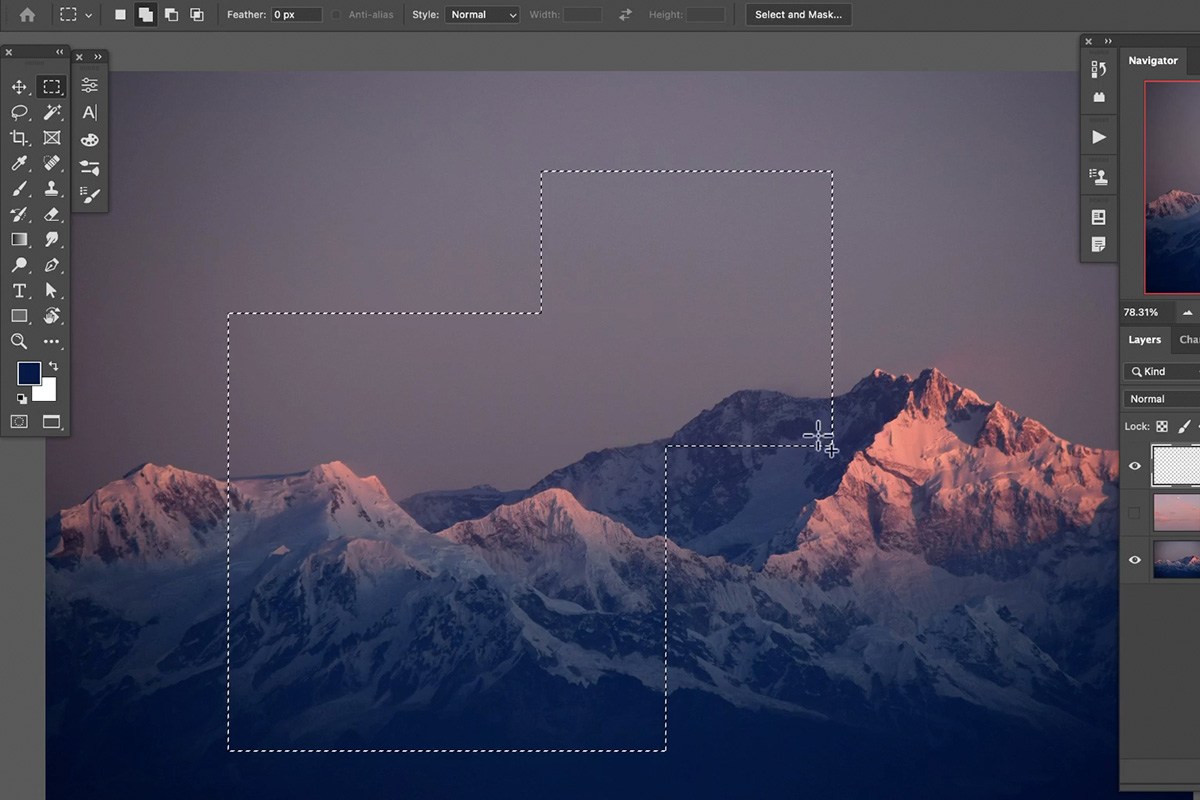
Hold Shift while drawing a new selection to add it to the existing one, hold Alt/Option to subtract, or hold Shift + Alt/Option together to keep only the intersection of the two areas.
-
Switch to the Elliptical Marquee for Curved Shapes
Select the Elliptical Marquee tool for oval selections, holding Shift for a perfect circle — the same add, subtract, and intersect shortcuts work identically here.
These Modifier Keys Work on Every Selection Tool
Shift to add, Alt/Option to subtract, and Shift plus Alt/Option to intersect aren’t unique to the Marquee tools — they apply the same way across the Lasso and Magic Wand tools too, which is what makes it possible to combine several different selection tools into one final selection.
Cutting Out Mountains with the Lasso Tool Family
A rectangular or elliptical selection isn’t well suited to an irregular shape like a mountain range, which is where the three Lasso tools come in.
-
Load a Rough Selection into a Layer Mask
Make an initial rough selection (even a simple rectangle) around the sky, then click the layer mask icon to load that selection directly into a mask. The selected area stays visible and everything else is hidden, so press Ctrl/Cmd + I to invert the mask: now the mountains show and the sky is hidden. White areas on a mask stay visible, black areas are hidden.
-
Draw Freehand with the Regular Lasso Tool
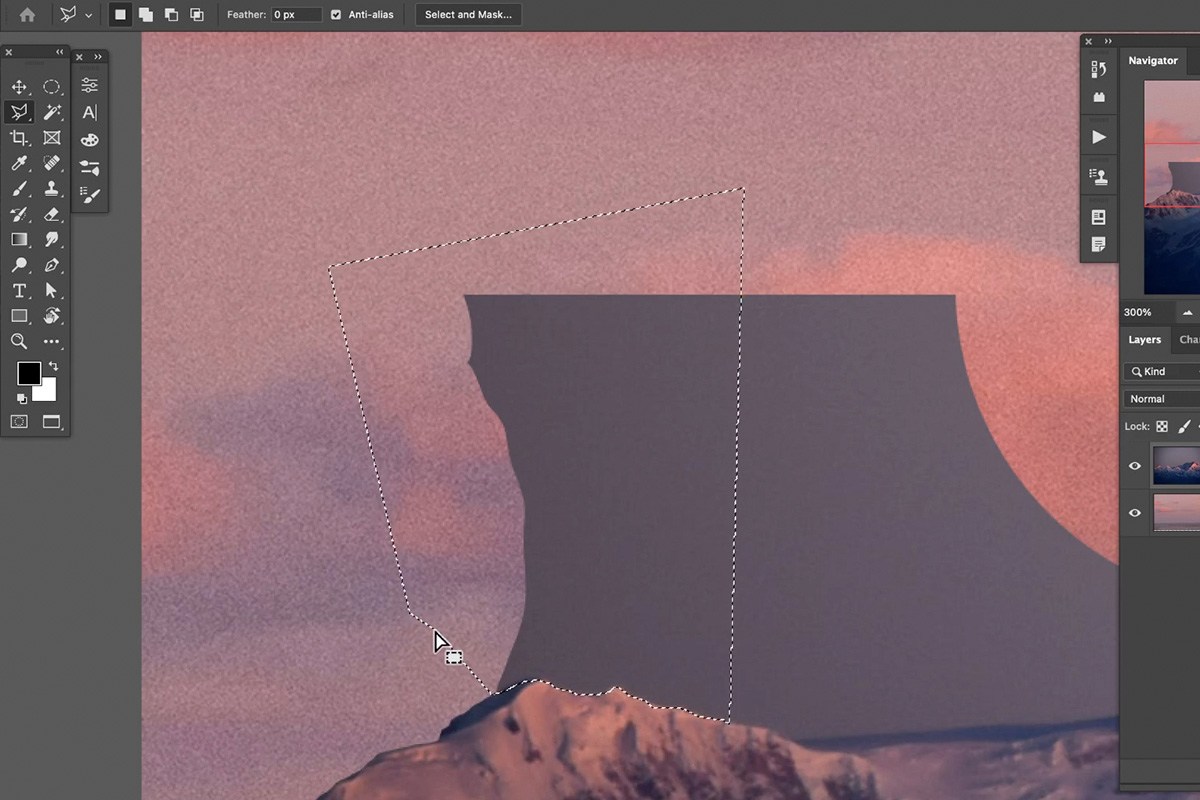
Press L for the Lasso tool and draw directly along an irregular edge like a mountain ridge, then go to Edit > Fill and fill the selection with black on your layer mask to hide that area.
-
Use the Polygonal Lasso Tool for Straight Edges
Switch to the Polygonal Lasso tool (found under the regular Lasso) for subjects with straight edges, like architecture. Click once per corner to connect straight line segments, then press Enter to close the selection.
-
Hold Alt/Option to Switch Between Lasso Types Mid-Selection
While using either the regular or Polygonal Lasso tool, hold Alt/Option to temporarily switch to the other type — useful for a subject with both curved and straight sections.
-
Try the Magnetic Lasso for Automatic Edge-Snapping
Select the Magnetic Lasso tool and move your cursor along an edge; it automatically places points that snap to the boundary it detects. Press Delete or Backspace to remove a misplaced point and back up.


Choosing Between the Three Lasso Tools
The regular Lasso tool is best for organic, irregular edges where natural hand variation isn’t a problem — a jagged mountain ridge, for instance. The Polygonal Lasso tool is better for subjects with genuinely straight edges, like buildings. The Magnetic Lasso tool trades some accuracy for speed, snapping to detected edges automatically, which makes it a reasonable starting point when you don’t need a perfectly precise selection.

Point Sample Versus Averaged Sampling
A Point Sample setting reads the exact single pixel you click on, which can make a selection overly sensitive to small noise or grain. A 3×3 or 5×5 average instead reads a small cluster of pixels around your click, giving a steadier, more representative starting color for the selection to expand from.
Speeding Up Simple Areas with the Magic Wand Tool
For a relatively uniform area like open sky, the Magic Wand tool can select based on color similarity far faster than tracing an edge by hand.
-
Set Your Sample Size and Tolerance
In the options bar, choose a sample size like 5×5 Average, and set the Tolerance value — a lower tolerance selects only very similar pixels near your click point, while a higher tolerance selects a broader range of similar colors.
-
Click to Select a Similar-Colored Area
Click once on the area you want to select. The tool expands outward from that point until it hits a significant color boundary.
-
Toggle Contiguous On or Off
With Contiguous checked, the selection stops at the first boundary it finds. Unchecking it selects every similar-colored area throughout the entire image, connected or not.
-
Build Up the Full Sky Selection
Adjust Tolerance up or down and hold Shift to click-add additional areas until the entire sky is selected right up to the edge of the mountains.

Sample All Layers for Complex Documents
The Magic Wand’s Sample All Layers option lets it read color information from every visible layer in your document rather than just the currently selected one, which matters once your composite has multiple images stacked together rather than a single flat photo.
Combining Multiple Tools on One Selection
None of these tools has to work alone — the real advantage of Photoshop’s selection tools is that you can switch between them freely while refining the same active selection.
-
Subtract Mistakes with the Lasso Tool
If the Magic Wand grabbed too much (part of the mountains, for instance), switch to the Lasso tool, hold Alt/Option, and draw over the unwanted area to remove it from the selection.
-
Add Missed Areas with Any Tool
Switch to the Rectangular Marquee, the regular Lasso, or any other selection tool, hold Shift, and add whatever area was missed — there’s no need to stick with the tool you started with.
-
Re-enable a Disabled Layer Mask
If a layer mask shows a red X, meaning it’s temporarily disabled, hold Shift and click on the mask thumbnail to re-enable it before continuing.
-
Fill the Finished Selection with Black
With the mask thumbnail selected (indicated by a white border around it), go to Edit > Fill and fill your completed selection with black to hide that area and reveal the new sky underneath.

Refining the Final Edge with Select and Mask
A selection built from several different tools can still leave a slightly jagged, obviously cut-out edge — Select and Mask is the last step for softening that transition.
-
Open Select and Mask
With your layer mask selected, go to Select and Mask and switch the view to On Layers to see the effect directly on your composite.
-
Feather and Shift the Edge
Add a small amount of feathering to soften the cut line, and use Shift Edge to expand or contract the selection slightly until it blends more naturally with the new background.
-
Add Contrast Carefully
Add a touch of contrast back to the edge if needed, but avoid pushing it too far — too much contrast on a refined edge tends to look artificial rather than natural.


Common Mistakes to Avoid
The most common mistake is sticking with one selection tool for an entire complex shape instead of switching tools as the shape’s edge changes — a mountain range with both jagged ridges and straighter cliff faces is a good candidate for combining the regular and Polygonal Lasso tools rather than forcing one to handle everything. It’s also easy to skip the Select and Mask refinement step at the end, leaving a hard, obviously artificial edge where a small amount of feathering would have blended the composite far more convincingly.


Why This Approach Works
None of Photoshop’s simple selection tools is designed to handle every situation on its own — the Marquee tools are fast but geometric, the Lasso tools trade speed for shape flexibility in different ways, and the Magic Wand is powerful on uniform color but useless on detailed edges. Learning them as a set, with the same add/subtract/intersect logic working identically across all of them, is what actually makes selections practical: you’re not choosing one tool for an entire image, you’re picking whichever tool fits the specific edge in front of you at that moment and combining the results. That same combine-as-you-go approach carries forward into more automated selection tools as well, including the AI-assisted Select Subject and Refine Edges workflow covered later in this series.
Final Thoughts
Simple selection tools might look basic next to Photoshop’s more automated options, but understanding exactly how they add, subtract, and intersect is foundational to everything else selections are used for, sky replacements included. Get comfortable switching between the Marquee, Lasso, and Magic Wand tools on the same selection, and finish every cutout with a quick pass through Select and Mask — that combination handles a surprising range of real compositing work on its own. Part two of this series covers the advanced tools, Object Selection, Select Subject and Color Range, and part three, Refine Selections in Photoshop: Select and Mask Made Easy, cleans selections up with Select and Mask, hair included.
Quick Reference: Keys, Menus and Settings
- Add, subtract, intersectShift, Alt/Option, Shift + Alt/Option; hold Spacebar to move a selection while drawing
- Deselect or copyCmd/Ctrl + D deselects; Cmd/Ctrl + J copies the selection to a new layer
- Selection to maskClick the layer mask icon; Cmd/Ctrl + I inverts; Edit > Fill > Black hides more
- Lasso toolsL, Shift + L cycles; hold Alt/Option to switch Lasso and Polygonal; Enter closes, Delete/Backspace removes a Magnetic point
- Magic WandSample Size 5 by 5 Average, Tolerance 20 (down to 15 or 10), Contiguous on
- Mask on and offShift-click the mask to disable or enable it; Alt/Option-click to view it
- Refine the edgeSelect > Select and Mask, View: On Layers, Feather, Shift Edge, a little Contrast
No AI, no generative credits.

Free Downloads
Follow Along on the Same Photos
Get the mountain photo, the cloudy sky photo, the finished sky replacement PSD and the 4-page PDF guide. Free with a PHLEARN account.
Simple Selection Tools: Common Questions
What does a selection actually do in Photoshop?
It limits your edits to the selected area. Paint with a selection active and the paint only shows up inside it. Press Cmd/Ctrl + D, or go to Select > Deselect, and you can paint anywhere again.
How do I add to or subtract from a selection?
Hold Shift to add (the cursor shows a plus), Alt/Option to subtract, and Shift + Alt/Option to keep only the intersection (the cursor shows a small x). These keys work with every selection tool, and the options bar has the same icons.
How do I draw a perfect square or circle selection?
Hold Shift while you drag with the Rectangular or Elliptical Marquee. Hold the Spacebar while you are still drawing to move the selection, then let go and keep sizing.
My layer mask hides the wrong part. How do I flip it?
Press Cmd/Ctrl + I to invert the mask. Clicking the layer mask icon keeps the selected area visible, so if you selected the sky, inverting hides the sky and shows the mountains. White is visible and black is hidden.
Which Lasso tool should I use?
The Lasso for jagged, organic edges like a mountain ridge, the Polygonal Lasso for straight edges like buildings, and the Magnetic Lasso when you want it to find the edge for you and don’t need a super accurate result. Press L, and Shift + L cycles through all three.
Can I switch between straight and curvy lines in one selection?
Yes. Hold Alt/Option while using the Polygonal Lasso and it becomes the regular Lasso; let go and it is polygonal again. It works the other way around too. Press Enter to close the selection.
What does Tolerance do on the Magic Wand?
It sets how much the wand selects that is similar to where you click. At 10 it grabs a small area, at 30 and 50 a lot more. In the video 50 took too much of the mountains, so the sky was selected at 20, dropping to 15 and 10 for the Shift-click additions.
What does Contiguous mean on the Magic Wand?
Checked, the selection spreads until it meets a very different pixel, then stops. Unchecked, it selects every similar area in the whole image, connected or not.
Why did Edit > Fill change my photo instead of the mask?
The layer thumbnail was targeted. Click the mask thumbnail so the white outline is on the mask, then go to Edit > Fill > Black. A red X on the mask means it is disabled; Shift-click it to turn it back on.
Are the sample files free?
Yes, with a free PHLEARN account. You get 2 sample images, 1 sample PSD and 1 PDF guide: the mountain photo, the sky photo and the finished sky replacement, plus a 4-page walkthrough.
From the Magazine View all
Stories, interviews and guides for photographers, new every week.
 EditingHow to Color Grade Photos in Photoshop and LightroomCorrect the photo first, then put color in the shadows, midtones and highlights. Aaron Nace on the order, the tools and skin.
 BusinessHow to Compete With AI: Give Your Clients MoreEveryone has the same tools now, and your clients know it. The way to compete is to give them more.
 EditingLightCraft vs Lightroom: I Edited the Same RAW Files in BothThe free clone on the same RAW files: what matches, what breaks and who should switch.
Master Photoshop, Lightroom and Photography
Join PHLEARN PRO for $12.99 a month, or $99.99 a year (save 36%). Cancel anytime, with a 100% money-back guarantee.





