25 Greatest Tips for Street Photography
Street photography. It’s one of the most versatile and interesting genres of the medium. It’s also an elusive one, based on capturing real life situations filled with fleeting moments, light, expressions and interactions. And today, with a resurgence of lightweight mirrorless cameras and smartphone photography, more people are getting into it than ever before. Yet, despite its widespread adoption and high level of discipline and creativity needed to accomplish it, it is a genre largely ignored by the fine art world.
One possible reason for this may live inherently in the work itself—it’s supposed to be hard to like. One of street photography’s living masters, Joel Meyerowitz, describes it like this:
“[Street photography] was something made out of your guts, out of your instinct, and it was unwieldy in some way, not capable of being categorized by ordinary standards. So it was tough. It was tough to like, tough to see, tough to make, tough to draw meaning from.”
Most accomplished street photographers will tell you the same thing – they don’t do it for the fame. It comes from somewhere deeper inside; a desire to capture life as it is, to document and to reveal. Maybe in too harsh a way to be defined as “fine.”
Ready to leave the safer world of still lives and nature to capture a bit of real life on the street? Great! Here we will cover some of the best tips for getting yourself ready to do street photography at a high level. Stepping onto the streets to document is wild work, so having the basics down is essential. But remember, you’re not alone out there. Folks like Vivian Maier, Gary Winogrand, Bruce Gilden, Helen Levitt, Weegee and Meyerowitz have laid down a beautiful set of footprints for you to follow in – and these tips are culled from our observations from all of them.
And while you’re lacing up your comfy shoes, remember these inspirational words from the master of street photography, Henri Cartier-Bresson:
“To photograph: it is to put on the same line of sight the head, the eye and the heart.”
– Henri Cartier-Bresson
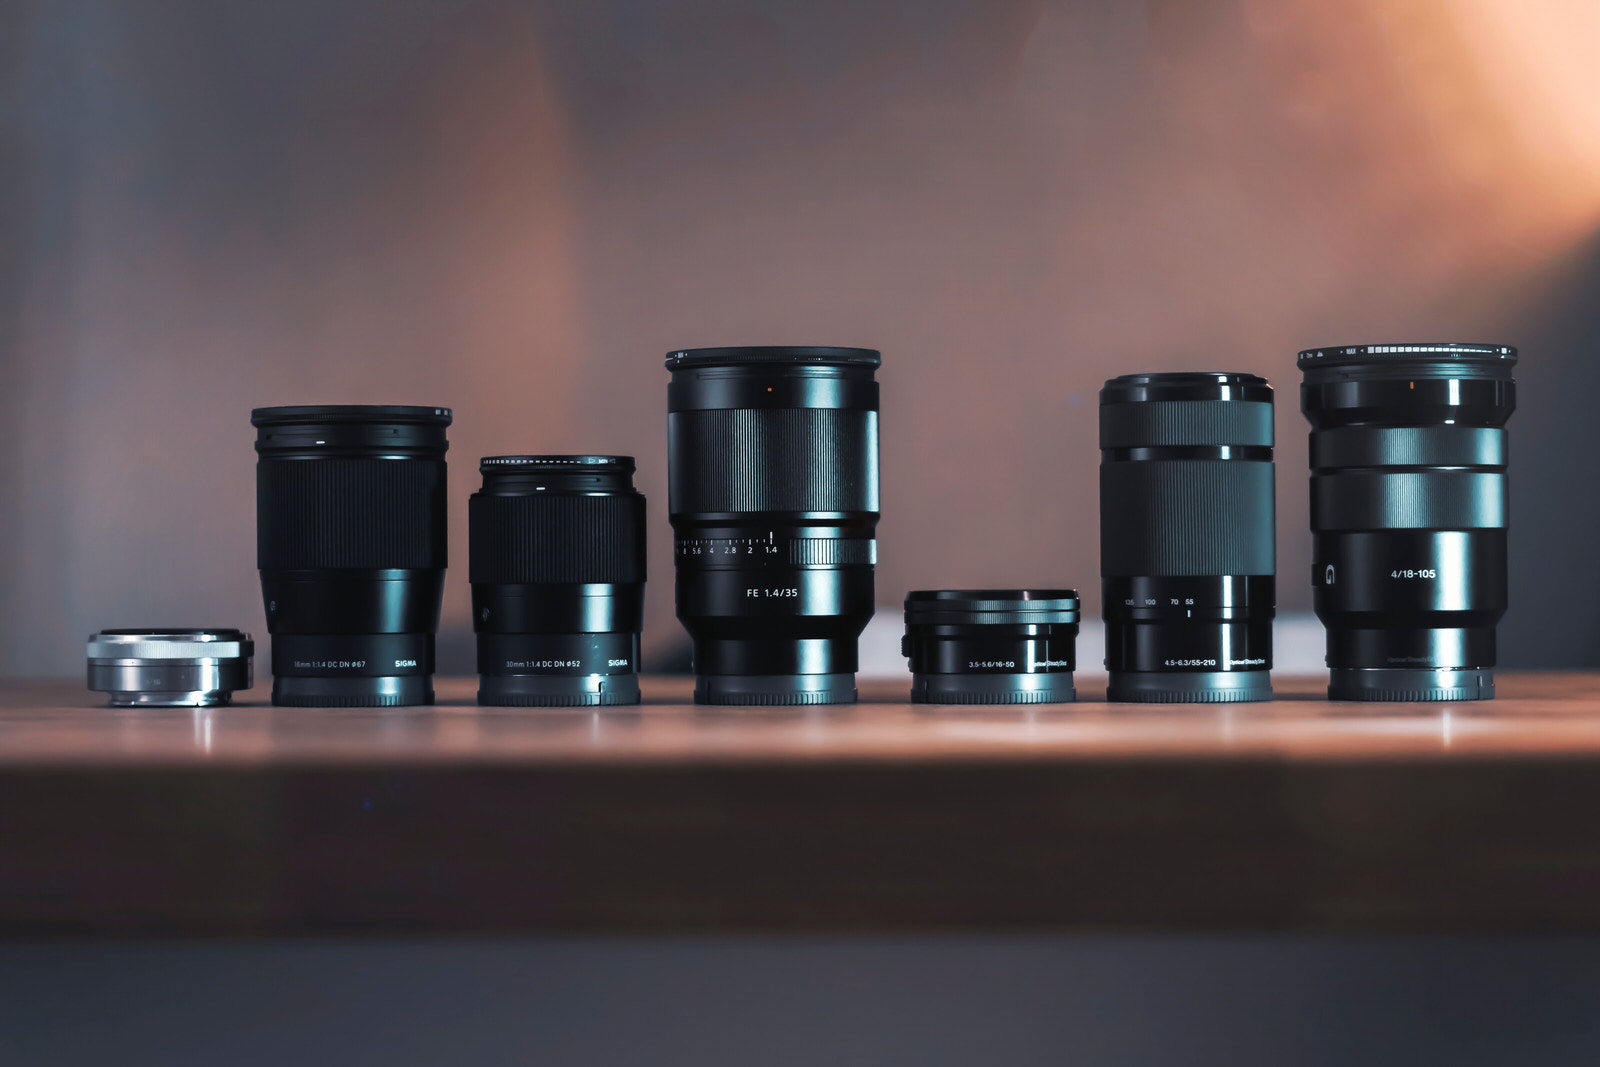
1. Choose Your Lens(es) Carefully
Cameras are amazing instruments and we love all different kinds, but in street photography, the glass reins supreme. Fishing around for the right lens can be an expensive and frustrating process, so try to choose them carefully and in concert with the look you want to achieve.
Wide-angle lenses let you include more of the surrounding elements of a scene. But they will also require getting “up close and personal” with portrait subjects—and too close for some. A telephoto will be useless in many situations, as it leaves out so much context, but might capture that “grab shot” across the street.
Many photographers prefer the versatility of a wide-angle to medium zoom lens. A 24mm-70mm zoom is a great choice as a complete package that can cover nearly all situations. But these lenses, especially the good ones, are larger and heavier than lenses that have a single focal length.
A lot of pros opt for prime lenses, due to their lighter weight and higher quality optics. The 35mm and 50mm focal lengths are popular as “normal” lengths for full-frame cameras (where you get a true 35mm or 50mm). In cropped sensors, you’ll want something more along the lines of a 23mm to a 35mm to achieve the same “normal” look of a 35mm or 50mm.
Shooting with these “standard” focal lengths accomplishes two things:
- People say a 35mm image approximates how the eye sees, so your final images have a better chance of having viewers feel the sense of ‘being there.’
- It forces you to move in order to frame the shot. Many pros believe that this involvement helps them create more meaningful photos.
In the final analysis, there is no “right” lens—only the right choice for your style. Always use the best you can afford and remember that the best lens for any shot is the one you have with you.
Lucas Favre
PRO TIP:
Choose a lens with a wide maximum aperture (a low f/number). This will allow more opportunities in low light, faster shutter speeds, and the ability to isolate your subjects with shallow depth of field. A maximum aperture of f/2.8 or wider is ideal.
2. Carry a Flash
Some cameras have a flash built in, but your higher-end cameras have only a hot-shoe to slide one into. If your camera is one of these latter ones, we suggest carrying a flash with you. Even if flash photography is not your thing, keep in mind that light is single most important element to photography, so being able to create your own just makes you a more versatile photographer who can handle more situations.
Here’s a short list of some uses for a flash in street photography:
- Filling shadows in portraits
- Lighting interiors
- Freezing the action of performers, cyclists, etc.
- Adding light to night portraits
- Adding contrast to dull scenes
- Light painting for fun or to bring out shadow details
If you have the space, carrying a few flash modifiers can expand the creative possibilities even further. A few colored gels can add interest, for example. And a diffuser or bounce reflector can soften the light for street portraits.
Ayo Ogunseinde
PRO TIP:
Remember to adjust your white balance when using a flash. Using fill flash in daylight conditions normally won’t be a major problem. Mixed lighting indoors can create color casts that are difficult to fix. (Shoot RAW to facilitate adjustment in processing.)
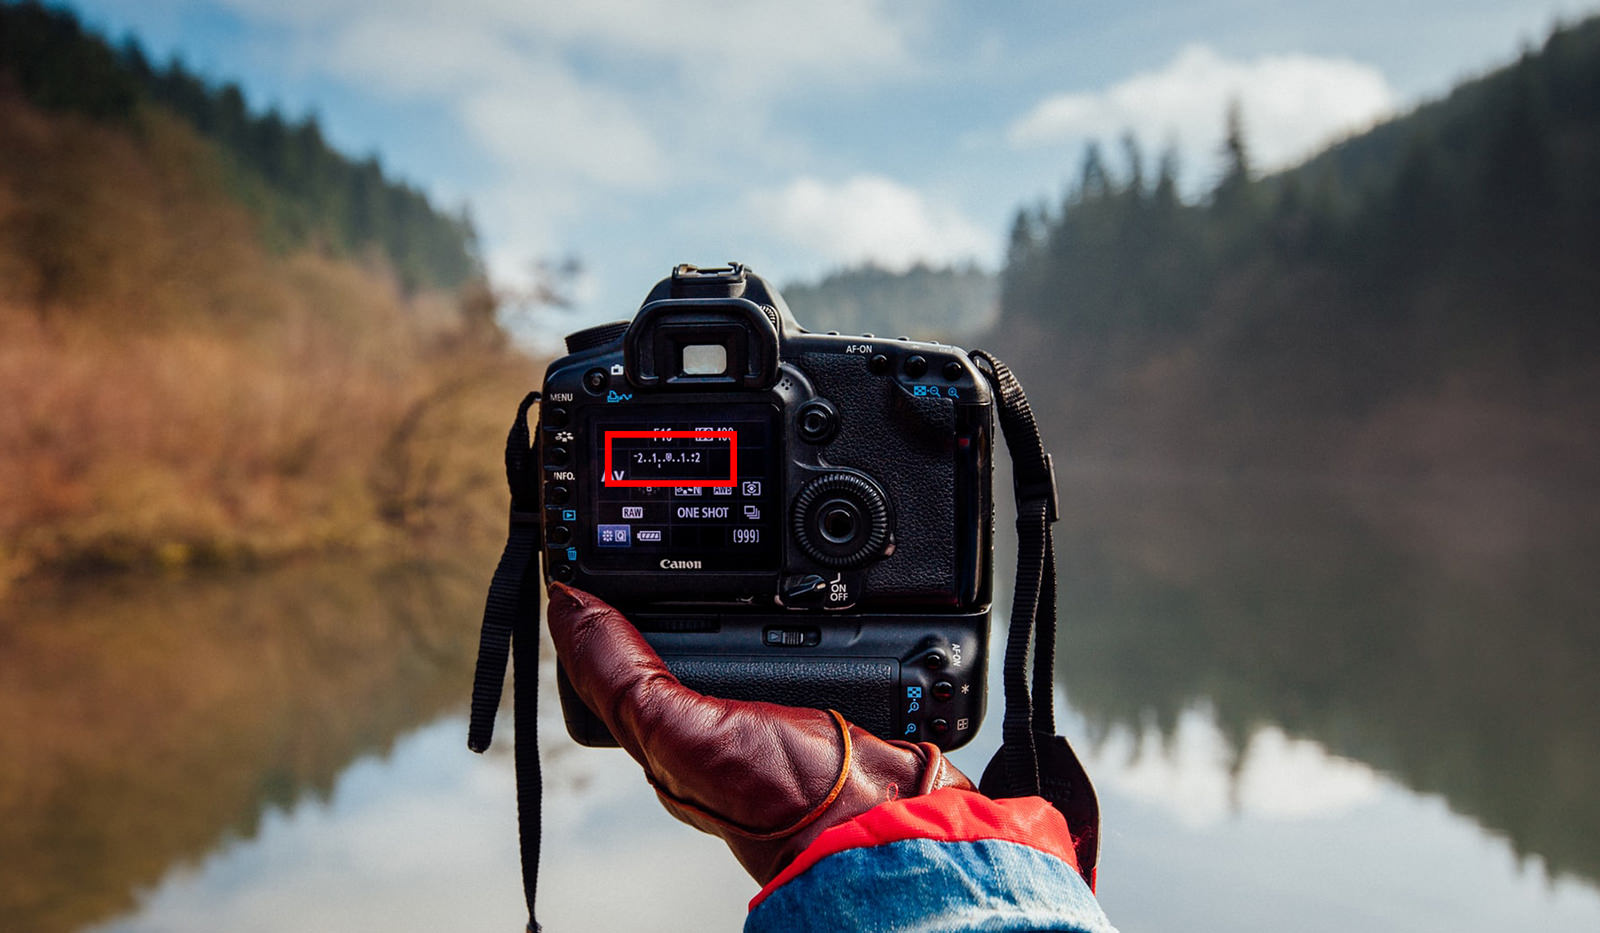
3. Know Your Gear
Opportunities rarely come twice in street photography. Don’t miss one because you couldn’t find a camera setting or selected the wrong one.
It isn’t enough just to know the “correct” settings and how to adjust them, you should have an intimate relationship with all the main functions of your photo equipment. Not to be an expert in camera equipment, but rather to not have to think about camera equipment when you’re shooting.
- Know the sweet spots of your lenses—these ranges will produce your sharpest images.
- Know the metering modes of your camera and how to quickly set exposure compensation—this will allow you to flow with light changes.
- Be aware of which autofocus points are active as well as when and how to change them—this will ensure a higher amount of usable, in-focus images.
Don’t be casual about learning to use your equipment. Study and practice are essential. This takes some time. Learn to embrace and enjoy the process of learning as you go. As Bresson said, “Your first 10,000 shots are your worst.”

Benjamin Hung
PRO TIP:
When you’re culling your work after a shoot, don’t delete a “blown” shot before considering what went wrong. Make a note, then practice fixing the issue.
4. Know the Location
Ever see someone else’s photograph and marvel at how well the environment and subject seem to interact with each other? That’s usually because the photographer had already staked out that location and knew right where to shoot. When you’re shooting at home, know your city or better yet, rediscover it. Before you shoot in an unfamiliar location, research it. Knowing where to be and when to be there will make your outings more rewarding.
Exploration and discovery are two of the most enjoyable things about street photography. Find the back streets and travel them. Check out the suburbs. Make notes about areas to visit in the future.
13on
PRO TIP:
Watch for events in your area. Check the local newspaper or online events calendars. Festivals, concerts, farmer’s markets and the like can all be golden opportunities. See what’s happening in new places before you go.
5. Develop your People Skills
It’s one thing to shoot incognito on the street and many photographers never approach their subjects. But, working a bit more closely with people will almost always result in images with greater emotional impact.
Let people see you as a participant rather than an observer. They know you’re there to take pictures. Do so politely and without obstructing the flow of life around you. You can interact with people without getting “in their faces.” Be friendly, be gracious and, when necessary, just walk away.
One of the best tools a photographer has is his/her smile. A good smile can be used to get permission for a shot as well as to make someone feel comfortable after they just noticed you took their photo. And if the situation (and your camera) allows, it’s always nice to show someone the photo you took. Almost 100% of the time, they will be amazed, suddenly seeing the image as a piece of art, rather than an intrusion.

Larm Rmah
PRO TIP:
Try being still. Sit or stand somewhere out of the flow of traffic and casually grab a few shots of the passersby. Those who want to avoid you, will. Others will warm up to you and may actually approach you.
6. Strike Up a Conversation
You can win over a subject and the crowd with a little friendly chatter. Once again, it’s a matter of being a part of the action.
Start with that shopkeeper or booth vendor with no customers. Check out some products. Buy a trinket or a cup of coffee. A few compliments on their goods will go a long way.
This doesn’t have to lead to a request to photograph someone, but it can if the “vibe” is there. Either way, it lets you blend in naturally to the environment and positions you as less of a threat.

Clem Onojeghuo
PRO TIP:
A word of caution is in order here. Think about who you’re approaching before you do so. Talk to a child only after speaking with the parent. Allow everyone their personal space. In simple street terms: “Don’t be creepy.”
7. Capture Color
The streets are a marvelous place to find and exploit color. There’s the bright blossom of a flower that’s pushed through a crack in the sidewalk. Or, how about those brilliant electronic billboards in the city square? The explosion of colors at, say, a Cinco de Mayo fiesta can be a story in and of themselves.
Look for those incidents of isolated color as well as colorful scenes. Every color can be used to add vibrancy and vitality to an image. But also, the colors you choose (and don’t choose) can define your style as an artist. Be purposeful and conscientious with your choices.
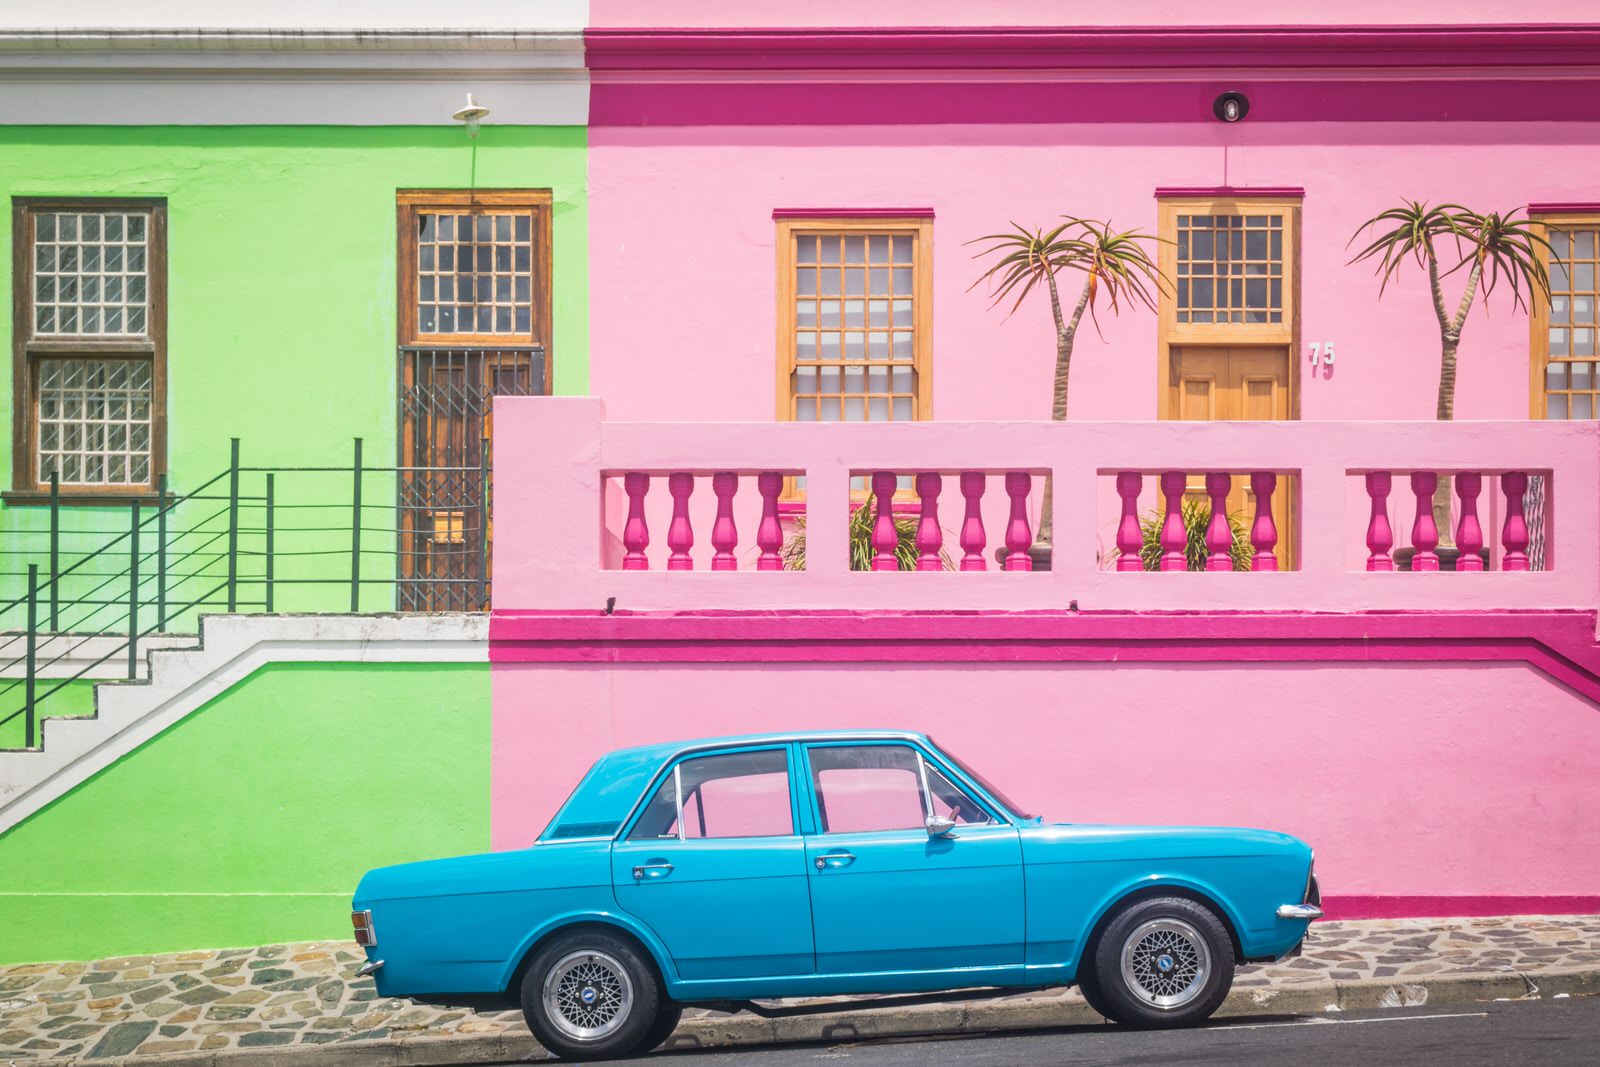
Claudio Fonte
PRO TIP:
The “Golden Hours” just after dawn or before sunset can change the face of a metropolitan street or village square as well as the faces of the people in it. Even the graffiti on a wall can “pop” in this warm light. Scout out locations to visit at these times.
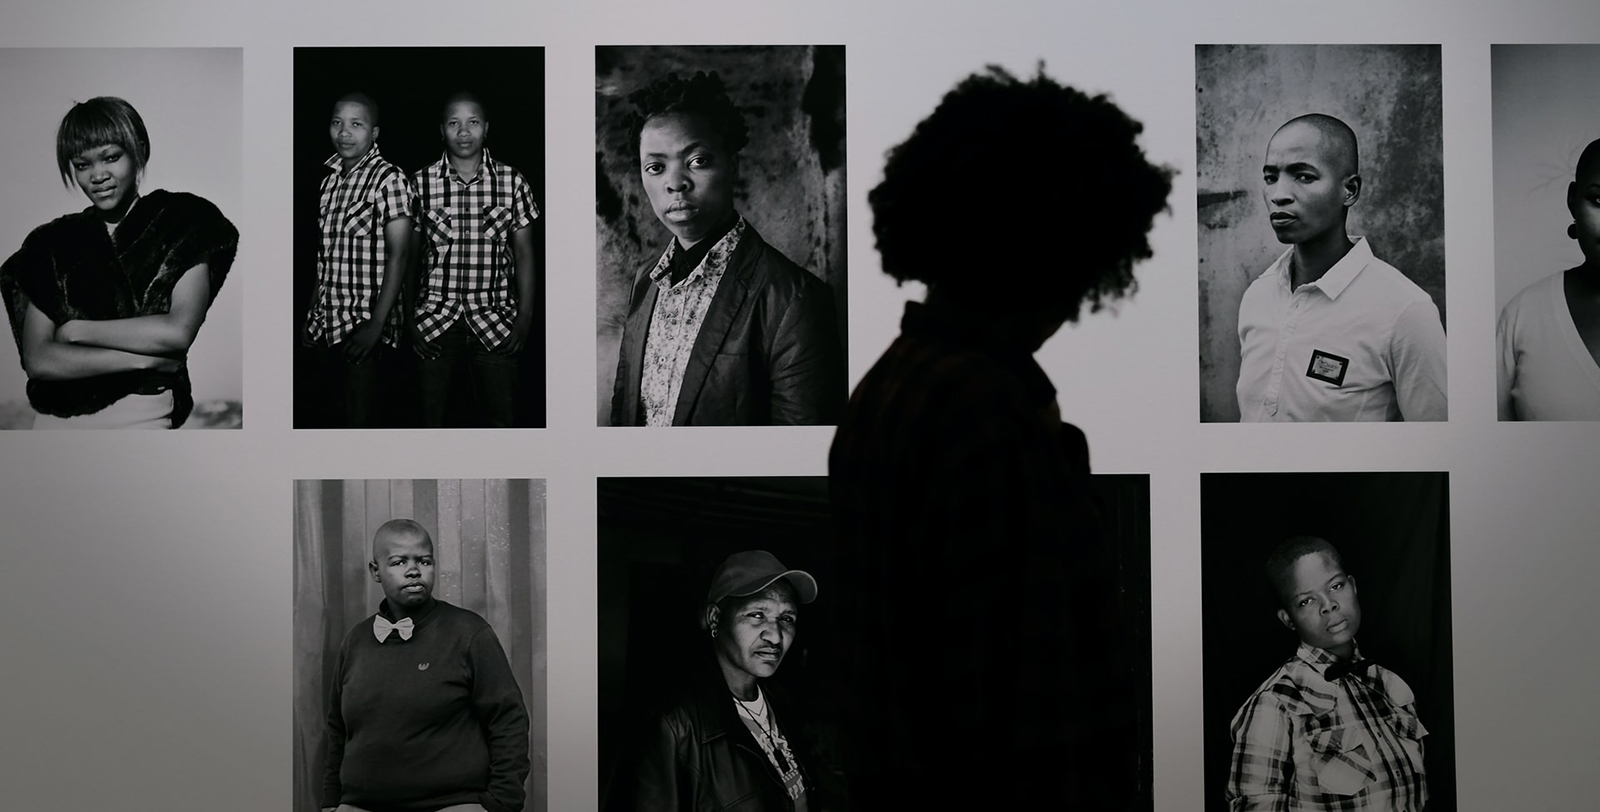
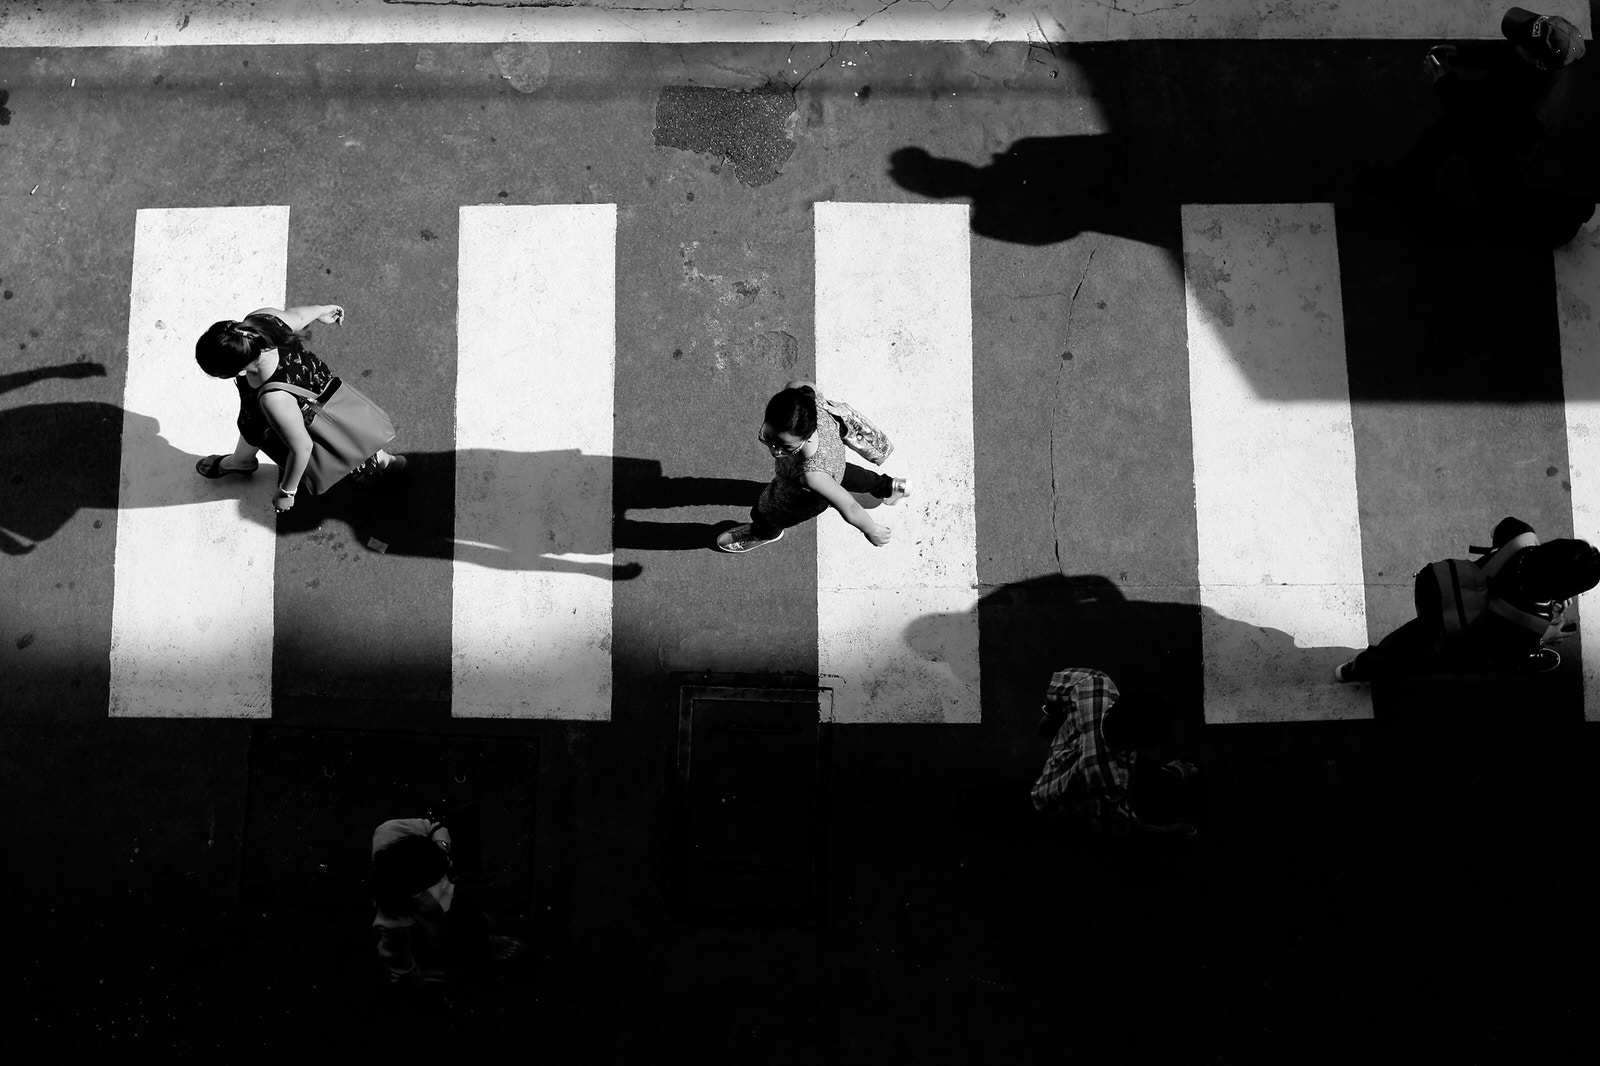
8. Capture Without Color
Another school of thought is that color only serves to distract from the main message of a street photo. A portrait may have more impact if you subtract the colors and let the wrinkles or expression tell the story. Shadows, textures, and patterns all might be accentuated more in black and white.
There are street photographers who always shoot in black and white (or monochrome, as it’s not technically just black and white). While this approach isn’t for everyone, experimenting with grayscale images may open some creative doors.
Mauricio Artieda
PRO TIP:
Black and white is often a good choice in settings where clutter or crowds create a “busy” image. Try converting a busy street photo to grayscale for less distraction.
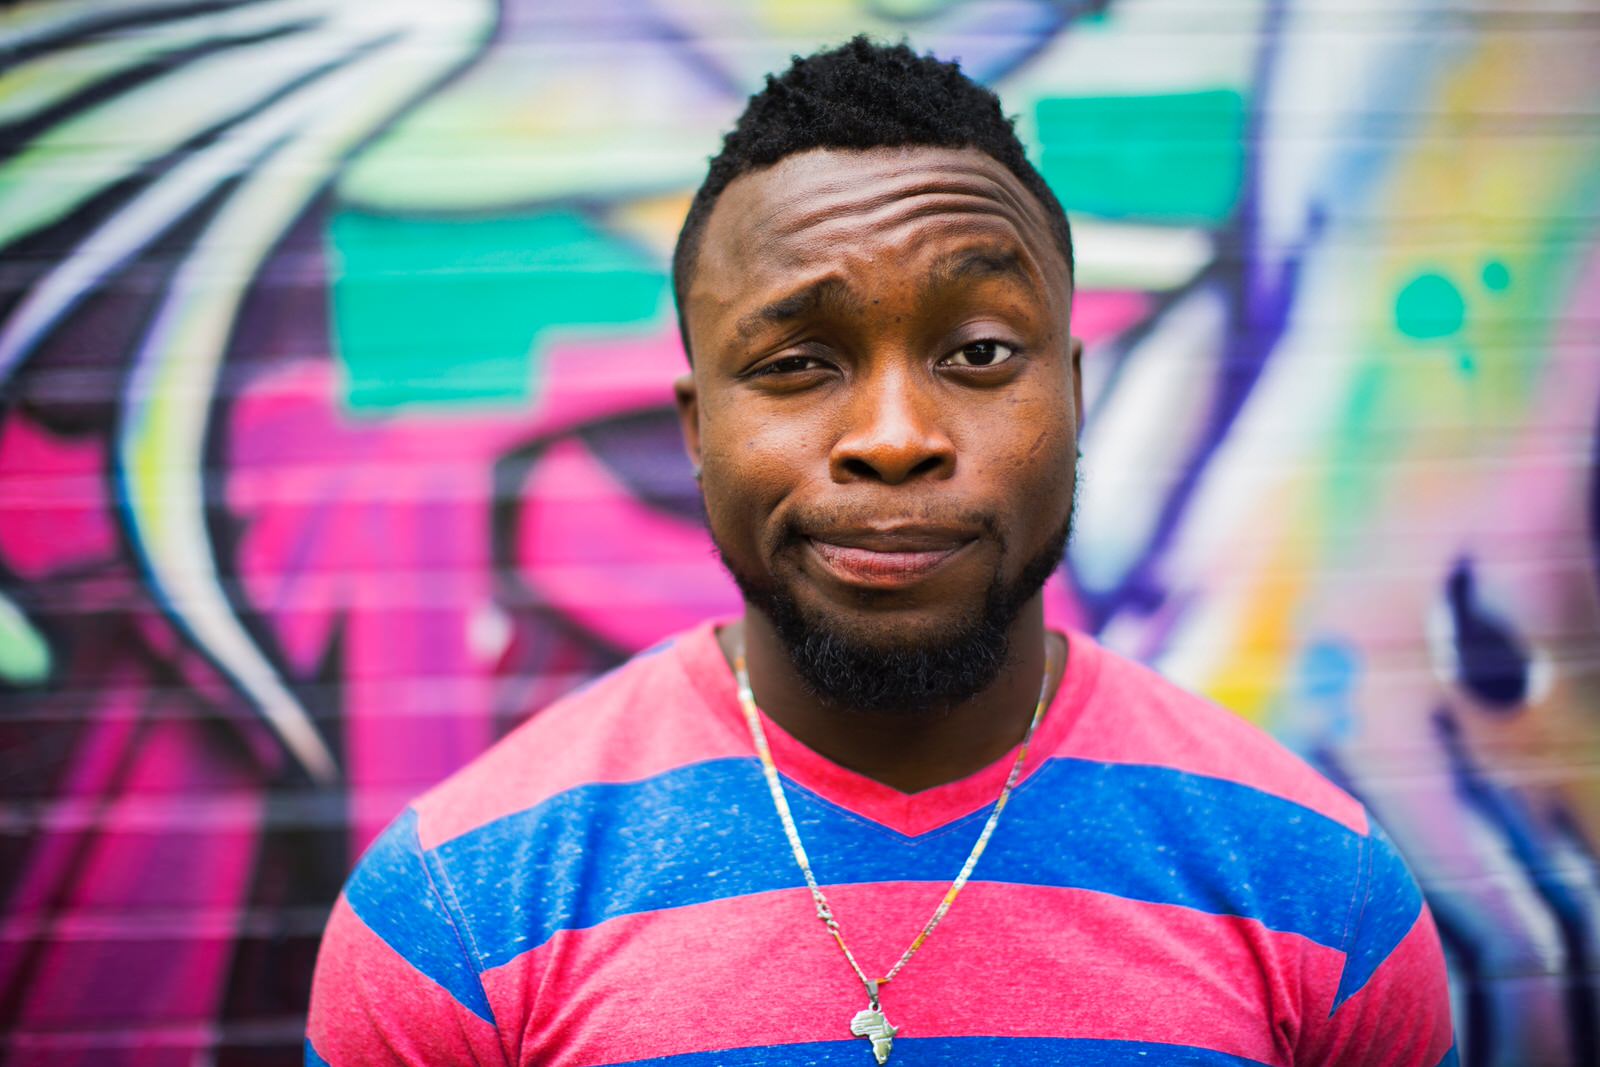
9. Get Personal with the Street Portrait
Street portraiture is an offshoot of street photography. Instead of capturing that fleeting moment, you’re stopping the action for a more up-close encounter with someone. It takes some careful maneuvering.
When shooting street portraits, first work to build a personal connection between yourself and the subject. Then turn that connection into one between the subject and the audience for your image. The eyes are the window to the soul, so focusing on the eyes is essential here.
Remember, too, that the environment is often part of the subject’s story. Be willing to back away a bit and let the viewers absorb some of the atmosphere when it adds to the image.

Hai Phung
PRO TIP:
Personalities don’t have to be portrayed by faces alone. Hands busy with the tools of a trade, a person’s posture or even a skinned knee can tell a powerful story. Practice capturing the visual clues that describe who your subject is.
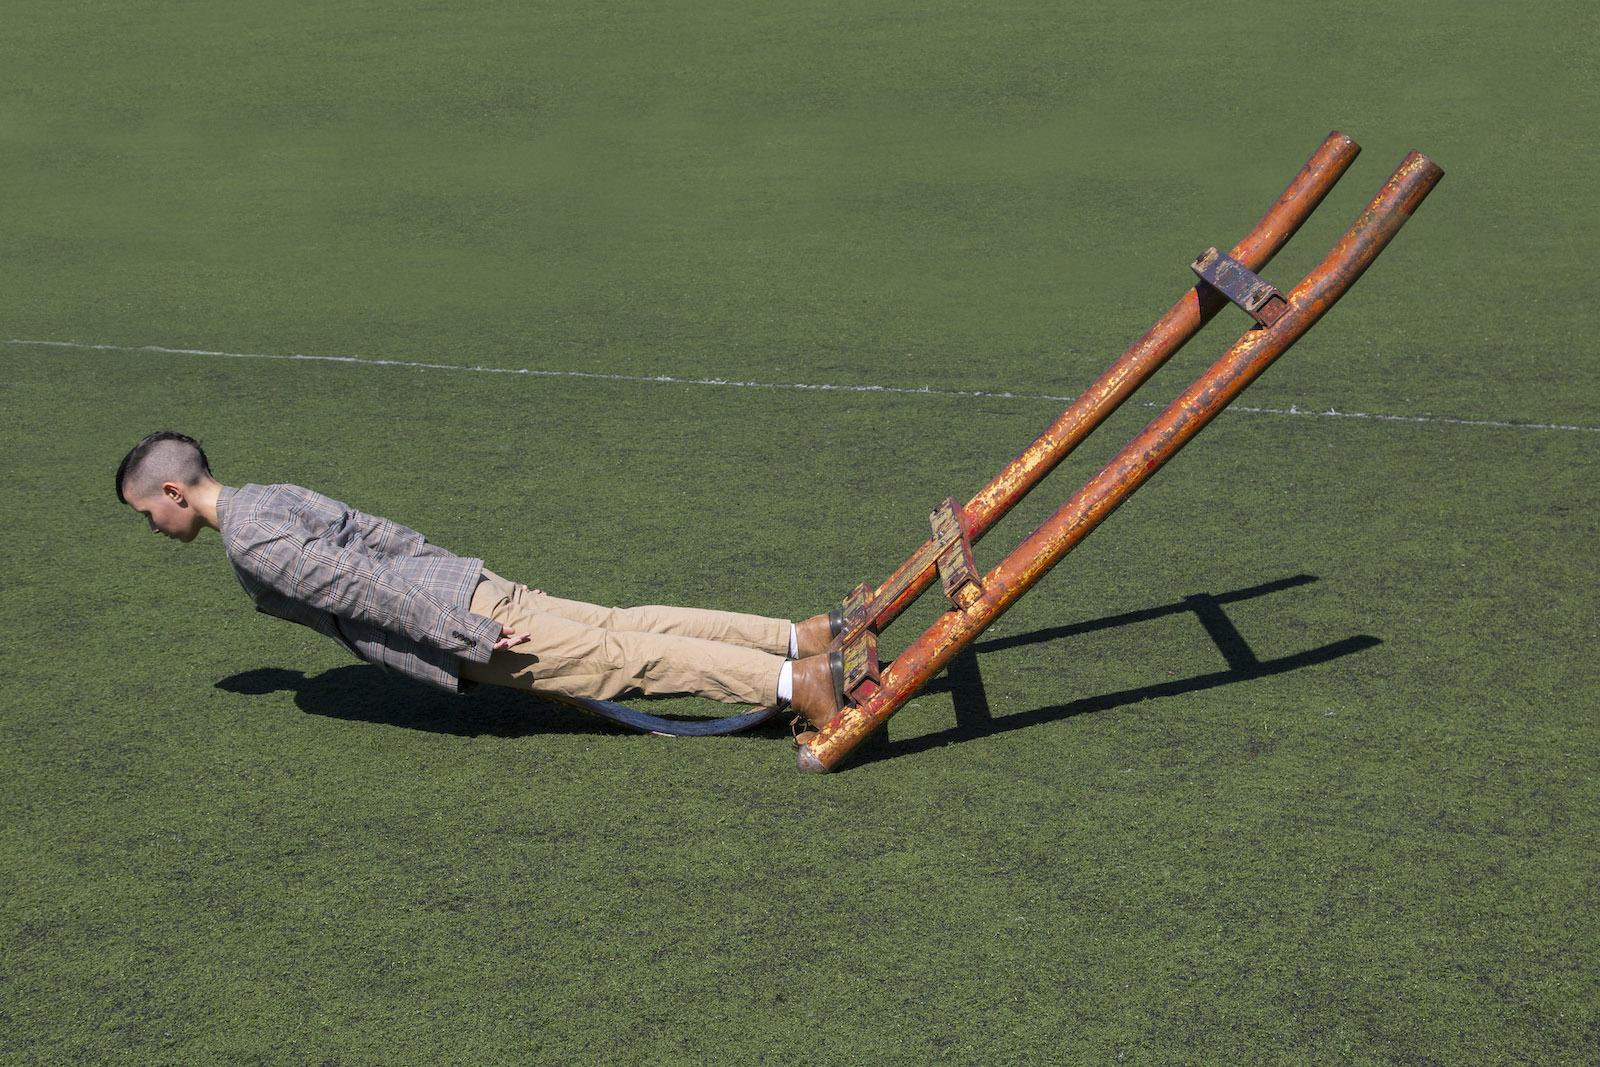
10. Loosen Up for a More Impersonal Approach
Remember, a story about the street does not always have to be made up of carefully-composed images of the people who walk them. There are many ways to capture a street feel without it being completely about the human form. Try loosening up your approach. Be willing to let members of the crowd be “props” by disconnecting from them a bit. Slow the shutter down to give them a more gestural look or let them get cut off, either by frame or something environmental.
This is a very different approach from the careful compositional work of photographing strangers without their knowledge. You might find it effective to shoot from the hip or shoulder, but when trying this, we recommend that you try not to connect to a person in the frame. Instead, use outstanding features of the neighborhood or architecture as the subject and have the people be more accidental.
Hector Bermudez
PRO TIP:
Try using a theme to create these “disconnected” shots. Choose a subject like bicycles, bags, hats, or even groups of three or more people. Spend an hour or a day shooting only that subject and see how the story changes.
11. Go Fishing
Many times on the street, great shots come to those who wait.
The tried and true method is to find yourself a great spot, perhaps with good leading lines, and get in position to frame it well. Then, settle in and wait for someone or something to become the subject(s) that the line leads to. You might even want to set your shutter to continuous mode and fire off a few frames to make sure you capture exactly the right moment.
This can be a fun and rewarding “fishing” game. It can also be boring and considered loitering, so don’t wait too long before you move on.
Lucas Quintana
PRO TIP:
Practice this “fishing” technique with sub-framing, converging lines, and even forced perspective. It’s a good composition exercise as well as a chance to get some interesting street shots.
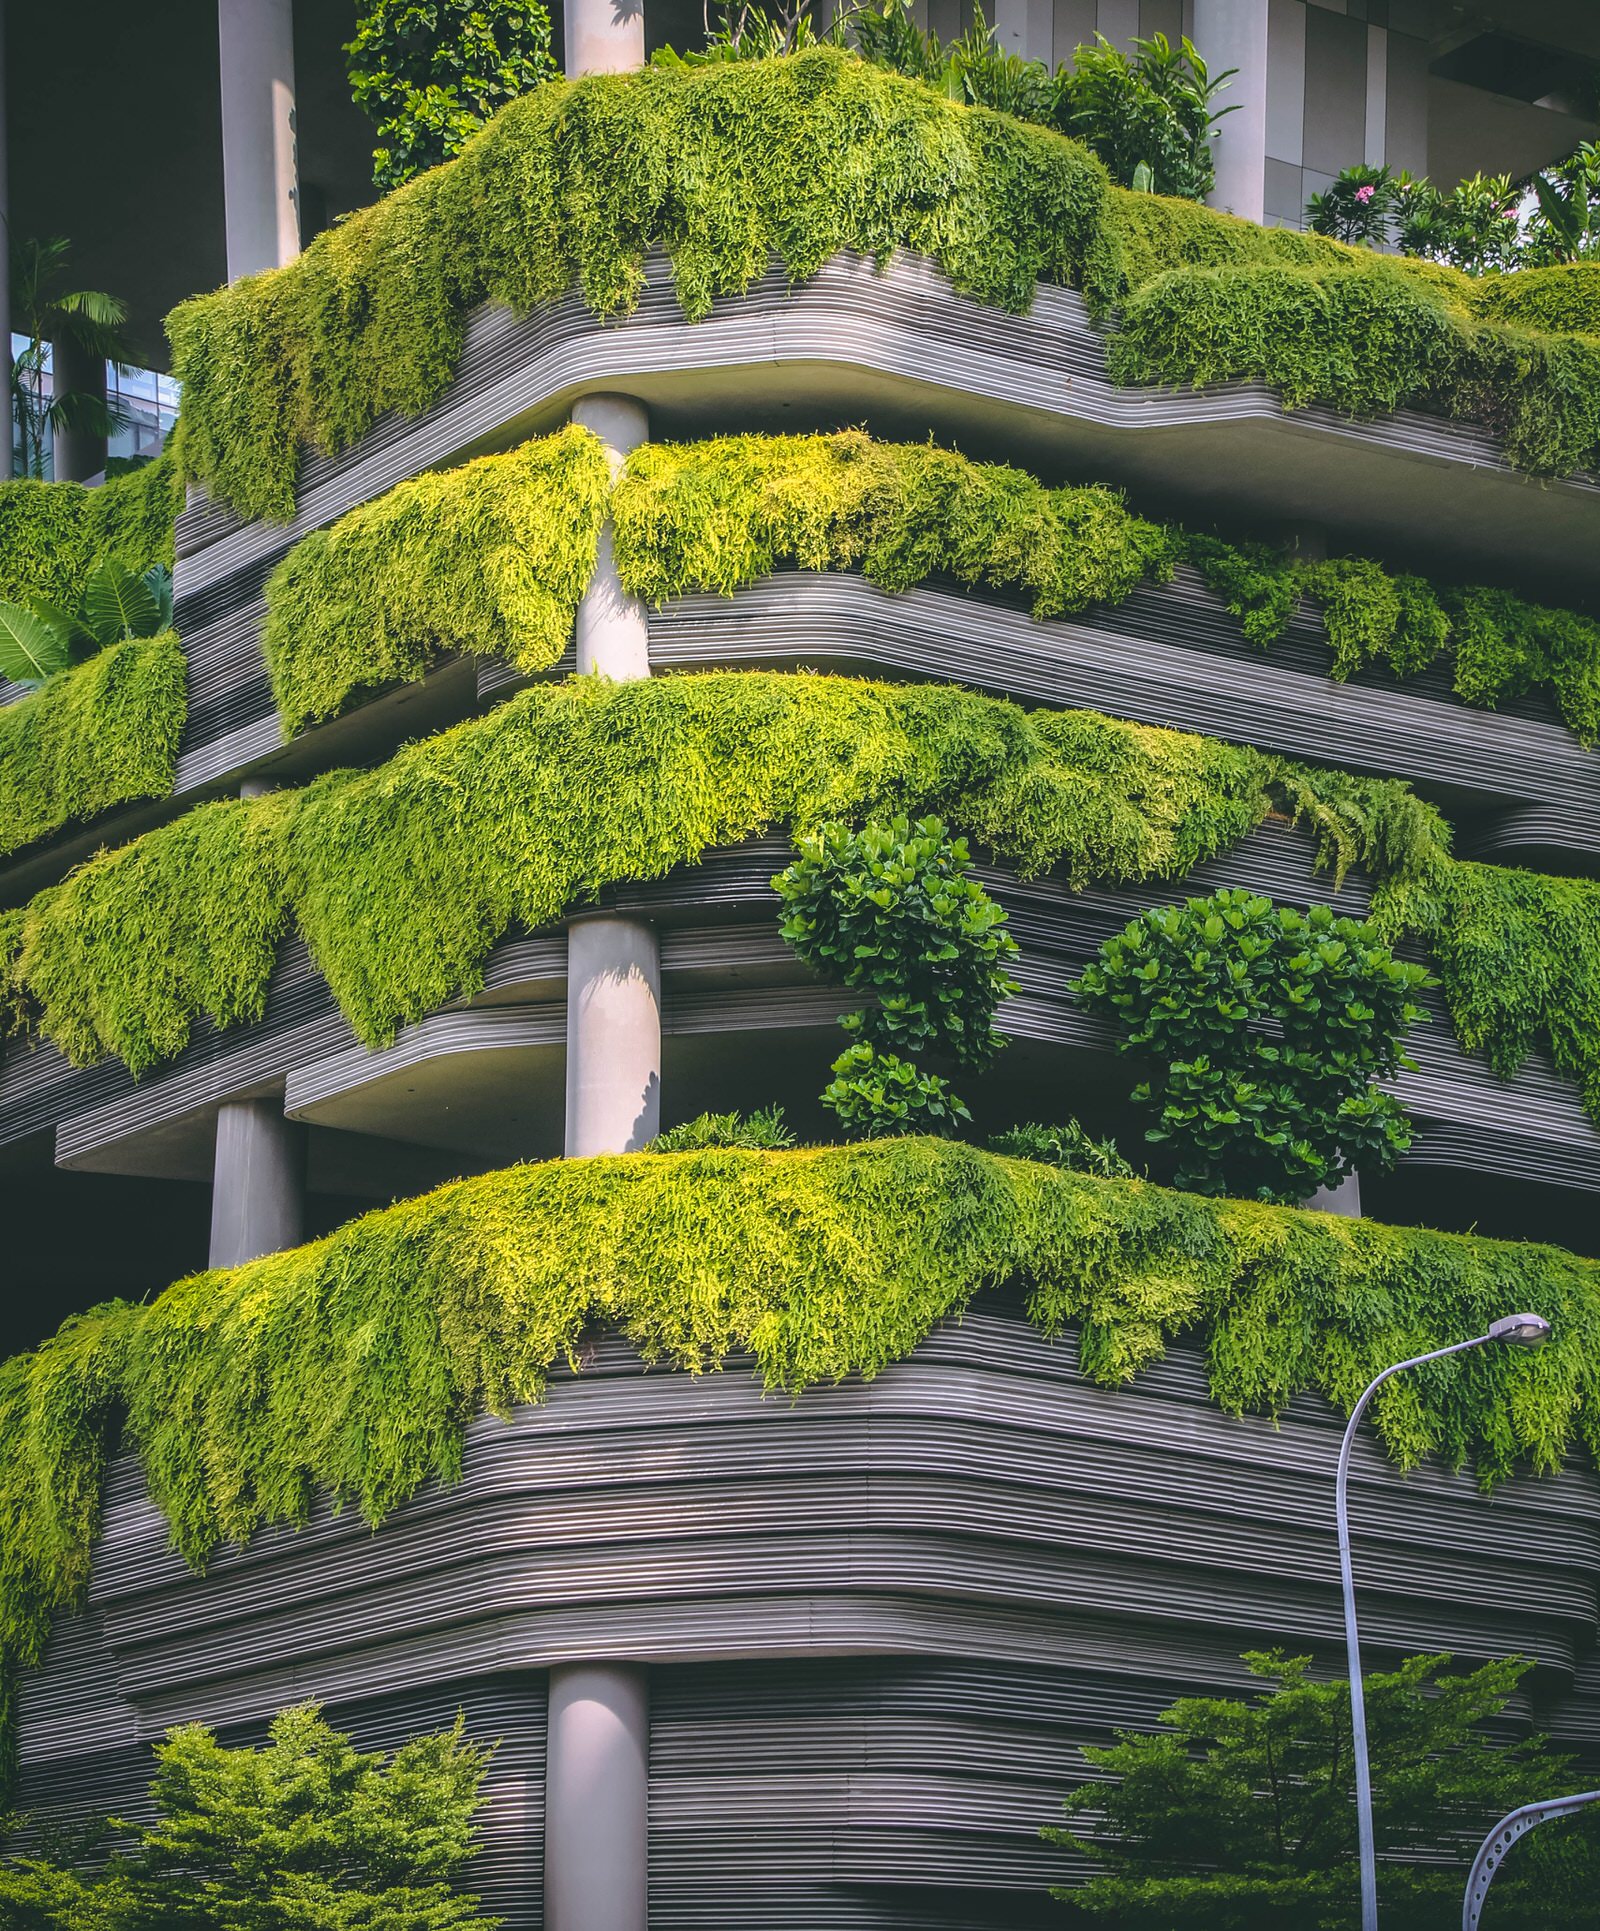
12. Juxtaposition Tells Its Own Story
One of the great things about shooting in an urban environment is the number of comparisons you’ll find. Architecture and humanity, the old and the new, tall and short, growth and decay—the possibilities are endless.
Finding objects with these contrasts and framing them in a way that highlights those differences is the art of juxtaposition. It’s fun, challenging and a great way to add impact to your photos. Try it during your next street session.
Victor Garcia
PRO TIP:
These comparisons work best when they’re immediately recognized. When you find the right subjects, look for a way to frame the shot so that the difference can’t be missed. Use camera angles, lighting, and other “tricks” to emphasize the differences.
13. Try Some Close-Up Work
There’s more to the urban scene than the “normal” view. Just as in nature, there’s a whole other world to explore from a closer vantage point.
You don’t need a macro lens to photograph much of the miniature view on the street. It’s a target-rich environment—from the cracks in the sidewalk, to the peeling paint of a sign to the spider sunning itself in a store window.
If you’re carrying a long lens, you can take advantage of its magnification factor by shooting a few feet away from your miniature subject. This also gives you the opportunity to create some nice bokeh effects with a wide aperture.
Zoltan Kovacs
PRO TIP:
When possible, shoot small objects from a very low point of view. With the surroundings and the sky in the background, you can convey an interesting sense of scale.
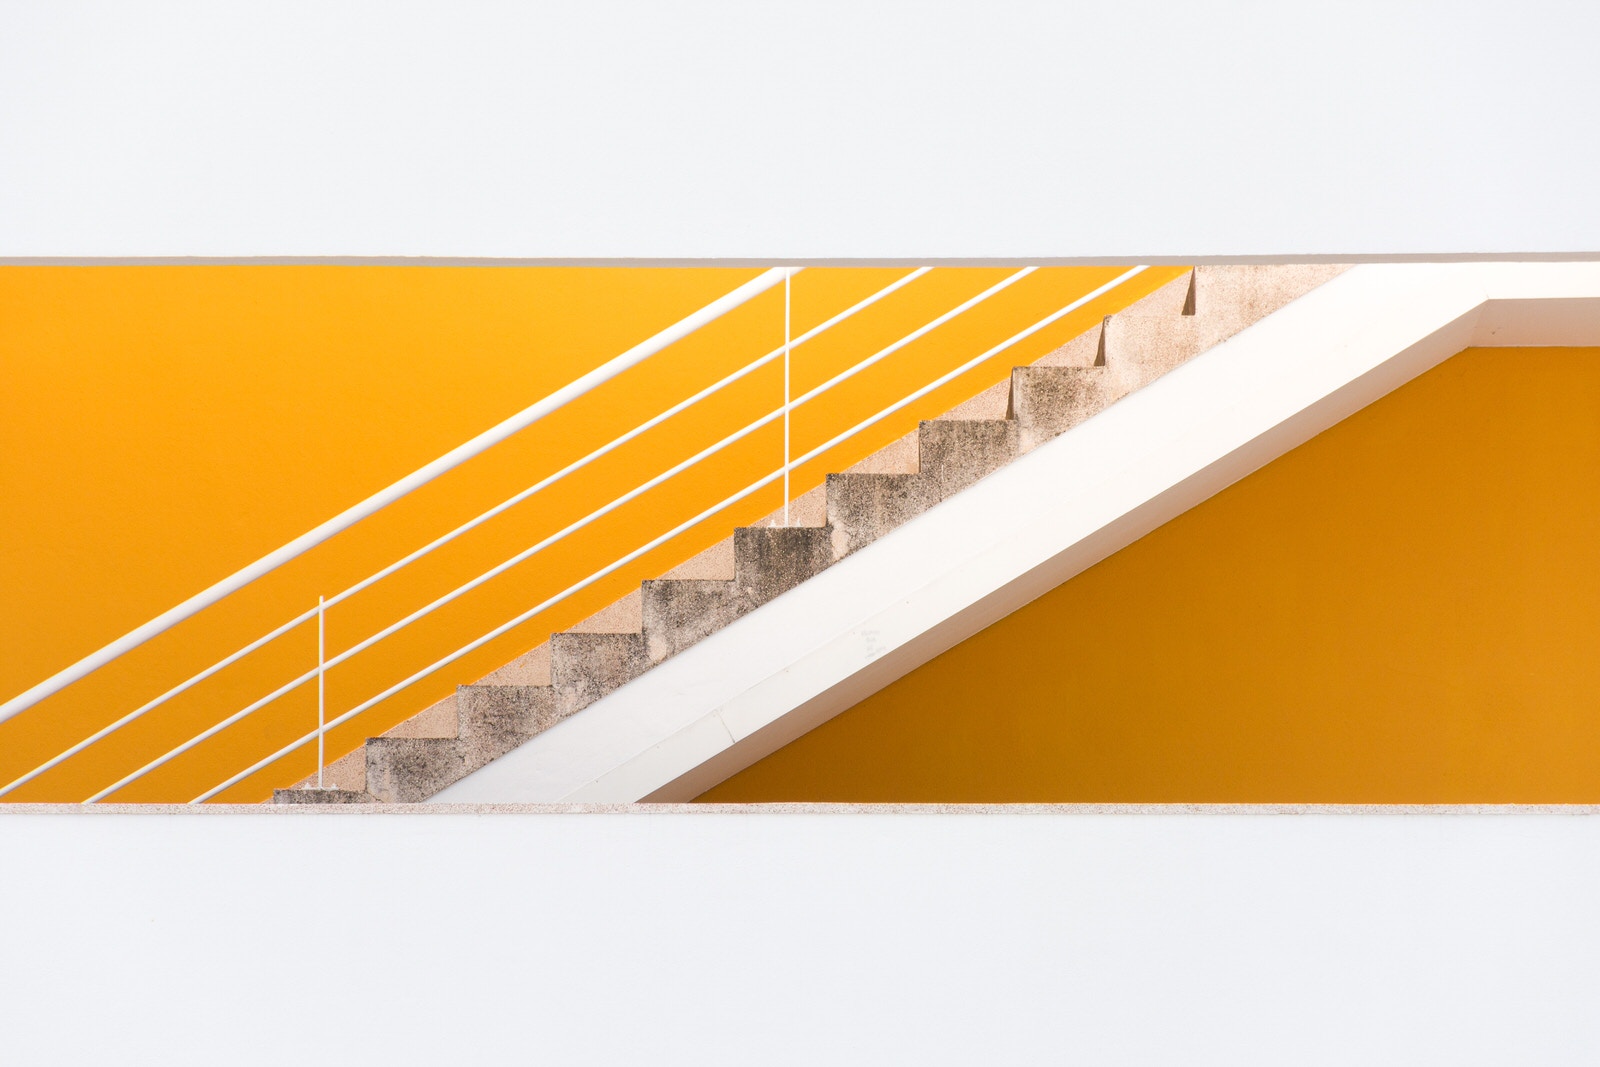
14. Try Going Wide
A lens with a wide focal length (24mm or wider) can be a lot of fun in many street situations. Used parallel to the ground, a wide-angle lens will give you a great field of view. You can capture the foreground, the buildings, and sky all in the same frame. Shooting from a distance can even shrink the scene for a different perspective.
When you move in closer to a subject and shift the angle of view, that’s where the wide-angle fun begins. Conventional, fisheye lenses will distort the objects in the frame radially for those fun, bulbous effects. Rectilinear lenses correct that distortion, but will still distort the perspective in creative ways.

Marc Olivier Jodoin
PRO TIP:
Wide-angle lenses have incredible depth of field, but focusing can be tricky. At most aperture settings, you can focus on an object about 1/3 of the distance “into” the frame to maximize the sharpness throughout your photos. This is handy when shooting urban landscapes, especially at night where focusing can be especially tricky.
15. Bad Weather Is Good Weather
It’s an old adage that when it starts raining, the photographer grabs an umbrella. For a street scene, weather of all kinds only adds texture and life to an environment. Plus, people battling the elements creates for some dynamic images. Sometimes, the worst conditions can provide the best photo ops.
When it’s hot, watch for the unique ways people find to cool themselves off. A sudden downpour will cause a flurry of activity. The puddles left in its wake make a great canvas for reflections and splashing fun. Wind and snow also create awesome dynamics and opportunities.
Be prepared to protect yourself and your equipment when conditions change. Keep shooting, but know how to protect your equipment and when to seek shelter, too.

Jeffrey Blum
PRO TIP:
Add a few heavy plastic trash bags to your gear bag. They can be used as emergency rain/snow covers for you and your equipment, sun shades, ground tarps. They can even be filled with sand to make a stabilizing weight for your tripod or a “bean bag” camera rest.
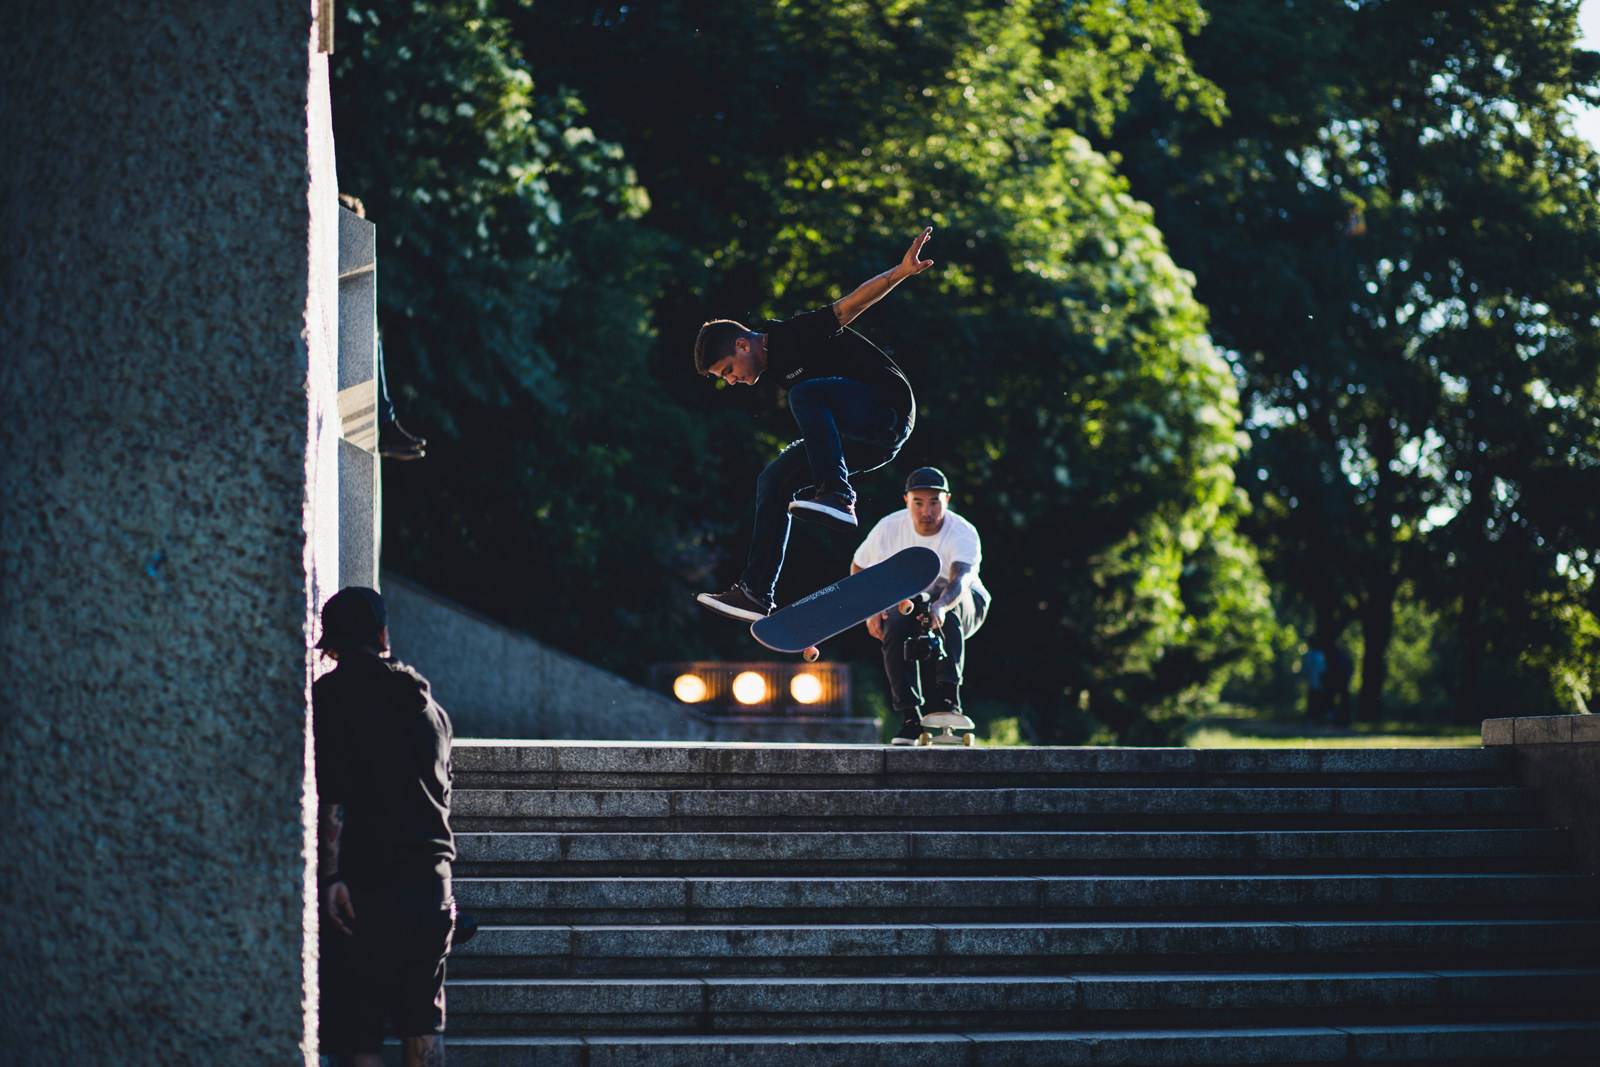
16. Work the Sunlight
We’ve already discussed “golden hour” lighting, but what about other times of day? Sunlight is an incredible tool, you just have to work different kinds in different ways. While portrait photographers bemoan the harsh direct light of midday, for a street photographer, the hard shadows that kind of light creates makes for wonderful shapes and abstractions.
Get a little lower and see how aiming toward the sun and using reflections and flares can enable the sun to add life to your shots. One of street photographers’ great lighting tricks is to see where reflected light from a nearby building is shining into an otherwise shadowed area, essentially creating a near-perfect studio-like light setup.
As a street photographer, you’re working with what’s given to you. So, when you can’t choose the time of day for the shoot, find ways to work with the available light. Having a number of “tricks” in your repertoire for any situation will pay off in countless ways.

Sawyer Bengtson
PRO TIP:
Watch for the continuously-changing shadow shapes and patterns that the sun paints and then use them to add interest to you image.
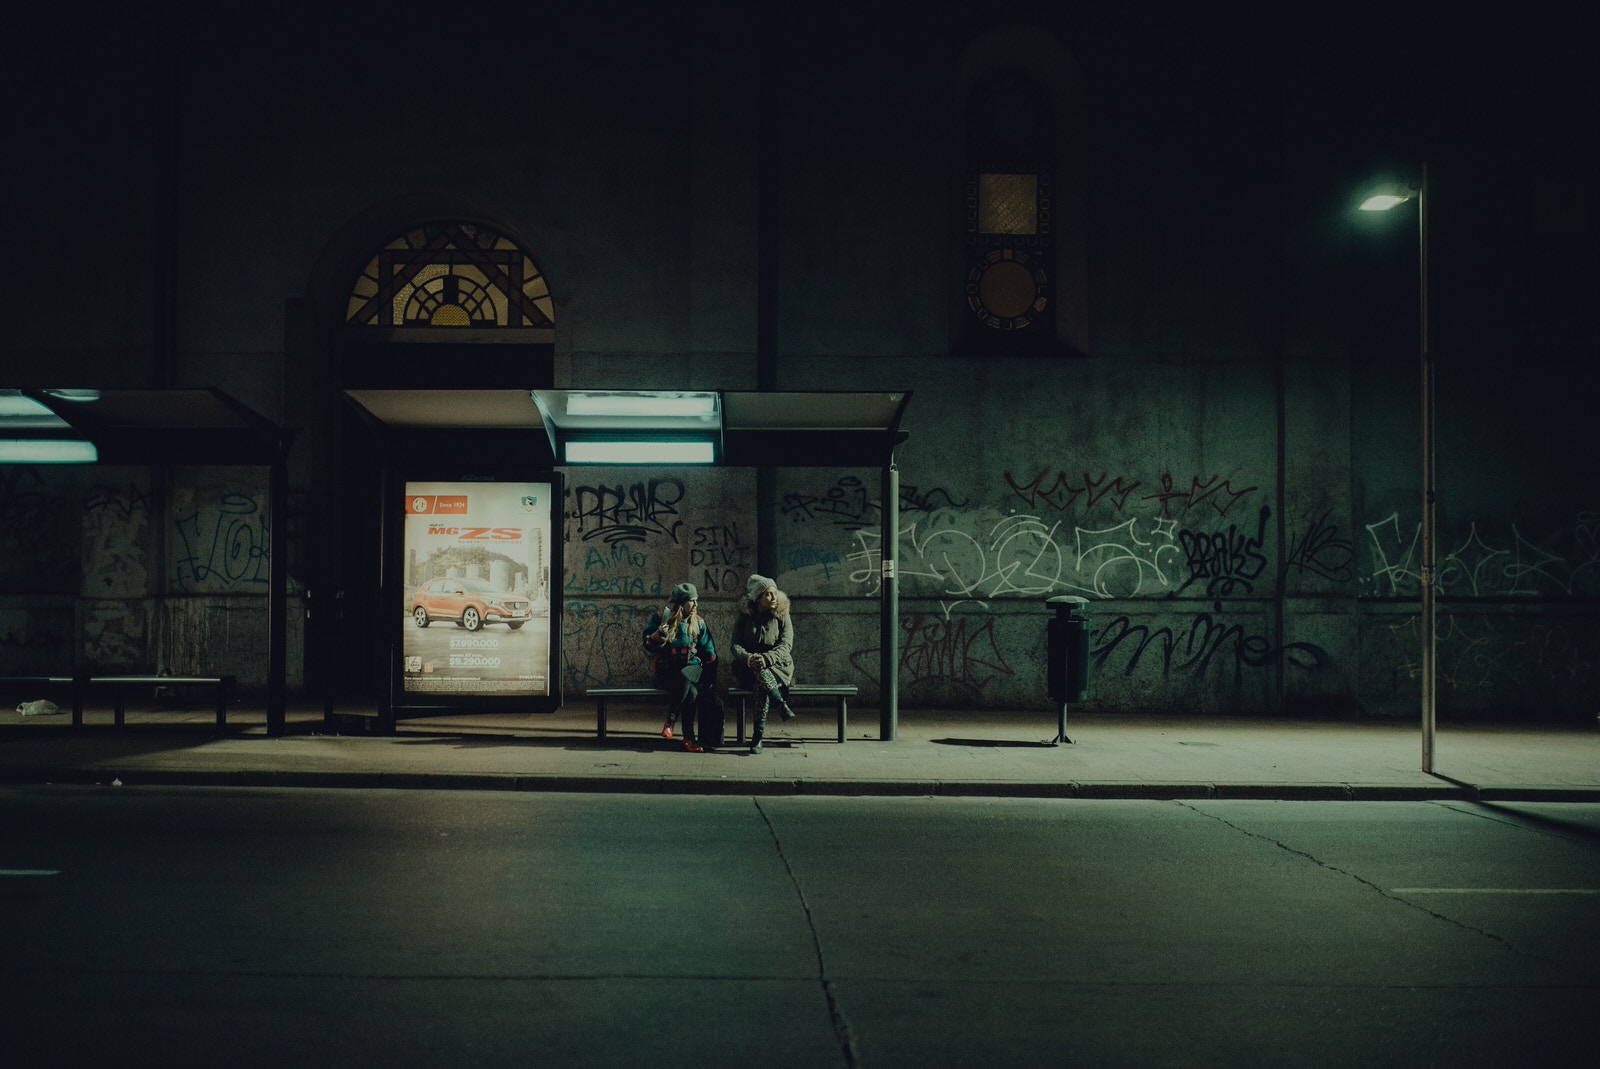
17. Work the Night, Too
The face of the city changes when the sun goes down. Light displays, traffic, and the creatures of the night offer unlimited opportunities.
A bold photographer will find dark stories on the back streets of many cities. But it doesn’t have to be dangerous—street lights, theater lines, and even a quiet park can provide an endless palette of creative inspiration.
Crank up the ISO setting and record the drama as it unfolds.

Chester Wade
PRO TIP:
Wide apertures, flash and fast shutter speeds will deliver less motion blur and nice bokeh, but don’t forget to think outside the box. Bring your tripod. Capture some light trails. Stop down to f/16 or f/22 and enjoy the light trails and starbursts that add drama and creativity to your shots.
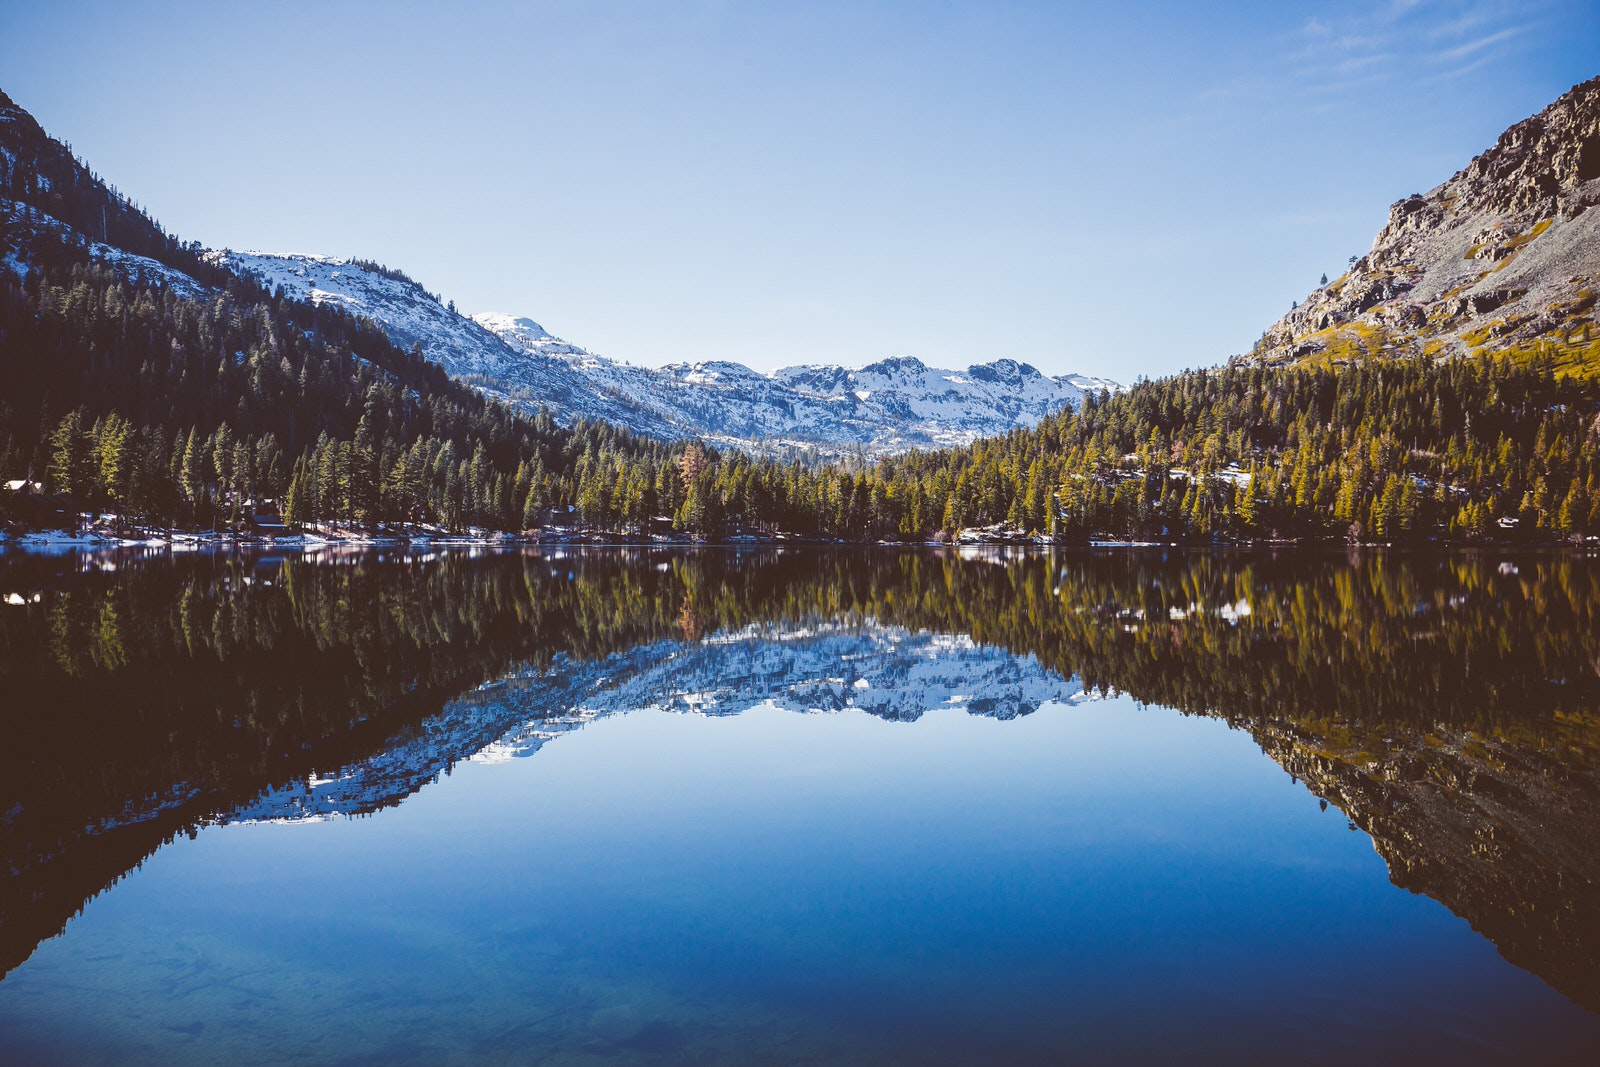
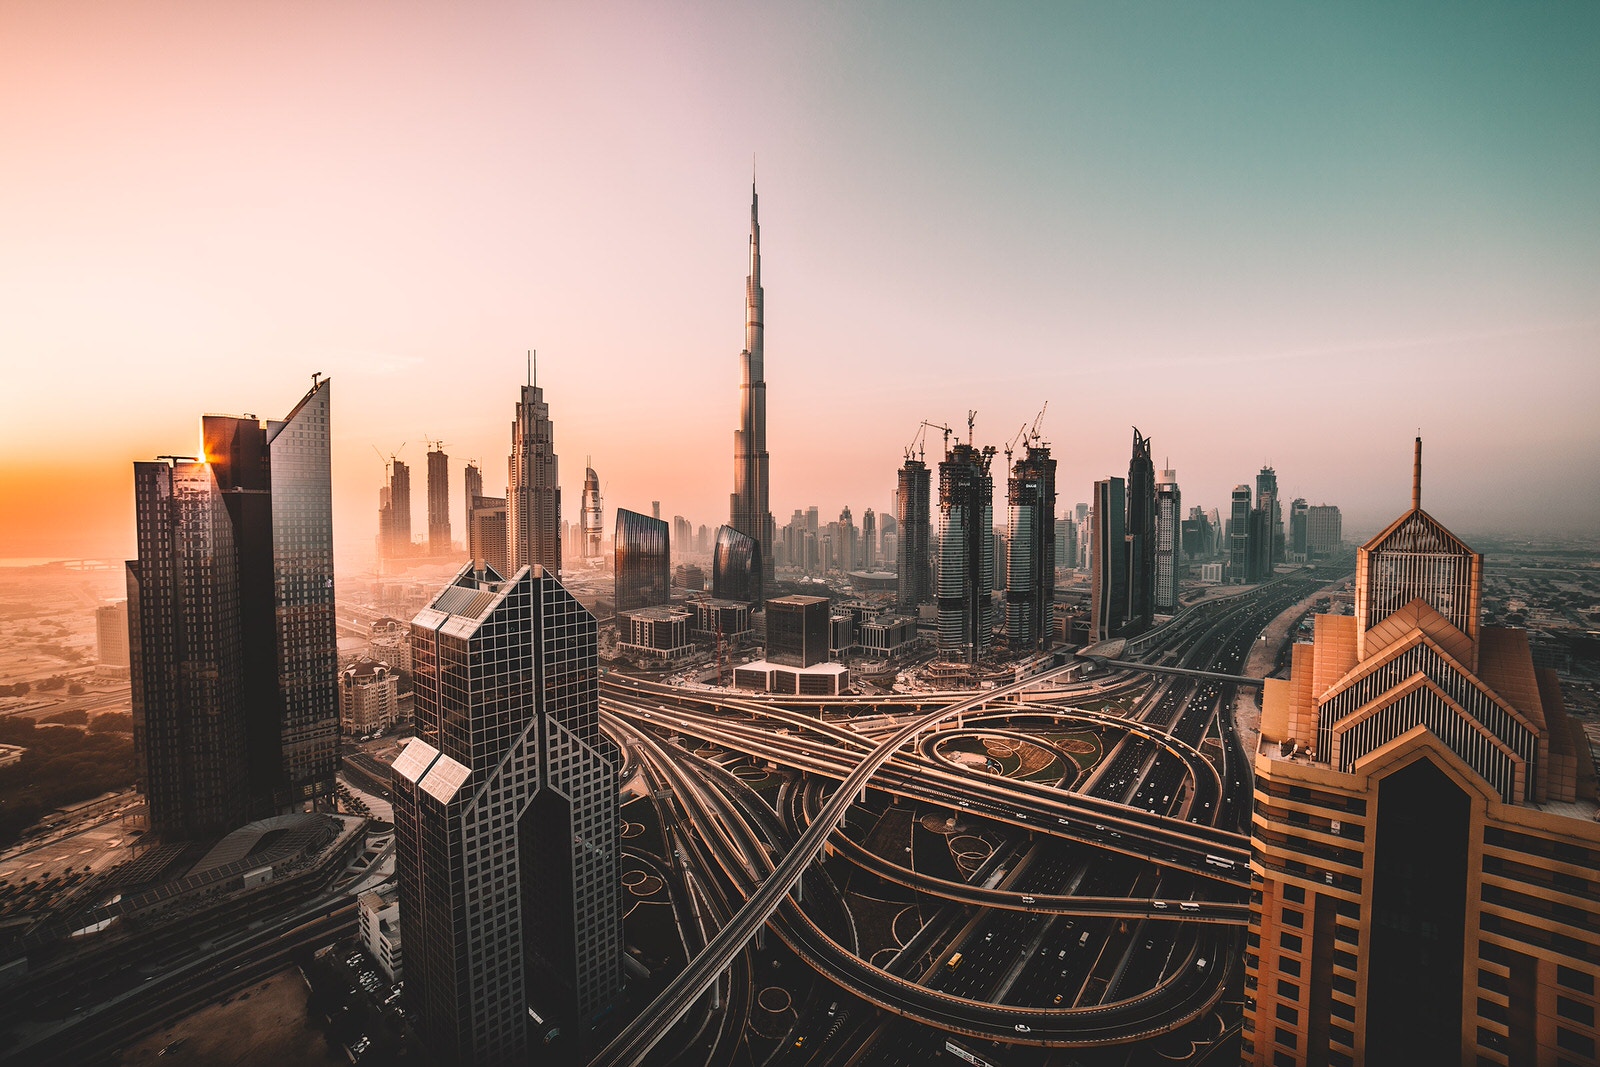
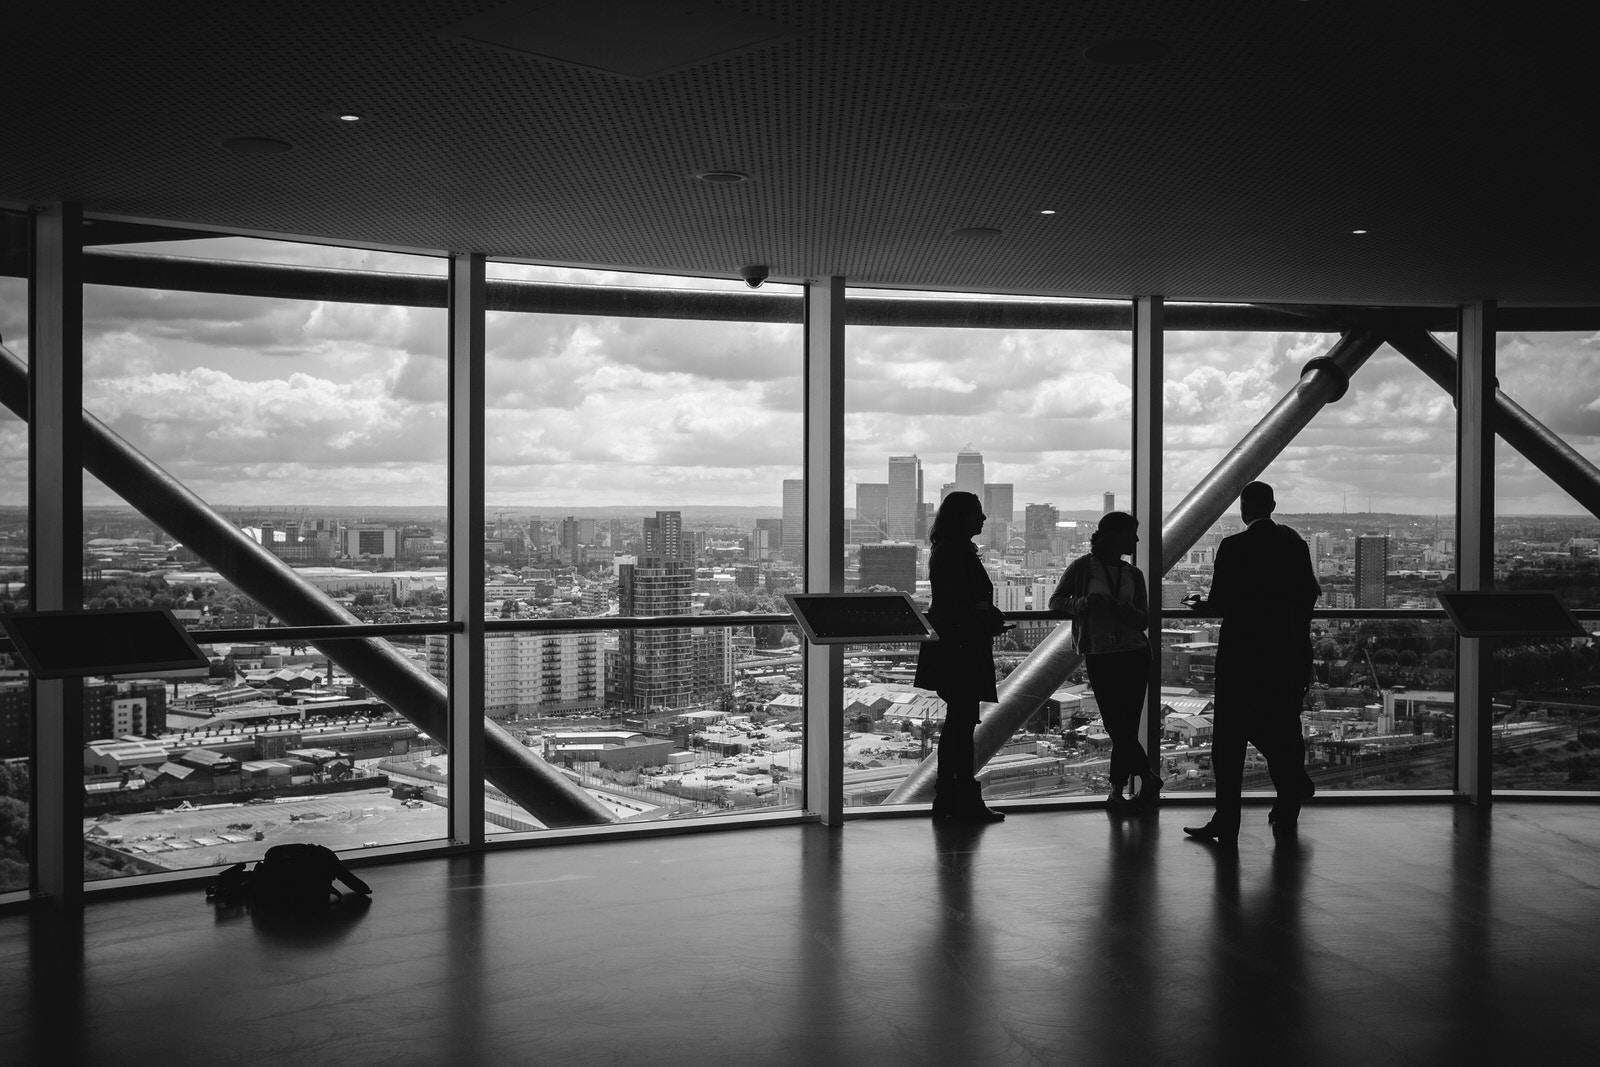
18. Head to Higher Ground
Just as a lower point of view can add interest, a higher vantage point can put a whole new spin on your images. One easy trick a lot of street and urban photographers employ is to location scout areas of a city that offer wide expansive views or where hilly roads offer new angles on things.
Don’t risk your own well-being and certainly don’t do anything to land yourself in jail (the light in there is terrible), but there are a few tricks to getting yourself above the crowds. A polite request might give you access to an upper story window or rooftop. Balconies and catwalks are good locations. Most cities have multi-level garages with gorgeous views and most tall hotels have restaurants and observation decks that are open to the public. Look up and find a place to look down.
David Rodrigo
PRO TIP:
When you are getting to a new city, grab a brochure or check with the local Chamber of Commerce to find great locations that are open to the public. Metropolitan areas almost always have tourist access to high places like towers and cathedrals. And most hotel rooms have books or magazines with tons of photos that offer clues to where these top locations are.
19. Take It Inside
While it’s not technically “on the street”, finding excellent indoor scenes still qualifies as street photography in our book. It’s just about finding the right spot, and shooting it in your street style.
Once inside, you have to remember you’re on private property and everyone has an opinion on what’s legal and what’s not. This is where being a stealthy street shooter comes in handy. Businesses will often discourage cameras and those that allow them may prohibit flash photography. Respecting those restrictions and going more low key with it may earn you some respect and will definitely keep you out of trouble, especially in government buildings.
Indoor flea markets, shopping malls, and similar locations can be great backdrops for some storytelling. Framing a shot through a doorway looking out is another great way to do something unique with your street work.
Charles Forerunner
PRO TIP:
Don’t be afraid to use a high ISO setting in lieu of a distracting and often unwelcome flash. Noise can be reduced in post-processing and can even add a “gritty” feel that suits some street shots.
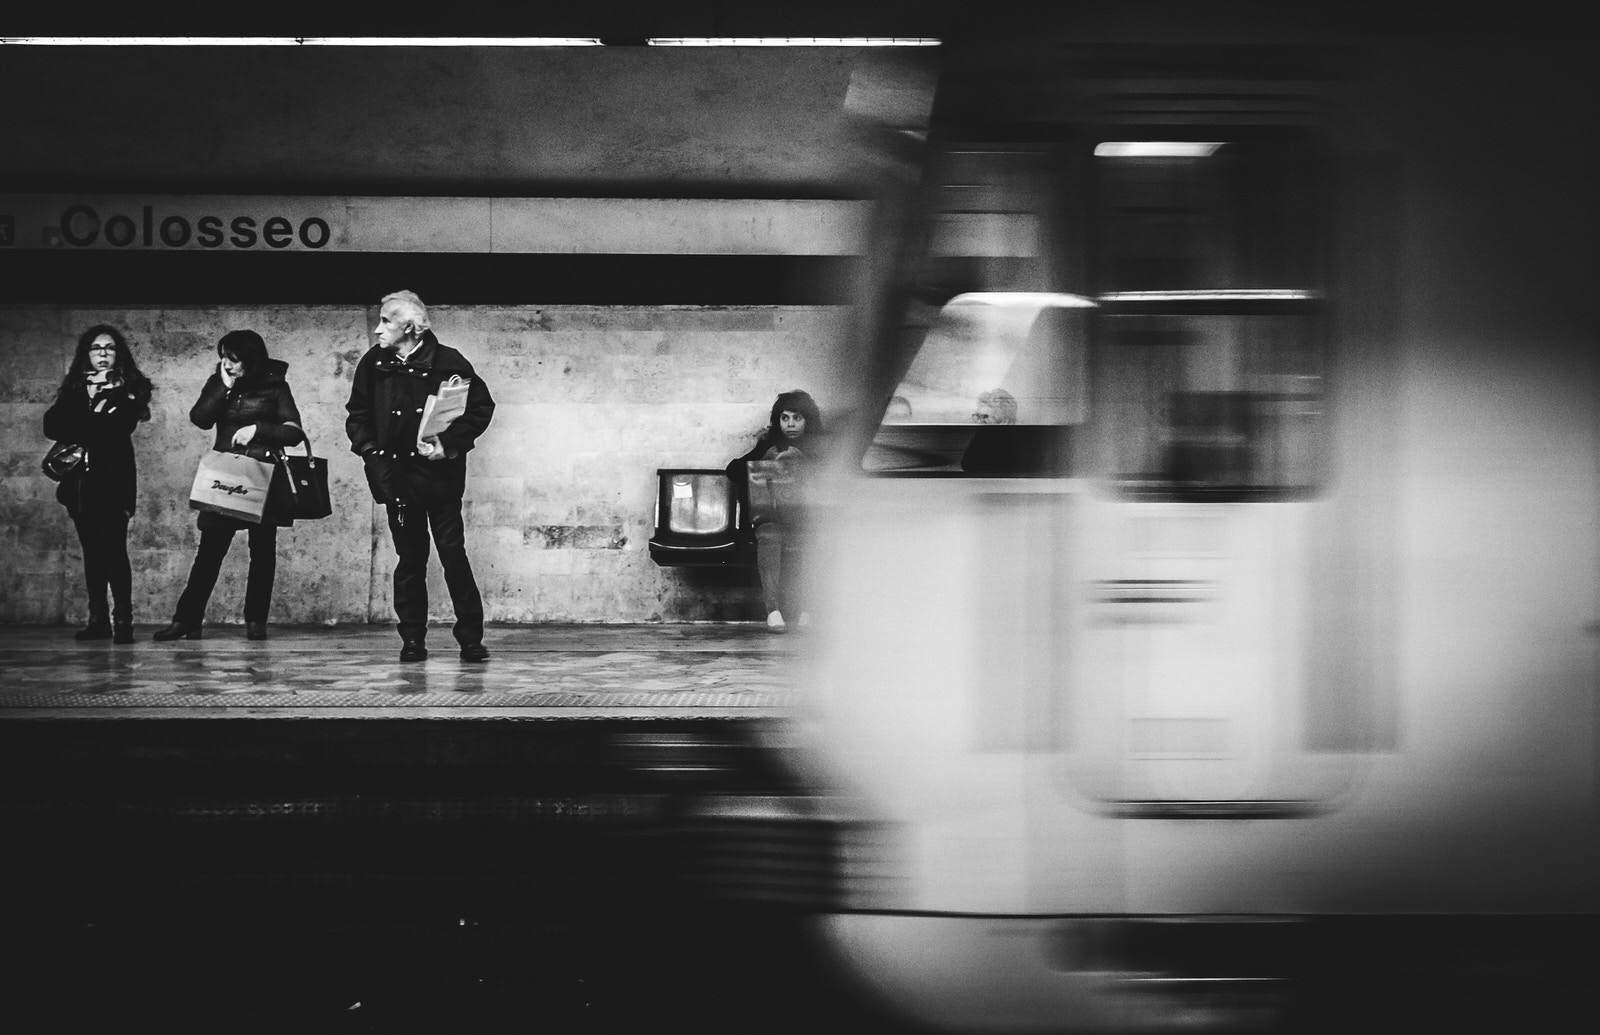
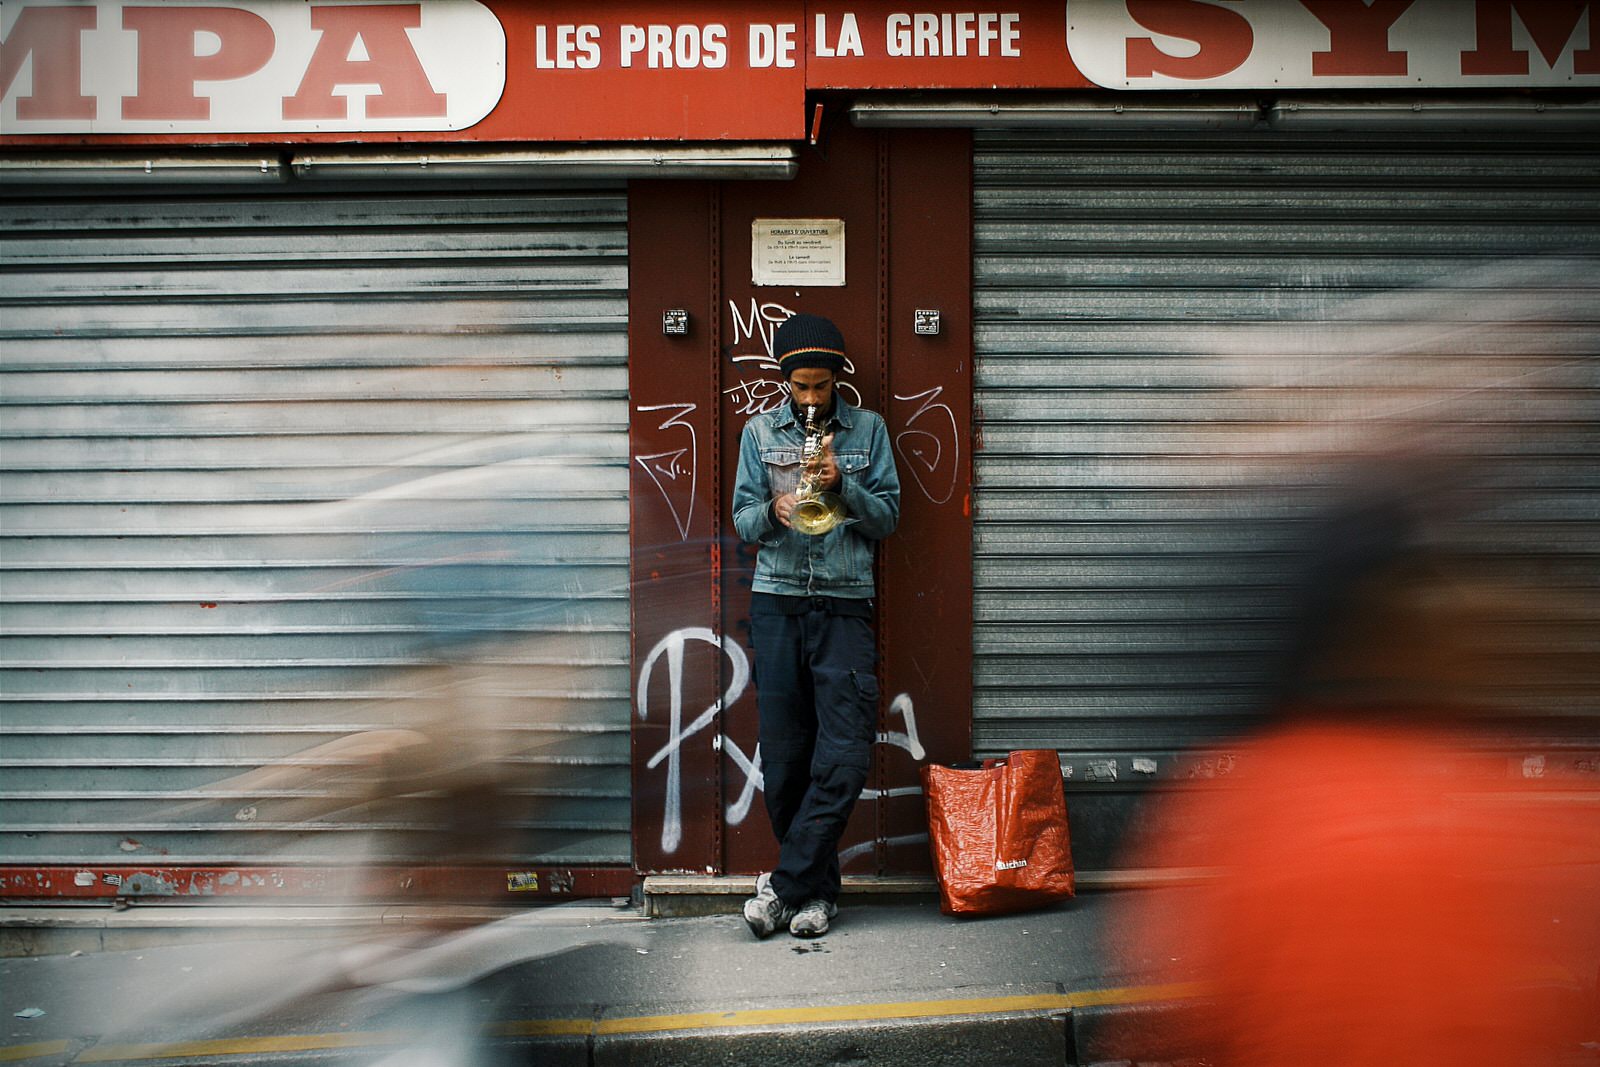
20. Go Slow to Look Fast
A little—or even a lot—of motion blur isn’t necessarily a bad thing in a street photo. If the story you’re telling is one of hustle and bustle, narrow escape or anything similar, let the motion show.
Slow shutter speeds at a popular tourist attraction or subway station will blur your subjects and can be a beautiful way to capture a sense of the activity. But this works in many situations. Long exposures at stoplights can give you “ghosts” of the vehicles and pedestrians. The blur of a flag or banner can telegraph a windy day. It’s all about using, and at times creating, visual clues to convey the moment.
Alessio Mumbojumbo
PRO TIP:
Try firing an external flash at the end of a fairly long exposure to “freeze” moving subjects with motion trails behind them. You may want your camera on a tripod for this trick.
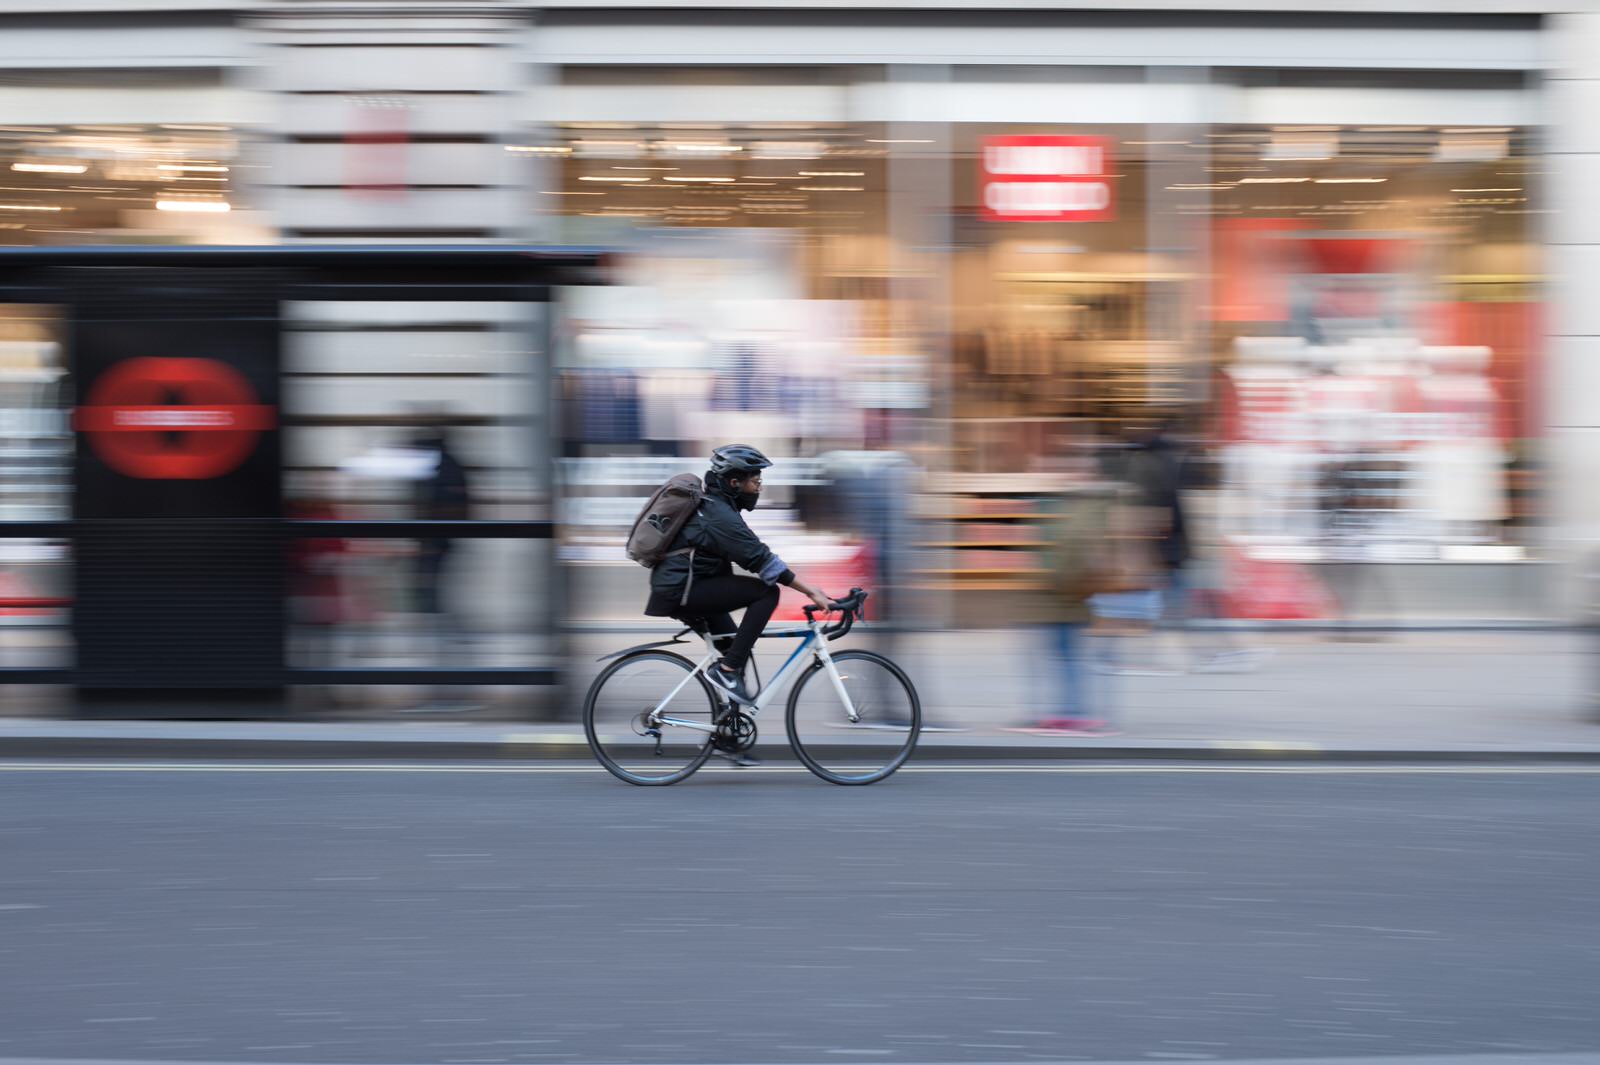
21. Pan with the Motion
Panning with a moving subject shows motion in a more unique way. For instance, try following the motion of a cyclist with your camera as you press the shutter. Match the speed of the pan with the speed of the cyclist. If your timing is good, you’ll freeze the bicycle and rider, leaving the spinning wheels and background blurred.
This technique takes practice and concentration to perfect, but once mastered, it’s an effective way to add dynamics to street shots. You can take this technique to any number of scenarios. It works great with cars, birds, runners… anything where movement is a key factor in the scene.
Roman Koester
PRO TIP:
When capturing an object in motion, be sure to leave leading space in the frame. In other words, don’t crop your image close to the front of the motion. A moving subject needs somewhere to go.
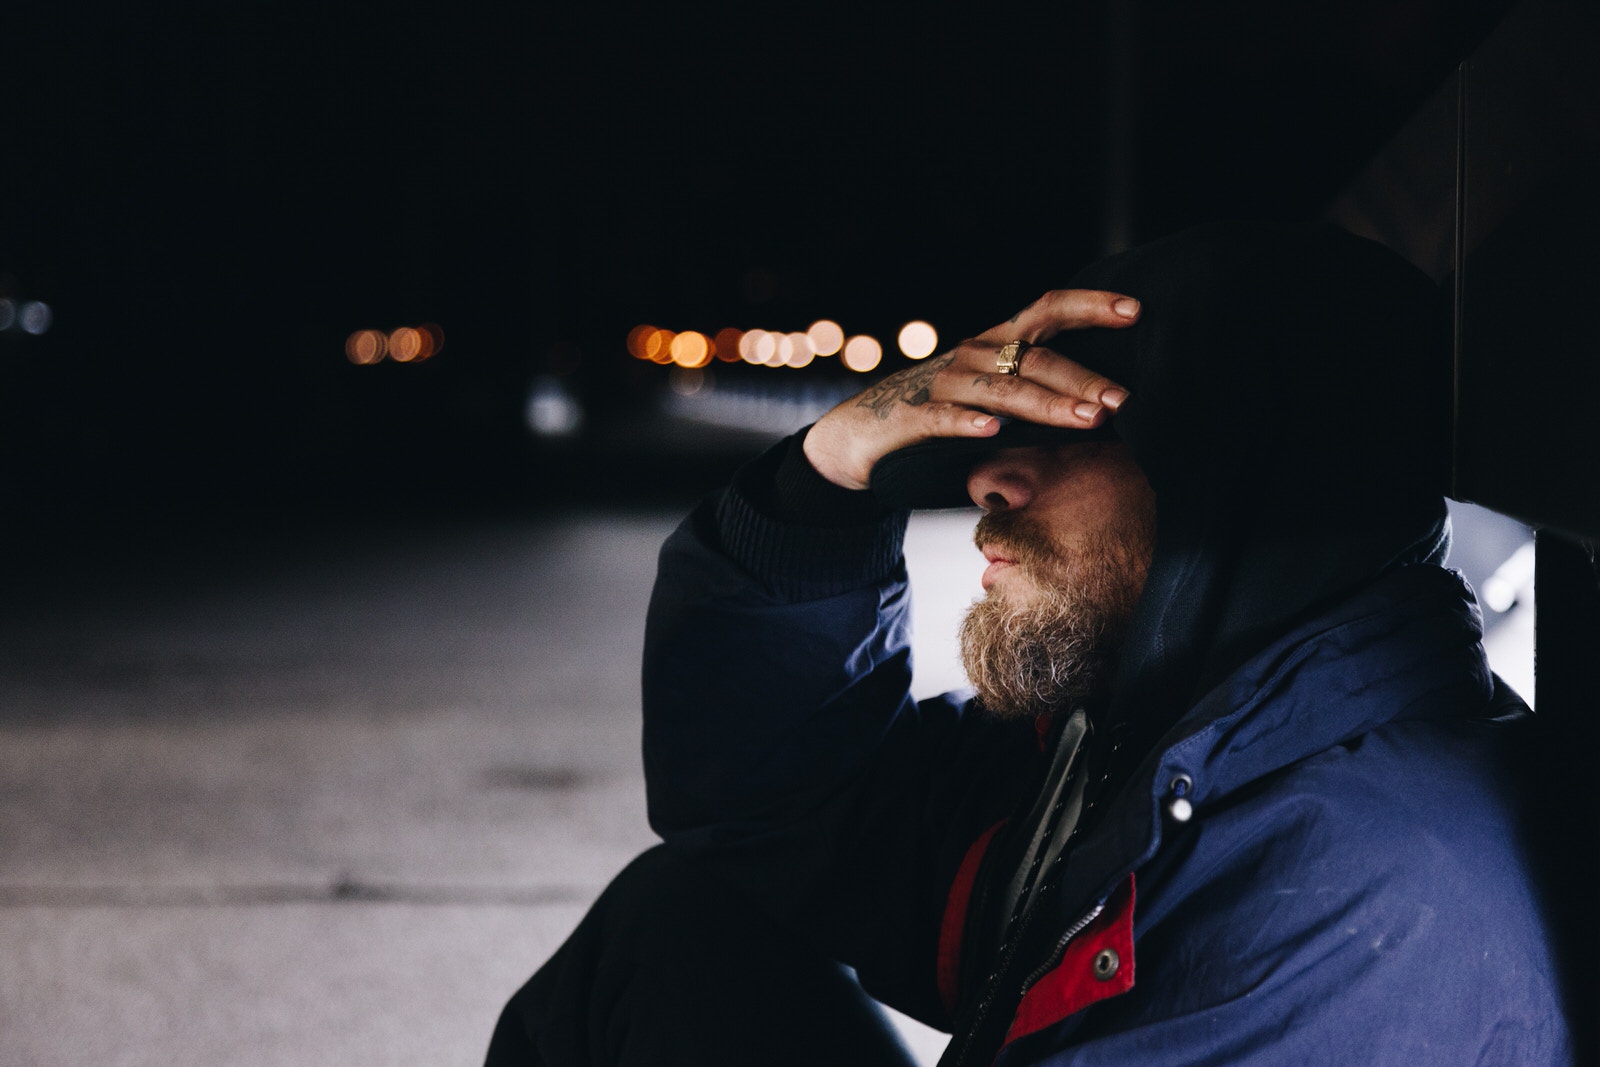
22. Capture Emotional Moments
The street is a great place to capture emotion. It’s filled with real people living their real lives. And when scenes unfold, they do so with a distinct, unscripted humanity. Some of the greatest street photos ever created simply tell the tale of a person having their very emotional human moment. The frustrated mother, the angry shopkeeper, the kissing couple… these are all street gold. And you can capture it.
Getting this special kind of shot takes patience, observation, luck, timing, and discretion. Where is the line between an artist or a documentarian and just plain invasion of privacy? Every moment has its own line and you have to know when you’re crossing it.
But if you really want to capture it authentically, try to remain unseen. Emotion is personal—as soon as it includes you, it turns into something else. Shoot from the hip, from behind a window or doorway, or even pretend to be shooting something else. Not to be sneaky, but so that you don’t find yourself the subject of the person’s emotion. Nobody wants to be taken advantage of when they’re vulnerable, so keep it all on the dl.
Jonathan Rados
PRO TIP:
One trick of the trade is to think a few steps ahead. Literally. If you see a subject that seems like it might be a great one to shoot, try to anticipate where it’s going to be in a minute, then go position yourself there and wait for it to cross your path. That way it feels like it came to you, rather than you going toward it.
23. Don’t Think. Feel. Then Shoot.
Street shooting really starts to feel fun when you learn to not think about the technical stuff and just feel the pulse of the city—and every place has some pulse, even if it’s just a village.
The trick with it is to get good enough, and confident enough, at settings that you can put it on “autopilot” and simply absorb the city, letting the sounds, smells, textures, and visuals seap inside you. The creative, photography mind will then translate that into something worth shooting. It might be more abstract than your usual, perfectly-timed or composed shot, but it might very well be more true to the feeling you had while there.
Trust the process and let it flow. Eventually, you might find these less-perfect images to be your most favorite, or even your signature.
Bash Carlos
PRO TIP:
Don’t “chimp” (constantly check your photo previews). Learn to trust your skills and maintain your rhythm. You’ll miss fewer shots and stay better connected to the shoot. Find your mistakes later and learn from them.
24. Don’t Forget Your Most Important Piece of Equipment: Your Body
Your body is the piece of equipment that supports that creative mind of yours. Treat it as well as you do your camera.
There’s no prize for least amount of food or water consumed in one session. Carry a water bottle and an energy bar in your pack for quick refreshment when you need it. If you don’t have a good way to carry your own, pick up a bottle of juice and a quick snack at a local shop. Avoid sugar crashes, stomach aches, and headaches by keeping it healthy on shoot days. Foods that digest easily and offer sustained energy are preferred here. Little sips of water all day are better than big gulps when you’re parched. Your body can only absorb so much water at a time.

Rawpixel
PRO TIP:
Nothing helps you keep pace like music. When you need a pick-me-up, either energy-wise or even just for some creative flow, try putting some music in your ears. It could even lead to an idea for a shot.
25. Remember Why You’re Here
The real motivation for most street photographers isn’t money, fame or anything tangible. Most of us do what we do because we love it.
Be you, be honest, and be authentic in everything you do—just like the people you’re photographing. It’s okay to laugh and it’s okay to cry. Being every bit of yourself makes you approachable and likeable out on the street. And as much as you paint yourself as an observer, the truth is, you’re also on that street. Find your place there and enjoy the feeling of being part of a community.

Frederik Trovatten
PRO TIP:
Talk to people on the street about what you’re doing. There’s a tendency to think of yourself as an outsider when you have a camera; break with the constructs that separate you from your environment and strike up a conversation with people about your art and goals. There’s no better way to ingrain yourself into the heart of a city—and more often than not, it’ll open a door to a part of the city you’ve never seen. Everyone has a story.
One Last Thing
Like most genres, street photography is a pursuit that requires skill, continuous creativity, and dedication. It blends photojournalism with fine art and even elements of storytelling. It’s a lot to learn and can often be frustrating, with what seems like steps back as much as steps forward. Those who truly find success in it are the ones who can withstand those harder times and push through them. And nothing helps with this more than continuously reminding yourself why you got into it in the first place.
The tips we’ve listed in this article will help you find your way around the urban jungle and set you on a path to creating images that stand out and pull viewers in. But it’s also worth mentioning that your motivation and curiosity is the true foundation of your work as a street photographer. And this a far greater factor in your work and career than settings and techniques. Stay curious and keep shooting! And remember: