Bokeh Photography: The Ultimate Tutorial
“You don’t take a photograph, you make it.”
– Ansel Adams
You’ve heard of that dreamy, blurry background of an image called bokeh. Now, learn the secrets and how to add it to your photos in camera and in Photoshop. In this complete bokeh guide, we’ll show you examples of bokeh in photography, teach you how to achieve it in Photoshop in our video tutorial, and go over all your questions.
Whether or not you’re aware of it, you’ve almost certainly happened upon bokeh. The term describes a particular type of blur that appears when you’ve set your camera to a shallow depth of field, softening your background and juxtaposing it with a sharp, clear subject. If you’ve seen the effect on an iPhone, it’s commonly called Portrait mode. It’s an effect easily identified by the little circles (or other shapes) of light appearing to dance lightly across the photo. No two bokehs are the same, even when they’re shot at the same location on the same day. It’s a technique that you can master without ever attaining complete control over it. It comes in a variety of colors, sizes and intensities.
These days bokeh is a highly sought-after look, one of those “perfectly imperfect” touches that can make a photo seem at the same time effortless and intentional, and it’s surprisingly easy to achieve. You simply go for a wide aperture that will give you a nice, shallow depth of field, and let all that light play around in the out-of-focus portions of your shot. Play is the key word here. There’s no one “right” way to use bokeh, which is what photographers love about it. It’s a fun way to unleash some creativity, and it’s a safe technique to experiment with since it’s really hard to do it “wrong.”
Learning how to take a bokeh photograph is easy enough; you don’t even necessarily need a DSLR to try it out. Many point-and-shoot cameras (and even some smartphone cameras) give you the option to adjust aperture settings. There’s also an army of smartphone apps that offer bokeh effects, and of course the big players like Photoshop have ways to mimic a true bokeh if you miss it in the moment. Once you feel comfortable getting the boken into your image, it’s time for the really fun part: working it into your composition.
Before we dive into the details of our bokeh tutorial, let’s quickly go over all the basic FAQs:
What is bokeh in photography?
Bokeh is the blurry, out of focus background in a photo. The blurred technique is captured when shooting on prime lenses with a wide-open aperture, or zoom lenses with a 2.8 aperture or wider.
Why is it called bokeh?
Bokeh the photography term originates from the Japanese word bokeh, which means ‘blur’ in English.
How do you get bokeh background?
Shoot in as wide aperture as possible, use a longer focal lens length and make sure there is distance between your subject and the background.
How do you pronounce bokeh photography?
Bokeh is pronounced boke-uh.
What is video bokeh?
Video bokeh is similar to, and achieved in the same way, as bokeh in photography. By shooting with a wide aperture and having distance between your subject and the background, you’ll achieve an aesthetic and blurry background with the foreground in perfect focus.
How do you get the bokeh effect on the iPhone?
Starting with the iPhone 7 Plus, all new iPhone models have included Portrait mode, which mimics the bokeh effect of shooting with a wide lens on a DSLR. Creating this beautiful photography trick is simple with today’s smartphones.
Can I get bokeh photography on my iPhone 7?
On the iPhone 7 Plus or newer, switch your camera to Portrait Mode and shoot an in-focus photo to achieve the bokeh effect. This gives you photos that are high quality, in focus with a blurred and aesthetic background.
Which camera lens has the best bokeh?
There is no clear winner, although generally the wider your lens, the more drastic – and beautiful – your bokeh effect. You should use a lens with at least an f/2.8 or wider to get a quality bokeh effect on your photos.
Can you get bokeh with a 18-55 kit lens?
To achieve an aesthetic bokeh with an 18-55 kit lens, shoot at the furthest focal distance, with the widest aperture, with as much distance between your subject and your background as possible.
Which camera lens blurs the background the best?
Seasoned and creative photographers can achieve beautiful bokeh with almost any lens. However, beginners should choose a lens with at least an f/2.8 aperture or wider.
What is the best camera setting to blur the background?
Generally speaking, setting your aperture to the smallest f-stop value you can will produce the most drastic bokeh, or blurred background.
OK. Now that we’ve got the basics, let’s explore bokeh’s role in photography composition.
How Can Bokeh Enhance a Composition?
Glad you asked! Bokeh is a flexible technique and it has a lot to offer. For example, it’s particularly helpful for eliminating harsh, distracting transitions in your backgrounds. But bokeh can share some of the limelight too, adding a funky vibe to a stiff portrait or giving viewers a hidden clue about what’s really going on in your image. Let’s take a look at some examples:

Photo by Alessandro La Becca on Unsplash
Here, a subtle bokeh is born between the leaves of a tree. The bright spots of sky might ordinarily draw your eye away from the subject, but the shallow depth of field has softened them a little and spread them out. Now those spots compliment the patches of white on the bird instead of stealing the show.

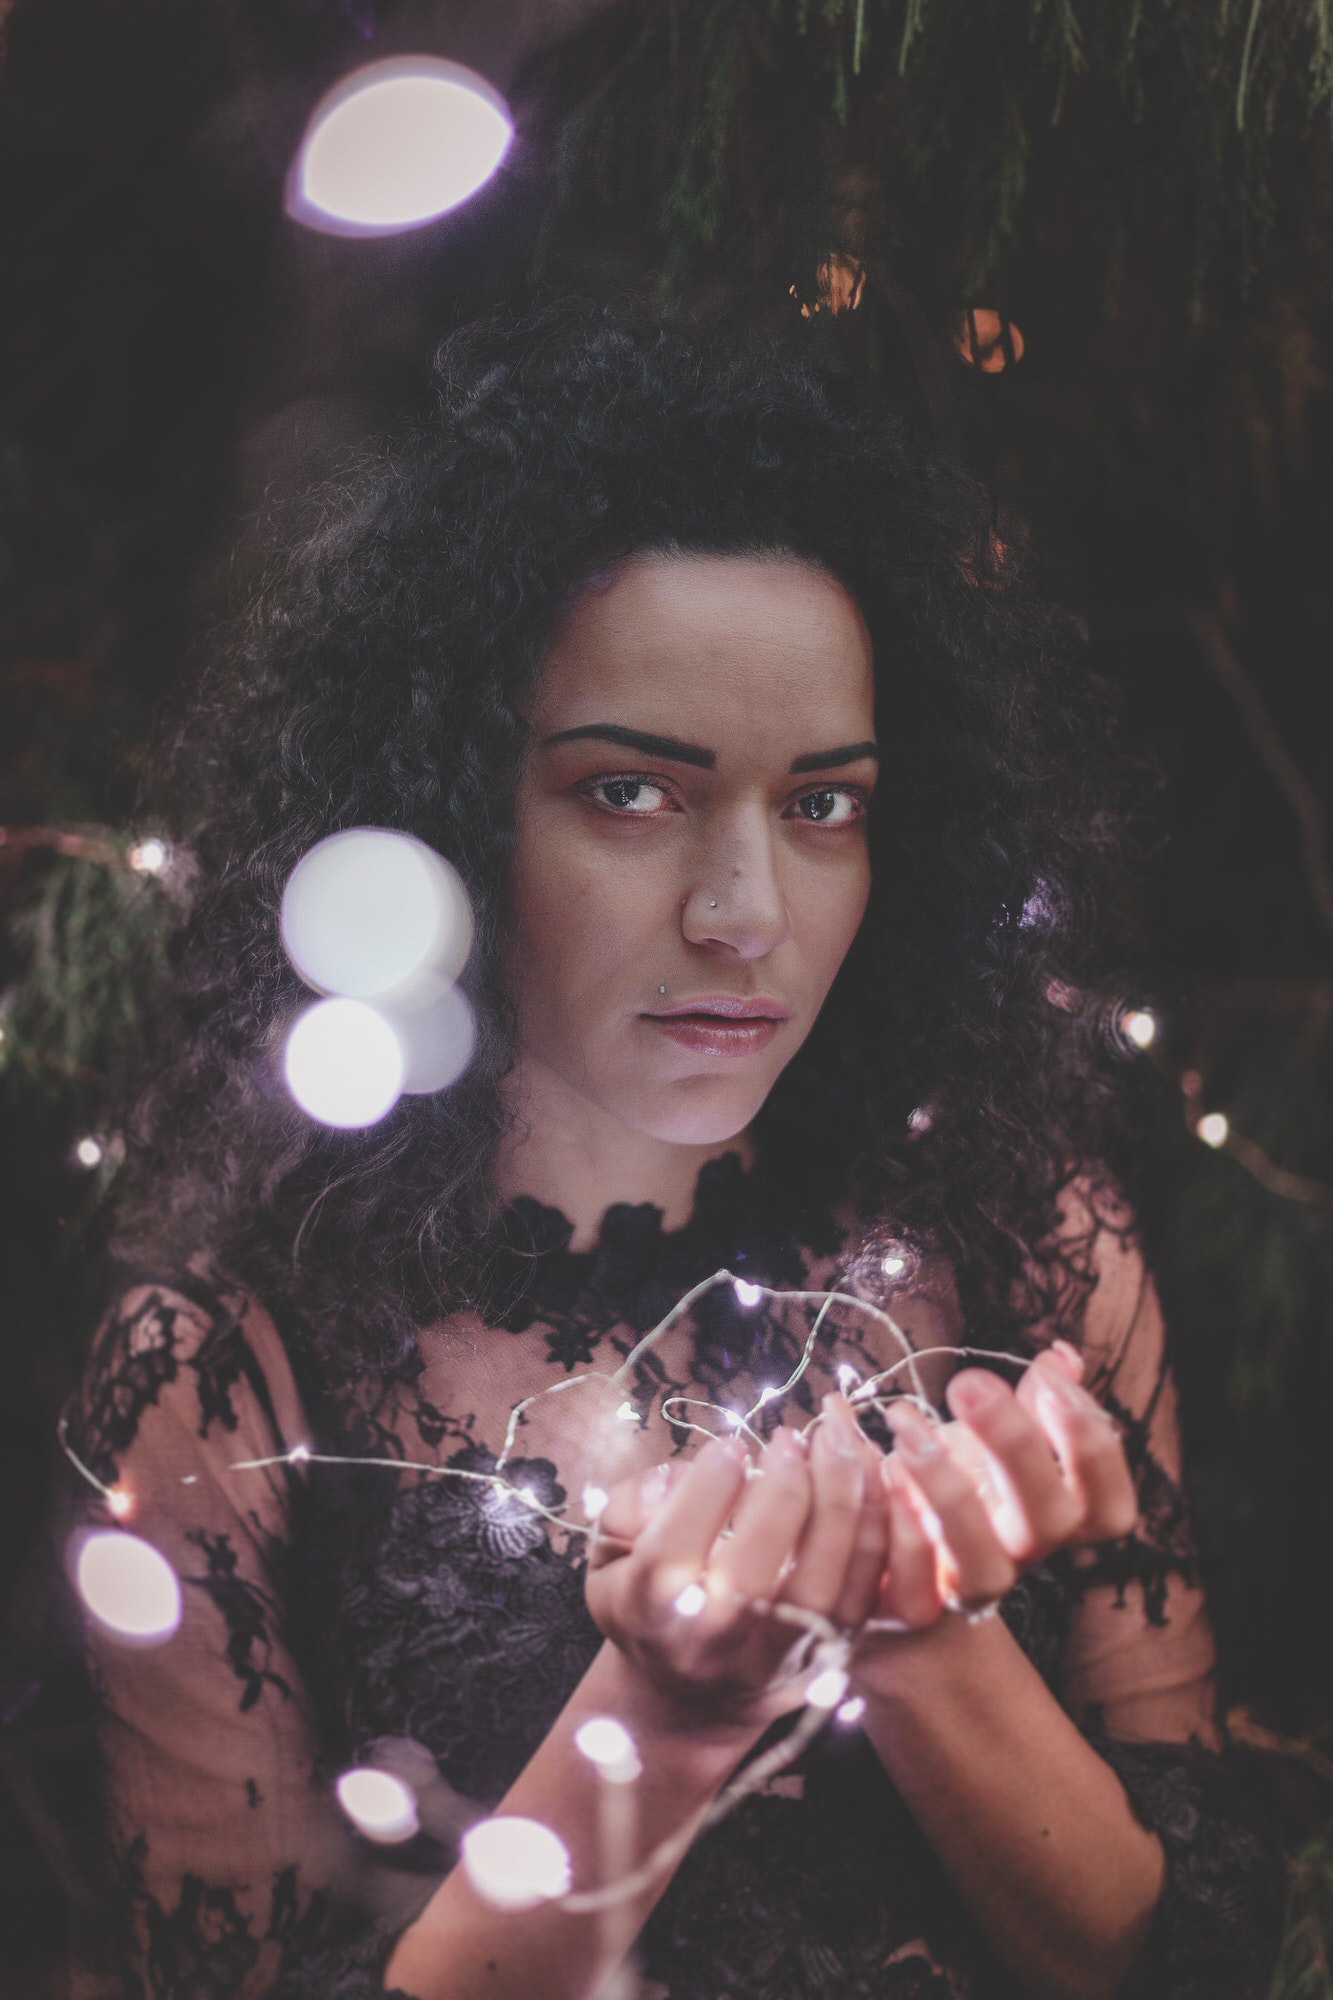
Photo by Yeshi Kangrang on Unsplash
This photographer used bokeh in the form of creative shapes to set a mood. The model doesn’t seem to be in a particularly loving frame of mind, but the dancing heart shapes behind her blend with the warm color scheme to send a different message. Instead of moving on to a new image and forgetting this one, now we wonder: what is on this woman’s mind?

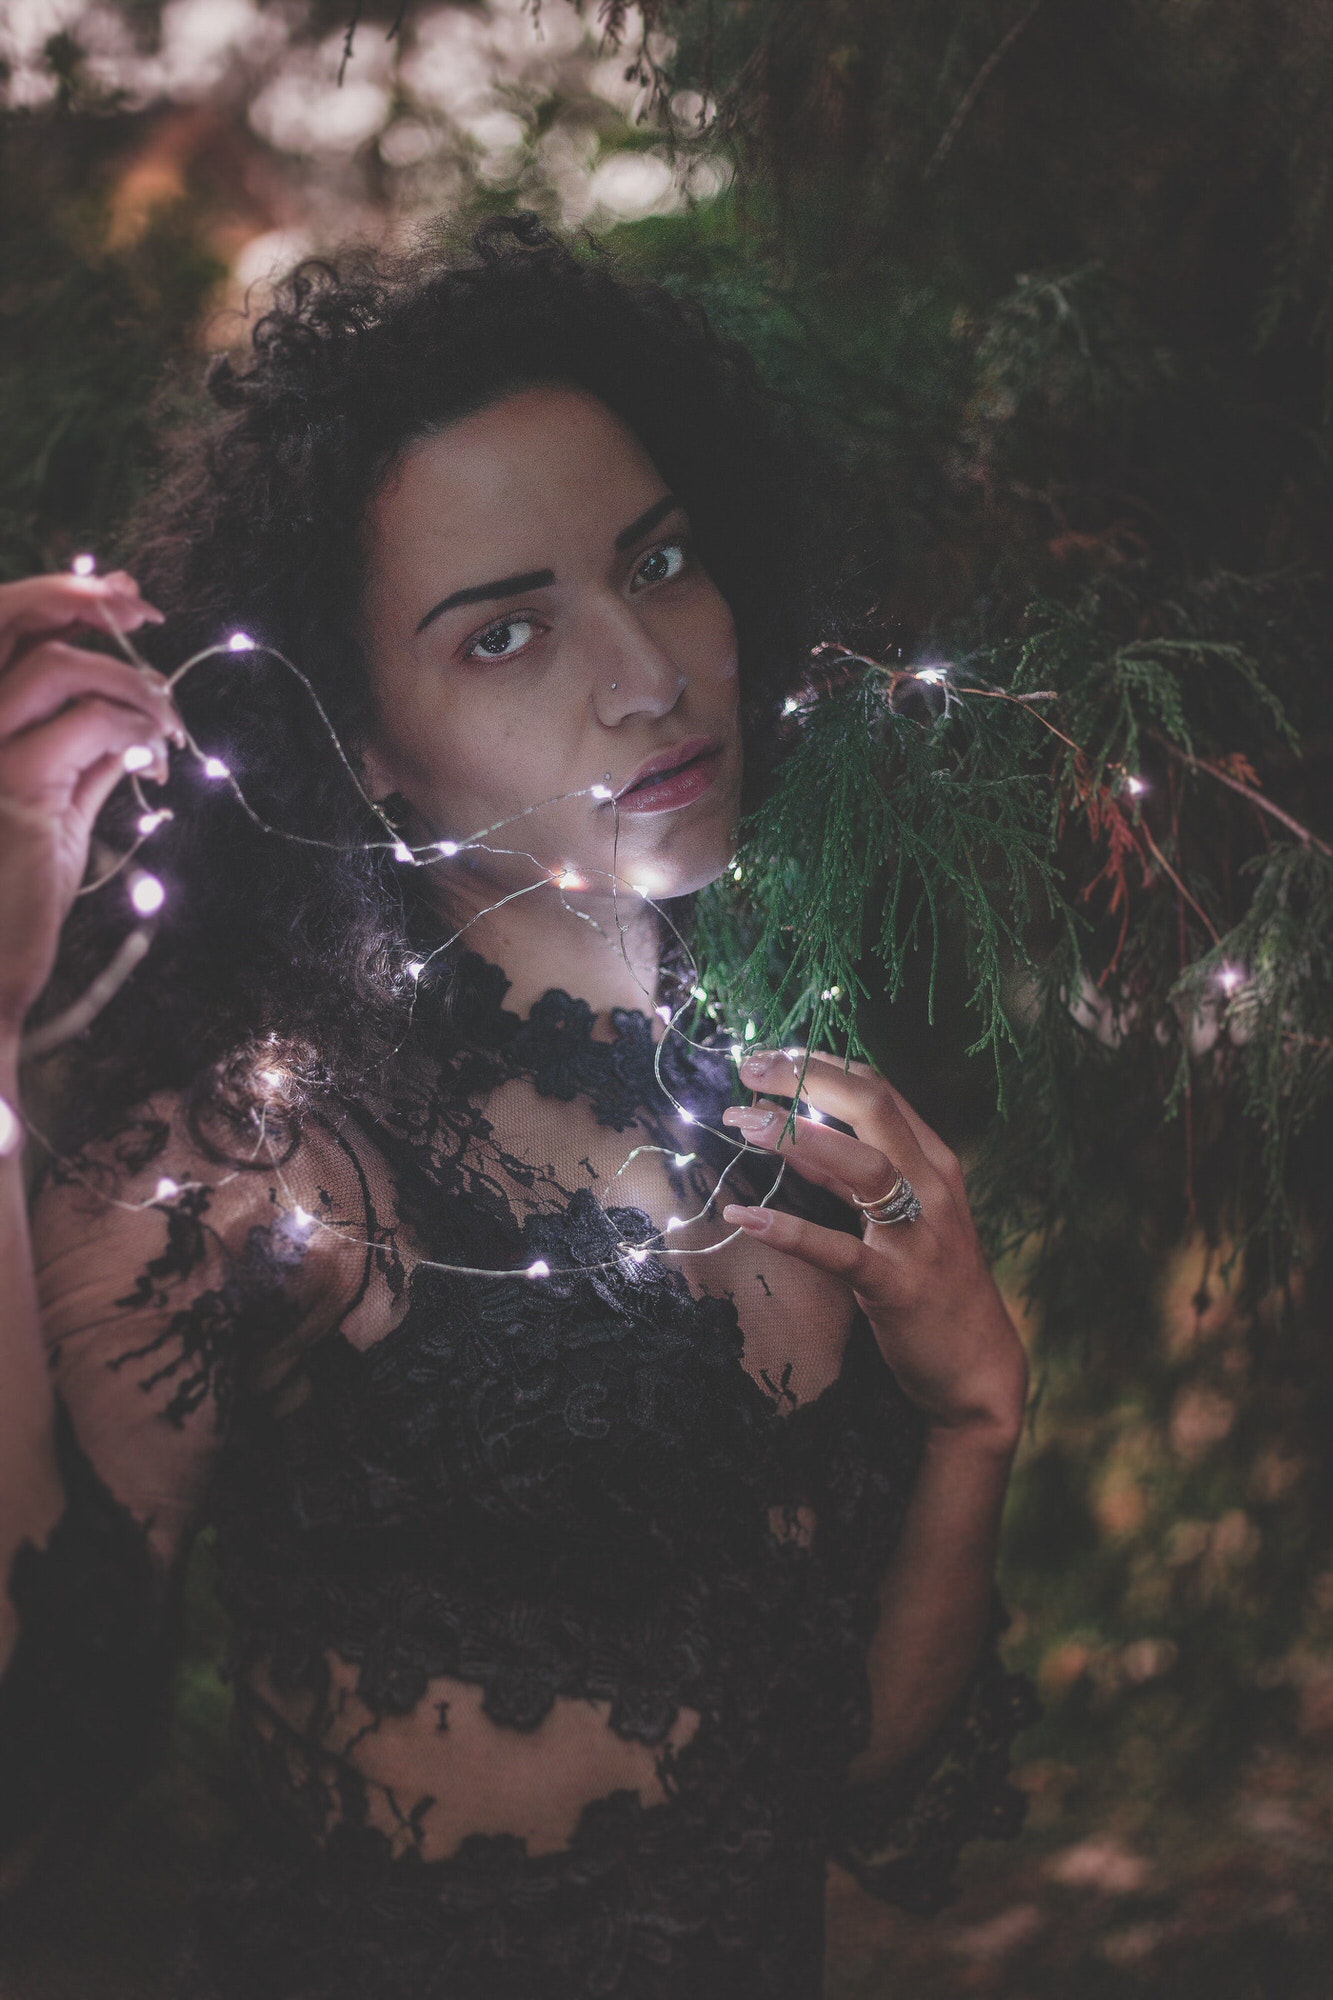
Photo by Sarah Richter
Here we see bokeh that has been added in post-processing. You can tell because some of the bokeh appears to be on the same plane as the subject, who is completely in focus. You can also see that certain portions of the bokeh have been lightened or partially removed to ensure that the important parts of this photo shine through. Now there’s an atmosphere of magic and childlike wonder, where before it would simply have been a cute snapshot.
Say Bokeh!
It’s understandable if the term strikes you as foreign. The word is Japanese in origin, credited to English speaker Mike Johnston for his use of it in the 1997 March/April edition of Photo Techniques magazine. In its Japanese form, “boke” roughly translates to “blur,” “haze” or “fuzziness.” Johnston added the final letter as a pronunciation clue to native English speakers like himself.
The Inner Workings of the Blur
Two main factors work in tandem to create a bokeh effect in your image: aperture and lens design. Remember that your aperture controls your depth of field. A wide aperture of f/1.4 creates an extremely shallow depth of field, while a narrow aperture of f/16 will give you an extremely wide depth of field. Is that backwards enough for you? Well strap in, there’s more.
As the age-old saying goes: a worker is only as good as his/her tools, and this definitely applies to this technique. To capture first-rate bokeh, you will need a fast lens with, ideally, an aperture of f/2.8 available. To create even more shallow depths of field (and make better blurred backgrounds), consider purchasing lenses that reach f/2, f/1.8, or f/1.4. Practice with your aperture at its widest setting; then begin to decrease the size to change the look of your bokeh. We’ll discuss the different ways your lens can affect bokeh later in this guide.
And don’t worry! There are ways to give your depth of field a little nudge if you just can’t make your widest aperture work. What you want right now is for the most important part of your image to be the only truly sharp portion of it. The way we do that is to put your subject on its own plane. So you want to be as close to your subject and have your background as far away from them as you can manage without foiling a solid composition. That might take some planning in the beginning, but over time you’ll become accustomed to scoping out the perfect bokeh sweet spot without derailing your entire shoot.
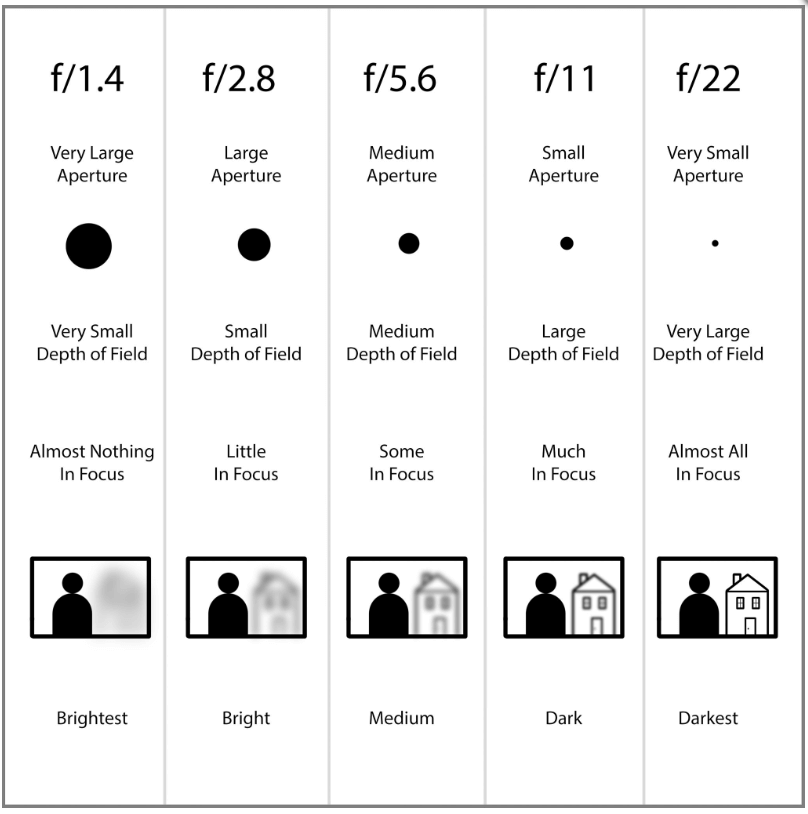
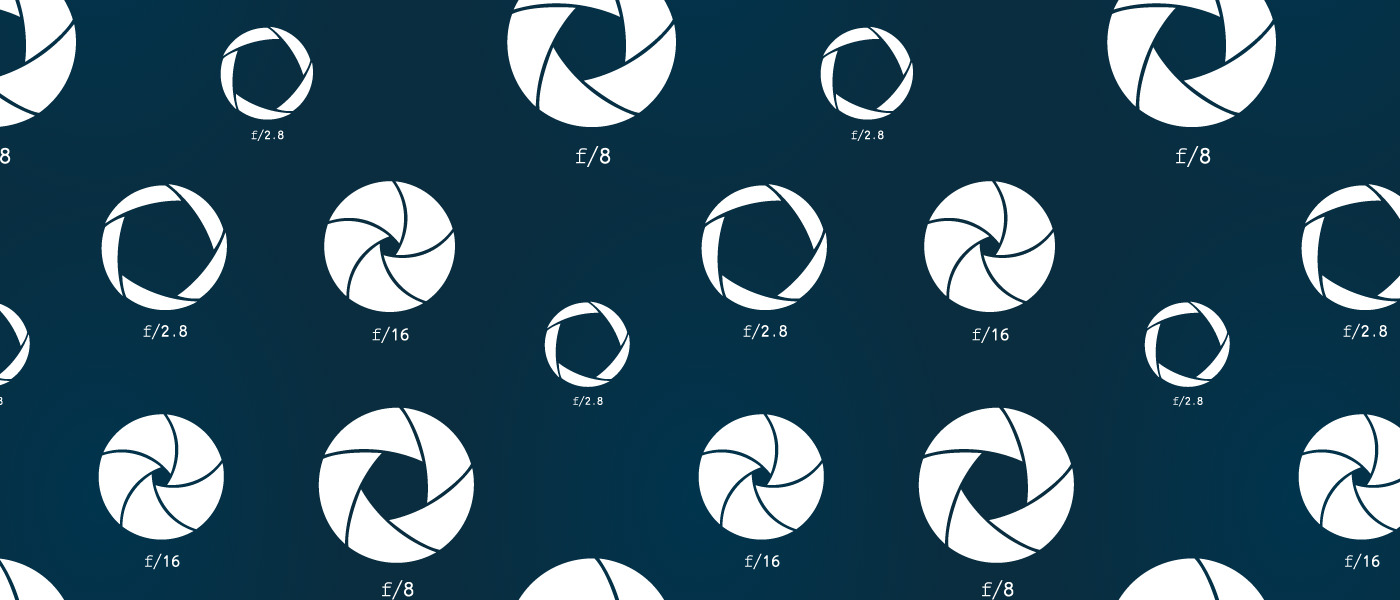
Image courtesy of https://photographylife.com/lens-aperture-chart
The above chart demonstrates the relationship between your aperture and the depth of field in your image. As you can see, the larger your aperture opening, the more shallow your depth of field. That’s why, when we shoot at the maximum aperture available to our lens, we call it shooting “wide open.”
Fun Fact:
If you’re a cell phone photographer, you can “change lenses” by placing other glass in front of your camera. In some cases, you can buy custom mini-lenses intended exactly for this purpose, but you can also get creative with it. For instance, you could pop a lens out of a pair of dollar store reading glasses and secure it in front of your phone camera for a homemade macro lens.
Practice Makes Perfect
Before you purchase sophisticated equipment, especially if you’re new to the technique, start with a low-budget, low-stress test shoot at home:
- Head to a light source. You could use a collection of lamps or candles, a string of Christmas lights or even something with shiny points such as aluminum foil. Any glass or metal object is fair game for experimentation at this stage!
- Choose your subject. It could be anything for this exercise; a fancy shot glass, a coffee mug, a favorite book or an available family member.
- Grab your camera, set it to Aperture Priority or Manual Mode and place it on a tripod. Try your widest aperture setting if you’re looking for the classic round, smooth balls that most people associate with bokeh.
- Place your subject in the foreground with your light source in the background. Voilà! You’re ready!
As you go along, remember that you can encourage a shallow depth of field by moving your subject further from your background and getting your camera lens closer to the focal point (or subject) in your photograph. Use this shoot as an opportunity to play with varying distances between subject and background and modify your camera settings.
You may want to start a photography notebook, where you take note of the changes you make and what settings or equipment you used. This way you can easily recreate your favorite looks in the future. You can also plan your shots with thumbnails in this notebook, so that when you come back to your work later on you have a refresher on your own thought process. A dedicated notebook is a good tool to have in your kit as you master other techniques as well.
Because there are so many different bits of equipment and processes to keep straight, a photographer may go months in between using a particular one. A notebook of your own info to refer back to will keep you from having to start again from scratch every time you want to create bokeh (or a double exposure, or any other special process).

Photo by Kevin Fitzgerald on Unsplash
A string of decorative lights is an inexpensive and easy hack to create natural looking bokeh. With many different shape and color varieties available, the possibilities are endless!
Some Things to Remember:
- Scattered light (like the reflection of light on raindrops), rather than one light glaring into the camera lens, should create a satisfying effect. Look for this type of light to capture, rather than just a single light source.
- For the ideal bokeh shot, a suitable background is almost as important as your subject. The lighting and colors that appear there can work with your vision or against it, so don’t forget to take these elements into consideration!
- In the same vein, consider the weather on the day of an outdoor shoot. Diffused lighting on an overcast day will yield softer, more blurred bokeh, while a brighter one could yield more distinct shapes.
- Good bokeh doesn’t depend on how the bokeh itself looks so much as how you integrate it into your composition, so don’t be afraid to experiment and have fun with it!
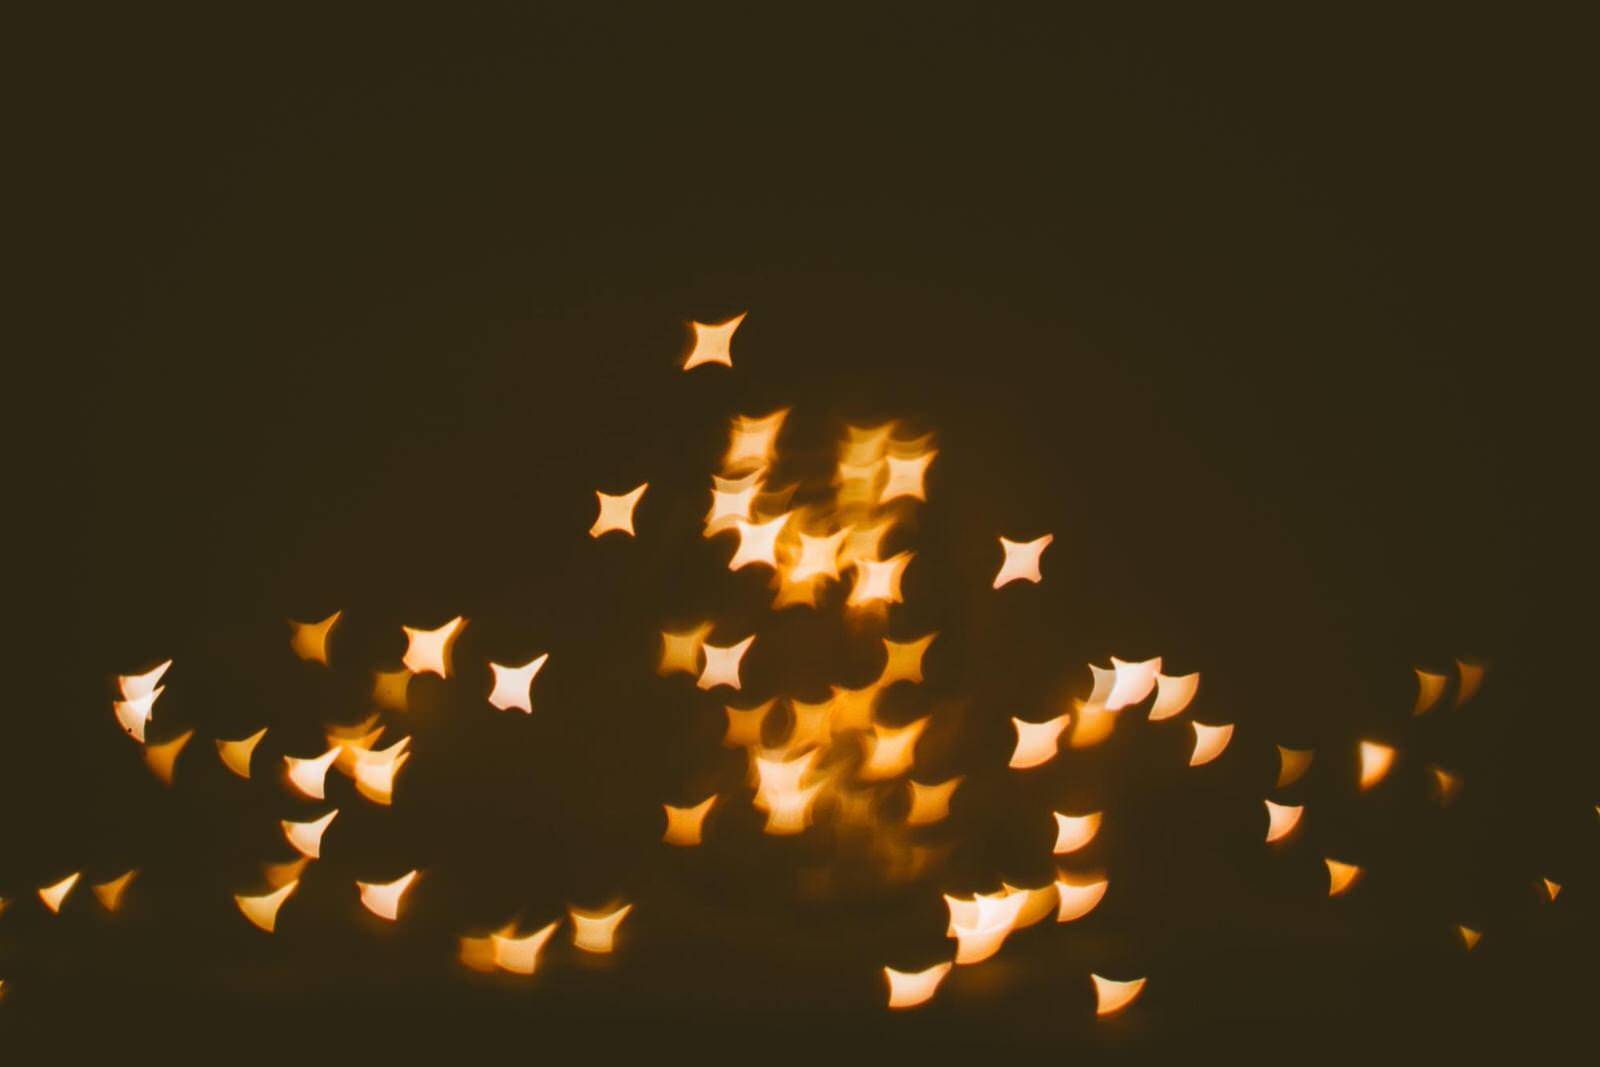
Photo by Jaizer Capangpangan on Unsplash
What’s in a Shape?
The aperture in your camera equipment may dictate the shape of your bokeh to an extent, as it is the shape of your aperture that forms the shape of your bokeh. Your aperture is composed of blades, arranged in either a circular or octagonal shape. Apertures with more curved blades (which ultimately create more circular balls of light) are often found in pricier lenses, but you can still get an excellent bokeh effect without perfectly round results. In fact, the sky’s the limit when it comes to your bokeh shape, especially if you don’t mind getting crafty.
To create a unique shape for your bokeh, you’ll need:
- Black construction paper
- Scissors (or a shaped puncher stamp for a perfectly formed shape)
- Tape
Use your scissors to make a shaped hole (around the size of a dime) in your piece of black paper. Tape the paper over your lens, guiding the hole into the middle of the lens, and snap away. Here’s a good step-by-step to craft your own bokeh shapes, courtesy of A Beautiful Mess. If you are simply not a DIYer, but still want to use this fascinating bokeh effect, photography kits are available for purchase.
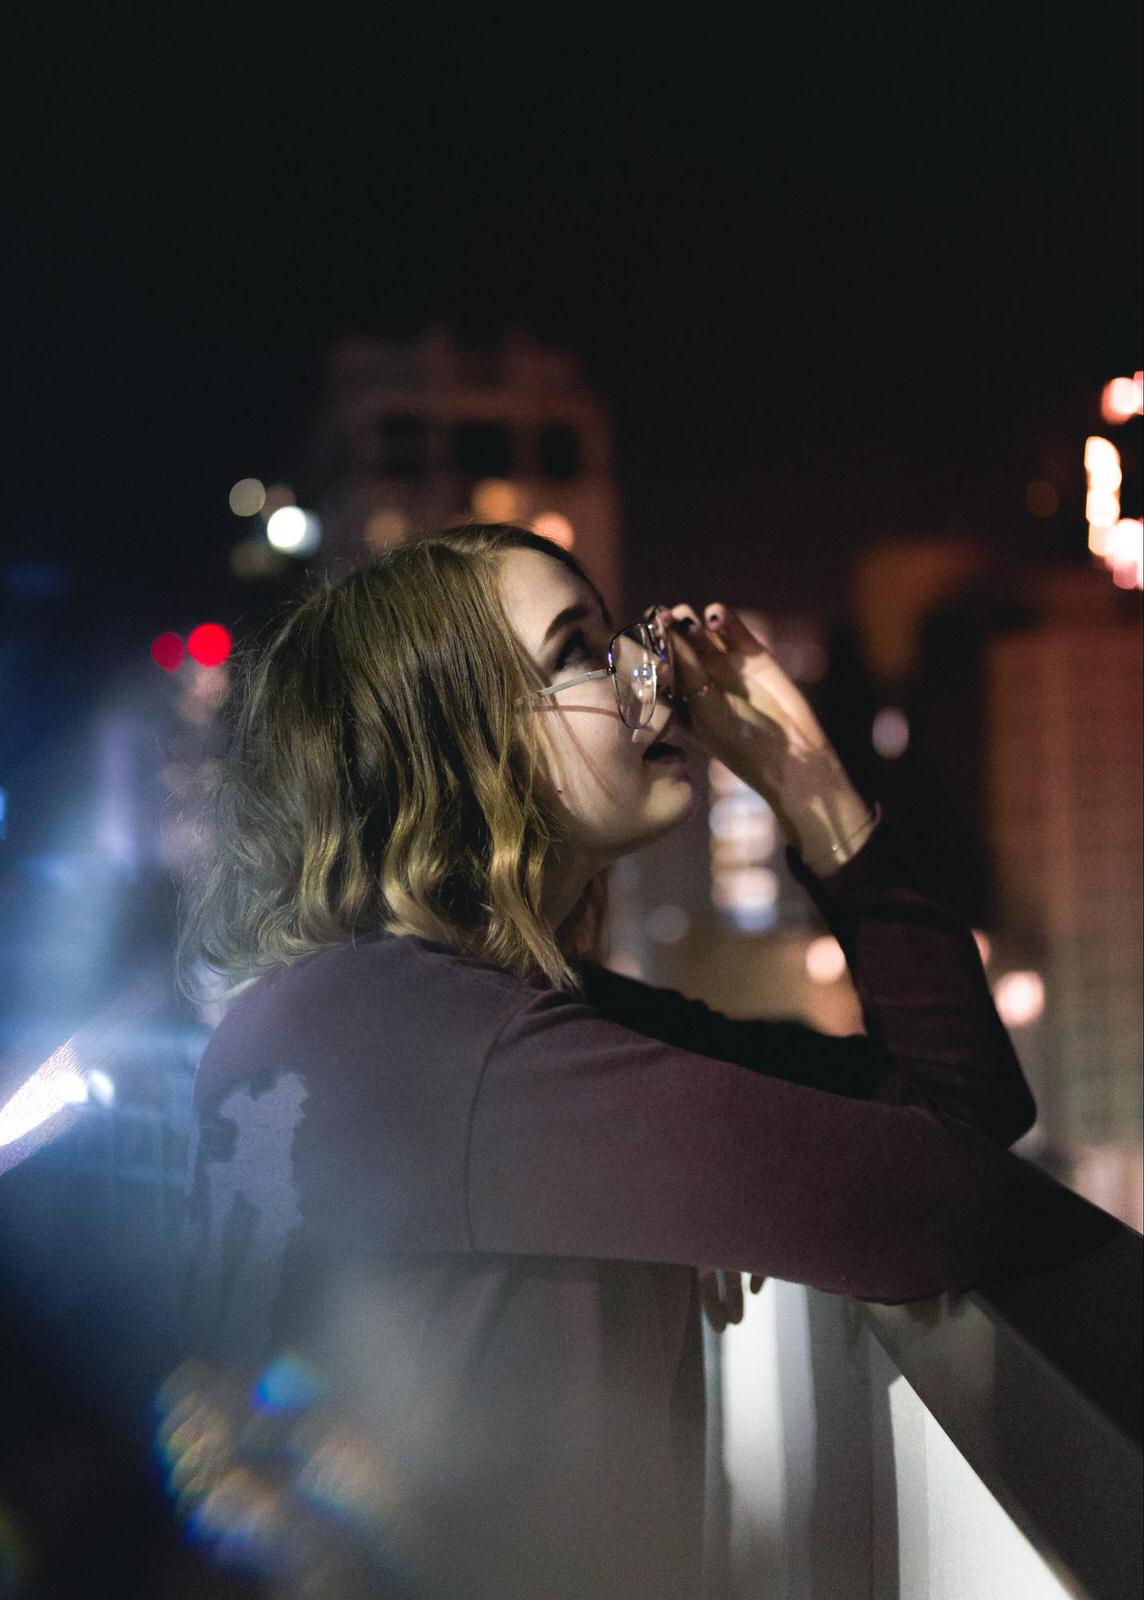
Photo by Finn Hackshaw on Unsplash
Another DIY hack which may enhance this technique is the use of an equilateral prism. By holding a prism up to your lens and twisting it to your liking, you can bend lines, create rainbows or splash other visual effects across your photos.
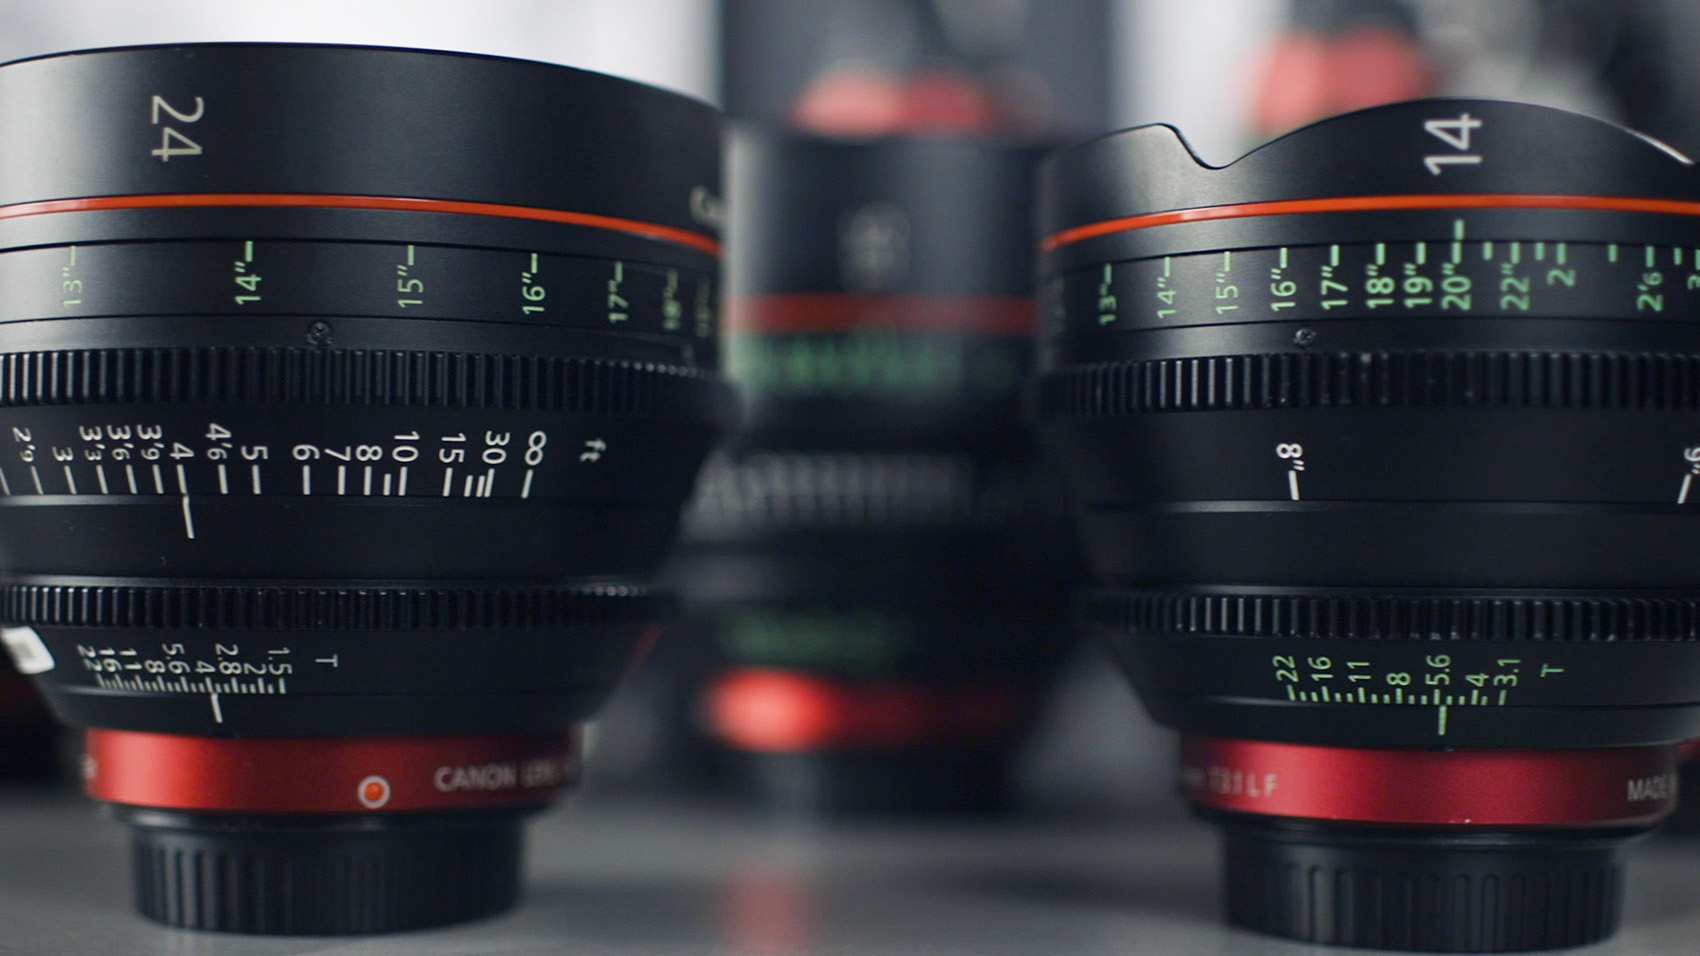
How Different Lenses Capture the Effect
If you do want to add lenses to your bokeh arsenal and aren’t afraid to invest in new equipment, there are many options which all yield unique effects. For instance, macro, wide angle or telephoto lenses can expose your bokeh photography in a new light.
- Macro: great for close-ups of subjects and larger bokeh balls
- Wide Angle: may make it tougher to create bokeh, but also makes it easier to capture more of the background in certain shots
- Telephoto: makes for softer bokeh
To showcase these lenses and their effects, check out this great guide to bokeh photography by Canon.

You Don’t Have to Break the Bank, Though
There’s nothing more fun than experimenting with a new photography technique, and bokeh offers plenty of opportunities for that. If you’re ready for a hefty investment, that’s great! But for some, second-hand may be the way to go. Here are some tips if you’re looking for a more economical option:
- Try before you buy and stay alert to scams.
- Research the reputations of various sellers (including second-hand photography shops and online private sellers).
- Don’t hesitate to ask questions about the shipping method, as lenses contain delicate parts that require gentle handling in transit.
- If the seller tells you the lens has light damage and suggests that fixing it shouldn’t set you back much, take that as a red flag. Repairing a lens is usually expensive.
- Put the lens on your camera, set to aperture priority mode and ensure the lens takes quality shots. Go through all focal lengths and ensure auto focus works on each one before you buy.
- Make sure you include image stabilization, sharpness and autofocus accuracy tests before you buy.
- Ask the seller why they are selling their lens. If it’s too hard for them to come up with a reasonable explanation, it’s a good indication there may be an issue with the lens.
How to Create Bokeh in Photoshop
Not in the market for a new lens or camera? Photoshop has the answer to your bokeh cravings. Unlike traditional photography, where the setup is key, in Photoshop the magic is all in the after-effects. There are a few methods you can use to create a bokeh image in Photoshop, including the following:
- Import your photo into Photoshop and select the elements you’d like to blur. Then, add a Lens Blur, the best Photoshop effect to mimic bokeh, because it uses characteristics of a camera lens to produce the blur. Brightening the background before you add your Lens Blur may boost the effect by giving you more light to work with in your photo.
- Take a photograph of a subject and a bokeh texture/bokeh overlay and blend them together, like Aaron does in this video:

Here are a couple of before and after examples of how a photograph can become more pleasing with the addition of a bokeh overlay:
BEFORE & AFTER. Photos by Oleg Magni


BEFORE & AFTER. Photos by Oleg Magni
Blur at Your Fingertips
If you’re just dipping your toe into ultra-shallow depths of field, the most handy way to take a bokeh photo may already be as close as the cell phone by your side. Do a quick online search to find out what sorts of features the camera on your particular model of phone has – many smartphones in today’s market have features like dual cameras and depth mapping to determine which areas of your photos to blur.
That technology hasn’t 100 percent caught up yet, and a pro can usually tell the difference between an automatic blur and a real one. But to get the feel of what your photography could look like, this is an option that you don’t have to invest extra time or money into, and there’s definitely something to be said for that.
You can also download apps like Tadaa SLR, Big Lens or Bokehful (this app is particularly good for creating balls of light) to fake a bokeh effect. The last two also allow you to add shapes like hearts and stars to your photographs instead of traditional balls of light.
Point-and-Shoot (Your Shortcut to Bokeh)
If you’re itching to try this technique, but don’t have access to the technology we’ve already mentioned, you’re still left with one more option: your point-and-shoot camera. Your point-and-shoot has been constructed to help you take foolproof in-focus photos, but you can get around these constraints. You can influence the depth of field in your point-and-shoot by switching to portrait, macro or toy camera/miniature effect settings, or by selecting Aperture Priority mode so the aperture setting is completely in your hands. All of these settings are pre-designed to blur different areas of your photograph. You may also need to move background objects a further distance from the subject than you would with a DSLR. Otherwise, those objects might remain in focus.
For any of these settings, try using a tripod. It will prevent camera shake and improve the quality of your shots. It will also help you to experiment by keeping the camera in one spot while you adjust settings or alter your subject’s distance from the background or foreground.

As you can see, bokeh offers a tremendous outlet to experiment with your photography. Color, shape and varied equipment provide a myriad of ways to express your creativity, think outside the box and add a brand new technique to your toolkit.
The information in this guide will give you a solid jumping off point, but remember: it’s more than okay to break the mold! Once you’ve mastered the basics of bokeh, have a great time making unique photography magic with the settings of your choice.