Exposure Bracketing: The Ultimate Guide to Bracketed Photography
“In photography, there are no shadows that cannot be illuminated.”
– August Sander
Exposure Bracketing Photography: The Complete Guide
Nearly every photographer has felt the disappointment of importing an important shoot into Lightroom, only to realize at least half of the images are over – or under – exposed. A DSLR’s preview screen is notorious for showing a brighter, cheerier version of what you’ve actually shot, so you could be setting yourself up for disappointment if you’re relying only on the back of your camera. That’s why many photographers hedge their bets with strategic bracketing, and after reading this guide you’ll have all the tools you need to get started!
It all starts with lighting. It’s the thing photographers tend to struggle with the most, because it really has a mind of its own. Artificial light is great for giving uncooperative natural light a nudge in the right direction, but it isn’t right or even possible for every project. Chances are, you will find yourself at the mercy of mother nature (or her unpleasant cousin, household lighting) many times throughout your journey. Taking exposures with varied settings will increase your chances of getting that perfect shot so your post-processing can be all about creativity, not damage control.
What Is Exposure Bracketing?
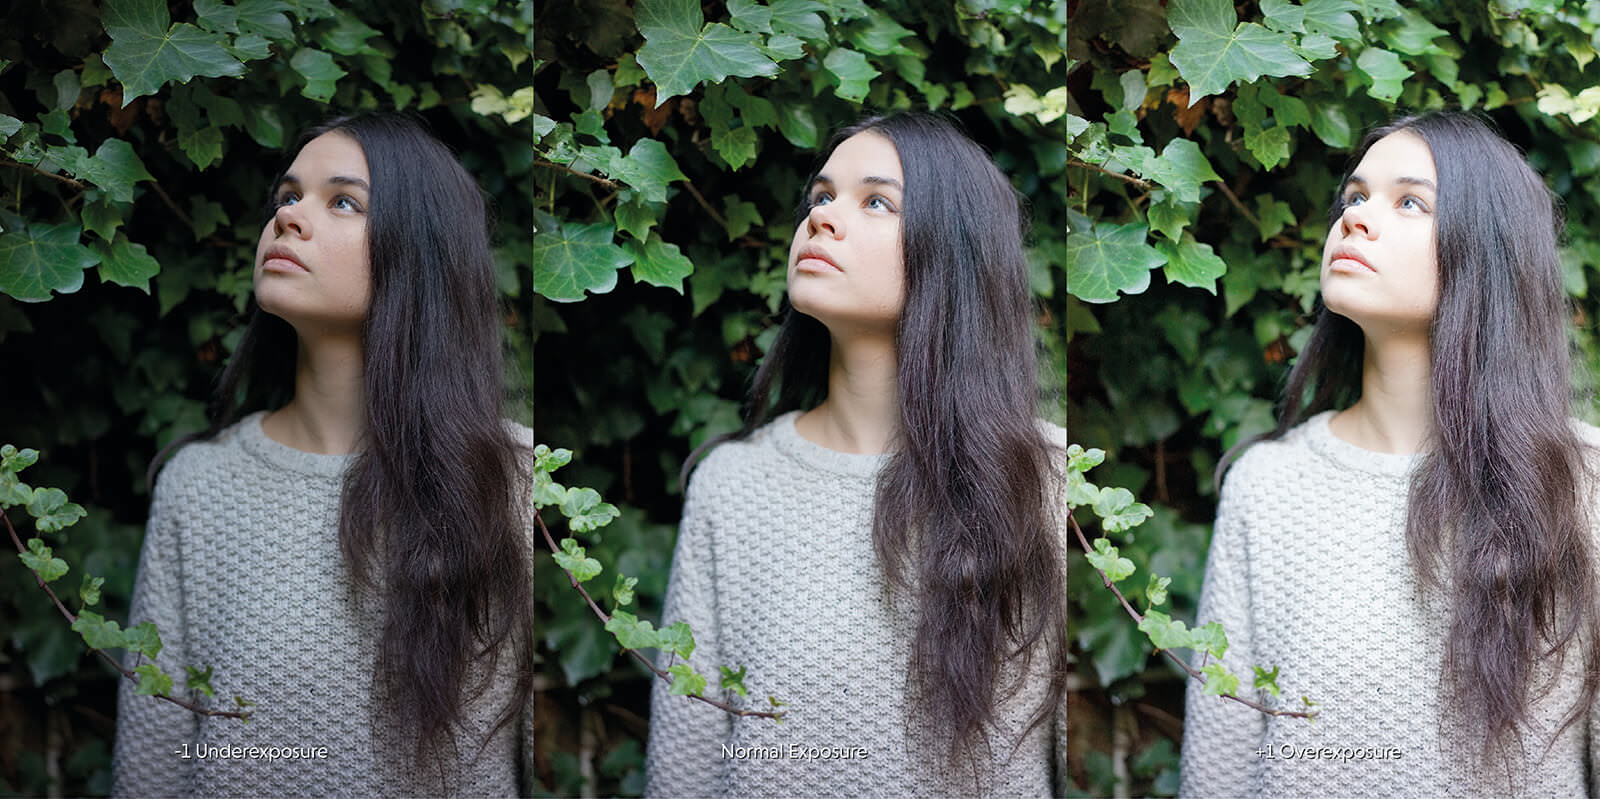
This technique is simply a way to ensure you’ve captured a scene with the “best” exposure possible by taking a series of three to seven photos with varying exposures. For example, if you are taking three photos, you:
- Take one that’s “underexposed”
- Take one that’s “overexposed”
- Take one that reads as the “best” natural exposure
After your photoshoot, you can select which one of your images actually has the ideal exposure for your needs and go from there. You can even go a step further and combine all of the photos with their varying exposures into one image, using Lightroom or Photoshop (more on this later).
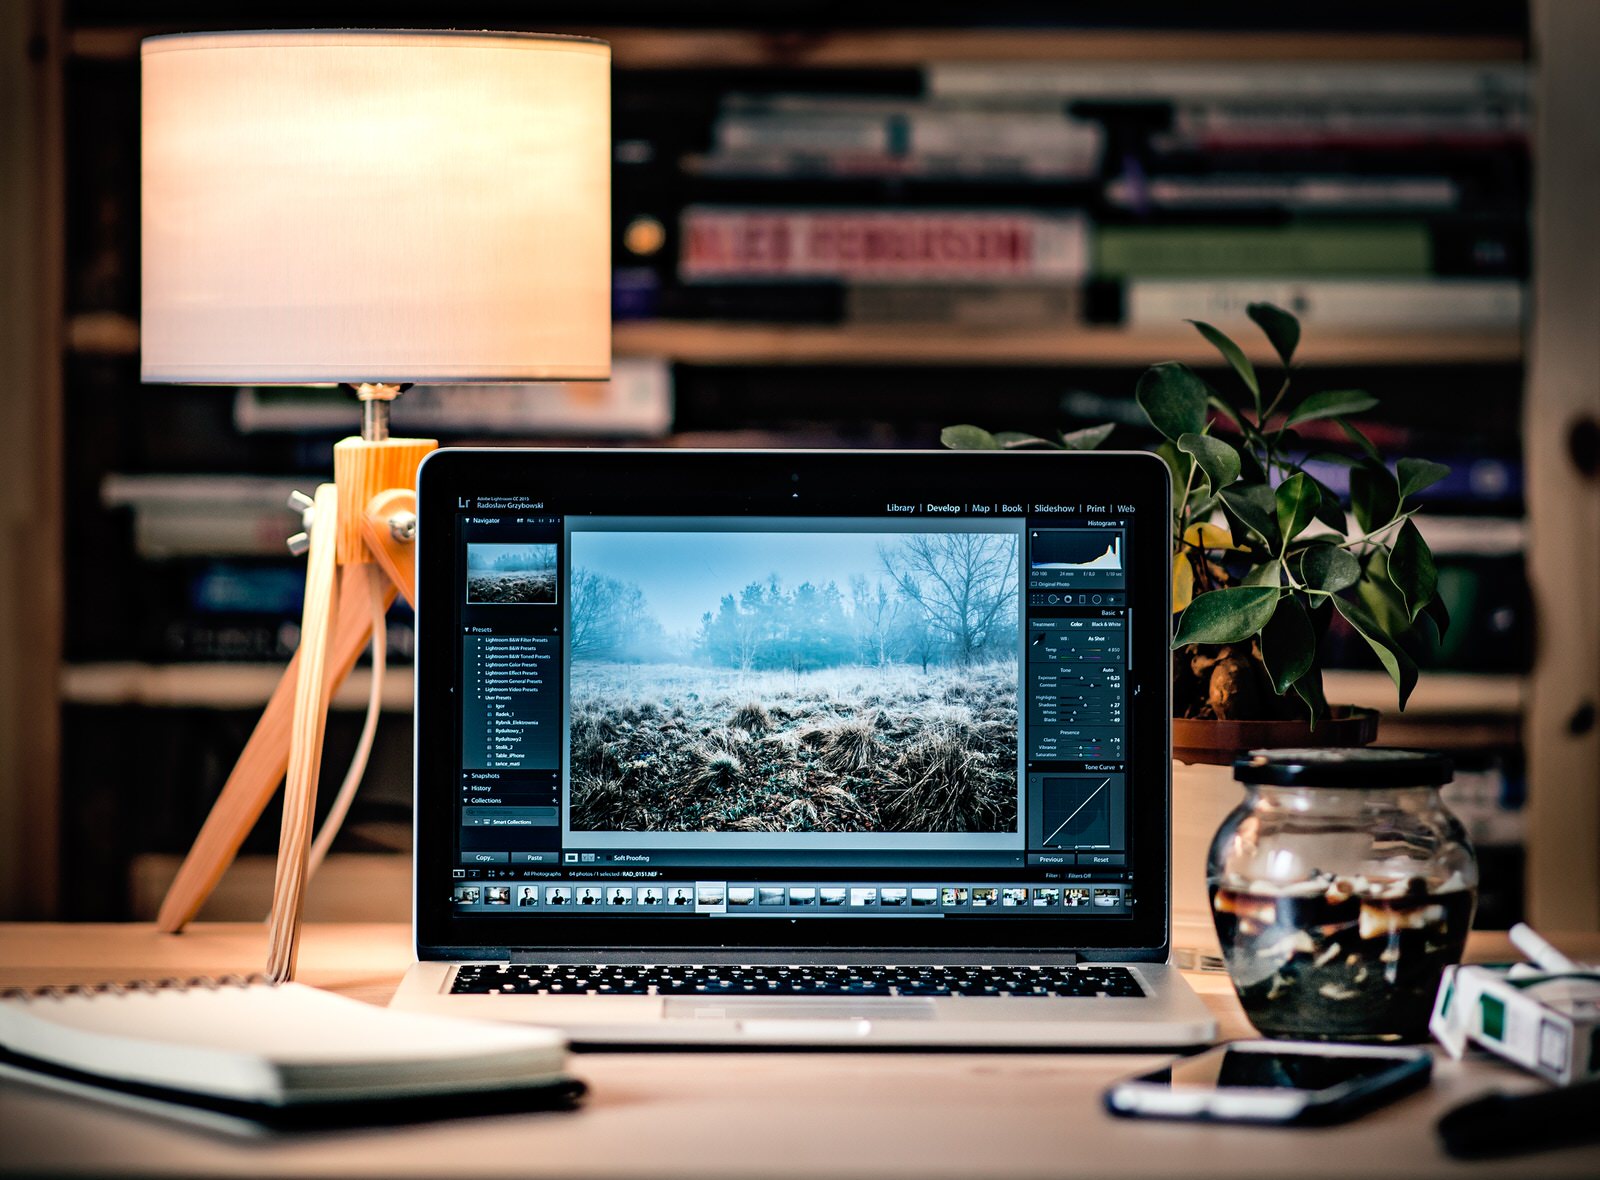
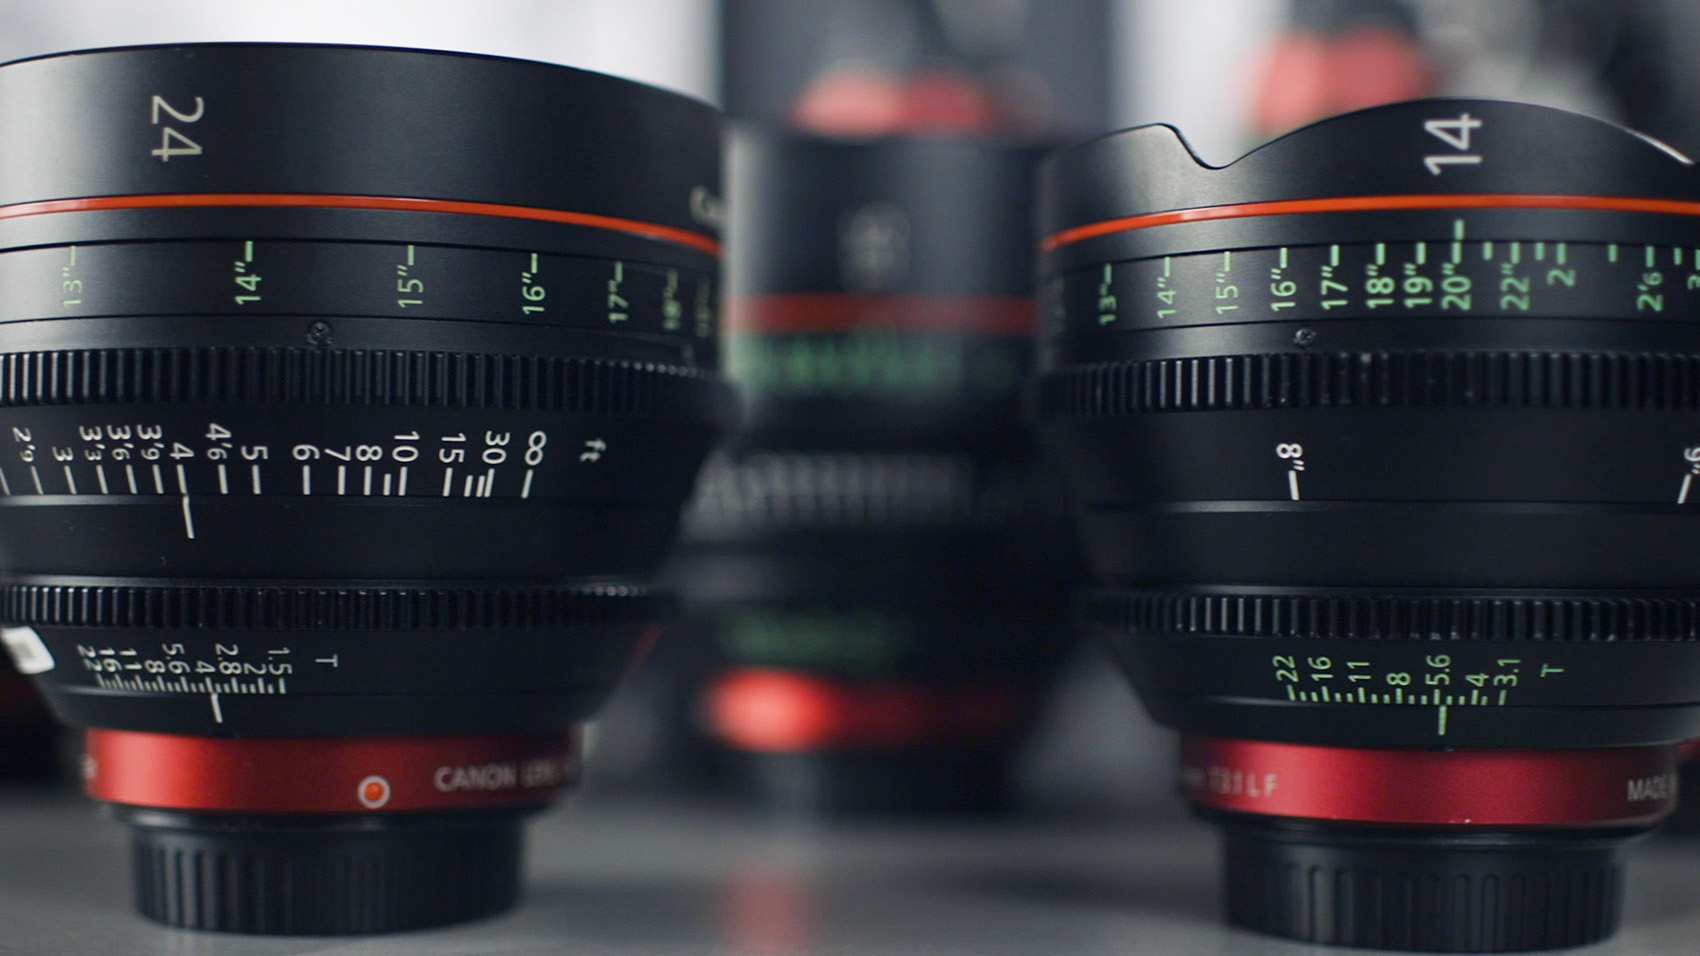
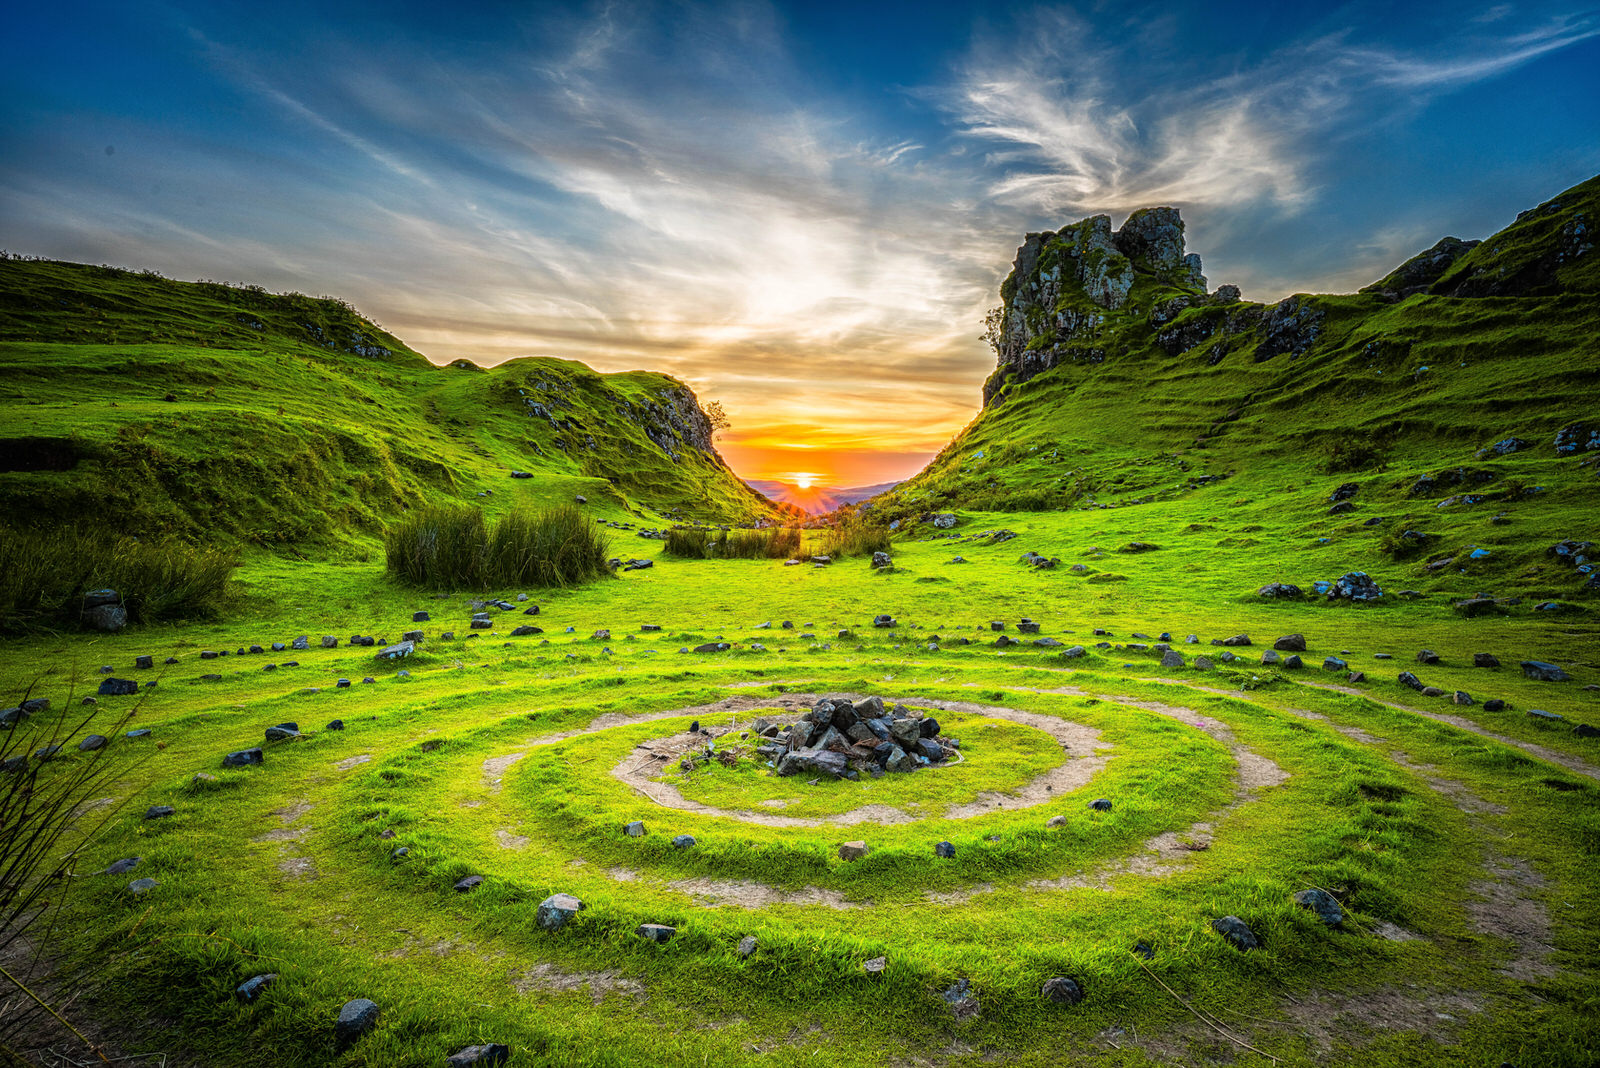
Photo by Radek Grzybowski on Unsplash
How Exposure Bracketing Works
In this instance, you’re probably determining the “best” exposure with the light meter built into your camera. That’s a great starting point, but it’s only going to take you part of the way. Light meters are designed to give you the best overall exposure in your image, which is great if everything in your image is at the same approximate value. As you probably know by now, that’s very rarely the case.
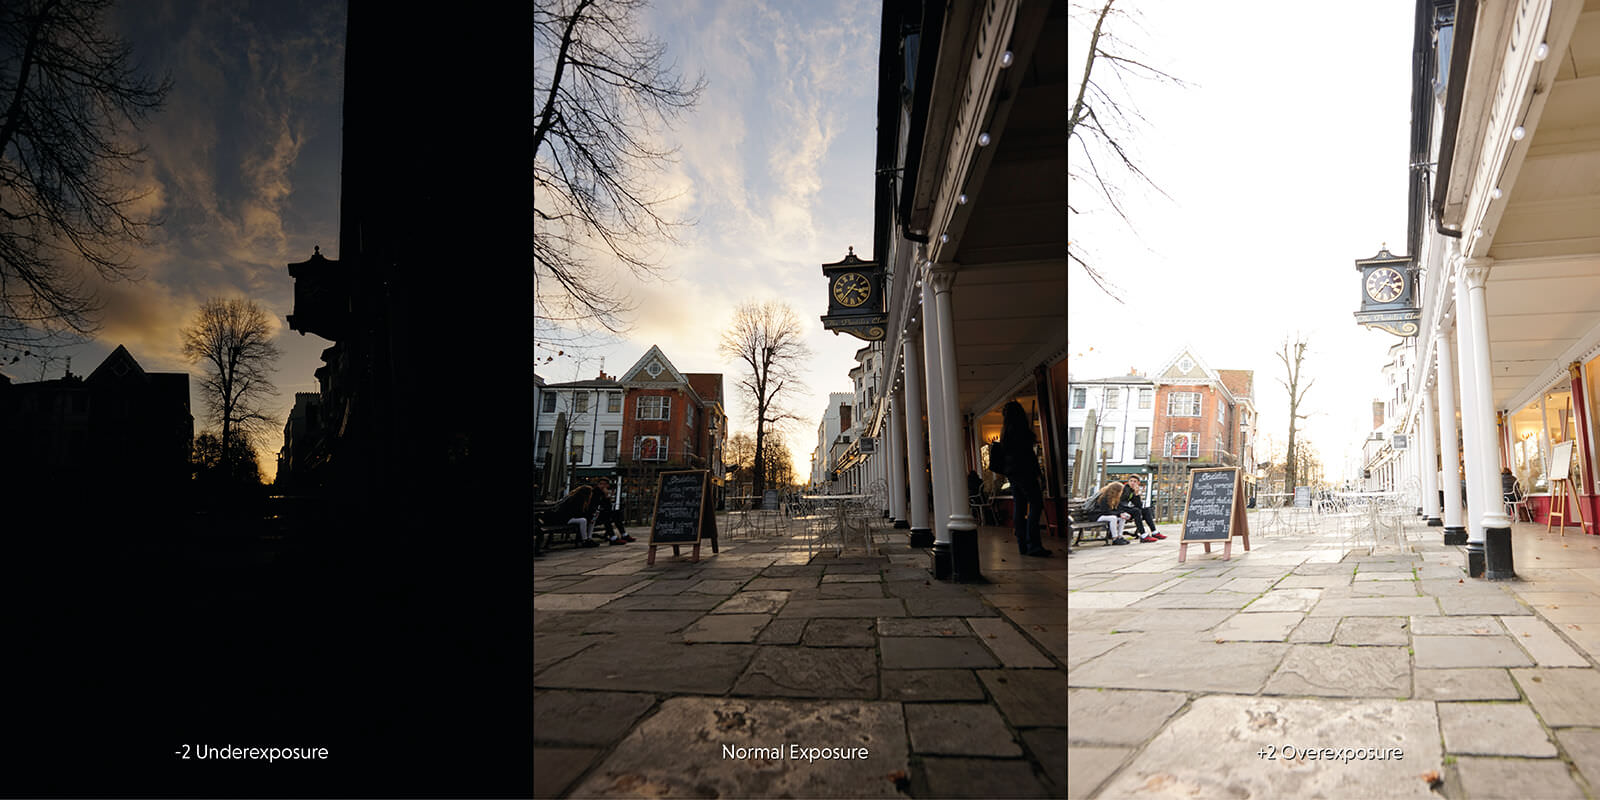
When we view a scene, we are able to see a large range of values at the same time. Our eyes are usually smart enough to make sense of dark areas alongside light ones, even if it takes them a few seconds to adjust. It’s a little different for our cameras. Without some help, it’s difficult for your camera to etch out detail in scenes where there is a high degree of variability in light. This is why many photographers avoid photo shoots during the brightest parts of the day. Although you’d think it would be the ideal time for a shoot, direct sunlight creates sharp shadows that are both tricky to manage in post-processing and hard to meter for correctly in-camera.
So when you take a photo with highlights, midtones and shadows, you may have a great deal of detail in one light range, but find that you have to sacrifice detail in other light ranges. Exposure bracketing allows you to find the settings that capture the best range of values for your specific needs.
Tip
If the sky is literally your limit (meaning, it’s too bright to expose correctly along with the rest of your scene), you could purchase a Graduated Neutral Density (GND) filter and attach it to your lens (or buy a holder that allows you to use multiple filters). A GND filter is comprised of a clear area and a dark area. If you place the darker part on the brightest area – say, the sky – then it will darken that area, which will help to even out the light range throughout your photograph.
Related questions about Exposure Bracketing
What is ISO Bracketing?
ISO bracketing is when your camera’s shutter speed and aperture stay the same. The bracketing occurs by increasing and reducing the gain, or the ISO. Because of this, ISO bracketing can only be performed while your camera is in manual mode.
Is auto exposure bracketing necessary with raw?
It can still be advantageous to use exposure bracketing photography even while shooting in raw. Although raw gives you ultimate flexibility while editing, you may still lose details in your raw photography if it is severely over or under exposed.
What is the difference between HDR and bracketing?
HDR stands for high dynamic range. The goal of an HDR photography is to increase the normal dynamic range of your camera, giving photos an ultra-realistic look. Exposure bracketing, however, is geared toward finding the correct exposure through multiple images.
How do you set exposure?
In short, correct exposure happens when all of your camera settings are perfectly in balance for the conditions that you’re shooting and result in optimum exposure. Correct exposure occurs when you balance highlights and lowlights and maintaining details in every aspect of your shot.
Dynamic Range
As we just discussed, man still beats machine (i.e. your camera) in being able to decipher a scene in one look (or click!). This is because our eyes have a much higher degree of dynamic range than the sensors in our cameras.
We can understand dynamic range by thinking of the world in grayscale, where everything is either the whitest of whites, blackest of blacks, or somewhere in between. A smaller dynamic range may only cover a dark gray to a light gray area. In photos with a smaller dynamic range, there would be shadowed areas which could appear to be slightly black and lighter areas that may verge on a blown-out white. On the other hand, a maximum dynamic range would cover the darkest black to the lightest white. This would result in an evenly lit photo, uncovering plenty of detail in the shot.
Digital or film cameras can only capture a certain amount of detail within a range, which is why you may want to make use of bracketed exposures.
Tip
If you’re having trouble seeing past color to value, there’s an old artist’s trick that might help you. While viewing your scene, squint your eyes. The brightest and darkest values will become more apparent right away. Now you can spot problem areas in your scene before they throw off your exposure!
Why Not Just Take It in RAW?
If you’re forced to shoot under less-than-ideal circumstances, shooting in RAW will help capture as much detail as possible so that you can recover some of the lost areas in post. It’s not a cure-all solution, though. While it would simplify things to use a magical file type and never look at a light meter again, a single RAW photo still doesn’t give us as much information/data as multiple photos do.
For one thing, you’ll run into quite a bit of digital noise when you brighten those extra dark pockets of your image in post-processing. While this noise can also occur during shooting, it’s a lot easier to solve in-camera than out.
For another, there’s no rule that says you have to choose between bracketing and RAW. In fact, they complement one another quite well. If you have additional images containing additional information, there’s a lot of overlap for you to fall back on in post. You’re a lot more likely to have at least one good exposure of every section of your photo with all of that at your disposal. In the immortal words of the (fictional but) great Dr. Frasier Crane, “If less is more, then just think of how much more more will be!”
HDR vs Exposure Bracketing
As you know now, exposure bracketing is a great way to give yourself a greater chance of snagging the ‘perfect’ shot. But to ramp up your lighting and, in turn, the amount of detail highlighted by that light, you may want to look into creating High Dynamic Range (HDR) photos.
Let’s take a peek into the world of HDR by looking at two examples of these types of photos:
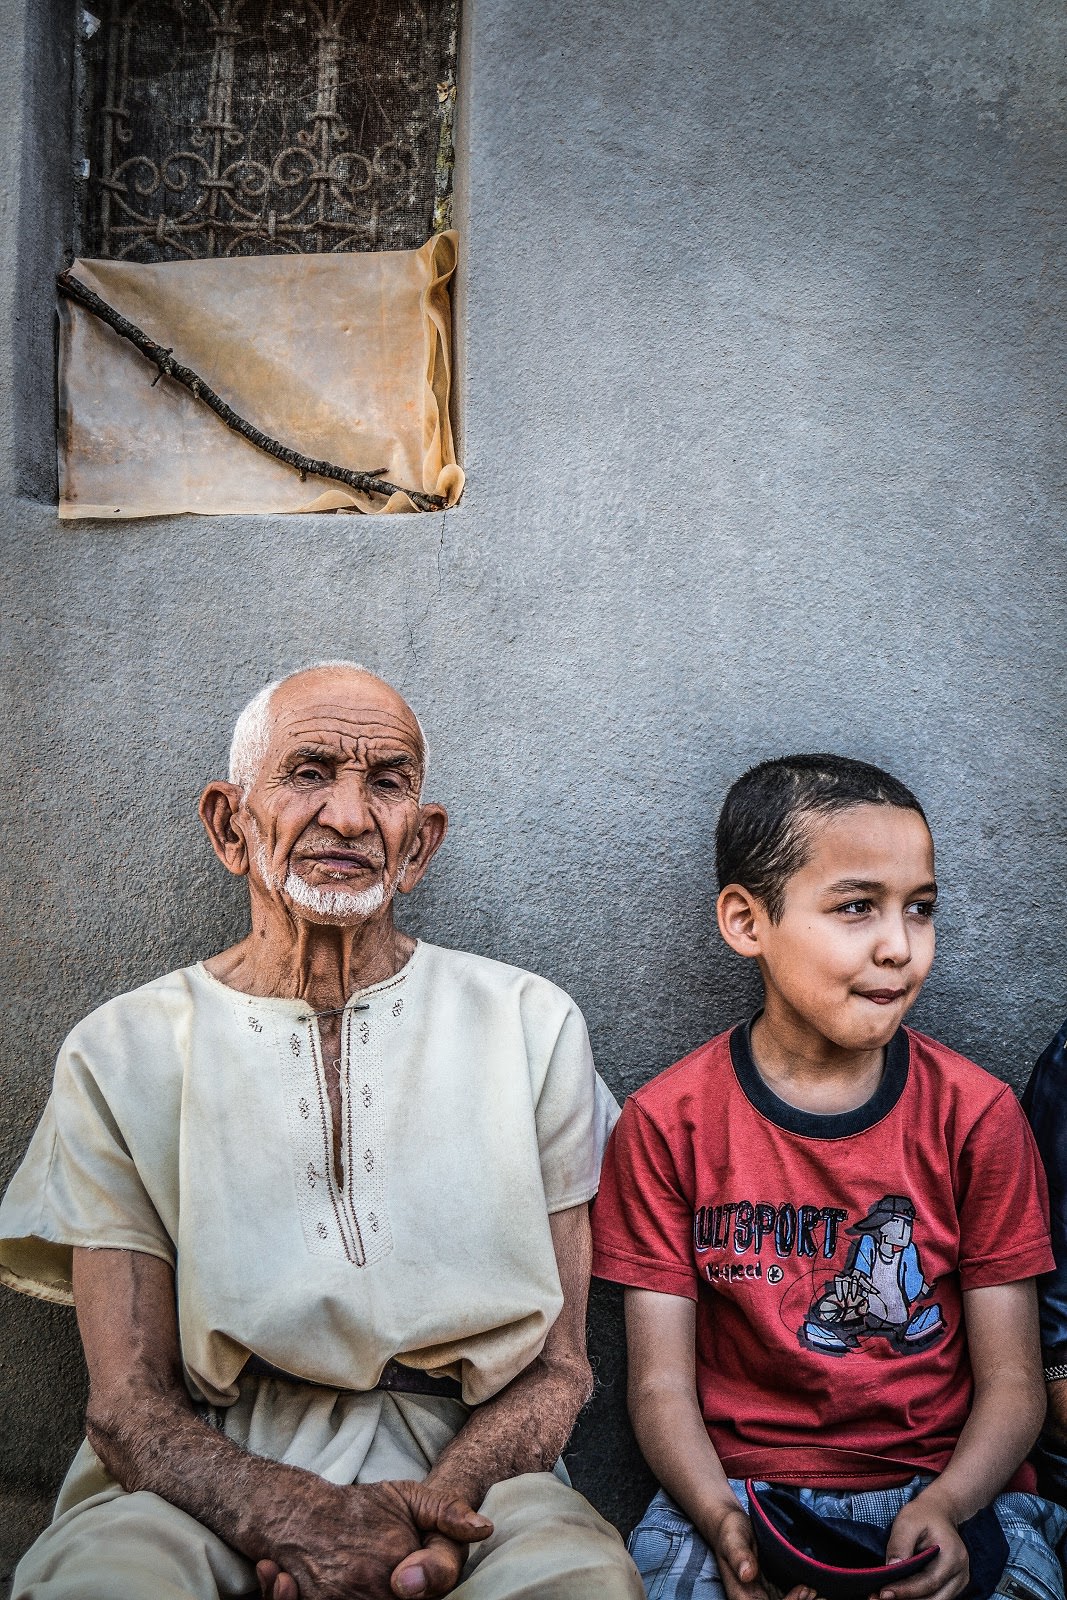
Photo by Nourdine Diouane on Unsplash
An HDR effect on faces can draw out character, like we see in the man on the left, but it can also result in a “Photoshopped” look, which we see in the boy on the right. Under these circumstances, using layer masks can help you soften or intensify the HDR effect on the different people in your image.
HDR is a favorite of landscape photographers, who know the importance of getting it right the first time! Outdoor lighting can be hard to replicate due to weather and other considerations, so having a good representation of each value in your image can be critical for post-processing.
Using these visuals, you can see how this method of compiling multiple photos to create a single image gives you visual access to values on both ends of the spectrum. HDR is usually associated with a distinctive look that can be (ironically) so hyperrealistic that it starts to look surreal. Don’t worry though, you can use HDR more subtly if you want something less obvious to get those details in without making your technique the only thing your viewers notice.
Most cameras and phones have an HDR setting, so you can just switch to that and see the results instantaneously. To execute this technique manually, you use the same process for taking photos as you normally would with exposure bracketing (you’ll just combine them all in a post-processing program later), but there are a few key differences and elements to be aware of:
- Be mindful of which setting you use to vary the exposure in your shots:
- Watch your ISO carefully. The higher the ISO, the more noise in your shots. So, if you’re shooting with different ISOs, compiling all of your photos into one only heightens the noise level (and decreases the amount of detail in your shot).
- Varying your aperture will produce different depths of field. These variations can sometimes conflict in the finished product.
- Varying your shutter speed is usually the best way to produce a matching set of photographs with different exposures. However, be aware that movement will process differently at different shutter speeds. Make sure you are using a tripod and a remote shutter release for long exposures, since even pressing the shutter button can result in camera shake that could throw off every image in the series.
- Consider purchasing a wide angle lens (one that can zoom out to 28mm or wider) for landscapes and cityscapes, which are often the focus of HDR photography.
Although we’ve covered exposure bracketing thoroughly in this guide, you may feel a bit lost when you open up Lightroom or Photoshop to begin blending your photos. You can get started easily with this video from Aaron on how to easily create an HDR photo by combining the photos you’ve taken and importing them into Lightroom:

If your end result turns out to look a little more artificial than you’re hoping for, see how Aaron navigates this problem by manually creating this high-density look:
Your Shortcut to HDR: Your Smartphone
If you’re using anything newer than, say, a Samsung Galaxy S4 or iPhone 4S, your smartphone is likely equipped with HDR capability.
To start using it, turn your camera mode to HDR or Rich Tone.
If you’re using an iPhone, go to Settings — Camera.
- Turn on ‘Auto HDR’ if you want your phone to make the call on when to use this mode. Otherwise, simply select.
- While you’re here, make sure you tell your phone to keep a copy of the standard photo as well (this way, you can compare your HDR photo with your standard photo and decide which one you like best).
- Then, click on your camera icon and choose HDR in the upper left corner of your screen.
- Take your shots!
Note: Keep your phone as stationary as you can, since your phone will be capturing a few shots at once and needs to stay steady during this time. You can buy an adapter for your tripod or use natural surroundings to stabilize your phone… just be sure not to leave the phone behind when you’re done!
For higher quality photos and a stronger effect, you can also download apps – try the Pro HDR X app for iPhone or the HDR Camera+ app for Android.
Process Makes Perfect: How to Bracket in Auto or Manual Mode
You can use both automatic and manual settings for exposure bracketing. Before getting into that, however, let’s cover a few basics:
We’ll start with a brief discussion on f-stops, because this is how people often refer to measuring the distance between exposures. Remember that this term can be used for really any measurement of exposure.
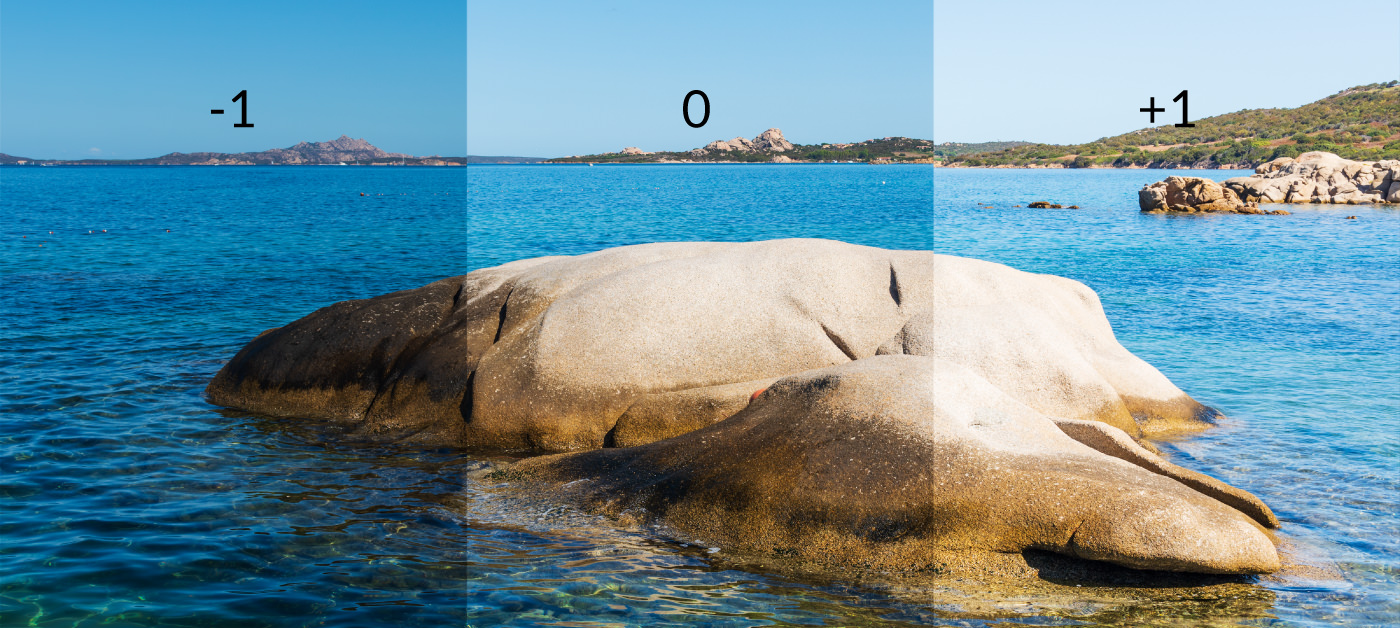
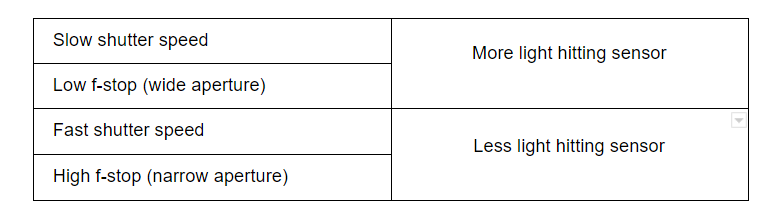
A stop is a relative measurement, meaning it’s a measurement based on comparison. In exposure bracketing, that relative measurement is between two levels of brightness. So, when we say “stop down/-1 stop”, we cut the light in half from its original position, and when we say “stop up/+1 stop”, we double the amount of light that hits the camera’s sensor.
Let’s take a look at how all of this theory about stops works in practice:
If you’re photographing a scene with a medium contrast of lighting with the normal exposure set to 1/500th of a second, your -1 stop, 0, and +1 stop would be: 1/1000 sec, 1/500 sec and 1/250 sec (where shutter speed, of course, is the changing variable).
Alternatively, for a high contrast scene you could try: -2 stop, 0, +2 stop, where if your normal exposure is 1/500, then this would be equal to: 1/2000 sec, 1/500 sec and 1/125 sec.
If the language of stops is too technical for you, just remember this little rhyme:
One above, one below, an exposure in between
It’s the perfect recipe for a super awesome scene.
Is it cheesy? Yes. Will you forget it? I didn’t think so.
Auto Exposure Bracketing
Using a DSLR, you can automatically take bracketed exposures.
Start by setting your camera to:
- Aperture Priority (keeps aperture steady where you choose, changes shutter speed automatically), or
- Shutter Speed Priority (keeps shutter speed steady and changes aperture automatically)
Then, find a button labelled either AEB or BKT on the back of your camera or locate it within the menu. (Hint: If you don’t want to choose a priority mode, you can also just select this button first and then the exposure will automatically be set for you).
You will then see a scale – you can use this scale to indicate where you would like to set your stops. You can choose either full stops or fractions of stops.
Then, press the shutter (typically three times) to take your bracketed shots.
Again, use a tripod and a remote shutter release to make sure you are capturing the scene from exactly the same angle each time and to avoid camera shake.
Tip
You can use our brief tips, but make sure to browse through your model’s manual as well. Most manufacturers have their own spin on different processes, and you may find some surprising features as a bonus!
Manual Exposure Bracketing
Auto is a lifesaver under the right circumstances, but some photographers may want more control over their images. If this is you, you can manually bracket exposures by:
- Sticking to one shutter speed and adjusting your aperture, or
- Keeping the aperture steady and changing the shutter speed.
Keep in mind, as always, that fiddling with your shutter speed will affect how clearly you capture motion, while aperture changes will affect your depth of field. Whichever facet of exposure you choose to vary, you may still have to play with the others at times. For the most important shots, if you have the time, it might even benefit you to do more than one set of brackets, using more than one method.
Also, it may help to remember these formulas:
And here’s a quick reference on how to find out where your camera thinks the optimal exposure should be:
- Start by finding the light meter in your viewfinder (it is the dotted/dashed line with a short vertical line or 0 in the middle); you’ll also see a range of numbers.
- Depending on the model you’re using, there could be:
- a little hash sign on the 0 when you’ve hit the best exposure point, or
- a dotted line that gets longer if the image is over or under exposed.
- To find out precisely the type of system your model uses, adjust your aperture or shutter. You should now be able to see how your camera indicates exposure.
Tip
If you can tell that the meter in your camera is misreading a scene, you can easily alter the exposure settings so that it determines the ideal exposure based on your own interpretation. This will help you avoid the temptation to “chimp,” or check your screen after each exposure, since you know that the camera is evaluating light based on your preferences.
Troubleshooting Common Issues
Problem: Your individual images seem sharp enough, but when you combine them to create an HDR image everything goes fuzzy.
Solution: When you’re combining images, it’s imperative that everything matches up! Keep your hands off your camera as much as possible when shooting for manual HDR. The smallest movement can change everything for those longer exposures! Check the weather for outdoor shoots, since wind can move trees in your landscapes, hair in your portraits and even the tripod where your camera is mounted.
Problem: You’ve purchased an expensive camera, but there’s no auto bracketing mode.
Solution: Hopefully, you’re reading this before you’ve made a major purchase. Don’t assume that every model has this feature, and ask before you buy. If you’ve already made your purchase, you can still practice the technique in manual mode (more on this below).
Problem: Your camera’s light meter is unreliable, but everything else works like a dream.
Solution: Buy an external light meter. You can find a basic one on Amazon for less than $20, or you can spring for one that includes tons of handy features (and it may ruin you for in-camera light meters forever).
Tip
It’s true that you can experiment a lot with this technique, but the one thing you shouldn’t try to capture is a moving – or speeding! – object, like a runner or a moving train. You would need to use a technique designed to capture just one frame for movement like this, instead of multiple ones as in exposure bracketing.
More Types of Bracketing
There’s more than one technique under the bracketing umbrella. It’s never a bad idea to hedge your bets, and that principle can apply to more than just your basic exposure – it’s great for flash photography and focus as well.
Flash Exposure Bracketing (FEB)
When you’re using an external flash that doesn’t offer TTL technology (or if you’re adjusting to a brand new unit and still learning its ins and outs), bracketing can help you to find the perfect flash exposure for a given shot. You may want to do this if you feel uneasy about the lighting in the room you’re in or if you’re unsure that the light falling across your subject is appropriate. FEB allows you to apply bracketing in increments of +/- 3 stops.
Here’s how to practice this technique:
- Press the FEB button on the back of your flash
- Set the scale
- Take your shot
- Select the photo with the perfect exposure
Focus Bracketing
In images with a shallow to moderate depth of field, you generally have one point of focus that is the most important of any point in your image. (For example, in a portrait, the eyes should always be at the height of focus unless you have a specific reason for choosing otherwise.) But when you’re looking through a viewfinder, it can be difficult to hone in on that perfect point of absolute focus, which is why your might consider bracketing multiple points of focus.
This type of bracketing becomes especially useful when shooting in macro (or with a large aperture lens that’s fully open). The shallow depth of field involved in both of those situations makes it very tricky to achieve a proper amount of focus.
Focus bracketing can be a bit different than other photography techniques, as you may have to get a little physical by changing positions or manually adjusting your lens. It’s worth trying both techniques and then deciding what works for you.
Using Body Positioning
- Set your focus to manual
- Find the focus you believe is correct and snap
- Lean your body back a hair and snap
- Lean forward a smidgen and snap
Using Lens Focus
- Find the focus you believe is correct and snap
- Move focus ring to the right a bit and snap
- Move focus ring to the left and snap

Photo by Erik-Jan Leusink on Unsplash
An ultra-shallow depth of field calls for precision focus. Some of the most experienced photographers still choose to bracket their focus to ensure that the most important details come out razor sharp.
A World of Possibilities with Exposure Bracketing
Exposure bracketing is not what it used to be. For starters, now that we have digital technology, the technique is much less wasteful in terms of film, developing supplies and in some cases, printing. With the advent of technological advancements, you can take a deep dive into exposure bracketing with no real risk. You may start by taking a series of three to seven shots, but then HDR may reel you in.
The idea of bracketing in the first place is to save your behind if you miss the perfect shot, so always edit non-destructively. If you choose to combine images for HDR, save the originals separately. If you bracket traditionally, don’t delete extra shots unless you’re POSITIVE you’ll never need them again!
Now that you know how to avoid those heartbreaking missed exposures, you don’t have to be uptight about metering anymore. Cover your bases with exposures from either side of the recommended setting, and have fun exploring the possibilities bracketing and HDR have to offer!