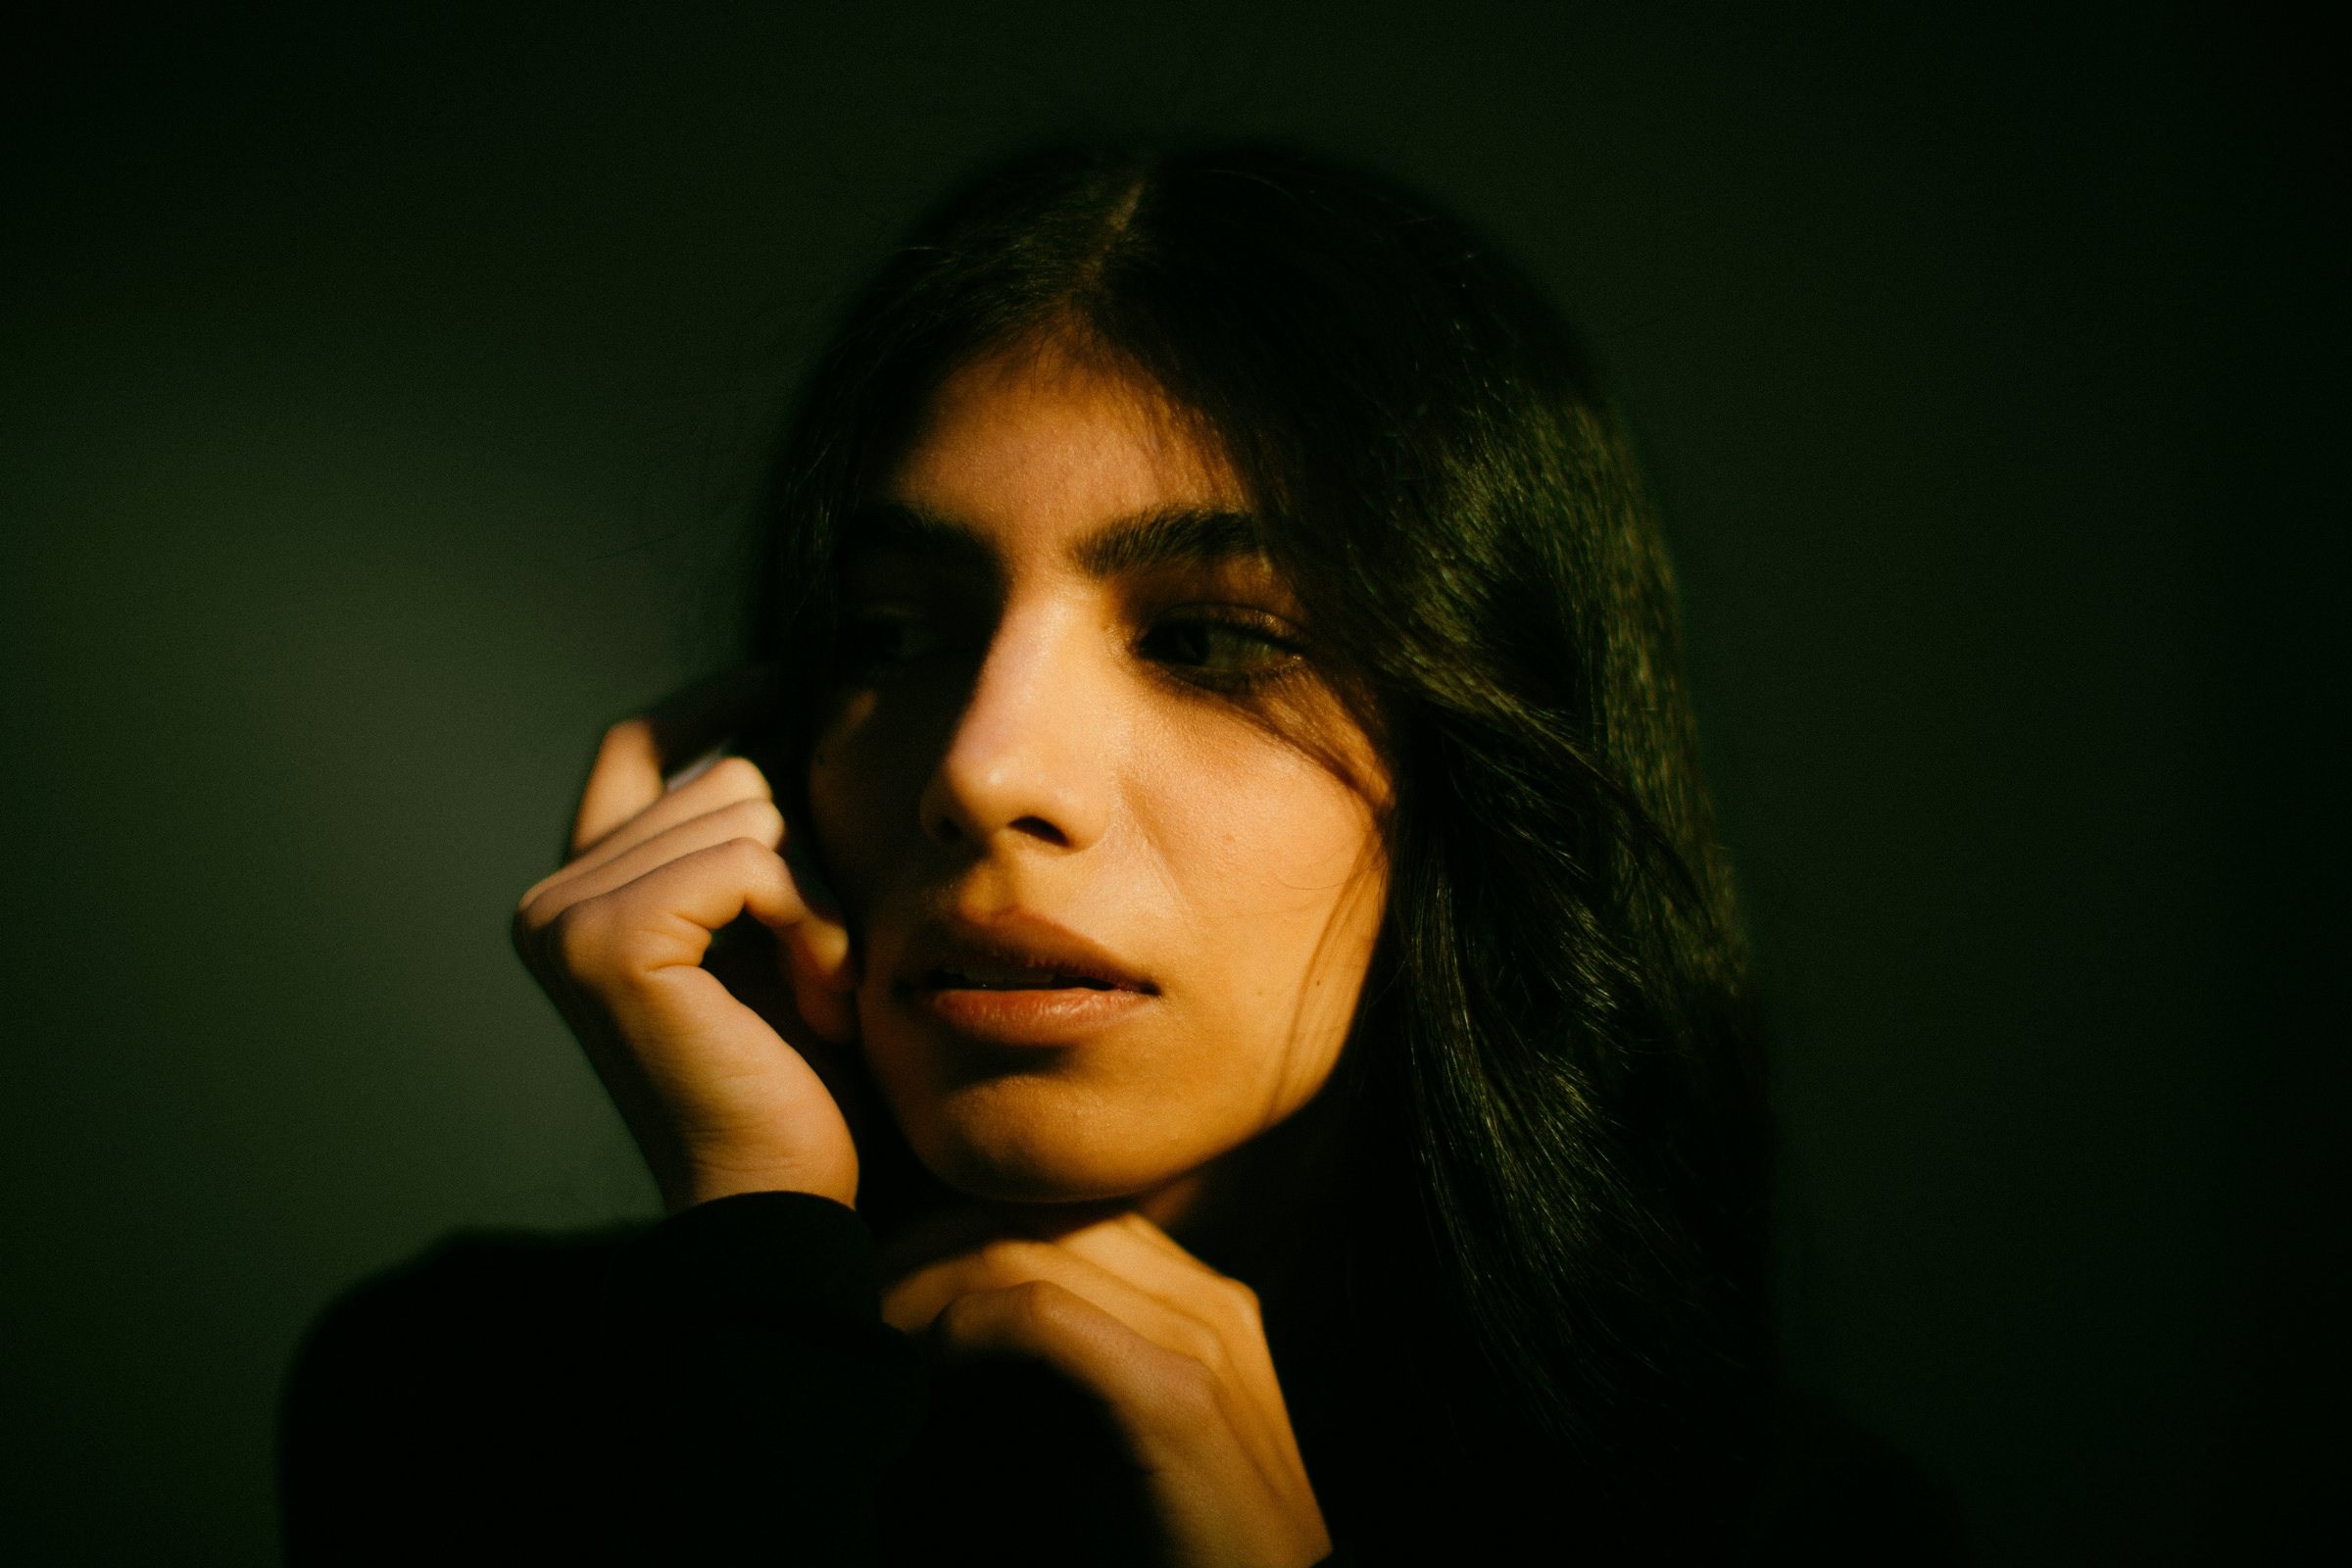
Portrait Lighting Patterns: 6 Setups Every Photographer Should Know
The six portrait lighting patterns come from one light, moved around one face. Each is recognized by the shadow it makes, and once you can read that shadow you can copy almost any portrait.
- Patterns6
- Lights needed1
- Works withWindow, lamp or flash
Take one light and walk it around a face. Every few steps the portrait changes: the shadows get longer, the face gets narrower, the mood gets heavier. Nothing else moved.
That is all the six portrait lighting patterns are: flat, butterfly, loop, Rembrandt, split and rim. Each one is recognized by the shadow it makes, mostly the shadow of the nose. This guide shows where the light goes for each, with a photo and a top-view diagram. You don’t need studio gear to follow it. A window, a lamp or a fifteen-dollar work light will show you all six.

The Only Three Things You Are Changing
Before the patterns, the controls. There are only three:
- Angle. How far around the face the light is, from straight in front, to directly beside, to behind.
- Height. How far above the eyes the light is. A little higher almost always looks better. The reason is simple: the light we have always lived under, the sun, comes from above. Light from below looks like a campfire story.
- Size. A large light close to the face makes soft shadows with gentle edges. A small or distant light makes hard shadows with sharp edges. The pattern stays the same and the mood changes.
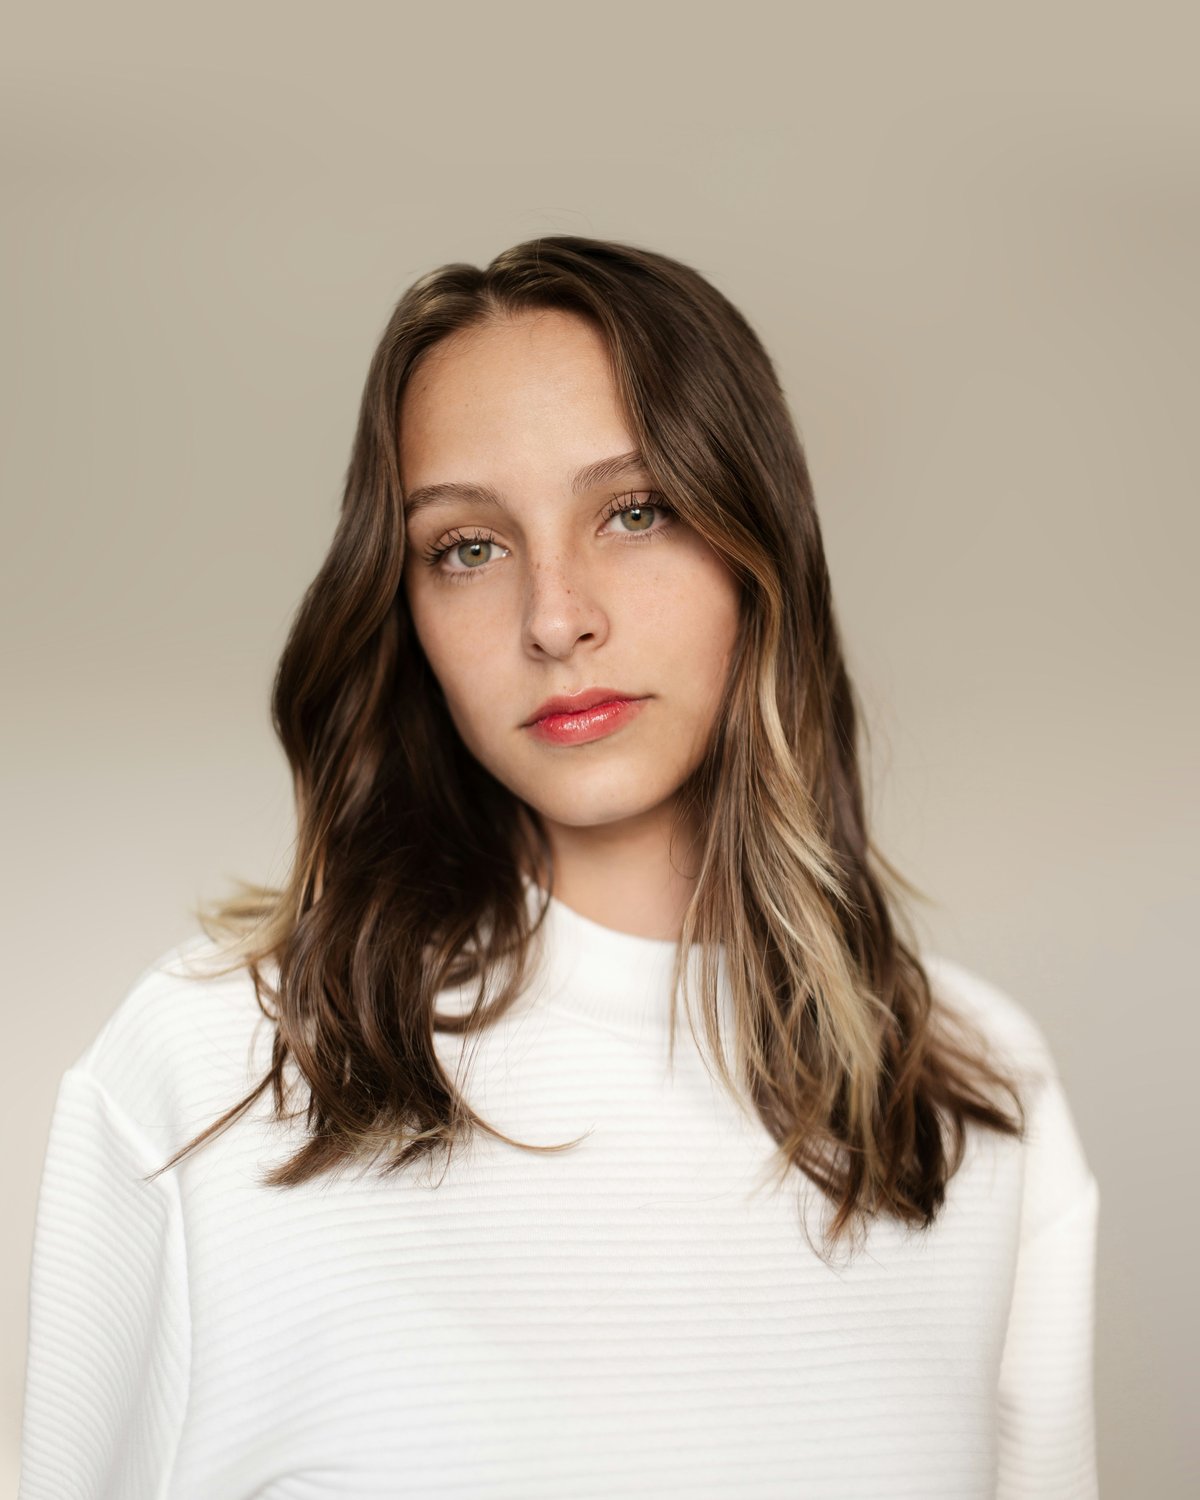
Start every setup with the light about 45 degrees to one side and a little above eye level. Then move it and watch the nose shadow. The angles in this guide assume the person is looking straight at the camera.
In the diagrams below you are looking down from above. The camera is at the bottom and the light is coral. A dashed ring means the light is raised high. Each diagram puts the light on the same side as in the photo next to it; mirror it and the pattern is the same.
How High Should the Light Be?
A top-view diagram can’t show height, so here it is in words. Stand where the camera is and look at the catchlights, the small reflections of the light in the eyes. Picture each eye as a clock face.
- At 10 or 2 o’clock: the light is above eye level and off to one side. Loop and Rembrandt lighting both put it here. For Rembrandt the light is higher, so the catchlight sits closer to the upper eyelid.
- At 12 o’clock: the light is above the face and straight in front. That is butterfly lighting.
- At 9 or 3 o’clock, or in one eye only: the light is level with the face and far to the side, as in split lighting.
- Missing: the light is too high. The brow is shading the eyes, and they will look like dark hollows.
- Below the middle of the eye: the light is under the face. Do that only on purpose.
As a starting point, raise the light until its center is a foot or two above the person’s eyes and tilt it down toward the face. For butterfly lighting, keep raising it until the nose shadow is about halfway to the upper lip, and stop before it touches the lip. For Rembrandt lighting, raise it until the triangle of light under the eye has a clear lower edge.
Pattern 1: Flat Lighting
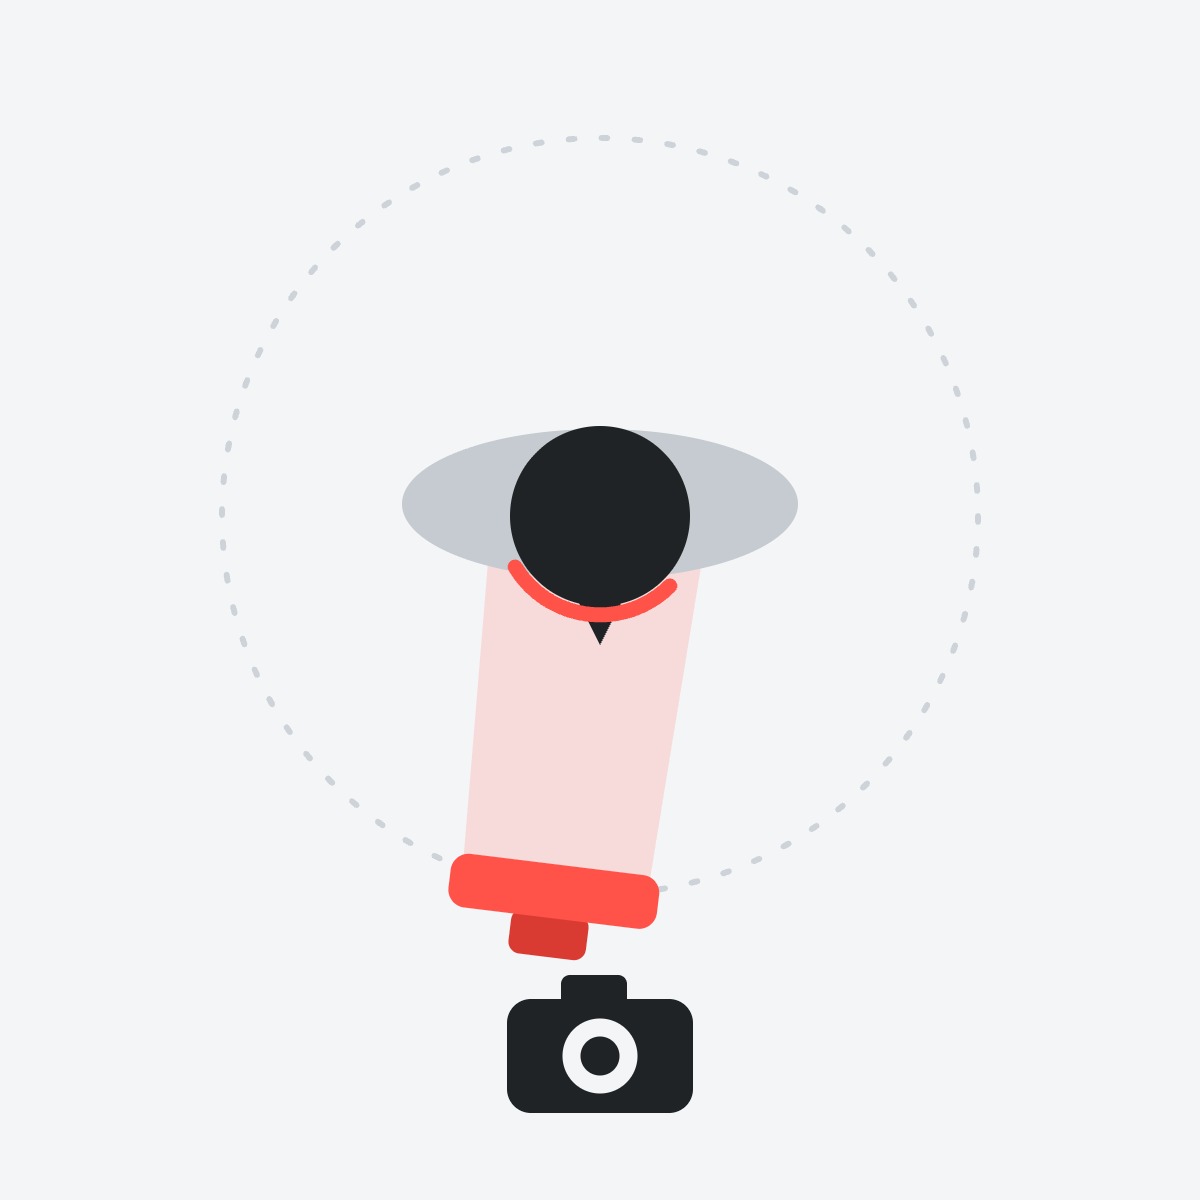
Where the light goes: Straight in front of the face, at or just above eye level, right beside or behind the camera.
What you see: Almost no shadows. The nose shadow is hidden behind the nose itself.
Use it for: Beauty and skin, because it hides texture and wrinkles. It is the most forgiving pattern for skin and the least flattering for shape. With no shadows, a face looks wider and flatter.
Pattern 2: Butterfly Lighting

Where the light goes: Still in front of the face, but raised high and angled down.
What you see: A small shadow straight under the nose, shaped a little like a butterfly, and a shadow under the chin. Cheekbones stand out.
Use it for: Glamour and fashion. Old Hollywood portraits used it so often that it is also called Paramount lighting. Put a reflector or a white card under the chin to soften the shadows. Photographers call that clamshell lighting.
Watch for: Raise the light too far and the eye sockets go dark. If you lose the bright reflection in the eyes, the light is too high.
Pattern 3: Loop Lighting

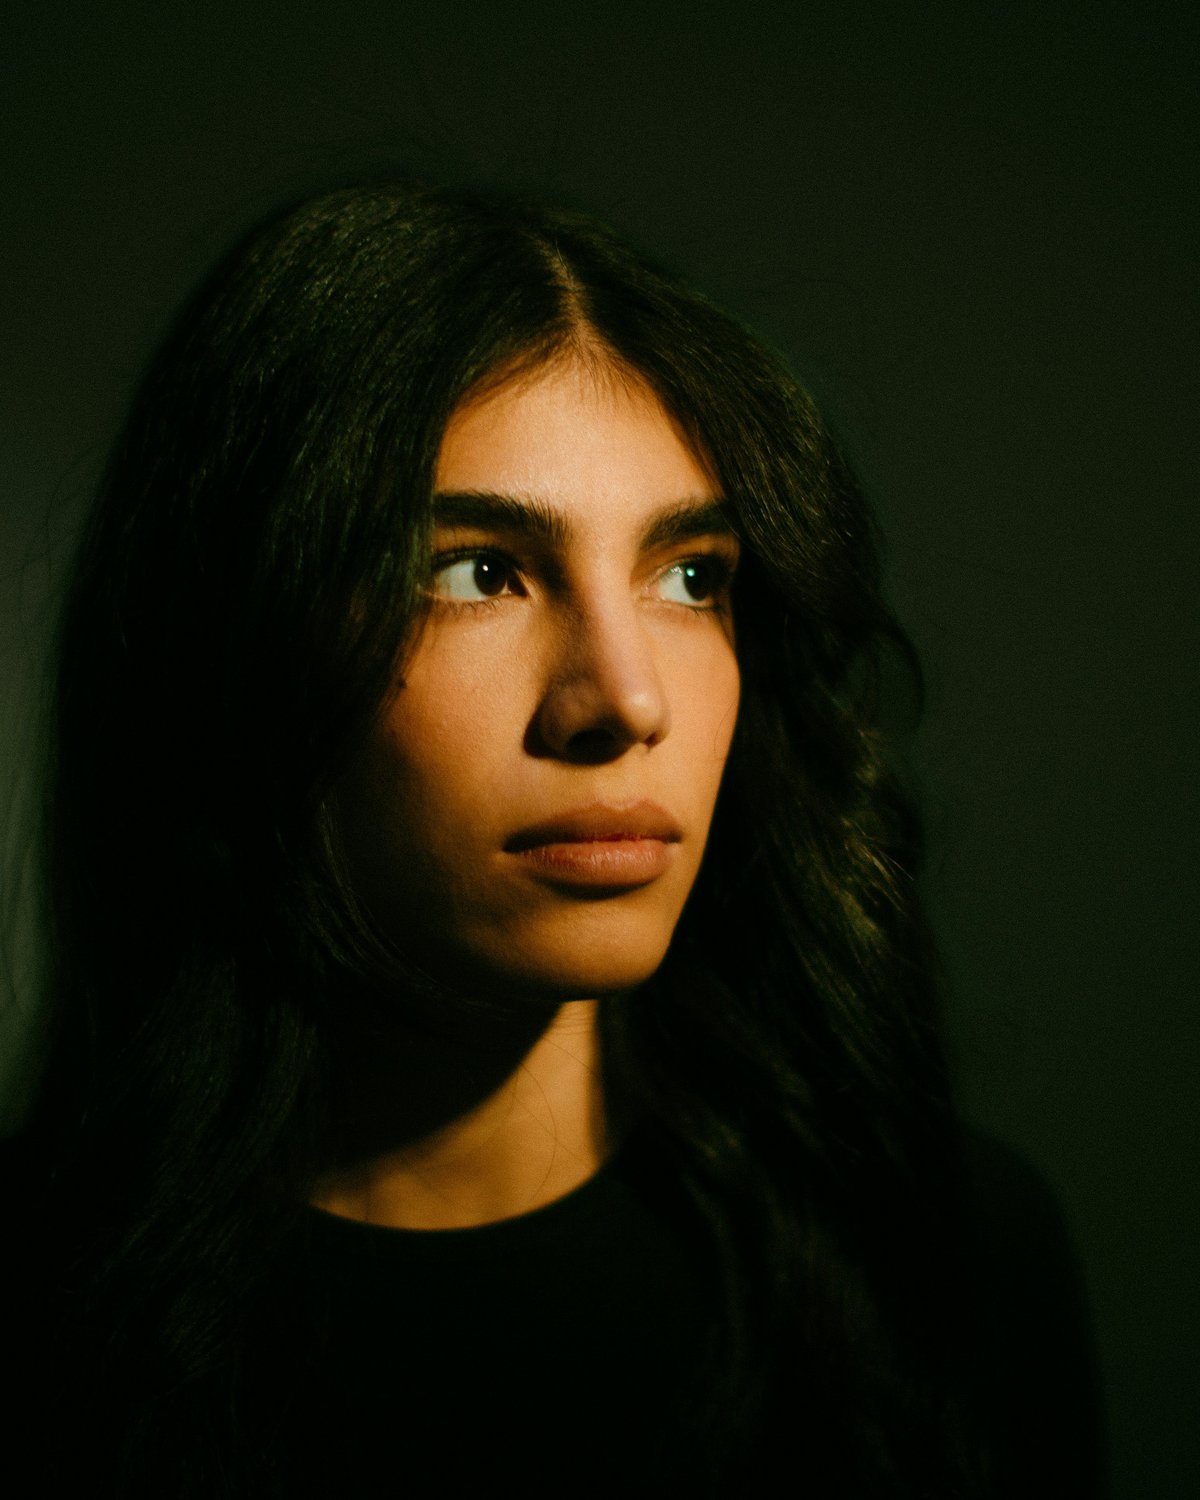
Where the light goes: About 30 to 45 degrees to one side, a little above eye level.
What you see: The nose shadow falls to the side and slightly down, making a small loop on the cheek. It does not touch the shadow on the far side of the face.
Use it for: Almost everyone. Loop lighting gives a face shape without drama. If you only learn one of the portrait lighting patterns, learn this one.
Pattern 4: Rembrandt Lighting
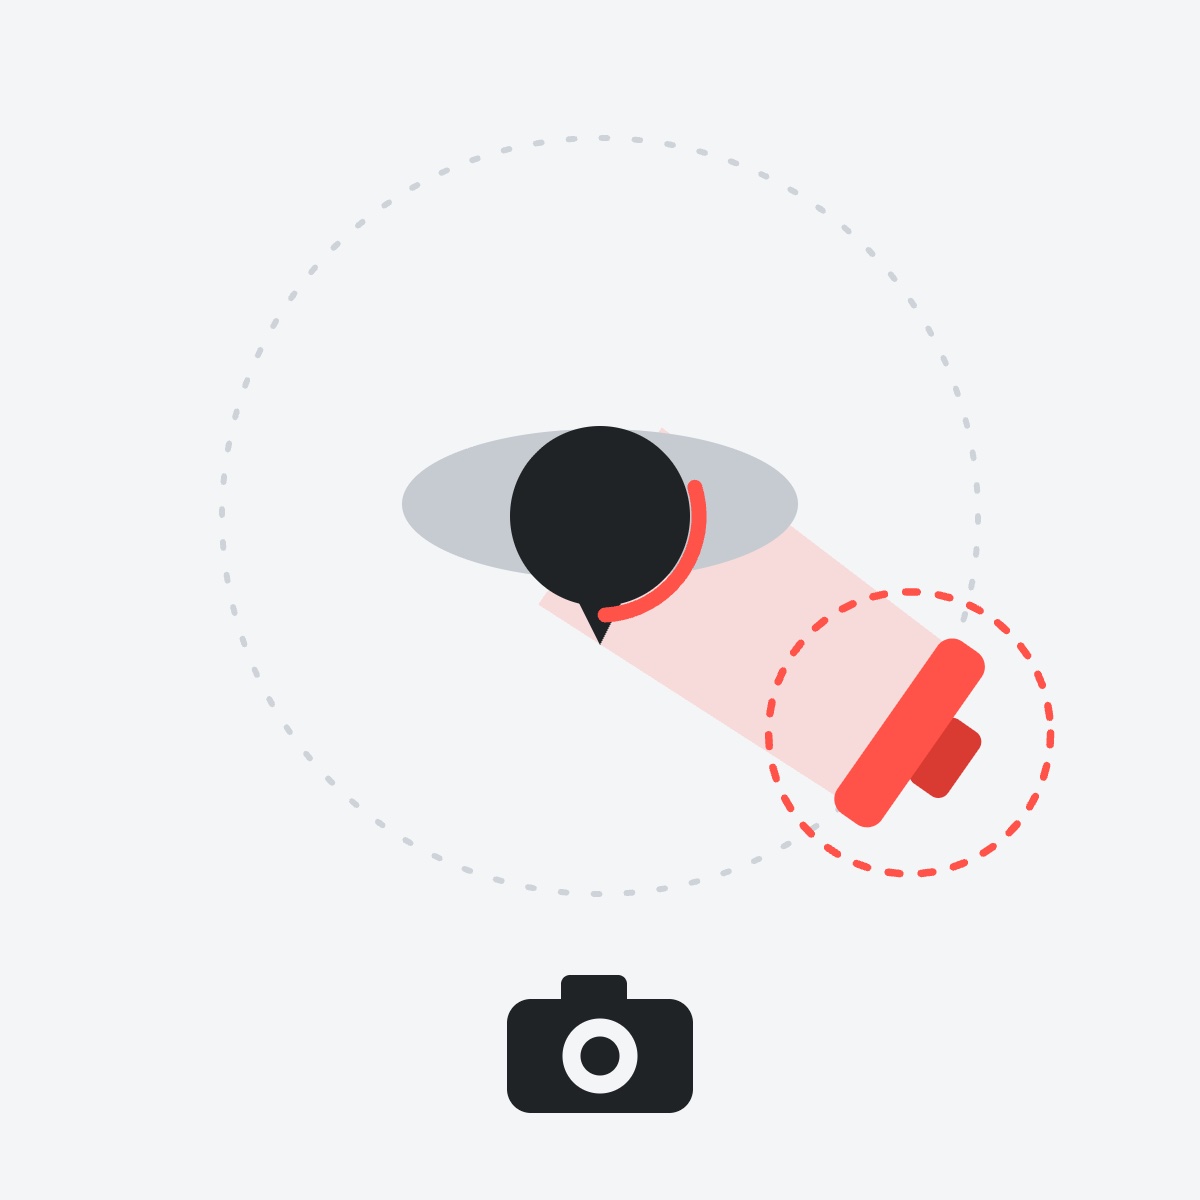
Where the light goes: Farther around, about 45 to 60 degrees to the side, and higher.
What you see: The nose shadow now reaches the cheek shadow and joins it. What is left on the dark side of the face is a small triangle of light under the eye. That triangle is the signature. It should be no wider than the eye and no longer than the nose.
Use it for: Mood, character and drama. It is named for the Dutch painter Rembrandt, whose portraits often show that triangle. For a photographer who works in that tradition, see Taking Rembrandt-Like Photos Using Old Master Techniques.
Watch for: If the triangle disappears, the light has gone too far around. Bring it back toward the camera a little.
Pattern 5: Split Lighting
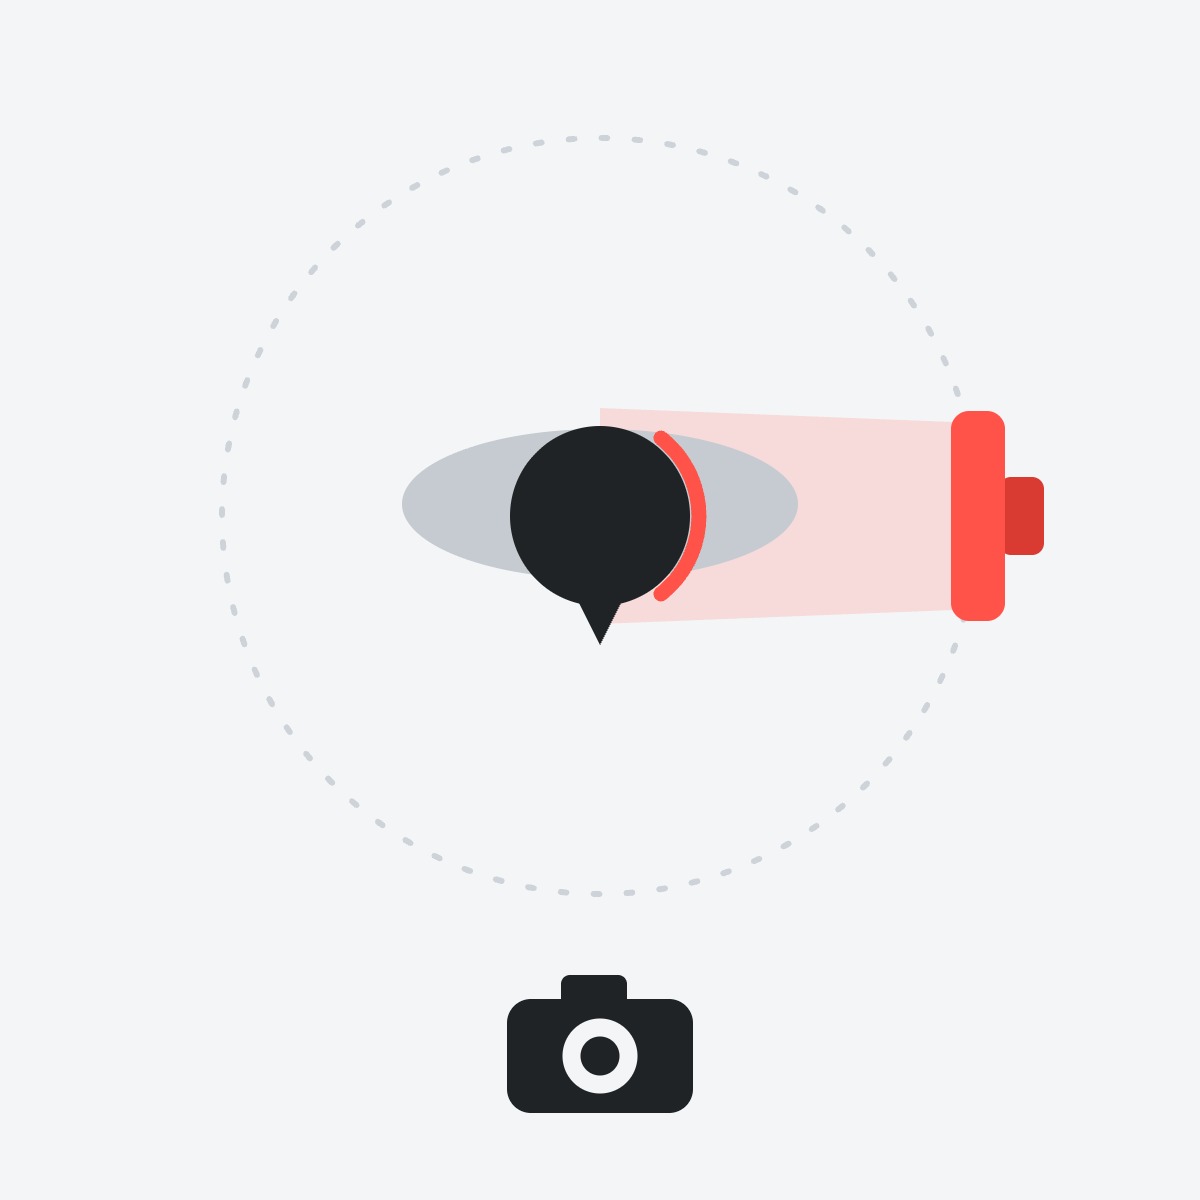
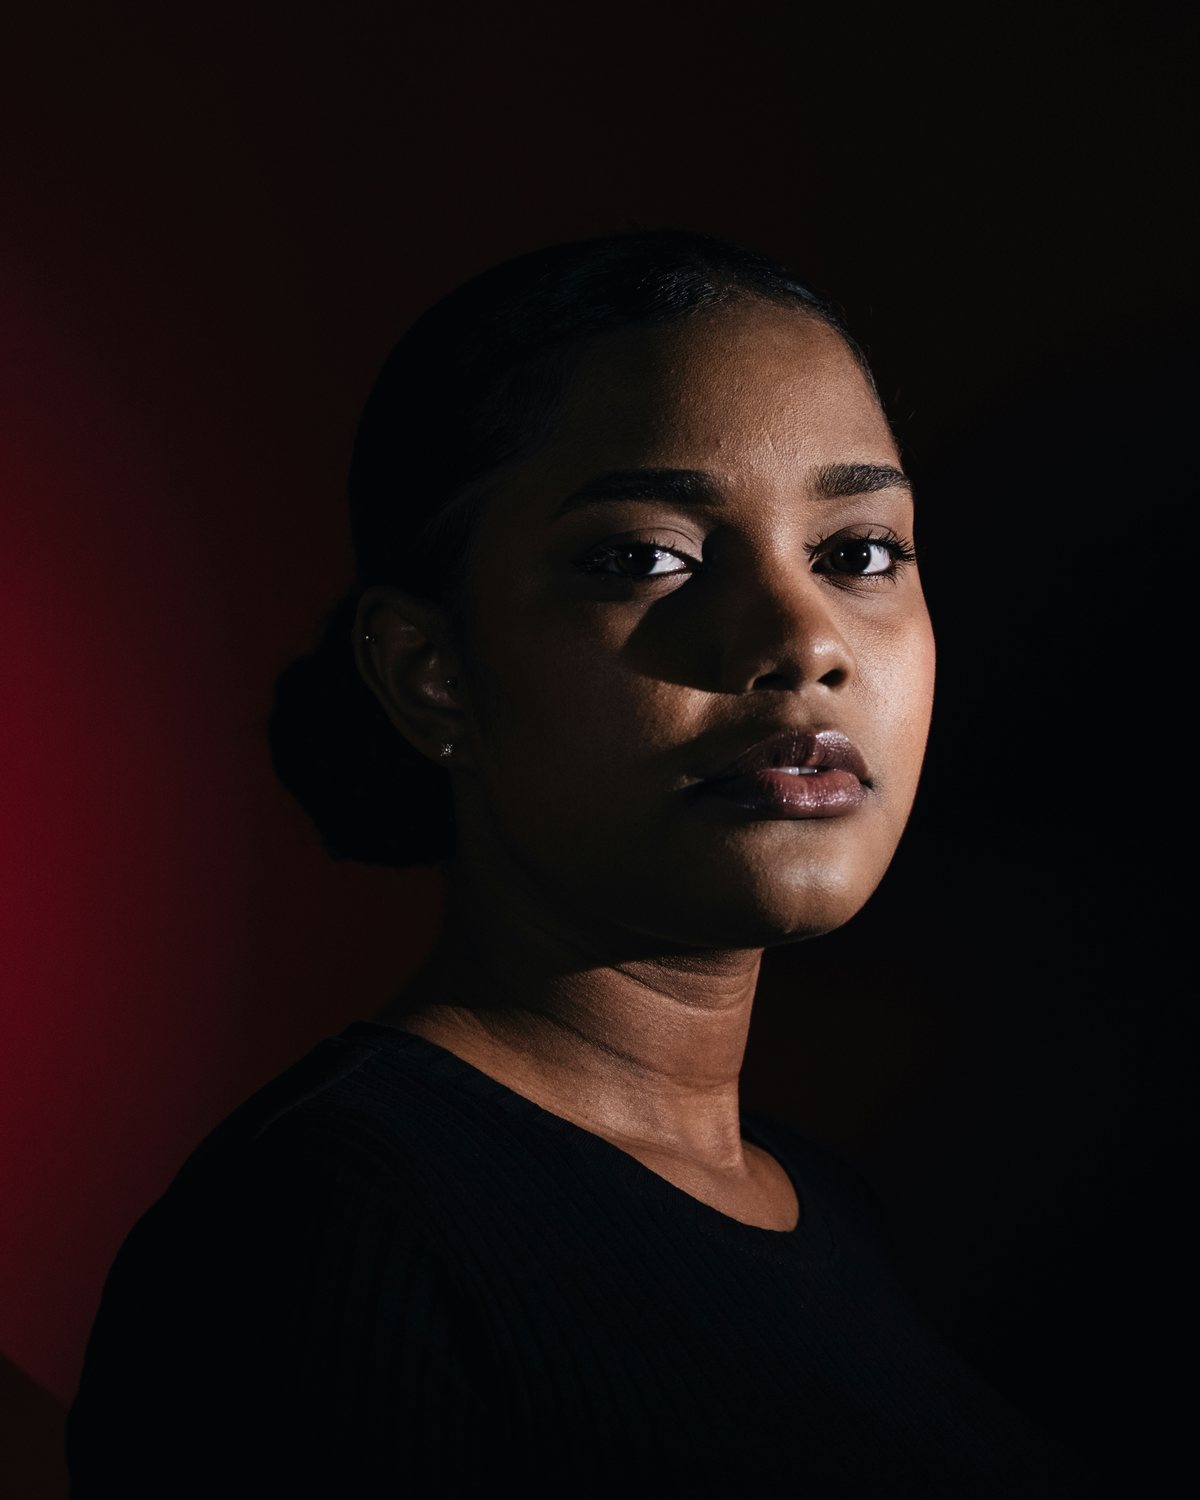
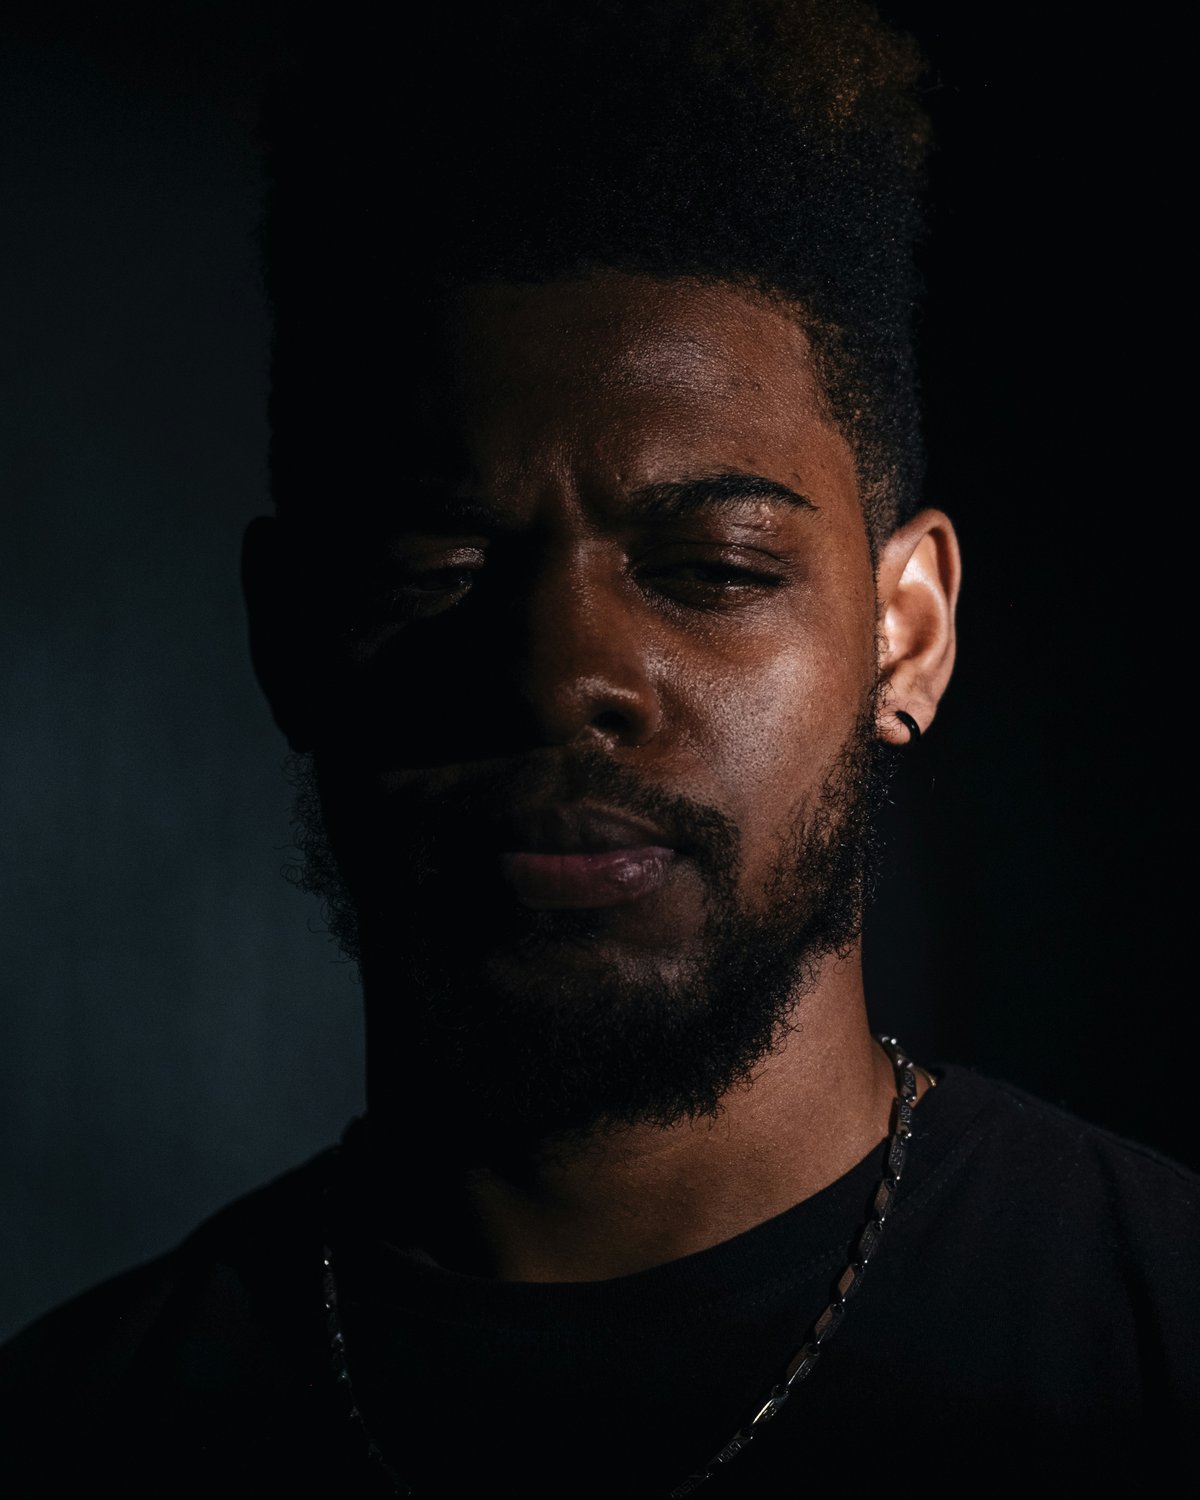
Where the light goes: Directly to the side, 90 degrees from the camera.
What you see: One half of the face lit, the other half in shadow, divided down the middle of the nose.
Use it for: Strong, dramatic portraits: athletes, musicians, film-noir looks. It shows every bit of skin texture, so it is hard on skin and good for character.
Pattern 6: Rim Lighting
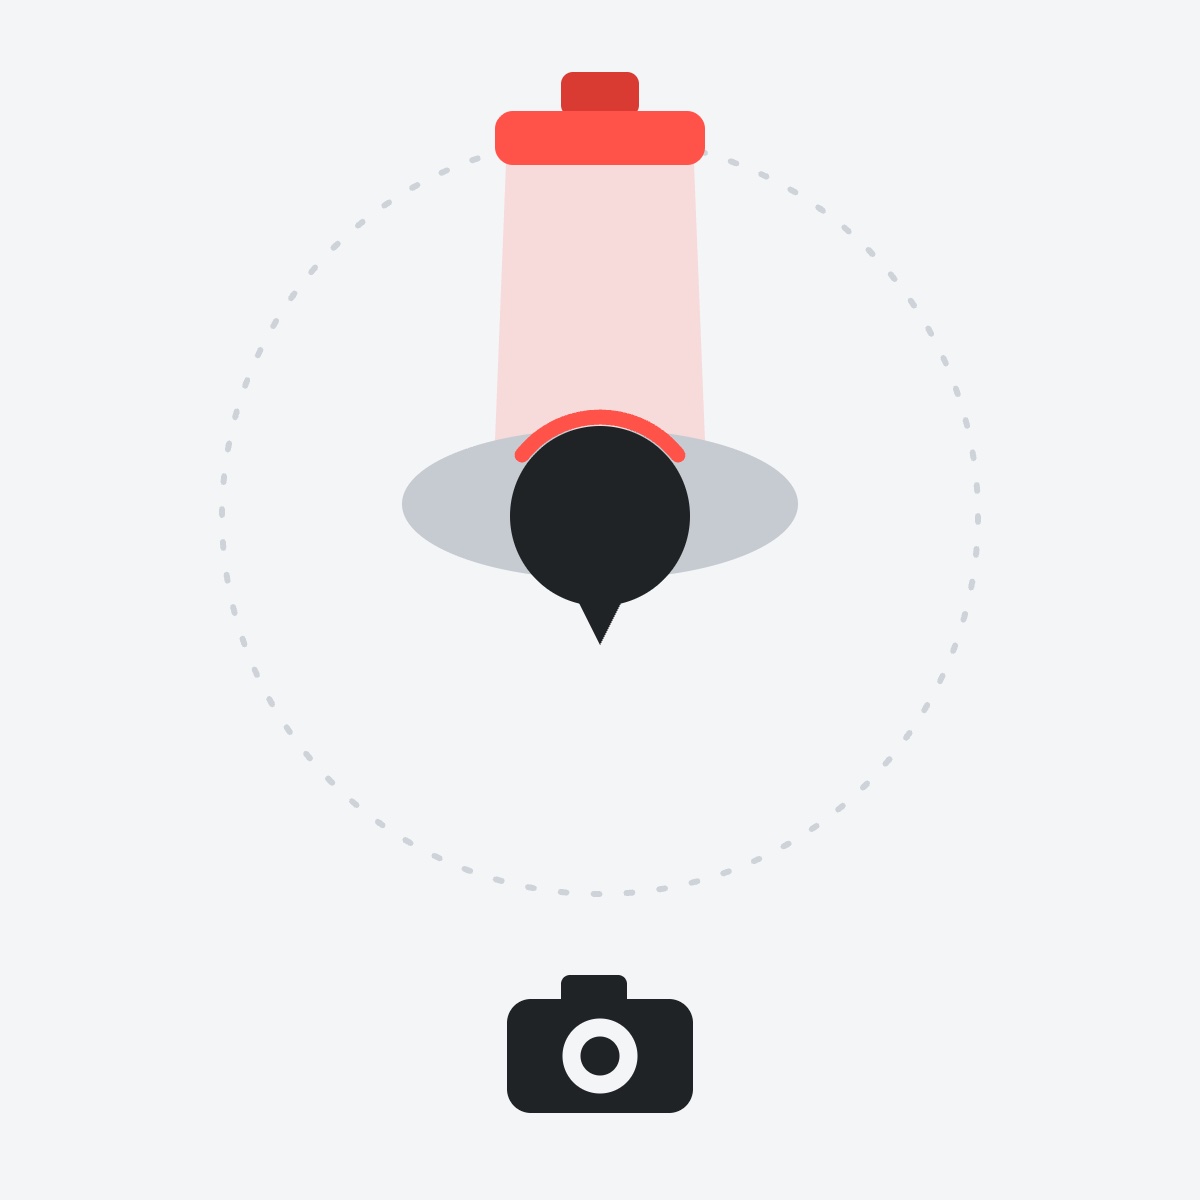
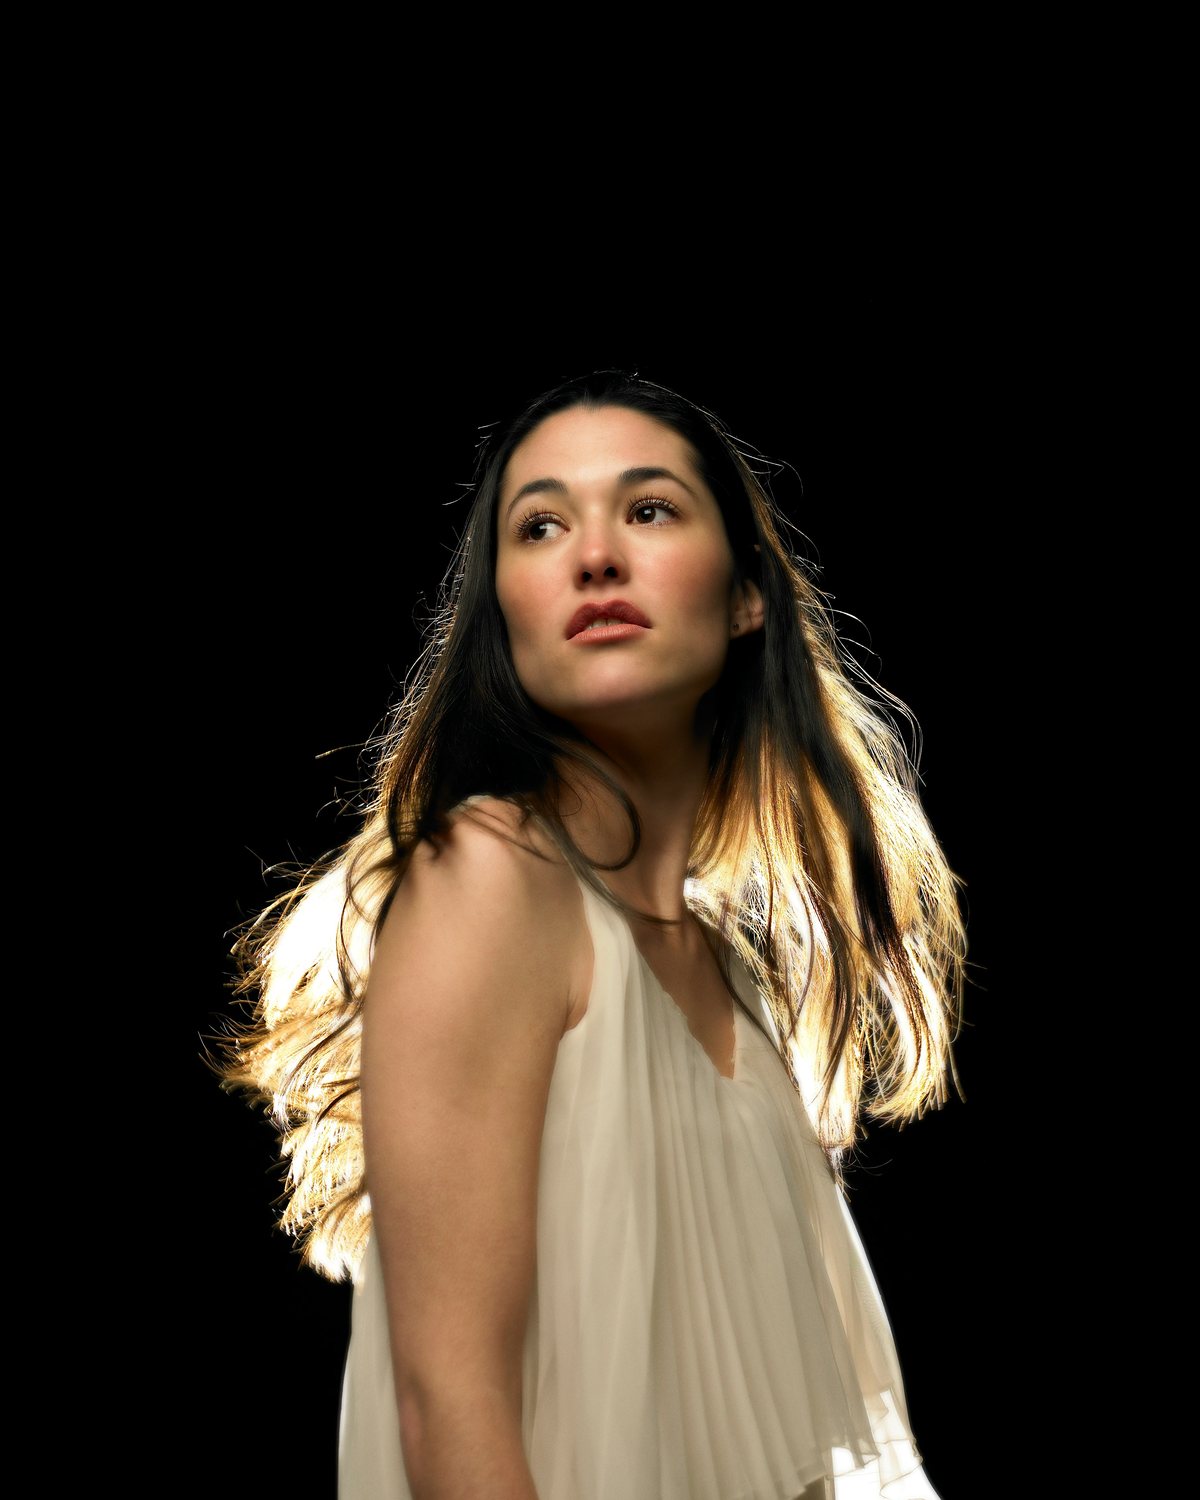
Where the light goes: Behind the subject, pointing back toward the camera. Put it directly behind and the head hides the light itself. Move it a little to one side and the edge on that side gets brighter.
What you see: A bright outline along the hair, cheek or shoulder. The front of the face is dark unless a second light or a reflector fills it.
Use it for: Separating a subject from a dark background. On its own it makes a near-silhouette with a glowing edge. Added to any of the five patterns above, it is the accent light that makes a portrait look finished.
Broad and Short Lighting
Once the face is turned slightly away from the camera, each of the portrait lighting patterns can be lit two ways:
- Broad lighting lights the side of the face nearer the camera. The face looks wider.
- Short lighting lights the side turned away from the camera and leaves the near side in shadow. The face looks slimmer and the portrait more sculpted.
Short lighting flatters most people. Broad lighting helps a very narrow face. The light doesn’t have to move. Ask the person to turn their head toward the light or away from it.
Making the Patterns With a Window
A window is a large, soft light that you can’t move, so move the person. Stand them facing the window with your back to it, and you have flat lighting. Turn them, and yourself, a little at a time so the window slides around to the side of their face: loop first, then Rembrandt, then split when the window is directly beside them. Put them between you and the window and the light becomes a rim.
Two things work differently from a lamp:
- Height. You can’t raise a window, but you can lower the person. Sit them down, or cover the bottom half of the window, and the light comes from higher up.
- Size. Close to the window the light is soft and falls off quickly into shadow. A few steps back into the room it is harder and more even.
Direct sun through the glass is a small, hard light. For soft shadows, use a window that looks at open sky, or hang a thin white curtain over it.
Main, Fill and Accent: What Each Light Is For
Each of the six portrait lighting patterns comes from one light. Extra lights only change how deep the shadows are and how the subject stands out.
- The main light, also called the key light, makes the pattern. It is usually the brightest and the closest.
- The fill light lifts the shadows the main light made. A reflector does the same job for free. More fill gives a softer, friendlier portrait. Less fill gives more drama.
- The accent light is the rim light from pattern 6: an edge of light that pulls the subject off the background.
Fill is the light people starting out most often forget. A hard main light with no fill gives bright highlights right next to shadows with no detail in them. There’s nothing wrong with that if you meant it. If a portrait was shot in natural light with no fill, the PRO course Master Natural Light Portrait Editing in Photoshop shows how to fix dark subjects and harsh shadows afterwards.
How to Read the Lighting in Any Portrait
Knowing the portrait lighting patterns lets you work out how most portraits were lit, from two clues:
- The nose shadow tells you the pattern, using the six descriptions above.
- The catchlights, the reflections of the light in the eyes, tell you the rest. Their position shows where the light was. Their shape shows what it was: a square or rectangle for a softbox, a round or eight-sided shape for an umbrella, octabox or beauty dish, a tall thin strip for a strip box. Their size shows how large and close it was.
Copying lighting you admire is one of the fastest ways to learn it: find the nose shadow and the catchlights, then set up one light until yours match.
Which Pattern for Which Face?
The portrait lighting patterns each suit a different job. Use this table as a starting point:
| If you want to… | Try |
|---|---|
| Flatter almost anyone | Loop, short side |
| Slim a round face | Short lighting, loop or Rembrandt |
| Widen a narrow face | Broad lighting or flat |
| Show off cheekbones | Butterfly |
| Hide skin texture | Flat or butterfly, with a large soft light |
| Add drama and character | Rembrandt or split, with little fill |
| Separate from a dark background | Add a rim light |
Five Mistakes to Watch For
- The light is too low. Light below eye level flattens the cheekbones and sends the nose shadow up the face. For butterfly, loop and Rembrandt lighting, raise it until the catchlights sit in the upper half of the eyes.
- The nose shadow touches the lip. In butterfly and loop lighting the nose shadow should stop short of the upper lip. If it reaches, the light is too high. Lower it a little.
- The pattern is halfway between two patterns. A loop shadow that almost closes into a Rembrandt triangle looks like an accident. Pick one, and move the light until it is clearly that.
- The person moved and the light didn’t. A pattern comes from the angle between the light and the face. When the person turns their head, the pattern changes, even though the light and the camera stayed where they were. Set the pose first, then the light.
- The catchlights are gone. Eyes without a catchlight look flat. If they disappear, the light is too high or too far to the side for that face. Deep-set eyes and hat brims need a lower light.
Common Questions About Portrait Lighting Patterns
What are the main portrait lighting patterns? Most lists name butterfly, loop, Rembrandt and split, often with flat lighting first. This guide adds rim lighting as a sixth because it is the one you will use most as a second light.
Which of the portrait lighting patterns is the most flattering? Loop lighting on the short side of the face suits the most people. It gives the face shape without deep shadows.
What is the difference between loop and Rembrandt lighting? Where the nose shadow ends. In loop lighting it stays a small, separate shadow on the cheek. In Rembrandt lighting it joins the cheek shadow and closes a triangle of light under the eye.
Can I make all the portrait lighting patterns with one light? Yes. Every pattern here comes from one light. More lights only fill the shadows or add an edge.
Do portrait lighting patterns work with natural light? Yes. Indoors, use a window as described above. Outdoors, the low sun early or late in the day behaves like a single light: turn the person until the nose shadow lands where you want it. At midday the sun is a butterfly light that is far too high, which is why eyes go dark. Find open shade.
Where should a beginner put the light? About 45 degrees to one side and a little above eye level. That is loop lighting, and every other pattern is a short move from there.
Shaping the Light Afterwards in Photoshop
A pattern that was nearly right in camera can be finished in Photoshop. Most of the tools deepen and soften what is there; one, still in beta, adds a new light.
- Dodge and burn brightens the lit side and darkens the shadow side a little, which strengthens any pattern. See How to Dodge and Burn in Photoshop, which does it with two adjustment layers painted through masks, then uses Blend If so the dodge lands in the highlights and the burn in the shadows.
- Lift shadows that went too dark when there was no fill light. Photoshop’s Light adjustment layer puts the Camera Raw tone sliders in the layer stack, so you can mask the lift to the shadow side.
- Move the light after the shoot. Photoshop’s Relight layer, still in the Beta, adds a light to the subject of a photo that is already taken. Setting it up is free, but every click of Done costs 30 generative credits, and the relit layer comes back at a lower resolution than the original, so our tutorial sets it to Lighten over the sharp photo.
- Add glows and flares. The PRO course Advanced Lighting Effects in Photoshop covers cinematic glows built from the light already in the photo, sun flares and skin glow. A rim light that wasn’t there is still best made on the day.
For light and composition together, the PRO course Fundamentals of Composition & Light in Photoshop works through nine landscape scenarios, and its low-flow dodging in Camera Raw works the same way on a face.
Practice With One Light
The fastest way to learn the portrait lighting patterns is to make all six in one sitting. Sit someone by a window, or put one lamp on a stand. Start with the light straight in front and take a photo. Move it a step to the side and take another. Keep going until it is behind them. In ten minutes you will have made every pattern in this guide, and you will know the names for what you are seeing.
Free with PHLEARN

This guide as a 6-page PDF
Every step and setting, ready to print.
With a free PHLEARN account.
In this article
- The Only Three Things You Are Changing
- How High Should the Light Be?
- 1. Flat Lighting
- 2. Butterfly Lighting
- 3. Loop Lighting
- 4. Rembrandt Lighting
- 5. Split Lighting
- 6. Rim Lighting
- Broad and Short Lighting
- Making the Patterns With a Window
- Main, Fill and Accent: What Each Light Is For
- How to Read the Lighting in Any Portrait
- Which Pattern for Which Face?
- Five Mistakes to Watch For
- Common Questions About Portrait Lighting Patterns
- Shaping the Light Afterwards in Photoshop
- Practice With One Light
Free with PHLEARN
This guide as a 6-page PDF
Every step and setting, ready to print.
With a free PHLEARN account.

Related articles