

Download Assets
Download Assets
This tutorial includes 2 sample RAW files and 1 Lightroom preset. Downloads are free with a PHLEARN account.
- Free sample files with every tutorial on PHLEARN
- New tutorials published every week
- Unlimited downloads with your free PHLEARN account
Watch the Full Series
description
Save a preset in Lightroom and it can carry far more than the basic sliders. What is less obvious is how much one can carry — color grading, and even masks that re-target themselves to each new image.
On Day 12 of 30 Days of Lightroom Classic we build a preset from scratch, cover the one dialog choice that decides whether it helps or overwrites your work, and export it as a shareable file.
This is Day 12 of our 30 Days of Lightroom Classic series. Follow along with all 30 episodes as we explore the magic of Lightroom together!
Continue Watching 30 Days of Lightroom Classic
JOIN 30 DAYS OF LIGHTROOM (FOR FREE!)
Ready to jump in? Sign up and we’ll email you a printable calendar and daily class schedule so you can get started right away!
Image Source

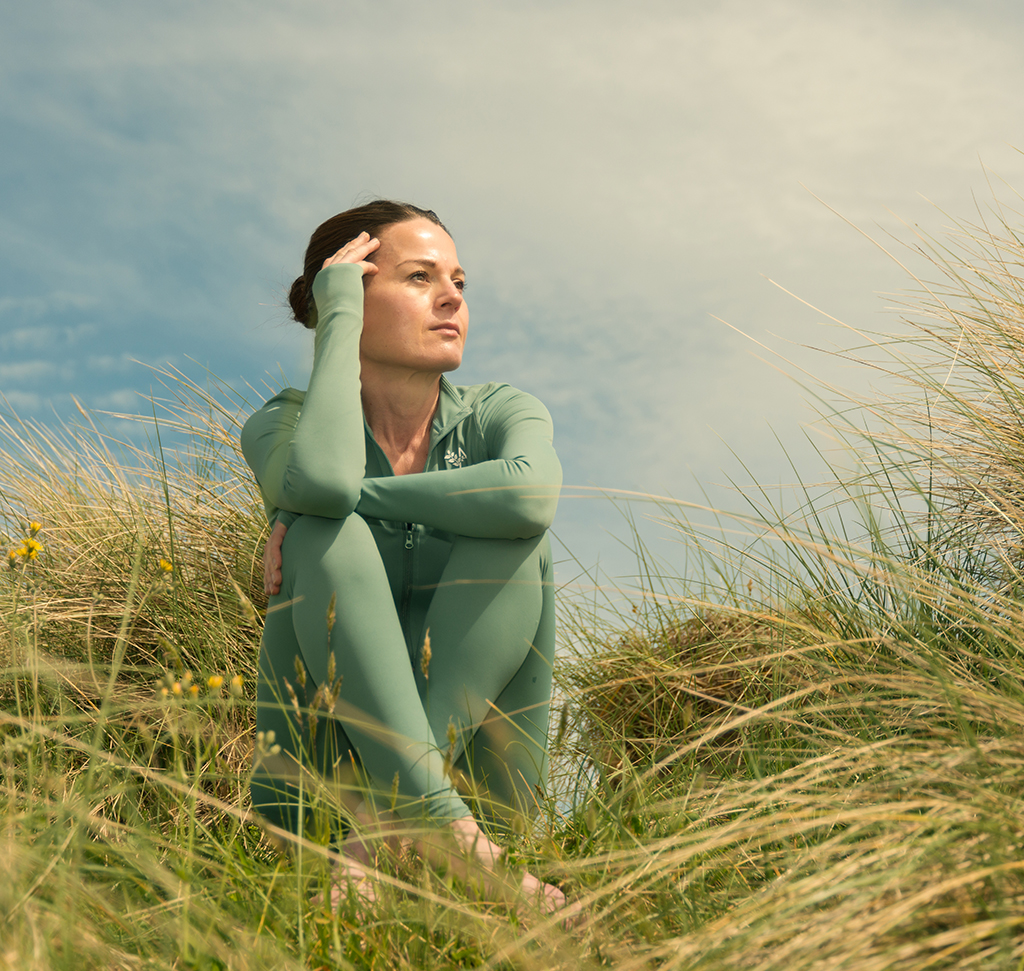
A Preset Can Carry Its Masks With It
A preset is a saved edit you can drop onto any photograph. That much most people know. What is less obvious is how much a preset can actually contain — not just exposure and color, but color grading and even masks, which re-target themselves to each new image.
Day 12 builds a preset from scratch, covers the one dialog choice that decides whether it is useful or destructive, and looks at exporting presets as files you can share or sell.
Build the Edit First
A preset is just a recording of an edit, so start by making one you like. The example here is a warm summer look, built from three layers:
Basic adjustments. Temperature pushed warmer, shadows lifted, a little Vibrance.
A mask. A radial gradient dragged in from the top of the frame, with exposure and temperature raised inside it to warm the sky.
Color grading. Midtones nudged towards greenish yellow, shadows towards green. Barely there.
Keep it subtle
This is the single most useful piece of advice about preset building. A strong edit is tuned to one photograph — its exposure, its colors, its light. Move it to another image shot in different conditions and it falls apart.
Subtle presets travel. And because every preset applies with an Amount slider, a gentle one can always be pushed harder on an image that suits it. The reverse is not true.
Saving It — and the Checkbox That Matters
Click the plus icon at the top of the Presets panel in the Develop module and choose Create Preset.

Name it something you will recognise later — “Warm Summer Day” beats “Preset 4” — and pick a group, normally User Presets.
Then the important part: the long list of checkboxes deciding what the preset carries.
Tick only what you actually changed. Everything is selected by default, including Exposure, Contrast and White Balance. Leave them all ticked and your preset does not just add a look — it overwrites the tonal work already done on whatever photo you apply it to. Correct a dark image, apply your preset, and the exposure snaps back to whatever it was on the photo the preset was made from.
For this example that means ticking white balance, contrast, shadows, vibrance, color grading and masking — and nothing else. Clicking Check None first and then selecting deliberately is the safest habit.
Applying It
Presets are reachable from both modules. In Develop they sit in the left panel; in Library there is a Preset dropdown in the Quick Develop panel, which is convenient for applying a look across a shoot without leaving the grid.
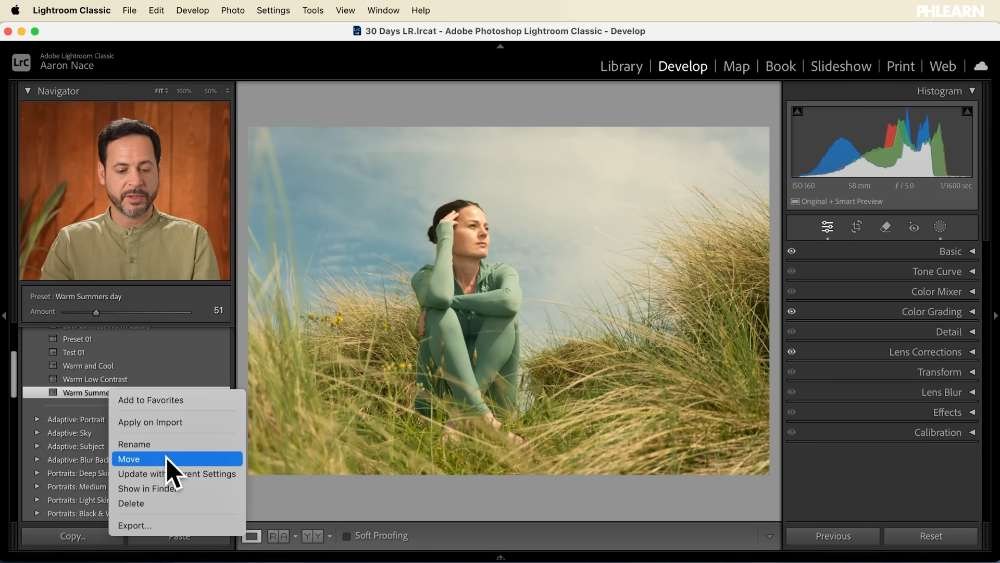
Hovering a preset previews it in the Navigator before you commit. Once applied, the Amount slider appears above the preset list, letting you scale the whole thing up or down. If a look is nearly right but too strong for a particular photo, that slider is the answer rather than editing individual settings.
Masks come with it, and stay editable
This is the part that surprises people. A preset containing a mask brings the mask across, and it remains a live mask — you can select it, move it, resize it.
Better still, masks built on selections rather than shapes re-target themselves. A preset containing a Select Subject mask will find the subject in each new photograph, which makes it possible to build a preset that brightens whoever happens to be in the frame.
Presets Are Just Files
Right-click any preset and choose Show in Finder (or Explorer) and you will find a small .xmp file. That is the whole preset.
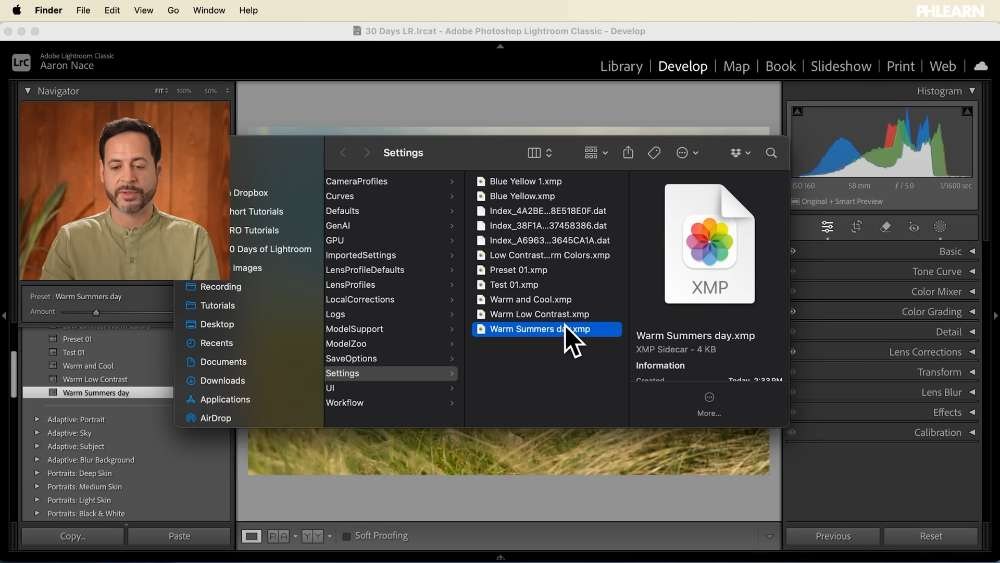
Which means presets can be shared like any other file. Zip up ten of them and you have a pack — plenty of photographers sell these, and it is a genuine side income. Giving them away works just as well if that is more your style.
Importing is the reverse: the plus icon on the Presets panel has an Import Presets option, or you can drag XMP files straight onto the panel. If a preset is already installed, Lightroom will tell you rather than duplicating it.
Where This Usually Goes Wrong
Leaving every box ticked. The mistake that makes presets feel broken. If applying a preset ruins your exposure, this is why.
Building the preset too strong. It will look brilliant on the photo you made it from and wrong on everything else.
Expecting a preset to be a finished edit. It is a starting point. Different light needs different exposure, whatever look sits on top.
Vague names. Twenty presets in, “Warm Low Contrast” is findable and “Preset 7” is not.
Take It From Here
Presets are how a consistent style stops being something you rebuild by hand on every photograph. Build them subtle, include only what you meant to, and they will hold up across shoots that have nothing else in common.
Tomorrow we look at what you are actually editing: RAW versus JPEG in Lightroom Classic.
Quick Reference: Keys, Menus and Settings
- Warm the photoDevelop, Basic panel: Temperature warmer, Shadows up, Vibrance up
- Warm the skyMasking > Radial Gradient dragged from the top; raise Exposure and Temperature inside it
- Color gradeColor Grading: Midtones toward greenish yellow, Shadows toward green, kept subtle
- Save the presetPresets panel plus icon > Create Preset; Group: User Presets; tick only what you changed
- Apply itDevelop Presets panel, or Library > Quick Develop > Preset; Amount slider to scale it; Cmd/Ctrl + Z to undo
- Find the fileRight-click the preset > Show in Finder (Explorer); it is an .xmp file
- Import presetsPresets panel plus icon > Import Presets, or drag XMP files onto the panel
Masks built on Select Subject find the subject again in each photo you apply the preset to.
Free Downloads
Follow Along on the Same RAW Files
Get the 2 RAW files from the tutorial plus the finished Warm Summer Day preset as an XMP file, mask and color grade included. Free with a PHLEARN account.
Lightroom Presets: Common Questions
How do I create a preset in Lightroom Classic?
Edit a photo first. Then in the Develop module, click the plus icon on the Presets panel, choose Create Preset, name it, pick a group such as User Presets, tick the settings to include and click Create.
Can a Lightroom preset include masks?
Yes. Tick Masking when you save it and the mask comes across as a live mask you can select and move. Masks built on Select Subject find the subject in each new photo.
Why did my preset change the exposure I already fixed?
Every setting was ticked when you saved it, so it overwrites the photo’s own exposure and contrast. Tick only the settings you actually changed; clicking Check None first is the safest habit.
Why does my preset look wrong on other photos?
A strong edit is tuned to one photo’s light and colors. Keep presets subtle so they travel, then push them harder on the photos that suit it.
How do I make a preset weaker or stronger?
After you apply it, an Amount slider appears above the preset list. Drag it down for a softer look or up to strengthen it.
Can I apply a preset without going to Develop?
Yes. In the Library module, open the Preset dropdown in the Quick Develop panel and choose it from User Presets.
Where are my Lightroom presets saved?
Right-click the preset and choose Show in Finder (Show in Explorer on Windows). Each preset is a small .xmp file.
How do I import presets into Lightroom Classic?
Click the plus icon on the Presets panel and choose Import Presets, or drag the XMP files onto the panel. If a preset is already installed, Lightroom tells you instead of adding a duplicate.
Can I sell or share my presets?
Yes. Because presets are just XMP files, you can zip a set together as a pack and sell it or give it away.
Are the sample files free?
Yes, with a free PHLEARN account. You get 2 sample RAW files and 1 Lightroom preset: the Warm Summer Day preset built in the tutorial, as an XMP file.
Master Photoshop, Lightroom and Photography
Join PHLEARN PRO for $12.99 a month or $99.99 a year. Cancel anytime, with a 100% money-back guarantee.





