
Download Assets
Download Assets
This tutorial includes 1 sample RAW file. Downloads are free with a PHLEARN account.
- Free sample files with every tutorial on PHLEARN
- New tutorials published every week
- Unlimited downloads with your free PHLEARN account
Watch the Full Series
description
Editing landscapes follows the same principle as portraits: decide where the viewer should look, then make everything else quieter. A landscape just gives you more to manage.
On Day 16 of 30 Days of Lightroom Classic we recover a bright sky with a gradient, build a focal point around a waterfall, and use Intersect — the most precise way to combine two masks.
This is Day 16 of our 30 Days of Lightroom Classic series. Follow along with all 30 episodes as we explore the magic of Lightroom together!
Continue Watching 30 Days of Lightroom Classic
JOIN 30 DAYS OF LIGHTROOM (FOR FREE!)
Ready to jump in? Sign up and we’ll email you a printable calendar and daily class schedule so you can get started right away!
Image Source


Landscapes Are About Deciding Where the Viewer Looks
Landscapes and portraits are edited on the same principle: decide where you want the viewer to look, then make everything else quieter. A landscape just gives you more surface area to manage — a sky that is brighter than the land, rocks pulling attention from the water, a background more saturated than the foreground.
Day 16 works through a long-exposure waterfall using nothing but masks, and introduces the third way of combining them — Intersect — which is the most precise selection tool in Lightroom Classic.
The Shot Behind the Edit
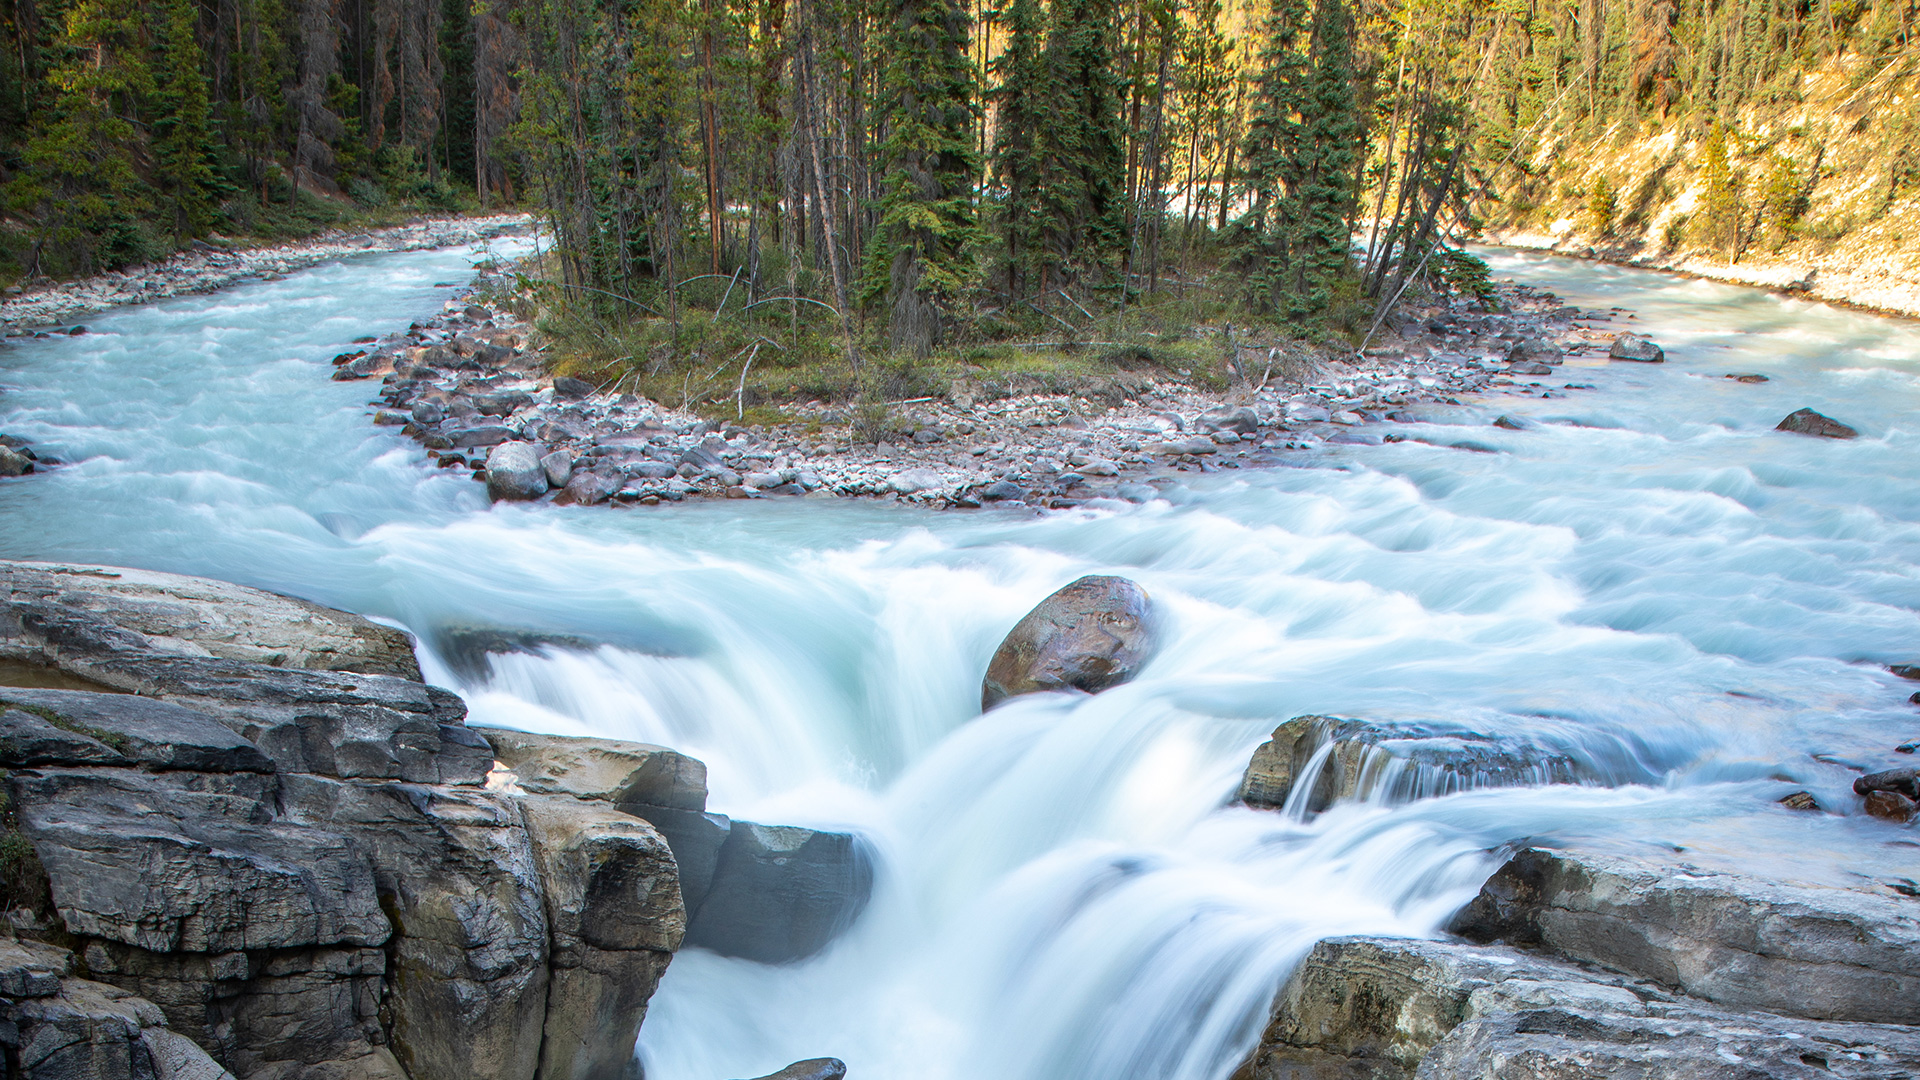
The silky water in this frame is a camera decision, not an edit. The metadata reads 0.4 seconds at f/16, ISO 50.
The logic is a balance. A long shutter speed lets in a great deal of light, so the aperture is closed down to f/16 and the ISO dropped to 50 to let in less. The three settings cancel out to a correct exposure while the shutter stays open long enough to blur anything moving. A tripod is not optional — everything static has to stay perfectly still while the water moves.
Auto First, Then Find What It Missed
Auto gets the global tones close immediately. What it cannot do is fix one bright corner, and on this frame the top right is still overexposed after it runs.
That is the pattern for landscapes generally: Auto handles the whole frame, and everything after it is local.
Recovering a Bright Sky — Highlights, Not Exposure
The instinct with a blown corner is a linear gradient with the Exposure slider pulled down. It half-works, and the half that fails matters.

Exposure darkens everything inside the gradient. The bright sky comes down, and so do the trees underneath it, which were already correctly exposed and now look muddy.
Use the Highlights slider instead. It only affects the brightest values in the mask, so the sky recovers while the trees stay where they were. This is the single most useful habit in landscape editing: inside a gradient, reach for Highlights and Shadows before Exposure.
A second pass with a low-flow brush along the shoreline, dropping exposure and highlights slightly, finishes anything the gradient could not reach without a visible edge.
Build a Focal Point
Every photograph needs one place for the eye to settle. Once the exposure is even, nothing is competing — which means nothing is winning either.
A radial gradient over the waterfall, with exposure, contrast and saturation raised slightly inside it, creates that focus. Drag the gradient around while watching and you can feel your attention follow it, which is a useful way to decide where it belongs.
Then reverse the idea on the competition: a brush mask over the rocks with exposure and shadows pulled down, and another over the water with saturation and contrast raised. Neither is a large move. The eye ends up at the waterfall because everything around it stepped back.
Subtracting to Protect a Bright Area
Brightening a whole central region with a radial gradient often overexposes the one part that was already bright enough.

Rather than shrinking the gradient, subtract a brush from it and paint out the area you want protected. You keep the broad, soft lift everywhere else and carve a hole exactly where it was too much.
Matching Colors in the Distance
A background that is a different color from the foreground pulls the eye backwards. Brushing a mask over the far bank and using Point Color inside it to shift a yellow-green towards green brings the two into agreement, and the depth of the frame settles.
This is worth noticing as a general move: color disagreement attracts attention just as strongly as brightness does, and it is easier to fix.
Intersect: the Most Precise Selection
The last technique is the most powerful, and it answers a problem the other two cannot.
The goal here is to lift only the highlights on the rocks. A luminance range selects highlights — but every highlight in the frame, including the waterfall. A brush selects the rocks — but all of them, bright and dark alike. Neither alone is right.

Create a Luminance Range mask and set it to the highlights. Then click the three dots on that mask and choose Intersect Mask With > Brush. Now paint over the rocks.
The result is only the pixels that are in both selections — bright and painted. Lifting the exposure inside that puts a delicate sparkle on the rock highlights and nowhere else.
Add, Subtract and Intersect together are what make Lightroom masking genuinely precise:
Add — in either selection. Subtract — in the first but not the second. Intersect — in both at once. Intersect is the one people never discover, and it is the one that solves “I want this kind of area, but only over here”.
Alt or Option while brushing erases, as always, if the intersection catches somewhere it should not.
Checking the Result
The Y icons at the bottom right give you a side-by-side before and after. On a landscape edited entirely with small local moves this is worth doing, because no single adjustment was large and the cumulative effect is easy to underestimate.
Where This Usually Goes Wrong
Using Exposure in a gradient. It flattens everything under it. Highlights and Shadows are almost always the better controls inside a mask.
Evening out the exposure and stopping. A perfectly balanced frame with no focal point is a boring photograph. Deliberately make one area brighter than the rest.
Brushing at full flow. Landscapes are full of soft gradients — sky, water, mist. Low flow and high feather keep brushwork invisible.
Reaching for Subtract when you want Intersect. If the sentence in your head is “this type of area, but only in this region”, the answer is Intersect.
Over-saturating water. It goes turquoise and fake faster than any other subject. Contrast usually does what you actually wanted.
Take It From Here
This edit contained no dramatic adjustments — a recovered corner, a brighter waterfall, some darker rocks, a background brought into agreement, and a little sparkle on wet stone. Landscape editing is almost entirely the accumulation of small decisions about where the eye should go.
Tomorrow we take the same thinking to a much less forgiving deadline: editing wedding photos in Lightroom Classic.
For landscape and travel editing taught in order, our PRO Landscape & Travel Editing Learning Path is where to go next.
Quick Reference: Keys, Menus and Settings
- StartDevelop, Basic panel > Auto
- Recover a bright cornerMasking > Linear Gradient, pull Highlights down rather than Exposure
- Build a focal pointRadial Gradient on the waterfall: Exposure, Contrast and Saturation up a little
- Protect a bright spotOn the mask, Subtract > Brush and paint the spot out
- Match distant colorBrush mask, Point Color: sample the color, shift Hue toward green
- Rock highlights onlyLuminance Range set to highlights, three dots > Intersect Mask With > Brush; Alt/Option to erase
- CompareY|Y icon at the bottom right for before and after side by side

Free Downloads
Follow Along on the Same RAW File
Get the long-exposure waterfall RAW file from the tutorial, with a bright corner to recover and a focal point to build with masks. Free with a PHLEARN account.
Landscape Editing in Lightroom: Common Questions
How do I get silky water in a waterfall photo?
Use a long shutter speed on a tripod. This photo was shot at 0.4 seconds, with f/16 and ISO 50 letting in less light so the exposure still balances.
How do I fix a bright sky without darkening the trees?
Drag a linear gradient over the bright area and lower Highlights instead of Exposure. Exposure darkens everything in the gradient; Highlights only pulls down the brightest parts.
How do I create a focal point in a landscape?
Put a radial gradient over the area you want people to look at and raise Exposure, Contrast and Saturation a little. Then brush over competing areas, like the rocks, and bring their Exposure and Shadows down slightly.
How do I brush a mask without visible edges?
Lower the brush Flow so the effect builds up as you paint over an area again. A soft, low-flow stroke along the shoreline blends in naturally.
My radial gradient made one spot too bright. How do I fix it?
On that mask, choose Subtract and pick the Brush, then paint over the spot. You keep the lift everywhere else and remove it only where it was too much.
How do I match the background color to the foreground?
Brush a mask over the background, open Point Color, sample the color and shift its Hue. In the tutorial a yellowish green in the distance is moved toward the greener foreground.
What does Intersect do in Lightroom masking?
It keeps only the area that is in both selections. A Luminance Range set to the highlights, intersected with a brush painted on the rocks, brightens only the bright parts of the rocks.
What is the difference between Add, Subtract and Intersect?
Add covers anything in either selection. Subtract removes the second selection from the first. Intersect keeps only what is in both at once.
How do I see a side-by-side before and after?
Click the Y|Y icon at the bottom right of the Develop module. The before shows on the left and the after on the right.
Is the sample file free?
Yes, with a free PHLEARN account. You get 1 sample RAW file: the long-exposure waterfall edited in the tutorial.
Master Photoshop, Lightroom and Photography
Join PHLEARN PRO for $12.99 a month or $99.99 a year. Cancel anytime, with a 100% money-back guarantee.





