
Download sample images
Download Assets
This tutorial includes sample images and a PDF guide. Downloads are free with a PHLEARN account.
- Free sample files with every tutorial on PHLEARN
- New tutorials published every week
- Unlimited downloads with your free PHLEARN account
Watch the Full Series
Description
2020 Edition
This lesson is from the original 30 Days of Photoshop. Photoshop has changed a great deal since — there is an updated version of this lesson in the 2025 Edition: How to Use Select Subject in Photoshop, Day 9.
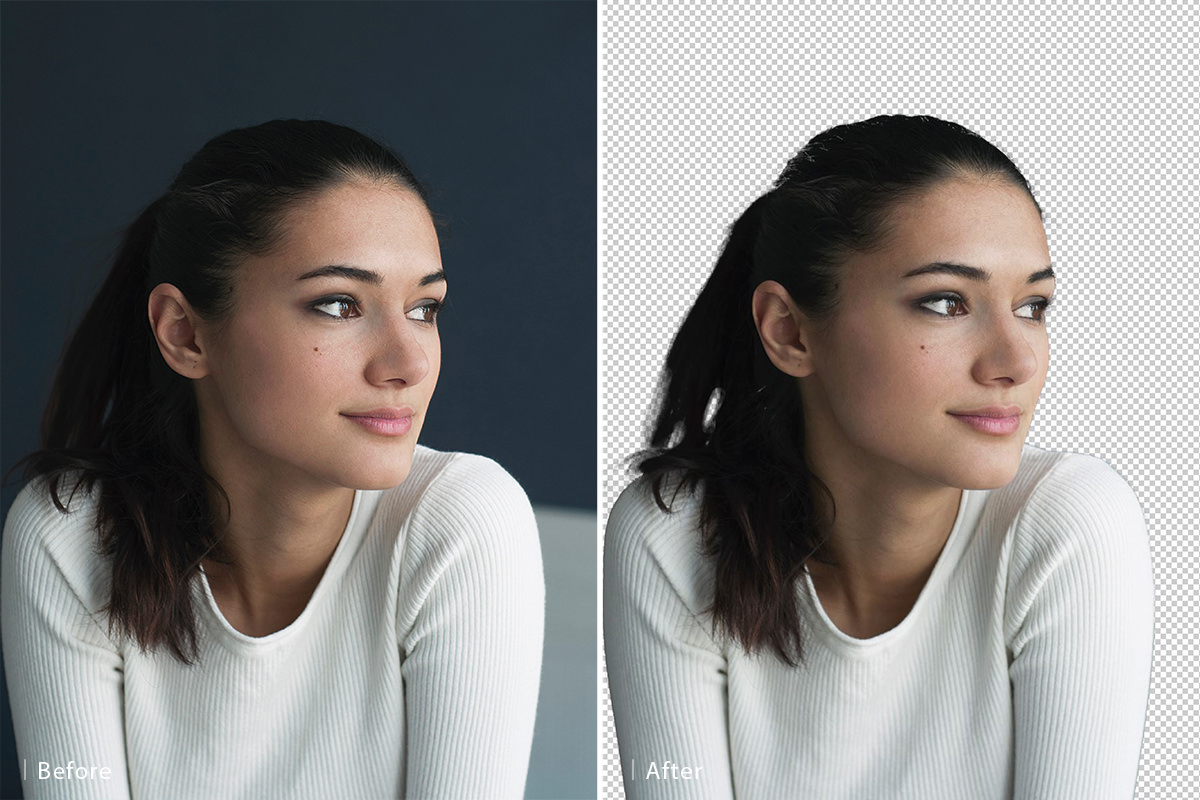
Selections allow you to cut people or objects out from their backgrounds, or define very specific areas of a photo that you want to edit. Learn about the major selection tools and how to use them to remove a background and create other great effects!
This is Day 5 of our 30 Days of Photoshop series. Follow along with all 30 episodes as we explore the the magic of Photoshop together!
Continue Watching 30 Days of Photoshop
Enjoying This Free Tutorial?
We publish a new free tutorial every week, each one with sample images and PSDs you can download and follow along with. Sign up and they land straight in your inbox, along with early word on sales, events and subscriber-only offers.
The Key to Cut-Outs
A selection tells Photoshop where it is allowed to work. Make one and every edit that follows — a fill, an adjustment layer, a brush stroke, a delete — lands only inside that boundary and leaves the rest of the image alone. That is the whole concept, and almost every cut-out, every recolour and every local adjustment in Photoshop starts with one.
There are a lot of selection tools, and none of them is the right answer on its own. This lesson goes through all of them on one portrait, cuts the subject out of her background, then uses simple selections to brighten her eyes and add colour to her lips.
Selections and Layers Are Independent
This trips people up early, so it is worth stating plainly: a live selection stays active no matter which layer you click on. Draw a rectangle, switch to a different layer, and the selection is still there waiting.
So the workflow is two decisions, not one. The selection decides where. The active layer decides what gets changed. Fill a selection with white on one layer, then click a different layer and fill the same selection with grey, and you have two independent pieces of artwork from one boundary.
The Marquee Tools
Click and hold the marquee icon and you get Rectangular, Elliptical, Single Row and Single Column. Drag to draw, then Edit > Fill to fill it, and Ctrl/Cmd + D to deselect.
Modifier Keys That Change Everything
These work on every selection tool, not just the marquee. Hold spacebar mid-drag to reposition a selection while you are still drawing it. Hold Shift before you start to constrain to a square or circle. Hold Shift to add to an existing selection — a small plus appears by the cursor. Hold Alt/Option to subtract, and you get a minus.
You can also switch tools mid-selection. Start a rectangle, add an ellipse with Shift, subtract another rectangle with Alt — the selection is cumulative and does not care which tool built each part.
The Lasso Tools
Lasso and Polygonal Lasso
The plain Lasso draws freehand, which is fluid but hard to be accurate with. The Polygonal Lasso clicks point to point in straight lines, which is far better for architecture than for people.
The useful trick: hold Alt/Option while using either one and it temporarily becomes the other. Release and it switches back. You can trace a curve freehand, hold Alt for a straight run down a shoulder, and release to carry on freehand.
Magnetic Lasso
Click once and move the cursor along an edge; it snaps to the contrast it finds. Press Backspace to undo the last point if it wanders, and double-click to close the selection. It does well on clean edges like a shirt and struggles badly on hair.
Magic Wand and Quick Selection
The Magic Wand selects everything similar to whatever you click. If it grabs too much, drop the Tolerance in the options bar — around 15 on this image stops it bleeding into the subject — and Shift-click to add the areas it missed.
The Quick Selection tool is a brush: paint roughly and it expands to what it judges to be the same region. Alt/Option-drag to pull areas back out. It is usually the faster of the two on a person.
Both often select the background rather than the subject. That is not a problem — load it into a layer mask and press Ctrl/Cmd + I to invert.
Color Range
Under Select > Color Range, this selects by colour across the whole image rather than by region.
Set the preview to Grayscale — light areas are selected, dark areas are not, and it is far easier to judge than the default. Click the background with the eyedropper, use the plus eyedropper to add more of it, and pull Fuzziness down until the selection tightens onto just the background without eating into the subject.
Cleaning Up a Mask With Selections and Fills
No single tool gets a person cut out perfectly. The finishing work is done on the mask itself, and it is faster than it sounds.
-
View the Mask on Its Own
Hold Alt/Option and click the layer mask thumbnail. The canvas shows the mask in black and white, which makes every mistake obvious.
-
Lasso the Area That Is Wrong
Draw round a patch that should be solid black or solid white. Hold Alt/Option mid-draw for straight edges.
-
Fill It With Shift + Delete
Shift + Delete opens the Fill dialog. Choose white to reveal that area, black to hide it. This is far quicker and cleaner than brushing.
-
Repeat Around the Edge
Work round the subject filling the obvious errors. A few passes gets a rough automatic selection to something genuinely usable.
Select and Mask for the Edge
The hardest part of any cut-out is the transition, and Select and Mask exists for exactly that. It is in the options bar whenever a selection tool is active, or under Select > Select and Mask.
Inside, the Refine Edge brush is the one that matters. Paint along the boundary — especially around hair — and Photoshop works out the difference between skin, hair and background at a level of detail no manual selection reaches. Set the view to Overlay to judge it, and output to a layer mask.
Select Subject
Select > Subject uses AI to find the person and select them in one move. On this image it does a decent job in about a second — not perfect, but a better starting point than any of the manual tools, and it takes a fraction of the time. Clean up the result with the fill technique above and follow with Select and Mask on the edge.
Editing Inside a Selection
Brightening the Eyes
Draw an elliptical selection around the iris, then add a Curves adjustment layer. Because a selection was live, the adjustment arrives already masked to that area — lift the curve and only the eye brightens. Paint a little black on the mask if the edge reads hard.
Colouring the Lips
Lasso around the lips and add a Solid Color fill layer. Set its blending mode to Soft Light so it tints rather than covers, then Filter > Blur > Gaussian Blur on the mask to soften the edge. Double-click the fill layer’s swatch at any point to change the colour.
Save a Selection You Worked Hard For
If a selection took real effort, do not throw it away with Ctrl/Cmd + D. Select > Save Selection, give it a name, and it is stored in the document. Select > Load Selection brings it back — five minutes or five years later.
Two related shortcuts worth having. Ctrl/Cmd + click any layer thumbnail turns that layer’s contents into a selection — including type layers, which is how you load text as a selection and then fill it with a gradient. And Ctrl/Cmd + H hides the marching ants without deselecting, so you can see what you are doing while the selection stays live.
Cut Out Your Own Subject
Download the sample image and try the same subject four ways: Magnetic Lasso, Magic Wand with a low tolerance, Quick Selection, and Select Subject. Compare how long each takes and where each fails. Then take the best one, clean the mask with lasso-and-fill, and finish the hair with the Refine Edge brush in Select and Mask.
Tomorrow, Classic Day 6 covers Levels and Curves. The Pen tool, the most precise selection tool of all, gets its own lesson on Classic Day 26, and cutting out hair specifically is Classic Day 27. For how this is done with current AI selection, see Day 9 of the 2025 Edition.
Related Tutorials
Master Photoshop, Lightroom and Photography
Join PHLEARN PRO for $12.99 a month or $99.99 a year. Cancel anytime, with a 100% money-back guarantee.





