


Download Assets
This tutorial includes 1 sample image, 1 sample PSD and 1 PDF guide. Downloads are free with a PHLEARN account.
- Download the sample images and PSDs from every free tutorial on PHLEARN
- New free tutorials published every week
- One free account — sign up once, then download anything
Free PDF Guide · 3 Pages
This Tutorial as a Step-by-Step PDF
The guide walks through setting up the Brush with Hardness 0, Opacity 100% and a low Flow, building a 50% gray noise layer as a Smart Object on Soft Light with Add Noise, matching it with Gaussian Blur, Hue/Saturation and Levels, clipping it to the paint and masking the subject. Keep it next to your keyboard.
description
Learn an advanced object removal technique in Photoshop that works by painting instead of healing. On soft, out-of-focus backgrounds the Spot Healing Brush leaves a blotchy mess, so this tutorial uses the Brush tool at a low flow to paint people and objects away, then builds a reusable noise layer (50% gray Smart Object, Soft Light, Add Noise) clipped to the paint so every stroke carries matching grain. Finish with Select Subject and a mask to protect your subject.
Enjoying This Free Tutorial?
We publish a new free tutorial every week, each one with sample images and PSDs you can download and follow along with. Sign up and they land straight in your inbox, along with early word on sales, events and subscriber-only offers.
Image Source
Photo by Dorina Stati via Pexels


How to Remove Objects by Painting in Photoshop
Out-of-focus background clutter — a stray passerby, a distracting shape, an odd bit of clothing — is one of the hardest things to remove cleanly, because tools built for sharp detail tend to fall apart on soft, textureless areas. This tutorial covers a more advanced painting-based technique: building a reusable noise layer that matches your photo’s grain, then simply painting people and objects away with the brush tool.
Why the Spot Healing Brush Falls Short Here
The natural first instinct for object removal is the Spot Healing Brush (J), and it’s genuinely one of the best tools available for areas with a lot of fine detail. Painting it directly over a person standing in an out-of-focus background, though, produces a blotchy, unnatural mess — the tool keeps sampling nearby detail and blending it in ways that don’t hold together in soft, low-detail areas.
When a Softer Effect Calls for a Different Tool
Backgrounds that are already soft and out of focus don’t need a detail-matching tool at all — they need a soft, even fill. That’s exactly what the Brush tool (B) is built for, which makes it a better fit here than any of Photoshop’s automated healing tools.
Setting Up the Brush Tool for Removal
Start on a new empty layer and select the Brush tool with B. Right-click on the canvas to set brush size (the bracket keys, [ and ], also resize it on the fly) and set hardness to 0 for a soft edge; a smaller, harder brush can stand in for a hard edge when one is needed. Keep brush opacity at 100% throughout — flow is what actually controls how the paint builds up.
Using Brush Flow to Build Up Color Naturally
Flow, not opacity, is the setting that makes hand-painted removal look natural. Sample a color from the image and paint at a high flow, like 70%, and the color shows up strong and flat immediately. Drop flow down to around 10% — the number keys with Shift held (Shift+1 through Shift+0) set brush flow directly — and each stroke lays down only a light layer of color. Painting over the same spot repeatedly then builds the color up gradually, the same way it would build up in a real photograph.
The Problem With Flat Painted Color
Even with flow dialed in, a straight paint job on a new layer removes the object but leaves the area looking flat and plastic compared to the surrounding photo. The reason is grain: real photographs carry a layer of fine noise and texture everywhere, and a freshly painted area has none of it, which makes the retouch visible even from a distance.
Building a Reusable Noise Layer
The noise problem has a clean, reusable fix. Rather than adding noise directly to the paint, build a separate noise layer that can be matched to the photo once and then reused anywhere.
-
Fill a New Layer With 50% Gray
Create a new blank layer named “noise,” then go to Edit > Fill and set Contents to 50% Gray. A flat gray layer alone doesn’t do anything useful yet, but it’s the base the noise filter needs — a filter can’t add texture to a truly empty layer.
-
Convert the Layer to a Smart Object
Right-click the gray layer and choose Convert to Smart Object. This makes every filter applied afterward a Smart Filter, which can be reopened and adjusted at any time instead of being baked in permanently.
-
Change the Blend Mode to Soft Light
Change the layer’s blend mode from Normal to Soft Light. A 50% gray layer in Soft Light mode becomes invisible on its own — toggling it on and off at this stage shows no visible change, confirming the gray itself is contributing nothing but a neutral base.
-
Apply the Add Noise Filter
Go to Filter > Noise > Add Noise and apply a strong amount at first, just to see the effect clearly, before dialing it back in. Because the layer is a Smart Object, Add Noise now lives as an editable Smart Filter that can be reopened and adjusted as many times as needed.
Matching the Fake Noise to the Real Photo
A freshly generated noise layer is almost always too colorful and too sharp compared to a real photograph’s grain. Double-click the Add Noise Smart Filter to lower its amount, then add a small Gaussian Blur (Filter > Blur > Gaussian Blur) of only 0.1 to 0.4 pixels to soften it, and use Hue/Saturation (Cmd/Ctrl+U) to desaturate the color out of it. A small Levels boost (Cmd/Ctrl+L) can also help the contrast of the fake grain read closer to the original. All of these live as Smart Filters, so they can be nudged repeatedly while comparing against the real photo until the two are hard to tell apart.
Clipping the Noise Layer to the Paint Layer
The noise only needs to be visible where new paint is actually going down, not across the whole image. Right-click the noise layer and choose Create Clipping Mask so it clips to the paint layer directly below it. From that point on, painting on the paint layer automatically reveals matching noise wherever a stroke lands — a single brush stroke of flat color instantly reads as photographic texture, because the grain is baked into the setup rather than applied separately for every stroke.
Painting Over the Subject and Masking It Back In
Trying to paint right up to the exact edge of a subject usually leaves a visible, unnatural line. It works better to paint straight over the edge of the subject itself and clean that up afterward with a mask, rather than fighting for pixel-perfect precision with the brush.
-
Select the Subject
Temporarily hide the paint layer, select the background layer, and go to Select > Subject to generate an automatic selection of the person or subject in the shot.
-
Add a Mask and Invert It
With the paint layer active, click the Layer Mask icon to add a mask from that selection, then press Cmd/Ctrl+I to invert it if the mask comes in backward. The result hides the painted noise-and-color layer from the subject itself while keeping it visible everywhere else.
Why Painting Over the Subject Works Better Than Painting Around It
Once the mask is set up correctly, the brush can be dragged freely across the whole background — including over the subject — without any risk of affecting them, because the mask is already protecting that area. That removes the pressure to paint precisely and lets the retouching focus entirely on making the background look convincing.
Painting Straight Lines and Fine Detail
Hold Shift while painting to constrain a stroke to a straight vertical or horizontal line — useful for recreating architectural edges like a door frame or wall line that a removed object was covering. For finer detail like stray hair, sample a few different nearby hair tones rather than one flat color, since real hair is never a single uniform shade, and paint it back in with short, light strokes.
Zoom Out to Judge the Whole Image
It helps to avoid working too zoomed in throughout this process. Judging the retouch at something closer to full-image view makes the painted areas easier to blend convincingly, since small inconsistencies that stand out at high zoom often disappear entirely once the image is viewed as a whole.
Why This Noise-Matching Technique Works
The Spot Healing Brush and other automated tools rely on sampling nearby detail, which is exactly what makes them struggle on soft, low-detail backgrounds — there’s nothing reliable nearby for them to borrow from. Painting by hand sidesteps that problem entirely, and the reusable noise layer solves the one thing hand-painting is usually missing: photographic grain. Because the noise lives on its own Smart Object layer, clipped to the paint below it, every new brush stroke automatically inherits texture that’s already been matched to the photo, instead of looking like flat digital paint.
Final Thoughts
This is a more advanced technique than a simple healing-tool click, but it’s a genuinely useful one to have in your retouching toolkit for exactly the situations where the automated tools break down: soft, out-of-focus backgrounds with distracting people or objects in them. Once the noise layer is set up and clipped to your paint layer, object removal becomes as simple as picking a color and painting, with the texture matching taken care of automatically.
Quick Reference: Keys, Menus and Settings
- Set up the brushB on a new layer; [ and ] to size it; Hardness 0, Opacity 100%
- Flow and colorShift + 1 for 10% Flow; Alt/Option-click to sample a color
- Build the noise layerEdit > Fill, Contents: 50% Gray; right-click > Convert to Smart Object; blend mode Soft Light
- Add and clip the grainFilter > Noise > Add Noise, then right-click > Create Clipping Mask onto the paint layer
- Match the grainFilter > Blur > Gaussian Blur 0.1 to 0.4 px; Cmd/Ctrl + U lower Saturation; Cmd/Ctrl + L a little contrast
- Protect the subjectSelect > Subject, Layer Mask icon on the paint layer, Cmd/Ctrl + I to invert
- Lines and hairHold Shift while painting for straight lines; R rotates the canvas
No generative credits: everything here is painted with the Brush tool.
Free Downloads
Follow Along on the Same Photo
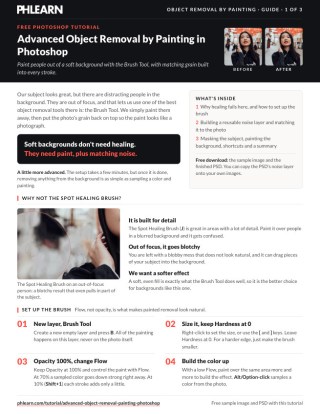
Get the street portrait with the distracting people behind her, the finished PSD with its reusable noise layer and the 3-page PDF guide. Free with a PHLEARN account.
Object Removal by Painting: Common Questions
Why use the Brush tool instead of the Spot Healing Brush?
The Spot Healing Brush (J) is great where there is a lot of detail, but over people in an out-of-focus background it leaves a blotchy mess and can pull in part of the subject. A soft background needs a soft, even fill, which is what the Brush tool does well.
What brush settings work best for painting out objects?
Paint on a new empty layer with the Brush tool (B). Right-click or use the [ and ] keys to size it, leave Hardness at 0, keep Opacity at 100% and control the paint with Flow.
How do I change brush flow quickly?
Hold Shift and press a number key: Shift + 1 sets Flow to 10%. The number keys alone change Opacity. At a low Flow, paint over the same area again and again to build the color up.
Why does my painted area look flat and fake?
Paint is perfectly smooth, while the photo next to it has fine grain and noise. That missing texture gives the retouch away, so you add matching noise on its own layer.
How do I make a noise layer in Photoshop?
Make a new layer called noise above the paint layer, go to Edit > Fill and choose 50% Gray. Right-click it and choose Convert to Smart Object, set the blend mode to Soft Light, then go to Filter > Noise > Add Noise.
How do I match the fake noise to the photo’s grain?
Double-click Add Noise to adjust the Amount, add a tiny Gaussian Blur of 0.1 to 0.4 pixels, press Cmd/Ctrl + U to lower Saturation and Cmd/Ctrl + L for a touch of contrast. They are all Smart Filters, so keep comparing and adjusting.
How do I make the noise show only where I paint?
Right-click next to the noise layer’s name and choose Create Clipping Mask. The layer indents with a small arrow pointing at the paint layer, and every stroke you paint now has the grain built in.
How do I paint near my subject without painting on them?
Paint over the edge on purpose, then hide the paint layer, click the Background layer and choose Select > Subject. Click the Layer Mask icon on the paint layer; if it hides the wrong part, click the mask and press Cmd/Ctrl + I.
How do I paint straight lines like a door frame?
Hold Shift while you paint to go straight up and down or left and right. It doesn’t have to be perfect: the background is out of focus, so nobody can say what was really there.
Are the sample files free?
Yes, with a free PHLEARN account. You get 1 sample image, 1 sample PSD and 1 PDF guide: the street portrait, the finished PSD, whose noise layer you can copy onto your own images, and a 3-page guide to the steps.
From the Magazine View all
Stories, interviews and guides for photographers, new every week.
 EditingLightCraft vs Lightroom: I Edited the Same RAW Files in BothThe free clone on the same RAW files: what matches, what breaks and who should switch.
 InspirationRare Historical Photos: 13 of the Rarest Pictures Ever TakenFrom the earliest surviving picture of a person to the last passenger pigeon: who took each one and why it survives.
 EditingArtCraft: Photoshop Cloned by AI in Two Weeks. Is It Legal?ArtCraft cloned Photoshop and Lightroom with AI and gave them away. Any good? Legal? Safe?
Master Photoshop, Lightroom and Photography
Join PHLEARN PRO for $12.99 a month, or $99.99 a year (save 36%). Cancel anytime, with a 100% money-back guarantee.





