
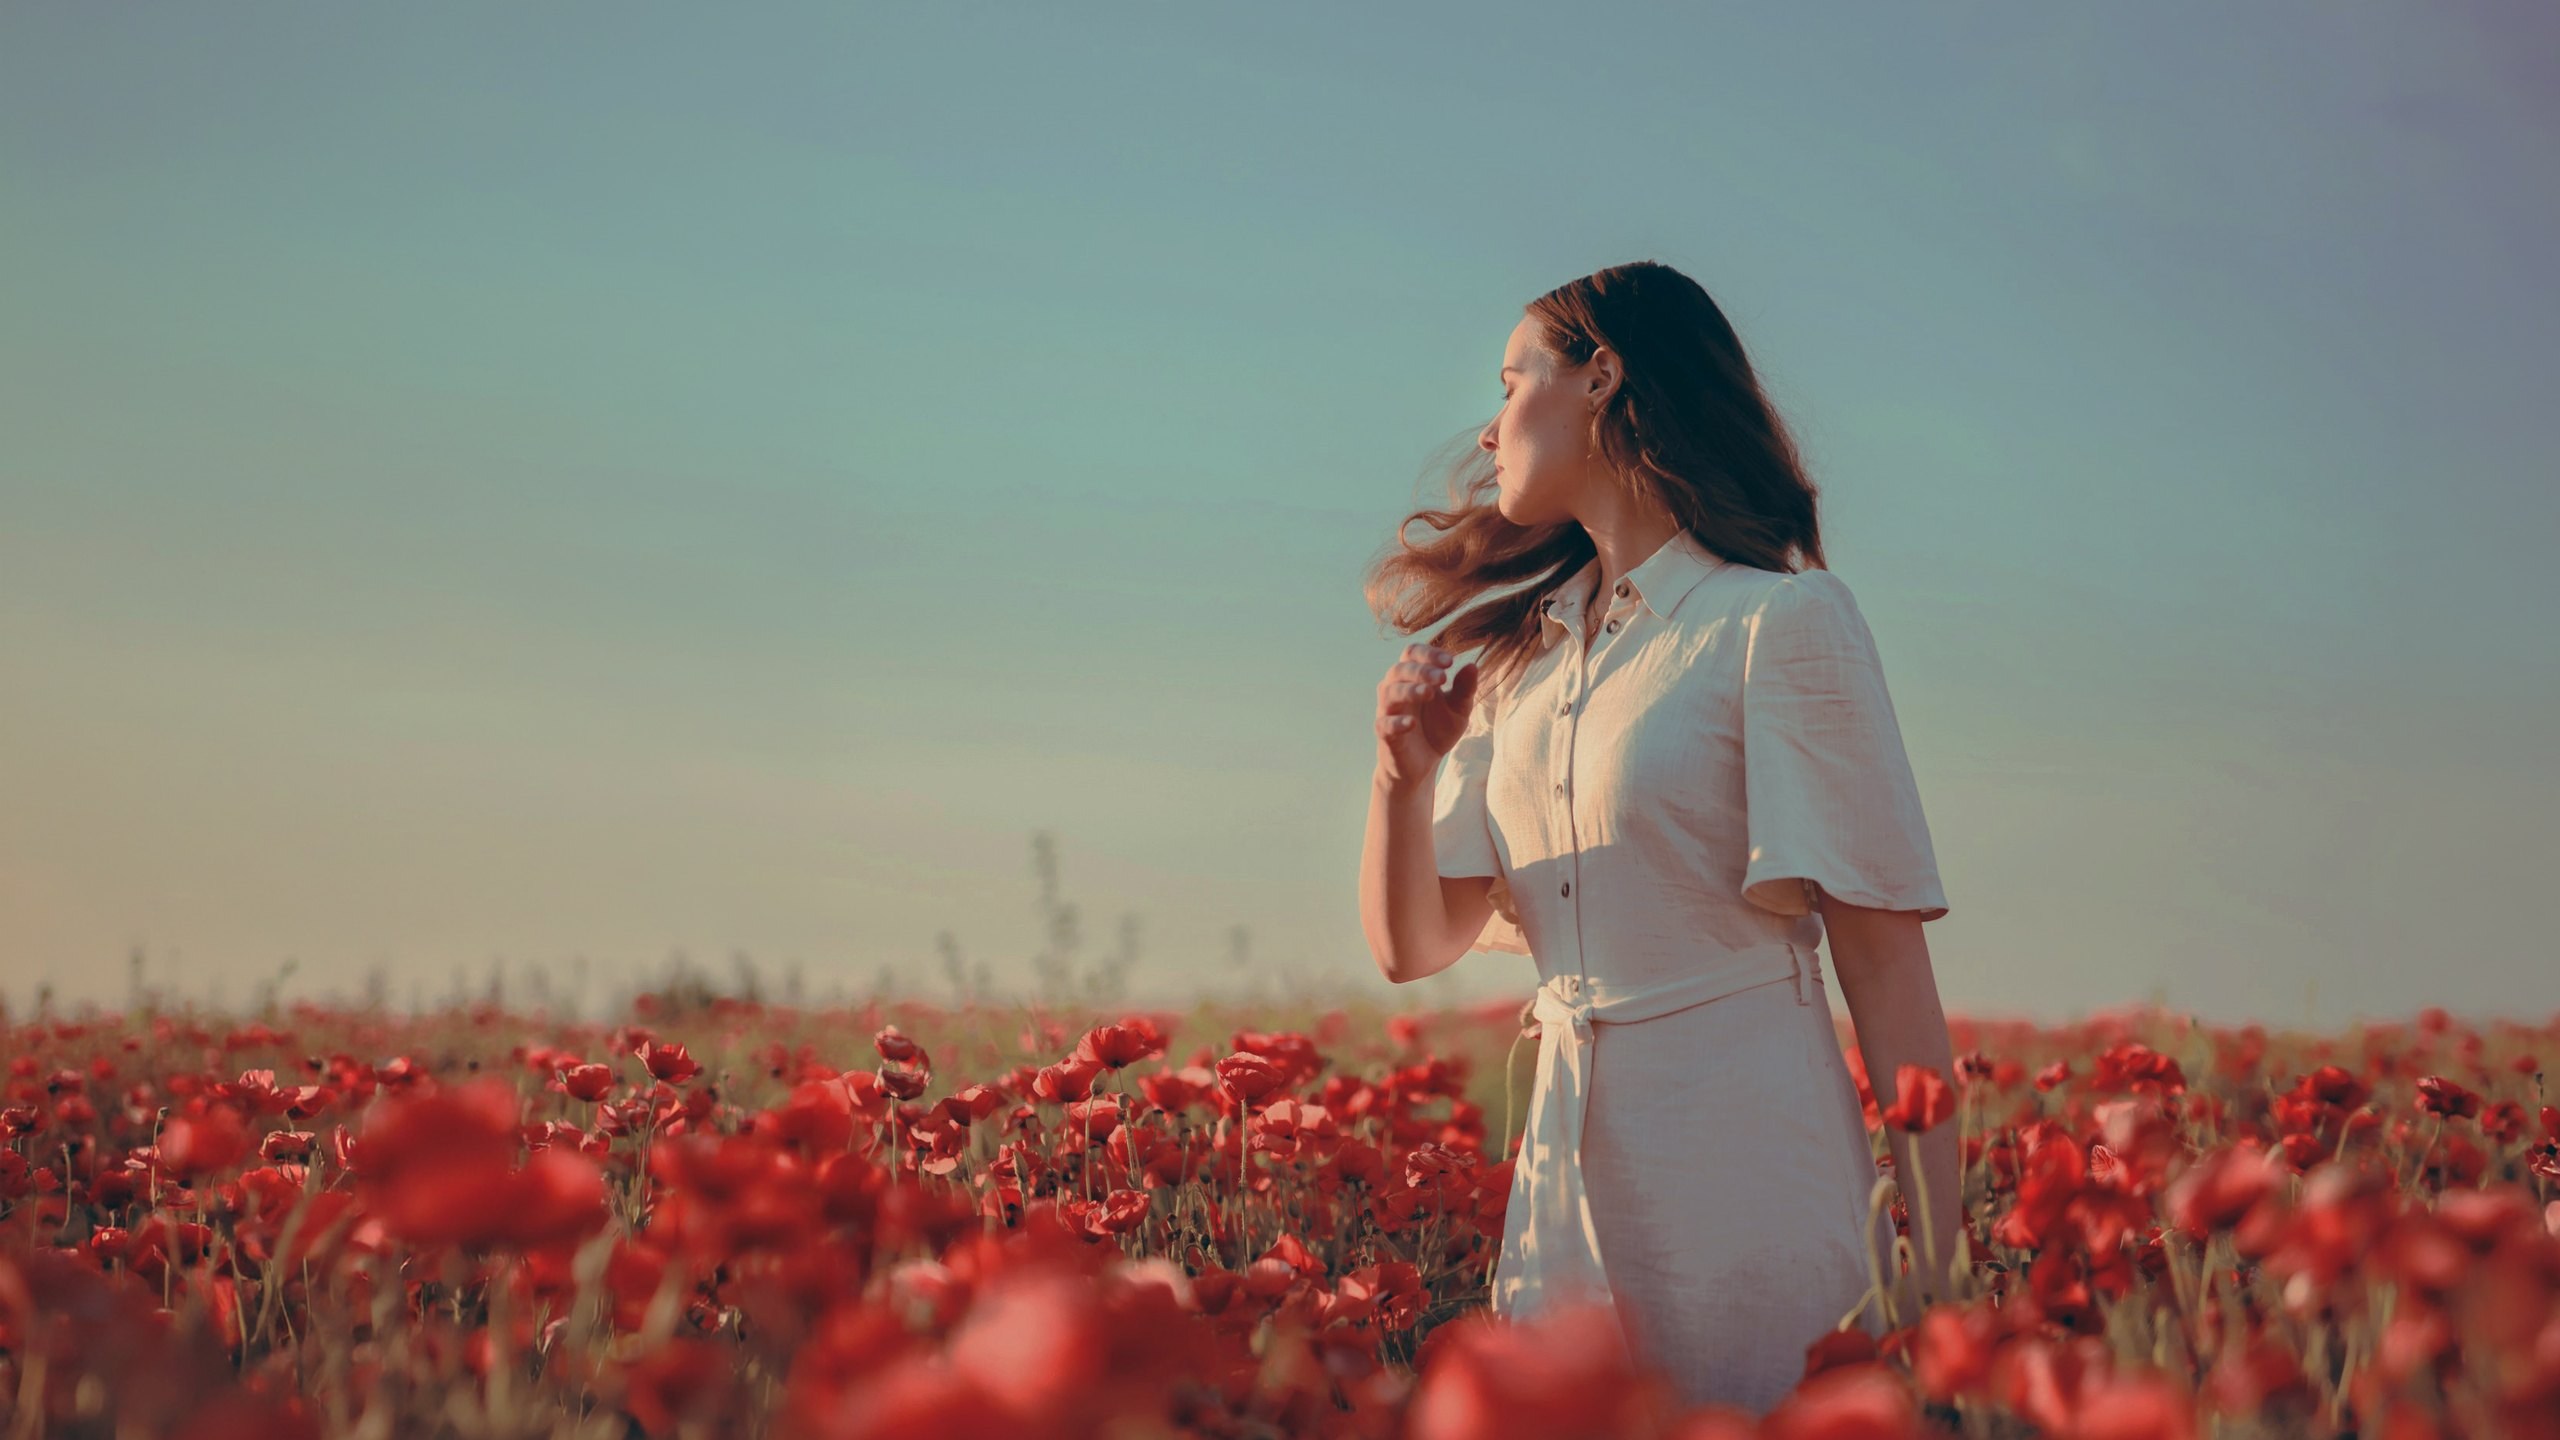

Learn color grading in Photoshop with one Curves adjustment layer. Aaron puts color into the shadows and highlights of the red, green and blue channels with the hand tool, keeps the midtones on the line so the skin stays natural, saves the grade as a preset, and loads the five free PHLEARN Curves presets plus the Bonus, which you can download on this page with the sample image, a step-by-step PDF guide and his PSD.
Free download
5 Curves Presets + Bonus, Sample Image, PDF Guide + PSD
The five looks plus the Bonus preset Aaron saves in the video (with their own install guide), the poppy-field photo, a 5-page step-by-step PDF of the whole tutorial, and his PSD.
This tutorial includes 5 Curves presets, 1 bonus preset, 1 sample image, 1 sample PSD and 1 PDF guide.
Create a free PHLEARN account to download, or log in if you already have one. One account gets you the files for every free tutorial.
description
Enjoying This Free Tutorial?
Image Source
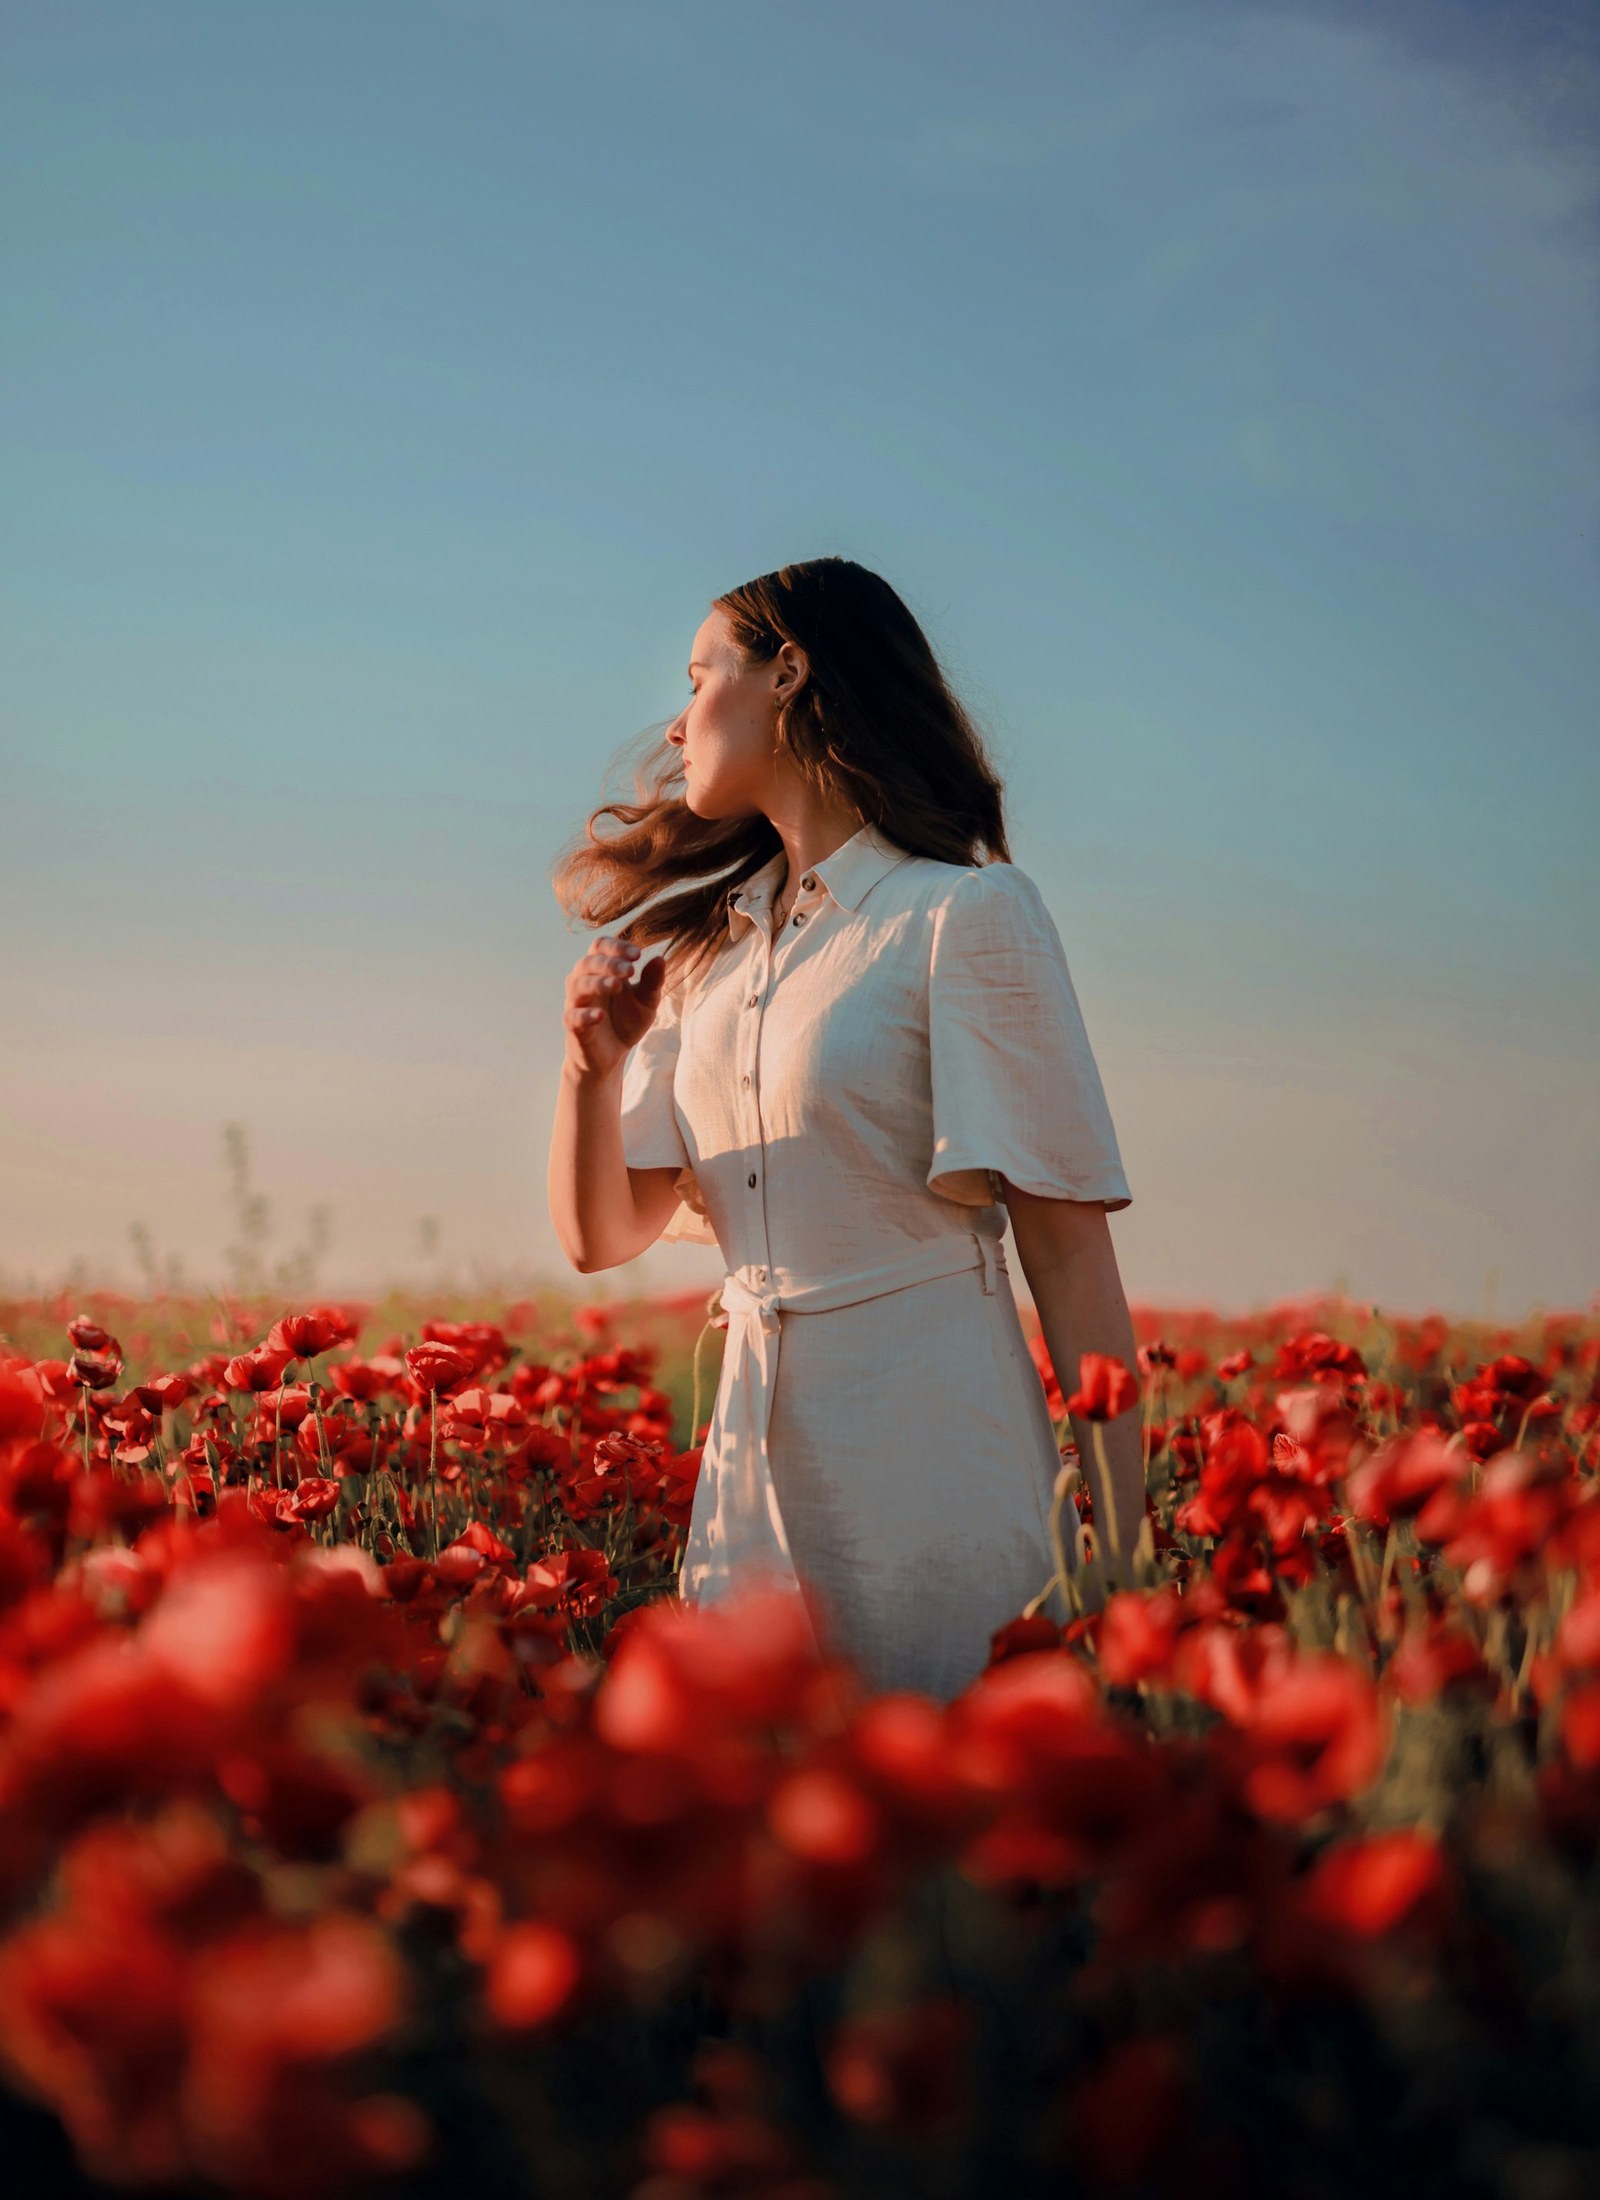
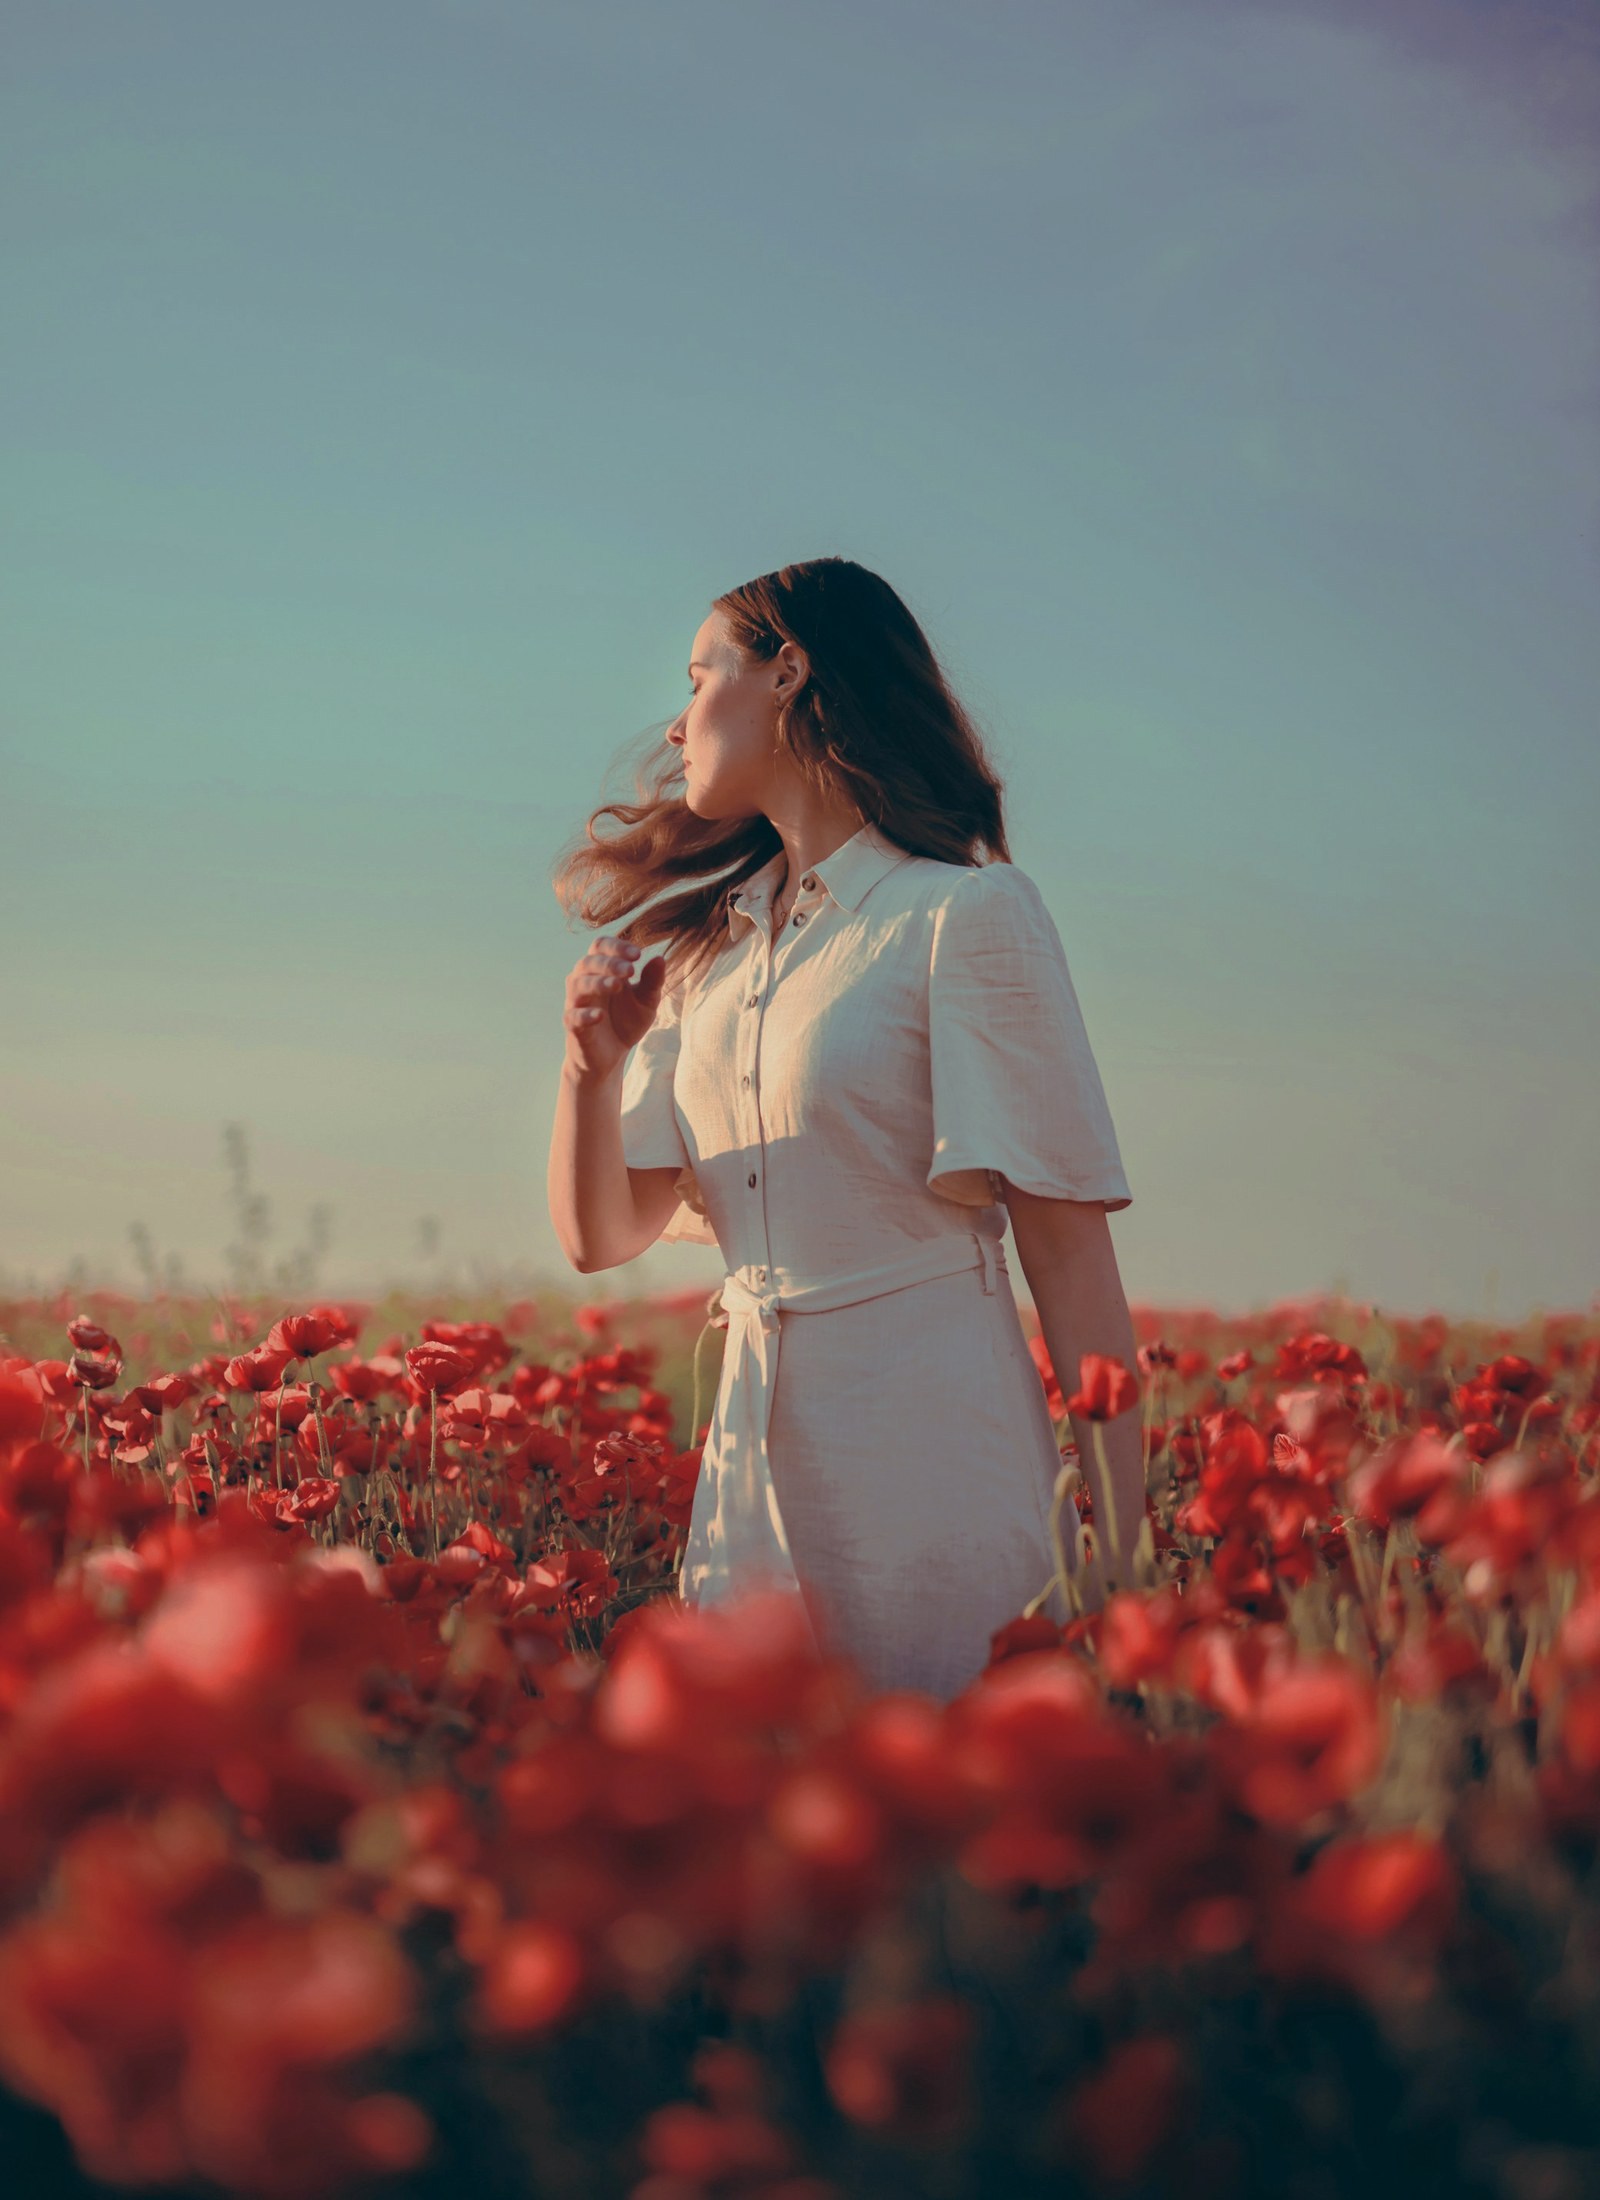
The free presets
One Photo, Five Free Looks + a Bonus
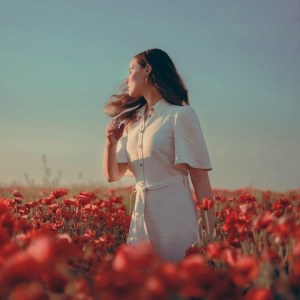
Every preset in the download on the same photo: five looks plus the Bonus Aaron builds in the video.
 Original
Straight out of the camera
 Honey Light
Amber shadows, soft honey highlights
 Night Market
Teal shadows, warm orange highlights
 Deep Water
Indigo shadows, cool clean highlights
 Faded Reel
Lifted blacks, soft warm highlights
 Plum Dusk
Plum shadows, rosy highlights
 From the videoBonus
The grade Aaron builds in the video
Color Grading in Photoshop With One Curves Layer
Quick answer
Color Grading in Photoshop in 30 Seconds
Color grading in Photoshop usually means a stack of adjustment layers, a LUT you can’t change, or a preset that turns everyone orange. In this video Aaron builds a cinematic grade on one Curves layer, by clicking on the photo instead of the graph, keeps the skin natural by leaving the midtones alone, saves the result as a preset, and shows both ways to install the five free presets and the Bonus. This page follows the video step by step, then covers the install in full.
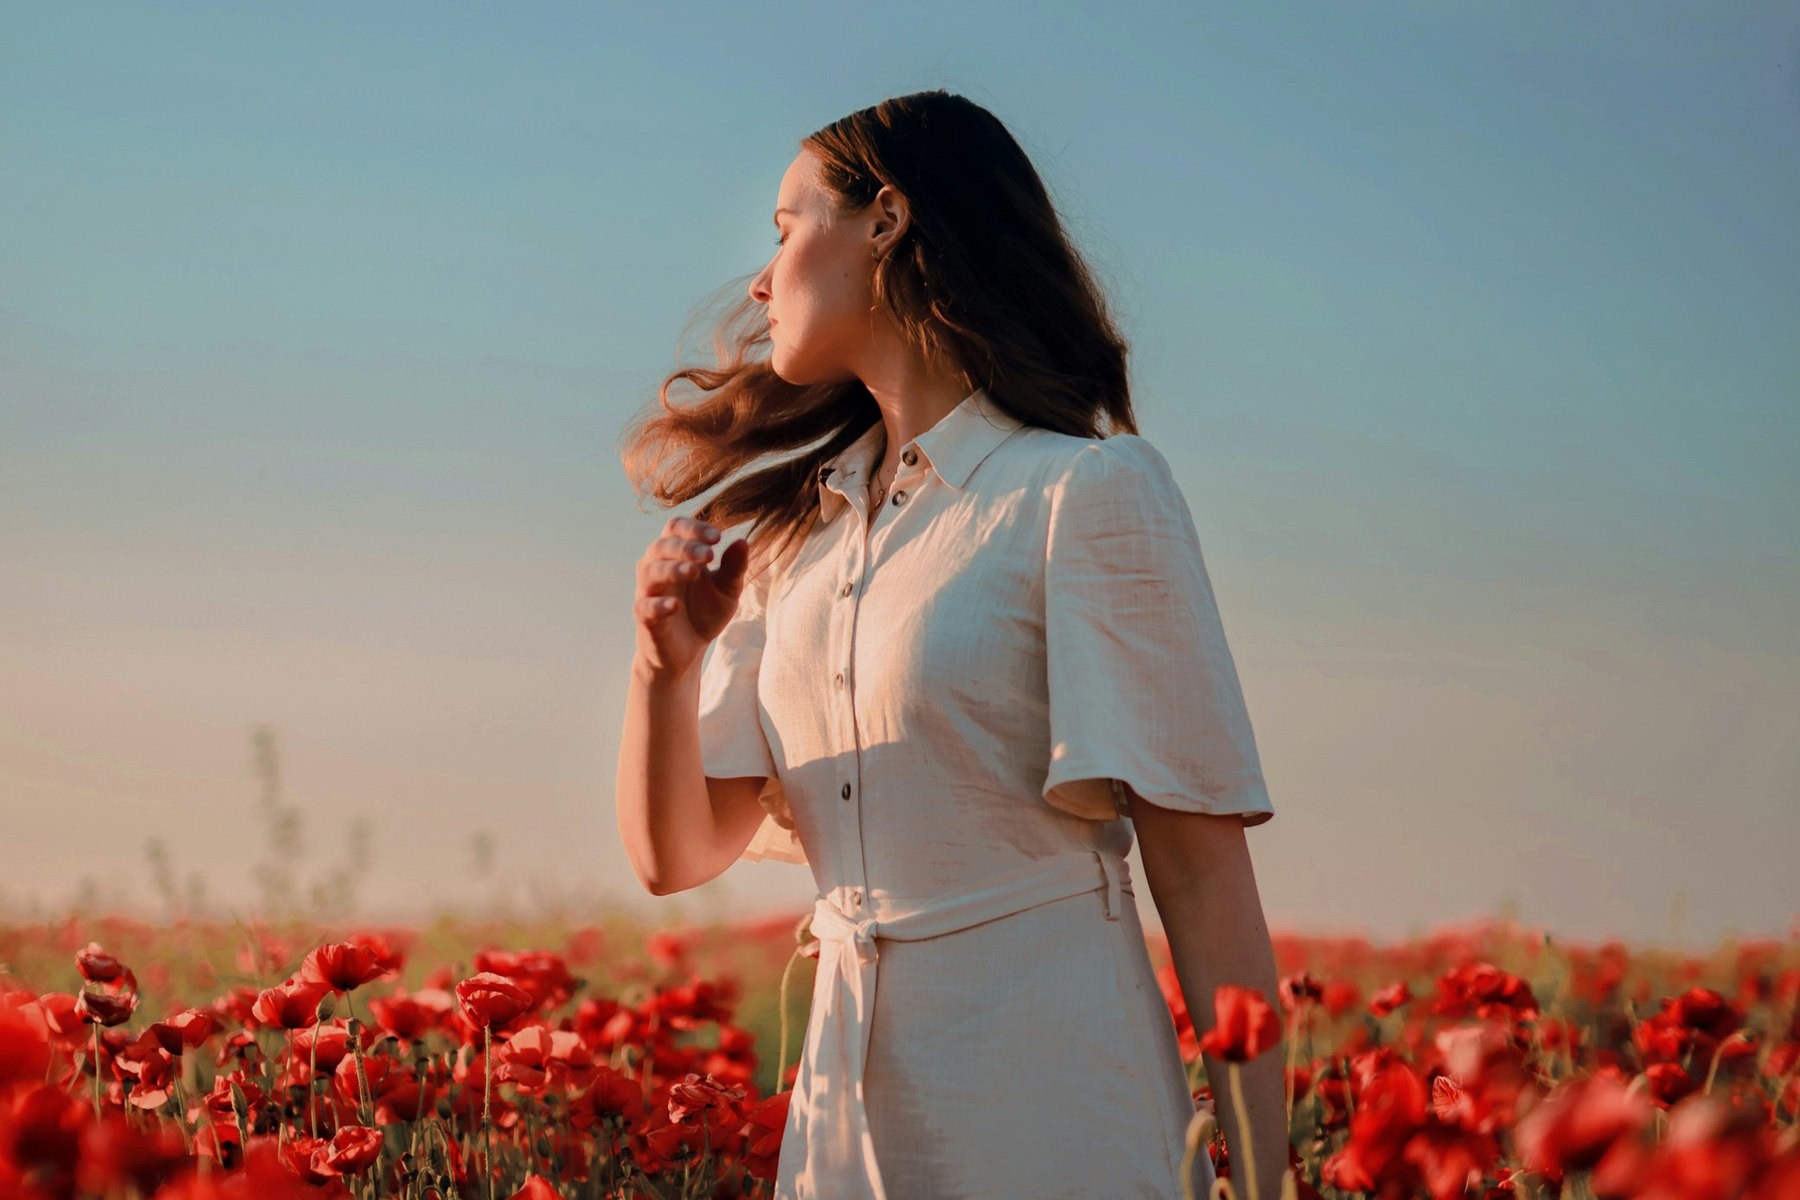
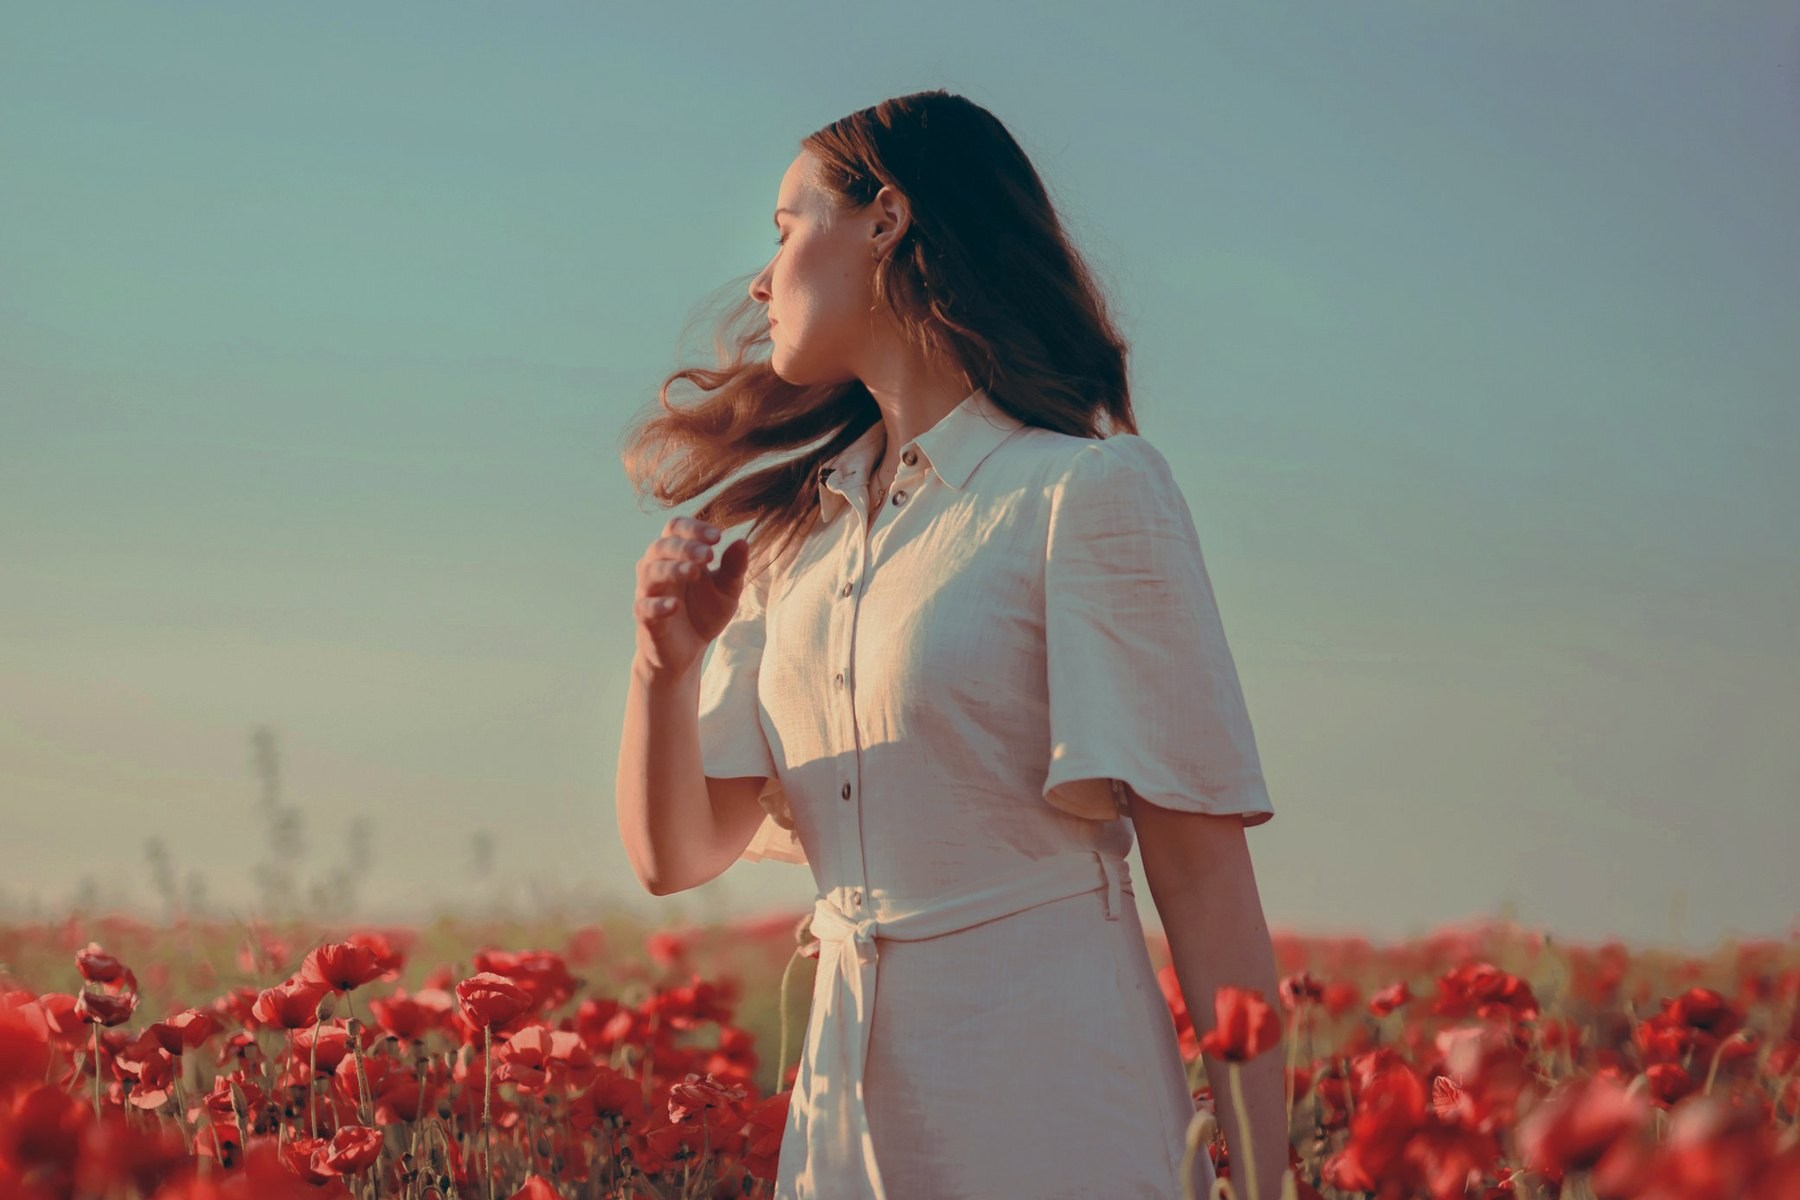
Photo: Zane Grunska / UnsplashBefore
Step 1: Add a Curves Adjustment Layer
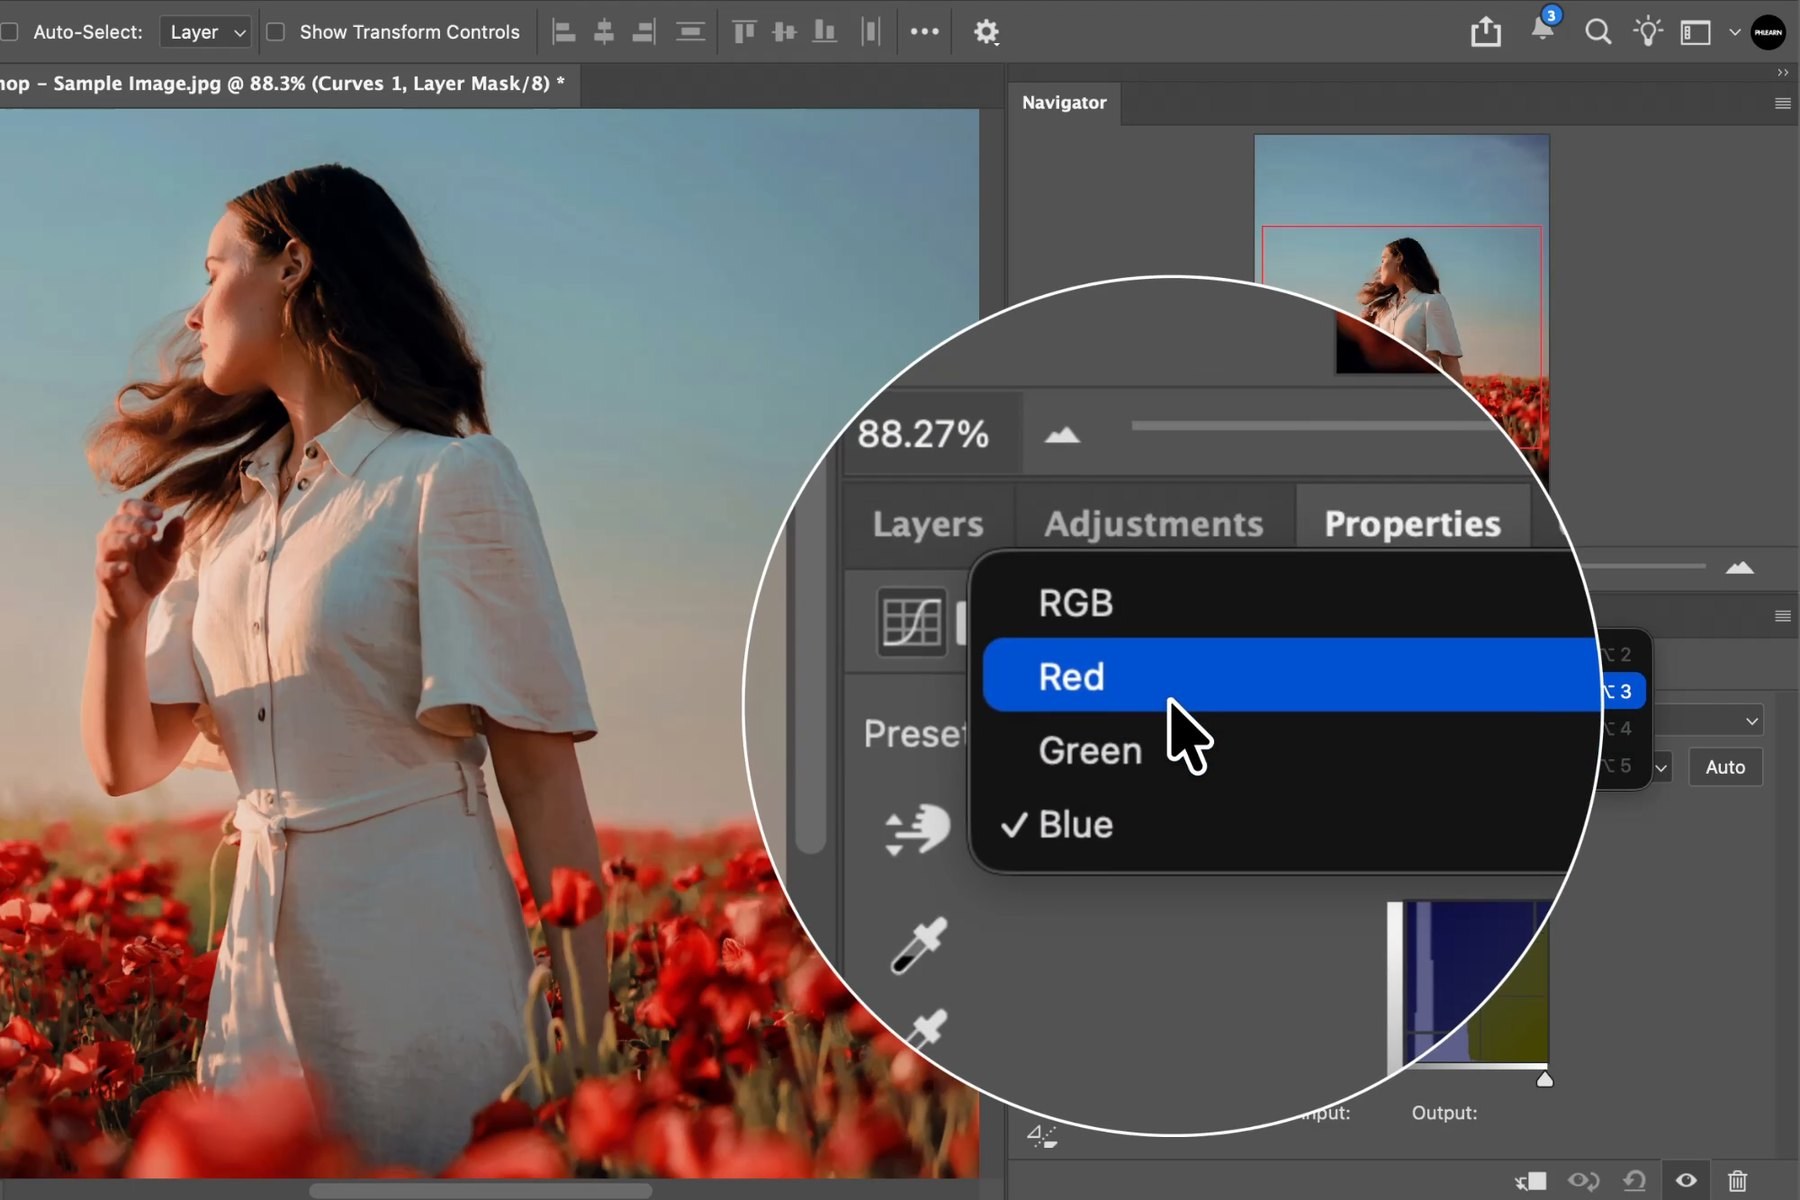
Open the photo, go to the Adjustments panel and click Curves. The Properties panel shows a grid with a straight diagonal line from the bottom left (the blacks) to the top right (the whites), and a menu above it that says RGB. On RGB, the curve adjusts your lights and your darks. Switch that menu to Red, Green or Blue and the same curve starts color toning the photo instead. That is the whole method, and it is the secret to color grading while protecting skin tones.
Step 2: Color the Red Channel With Two Points
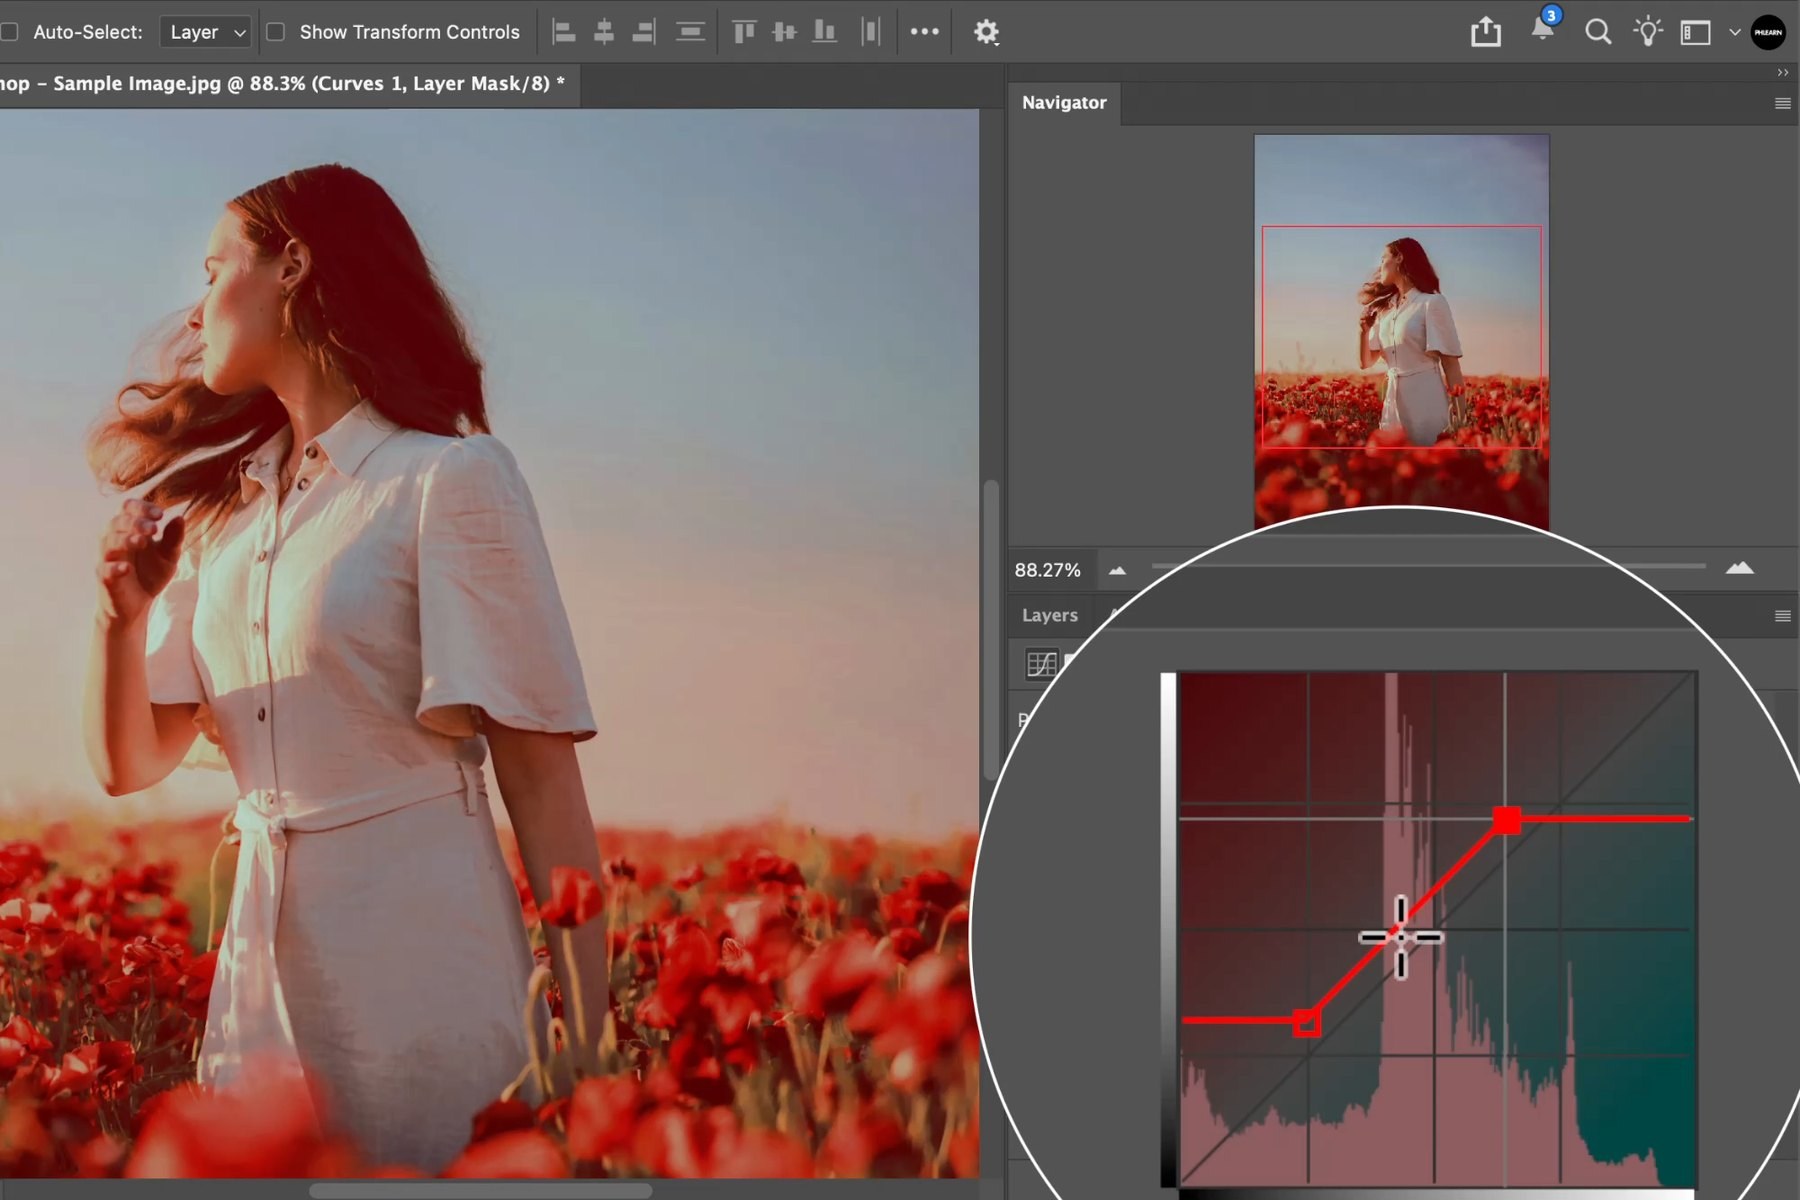
Pick Red in the channel menu. Grab the middle of the line: pull it up and the photo goes red, pull it down and it goes cyan. But you don’t have to work in the middle. Grab the point at the bottom left and pull it up: red goes into the shadows. Grab the point at the top right and pull it down: cyan goes into the highlights (pull it left instead and the highlights go red). With just those two points you have a big color grade on the photo. Click the reset icon at the bottom of the panel to start over.
Step 3: Use the Hand Tool, Aaron’s Favorite Trick
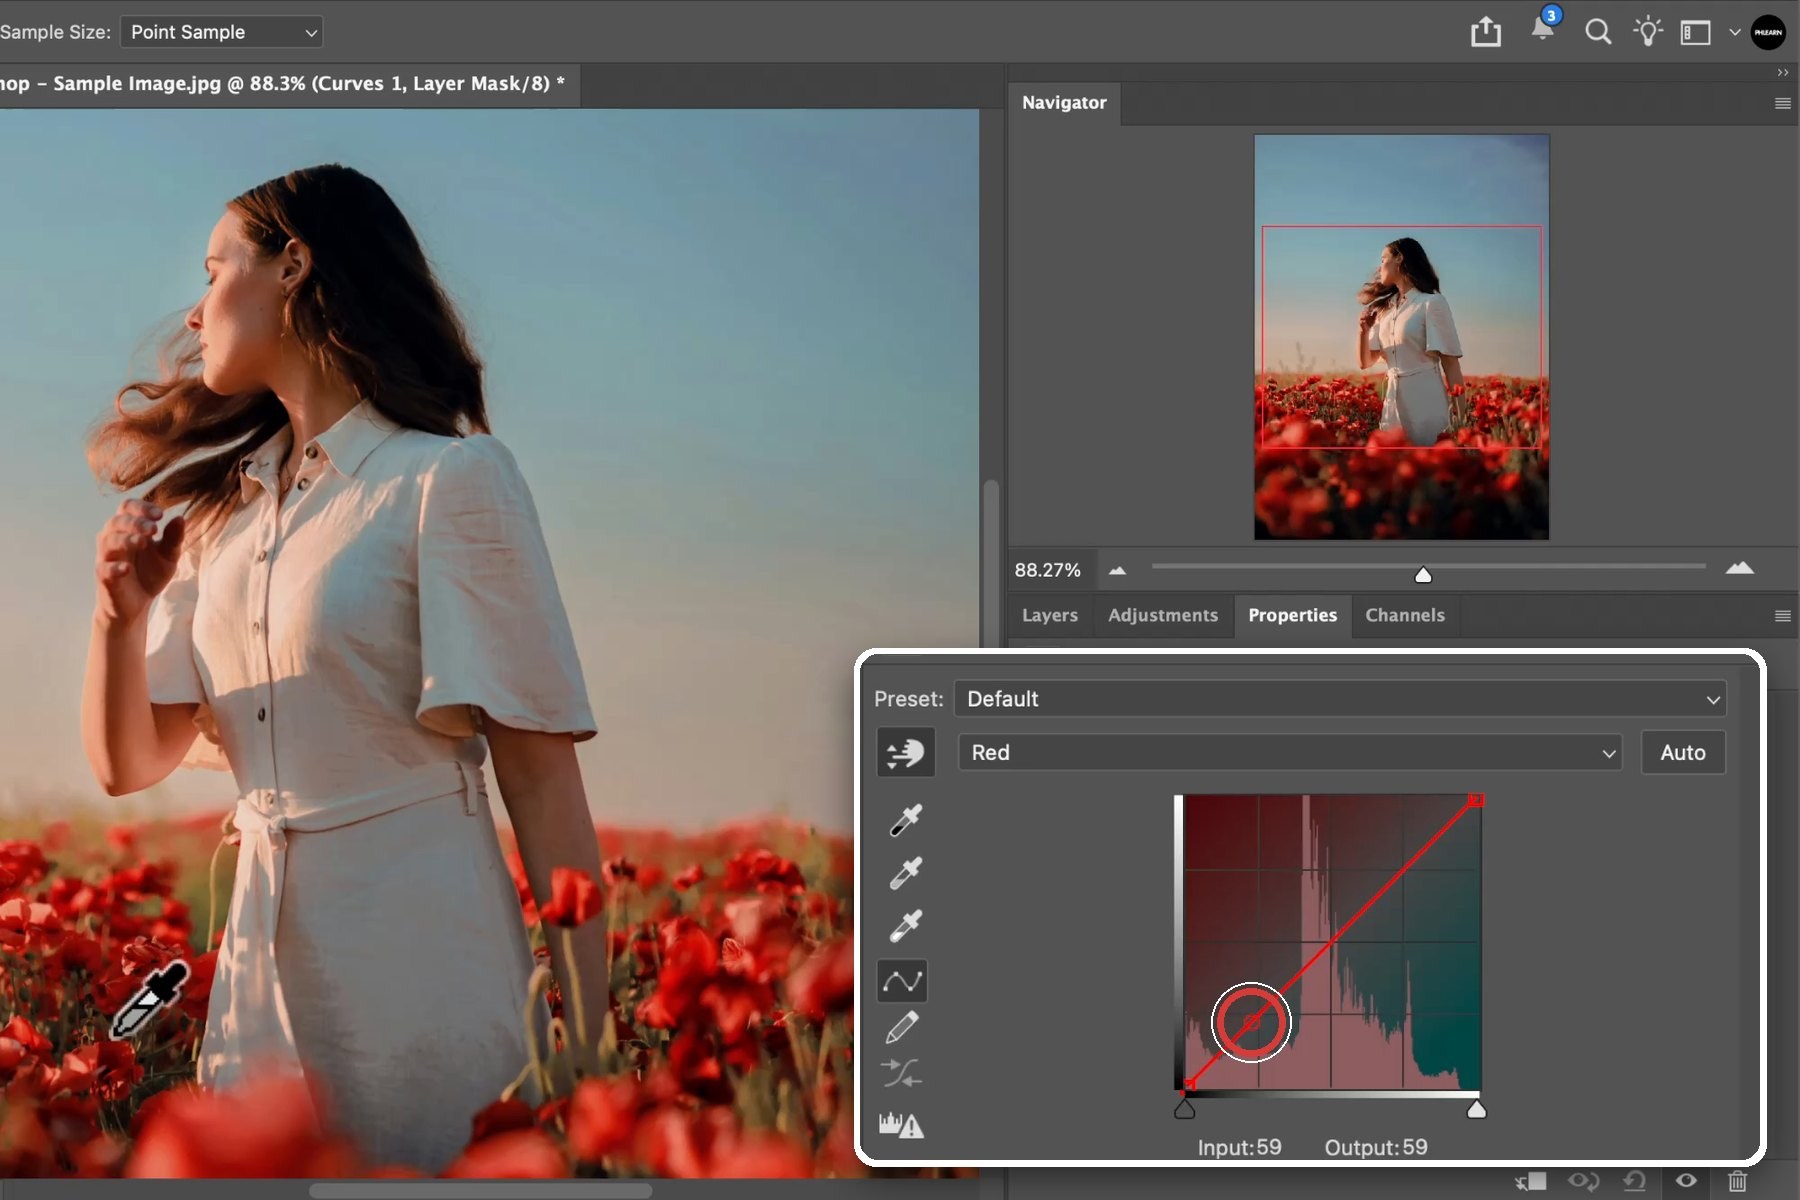
Click the hand icon at the top left of the Properties panel, then go to the photo itself. Hover over a shadow and Photoshop highlights that tone on the curve. Click on the shadow and drag up to bring more red into the shadows. Find a highlight, click and drag down to bring less red into the highlights. You never have to touch the graph: you color the parts of the photo you can see. Click the eye icon at the bottom of the panel to compare the before and after.
With the hand tool, you can click and drag on your image itself, so you don’t need to use the curves graph.
Aaron Nace
Step 4: Do the Same on the Green and Blue Channels
Switch to Green, leave the red curve as it is, and use the hand tool again: a little more green in the shadows, a little green pulled down out of the highlights. Then Blue: a little blue into the shadows, and pull the highlights down so they go warm. Cool shadows and warm highlights are the split behind most cinematic grades, and the photo looks like a different image with one Curves adjustment.


Step 5: Protect the Skin Tones (Keep the Midtones on the Line)
Skin tones live in the midtones of a photograph. Adding color to the shadows and highlights is what makes the grade, but the midtone area has to stay protected. Go back to the Blue channel: the hand tool brought the shadows up toward blue, which is great, but it also dragged the midtones a little toward yellow. Drag that midtone point up and to the right so the yellow lives in the highlights, then put the midtones back on the center line. Then do the same on Green: pull the midtone point right back to the middle. The red midtone already sits on the center point. Toggle the layer off and on and the skin tones stay completely natural while the shadows and highlights carry the color.
Keep the center of each curve right on the line. As long as your midtones stay on the line, your skin tones are protected.
Aaron Nace

Step 6: Save the Grade as a Curves Preset
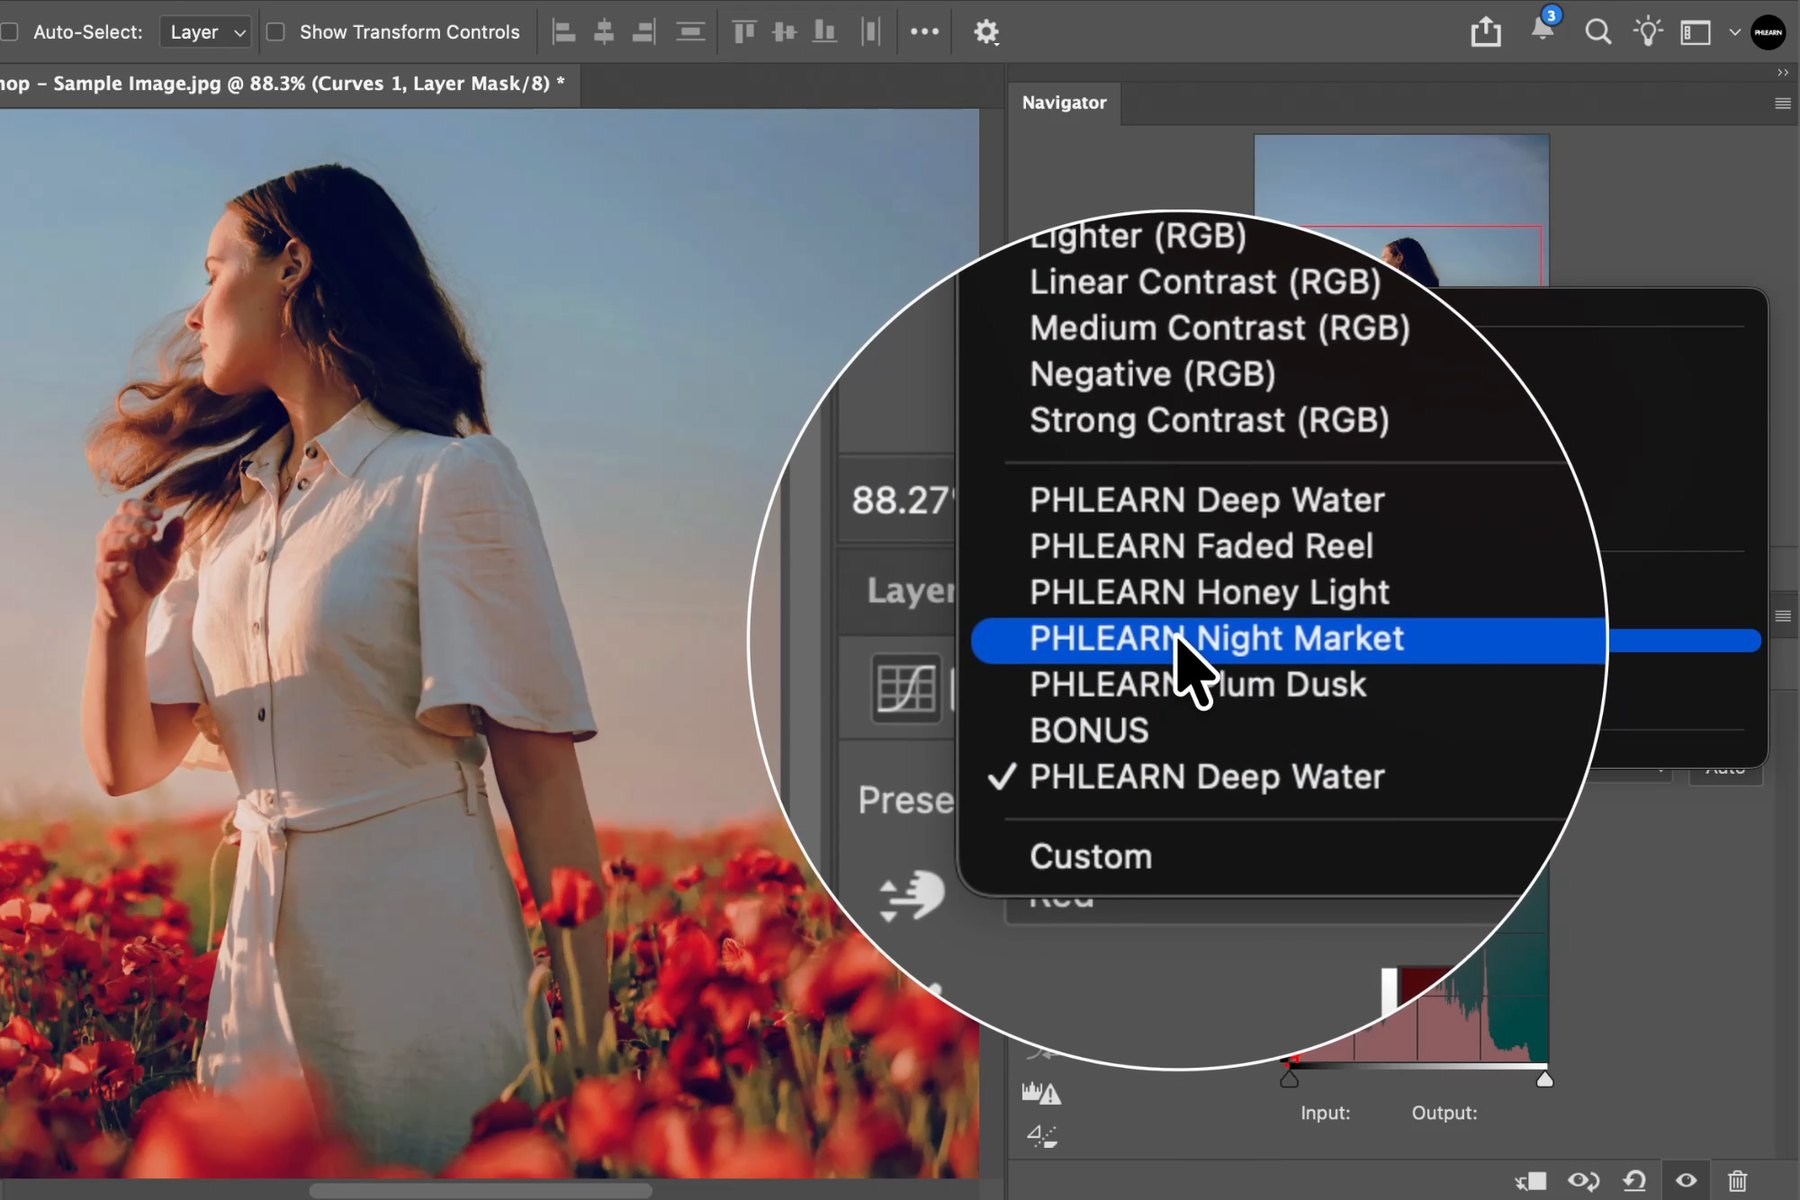
Once you have a color grade you like, save it so you can reuse it on any photo. In the Properties panel click the menu icon (four lines, top right) and choose Save Curves Preset. Photoshop writes a small .acv file that holds all four curves. In the video Aaron makes a new folder called Bonus and saves his grade inside it, and the download has it the same way: Bonus > PHLEARN Bonus (From the Tutorial).acv, the sixth preset.

Step 7: Load the Free Presets
Make any Curves adjustment layer, open the same panel menu and choose Load Curves Preset. Go to the Curves Presets folder from the download, pick a file and click Open: the four curves fill in at once. It gets even better: copy all six .acv files into Photoshop’s Curves presets folder, quit and reopen Photoshop, and they show up in the Preset menu at the very top of every Curves layer, ready to adjust any way you like. The five looks and the Bonus are all built the way Steps 2 to 5 describe: color at the ends of each curve, midtones on the line, skin protected.
The Free Curves Presets: Five Looks + a Bonus
Each look puts its color in the shadows and highlights and keeps the midtones close to the line. They are full Curves layers, so pick Red, Green or Blue and move a point to make any of them your own.

How to Install Curves Presets in Photoshop (Two Ways)
Unzip the download first; Photoshop can’t read a zipped file. Both ways below are also on page 3 of the step-by-step PDF guide, and the presets zip has its own install guide, so you always have the steps next to the files.
Way 1, load a look once. Select a Curves adjustment layer, open Window > Properties if the panel is closed, click the four-line menu at the panel’s top right and choose Load Curves Preset. Pick a .acv file from the Curves Presets folder and click Open. Load another the same way any time. This works in every version of Photoshop since CS6, on Mac and Windows.
Way 2, put all six in the Preset menu for good. Quit Photoshop. Copy the six .acv files into Photoshop’s Curves presets folder, taking the Bonus file out of its Bonus folder first: on a Mac choose Go > Go to Folder in the Finder and paste the path; on Windows paste it into the File Explorer address bar. Open Photoshop again and the presets are in the Preset menu at the top of every Curves layer’s Properties panel.
- Mac~/Library/Application Support/Adobe/Adobe Photoshop 2026/Presets/Curves
- Windows%APPDATA%\Adobe\Adobe Photoshop 2026\Presets\Curves
Each version of Photoshop has its own folder, so change 2026 to the year of the version you run. Not sure which you have? Open the Adobe folder in that path and look for your Adobe Photoshop folder, then Presets, then Curves. No Curves folder in there? Make one. Nothing shows up after the copy? Photoshop only reads the folder when it starts, so quit and reopen it.
If something goes wrong
Four Quick Fixes

Want 20 More Looks? They Come With the PRO Course
This video shows one way to color grade in Photoshop. There are many more, and Aaron’s new PRO course Skin Tones, Color Grading & Presets in Photoshop & Lightroom teaches them: color correcting skin with the vectorscope in Camera Raw, then color grading with Curves, Blend If, gradient maps, the color grading wheels, LUTs and Lightroom presets, and it includes over 121 presets that color grade your photo while protecting skin tones, the 20-look PHLEARN Color Grading Curves pack among them. If one Curves layer got you this far, the course is the rest of the method. It is included with PHLEARN PRO.
Free first: Levels vs. Curves explains the panel from scratch, and the color grading presets in Camera Raw cover the other tool.

PRO course · Included with PHLEARN PRO
Skin Tones, Color Grading & Presets in Photoshop & Lightroom
Quick Reference: Menus, Curves and Settings
- Add the layerAdjustments panel > Curves
- Pick a channelThe RGB menu above the grid: RGB, Red, Green, Blue
- Color from the photoHand tool in Properties, then click a shadow or highlight on the photo and drag
- Red curveUp = red, down = cyan
- Green curveUp = green, down = magenta
- Blue curveUp = blue, down = yellow
- Keep skin naturalColor at the ends of each curve; the midtone point stays on the center line
- Before / afterThe eye icon at the bottom of the Properties panel
- Save / load a presetProperties panel menu > Save Curves Preset / Load Curves Preset (.acv)
- Install for goodCopy the .acv files into Presets > Curves, quit and reopen Photoshop
Image source
Photo by Zane Grunska via Unsplash
Free Download
Five Looks + a Bonus, One Curves Layer
Free with a PHLEARN account.
5 Curves Presets + Bonus
6 .acv + install guide · 0.5 MB
Download the 5 Curves presets, the Bonus and the install guide
Sample Image
1 JPEG · 0.4 MB
Step-by-Step PDF Guide
5-page PDF · 1.0 MB
Sample PSD
Layered PSD · 12.5 MB
Color Grading in Photoshop: Common Questions
What is color grading in Photoshop?
Color grading is the color you add on purpose after a photo is corrected: cool shadows, warm highlights, a mood. In this video it is one Curves adjustment layer, with the Red, Green and Blue curves doing the color.
Why does my color grade turn skin orange?
Because the color landed in the midtones, where skin lives. Keep the midtone point of each curve on the center line and put the color in the shadows and the highlights. If a channel drifted, drag its midtone point back to the line.
What is the hand tool in Curves?
The hand icon at the top left of the Curves Properties panel. Click a tone on the photo itself and drag up or down, and Photoshop moves the right point on the curve. You never have to read the graph.
What is an .acv file?
A Photoshop Curves preset. It stores the RGB, Red, Green and Blue curves of one Curves layer. Photoshop writes one with Save Curves Preset and reads it with Load Curves Preset, both in the Properties panel menu.
How do I install Curves presets in Photoshop?
Two ways. Load one at a time with Properties panel menu > Load Curves Preset, or quit Photoshop, copy the .acv files into its Curves presets folder (Mac: ~/Library/Application Support/Adobe/Adobe Photoshop 2026/Presets/Curves; Windows: %APPDATA%\Adobe\Adobe Photoshop 2026\Presets\Curves, with your version’s year) and reopen it. They then appear in the Preset menu of every Curves layer. The PDF guide in the download has both with pictures.
What is the Bonus preset?
The grade Aaron builds in the video. He saves it with Save Curves Preset, and that file ships in the download in a folder called Bonus, as PHLEARN Bonus (From the Tutorial).acv, next to the five named looks.
Do the free presets work in my version of Photoshop?
Yes. Curves presets have worked the same way since Photoshop CS6, on Mac and Windows. Only the folder path in Way 2 changes with the version’s year.
Can I use these Curves presets in Lightroom or Camera Raw?
No. An .acv file is a Photoshop Curves preset. The PRO course includes Lightroom presets and Camera Raw color grading wheel presets for the same kind of looks.
Are the free presets the same as the ones in the PRO pack?
No. Honey Light, Night Market, Deep Water, Faded Reel, Plum Dusk and the Bonus were made for this tutorial and are not in the PRO pack. The PRO course adds the 20-look PHLEARN Color Grading Curves pack and over 121 presets in all.
Does this tutorial use AI or generative credits?
No. A Curves adjustment layer is a manual tool. No AI, no credits, no plugins.
From the Magazine View all
Stories, interviews and guides for photographers, new every week.
 EditingLightCraft vs Lightroom: I Edited the Same RAW Files in BothThe free clone on the same RAW files: what matches, what breaks and who should switch.
 InspirationRare Historical Photos: 13 of the Rarest Pictures Ever TakenFrom the earliest surviving picture of a person to the last passenger pigeon: who took each one and why it survives.
 EditingArtCraft: Photoshop Cloned by AI in Two Weeks. Is It Legal?ArtCraft cloned Photoshop and Lightroom with AI and gave them away. Any good? Legal? Safe?
Master Photoshop, Lightroom and Photography
Join PHLEARN PRO for $12.99 a month, or $99.99 a year (save 36%). Cancel anytime, with a 100% money-back guarantee.





