
Download Assets
This tutorial includes 3 sample images, 3 sample PSDs and 1 PDF guide. Downloads are free with a PHLEARN account.
- Download the sample images and PSDs from every free tutorial on PHLEARN
- New free tutorials published every week
- One free account — sign up once, then download anything
Free PDF Guide · 4 Pages
This Tutorial as a Step-by-Step PDF
Every step from the video in order: Select Subject, the two copies, the single-column marquee, the Cmd/Ctrl-drag stretch, the warp, and the gradient mask fade, with the shortcuts. Keep it next to your keyboard.
description
Learn how to create a high-end, dynamic pixel stretch effect in Photoshop 2026! In this tutorial, we’ll show you how to leverage the single-column marquee tool to stretch your subject, apply the warp tool for fluid motion, and use gradients on a layer mask for a seamless fade.
Enjoying This Free Tutorial?
We publish a new free tutorial every week, each one with sample images and PSDs you can download and follow along with. Sign up and they land straight in your inbox, along with early word on sales, events and subscriber-only offers.
Image Source
Photos by Fellipe Ditadi and Peter Thoms via Unsplash
The Pixel Stretch Effect, Built by Hand in Photoshop
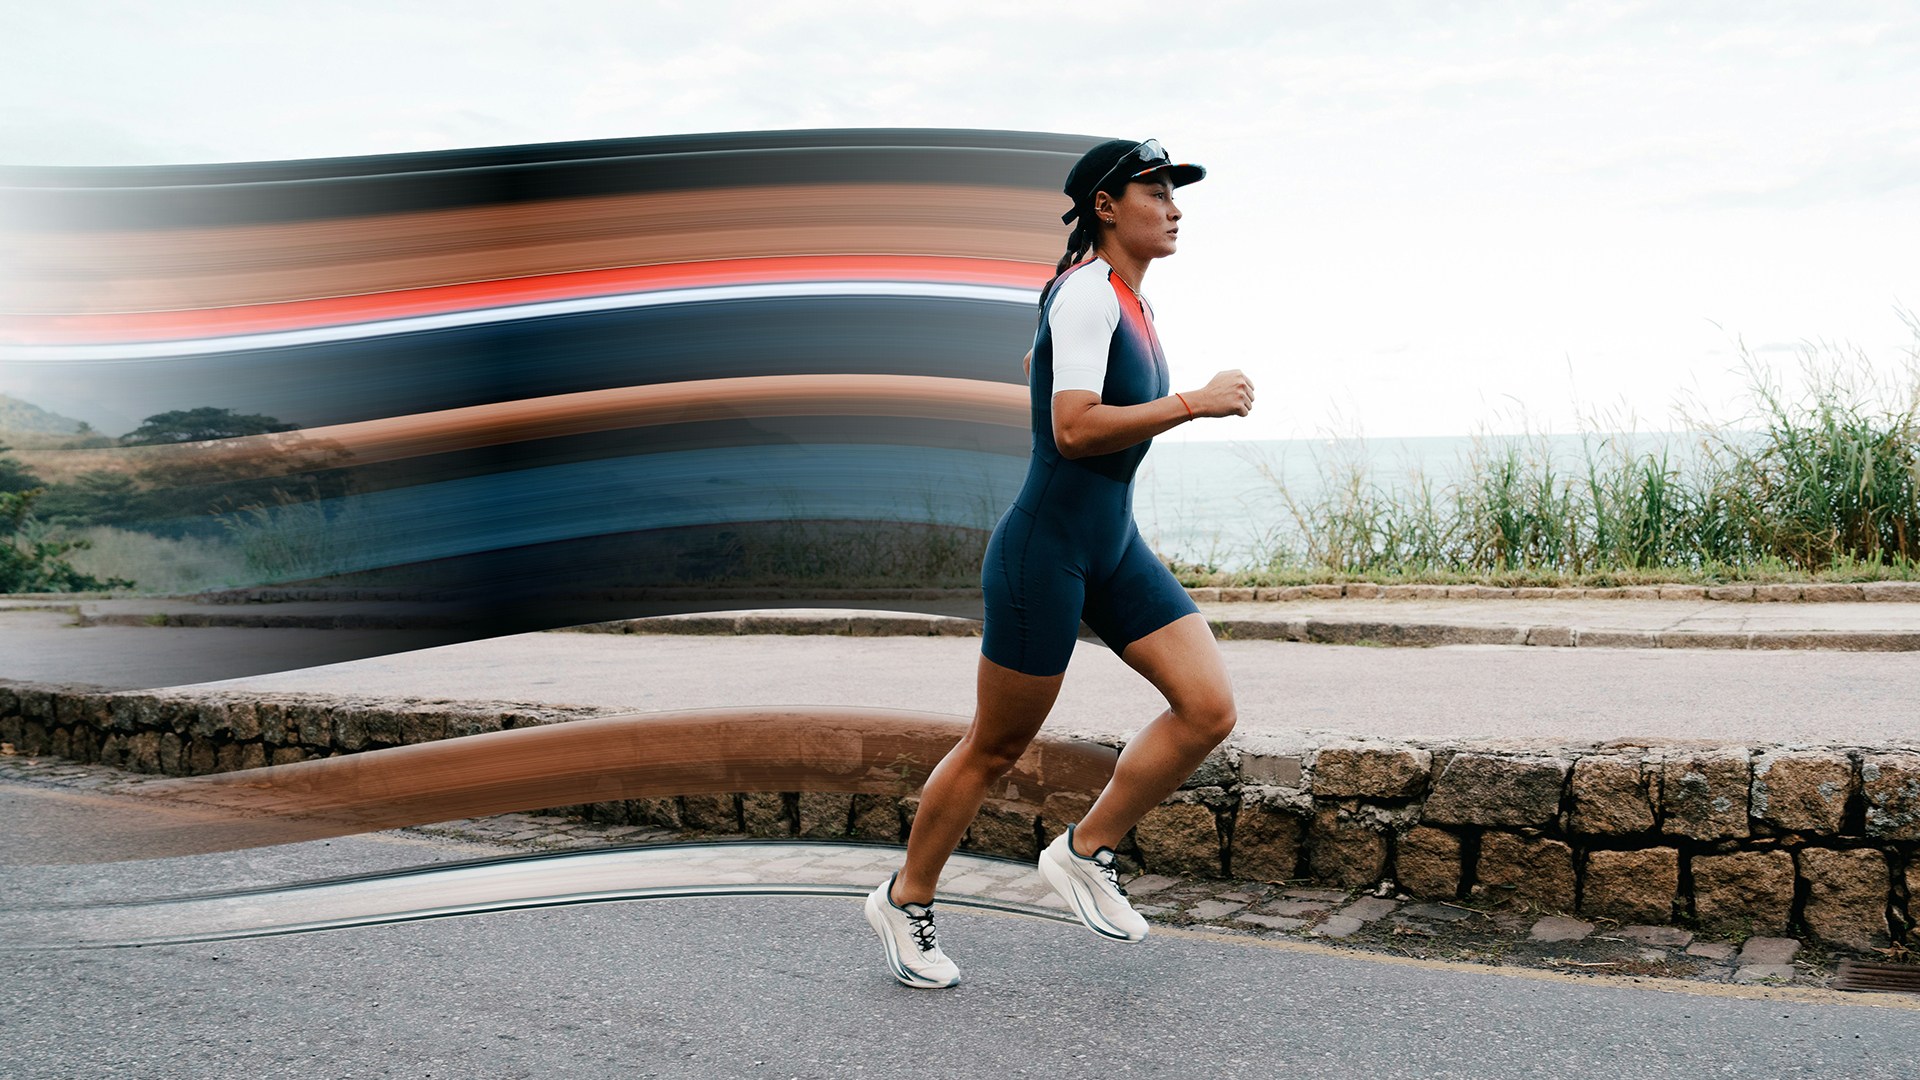
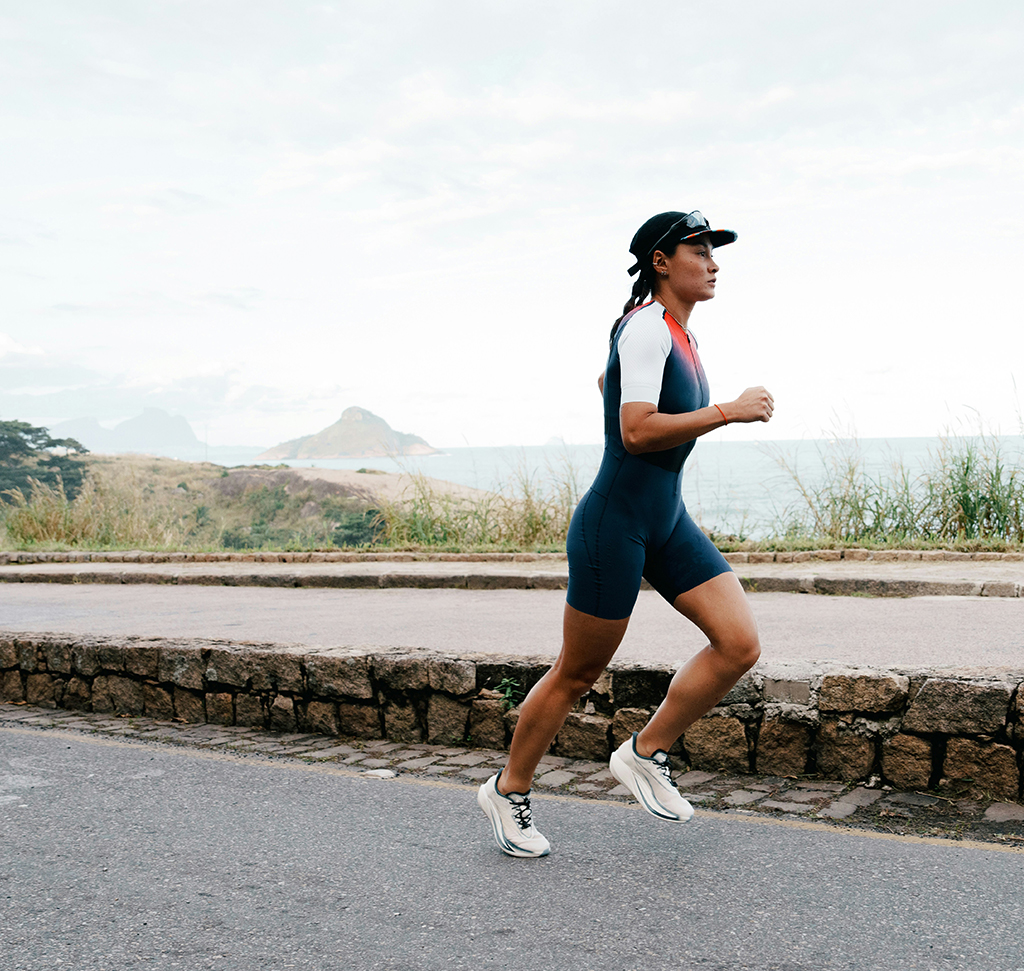
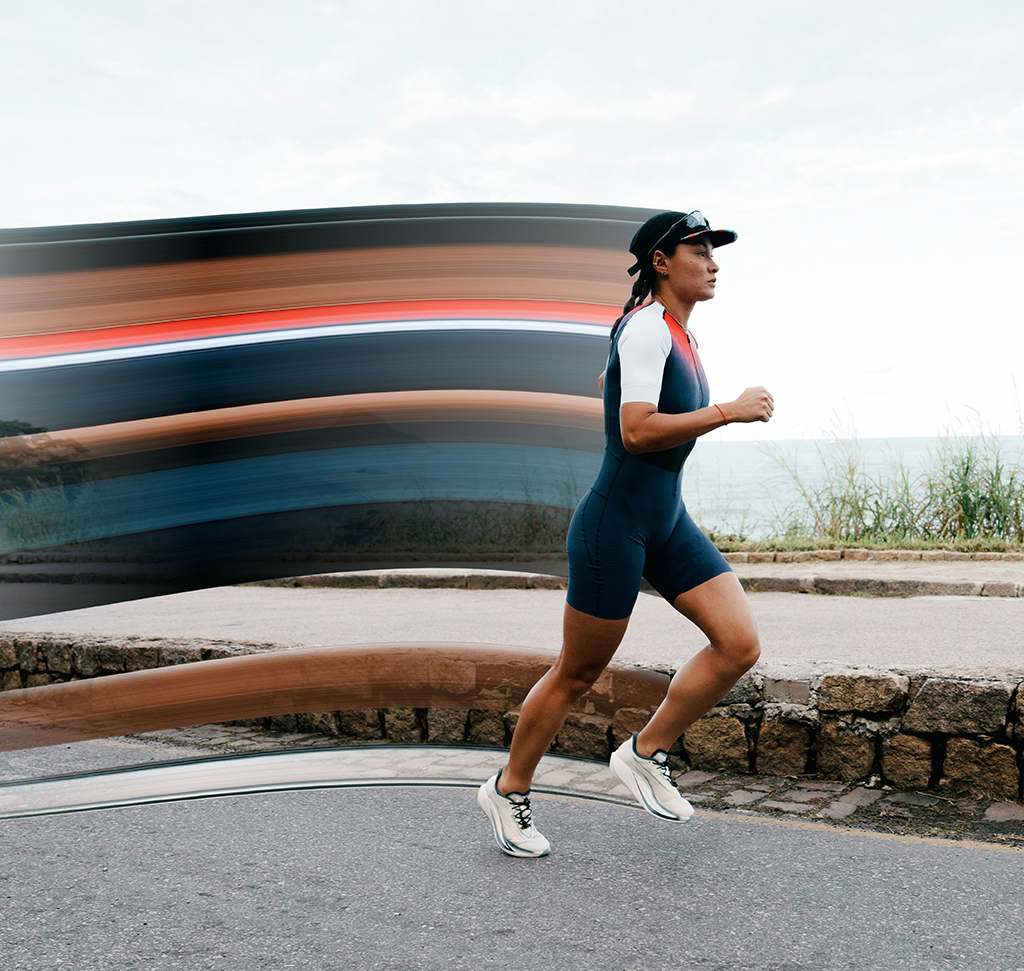
The pixel stretch effect is one of those techniques that looks like it came out of a motion graphics suite and actually takes about ninety seconds in Photoshop. A single column of pixels, dragged out across the frame and bent with the Warp tool, reads as speed, energy and direction — which is why you see it on sports covers, album art and product launches.
Nothing here is generative and nothing is destructive. It’s three layers, one obscure marquee tool, and a gradient on a layer mask. Once you’ve built it once, you’ll find yourself reaching for it constantly.
What the Effect Is Actually Doing
One Column of Pixels, Repeated
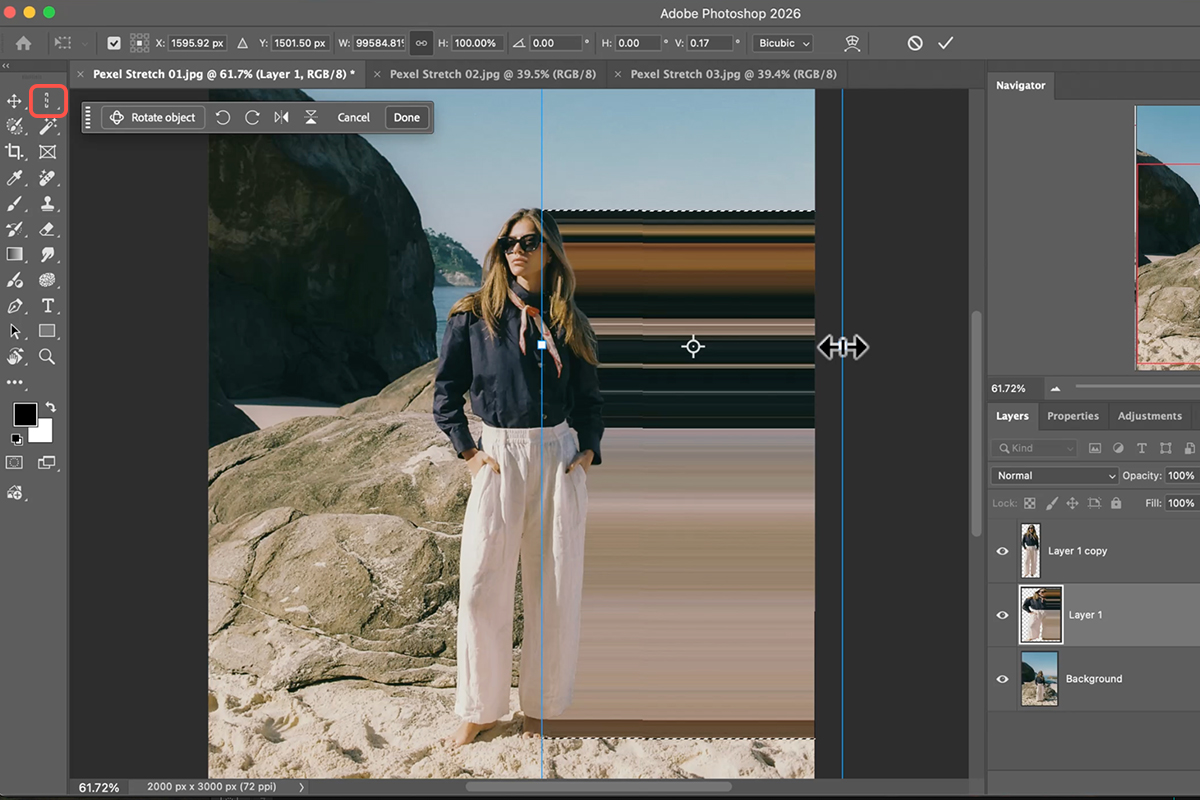
The Single Column Marquee Tool selects a strip exactly one pixel wide, running the full height of your document. When you scale that strip horizontally, Photoshop repeats each of those pixels sideways — so every color in that one vertical slice becomes a horizontal band. That’s the entire trick, and it’s why the result looks so clean: the pixel stretch streaks are made of your subject’s real colors, in their real vertical order.
Three Layers Keep It Under Control
The effect needs the stretched pixels to sit behind a clean copy of your subject. Stacking a sharp cutout on top is what keeps the person or product crisp while the streaks fly out around them, and it’s the difference between a deliberate graphic effect and a smeared photo.
Isolate and Stack Your Subject
Everything downstream depends on getting a clean cutout and duplicating it correctly, so take the extra few seconds here.
-
Select Your Subject
Open your image and click Select Subject in the contextual taskbar. Photoshop builds the selection automatically. If the edges need work — hair, a loose scarf, anything semi-transparent — refine them before moving on; the stretch will exaggerate any mistakes.
-
Duplicate the Subject Twice
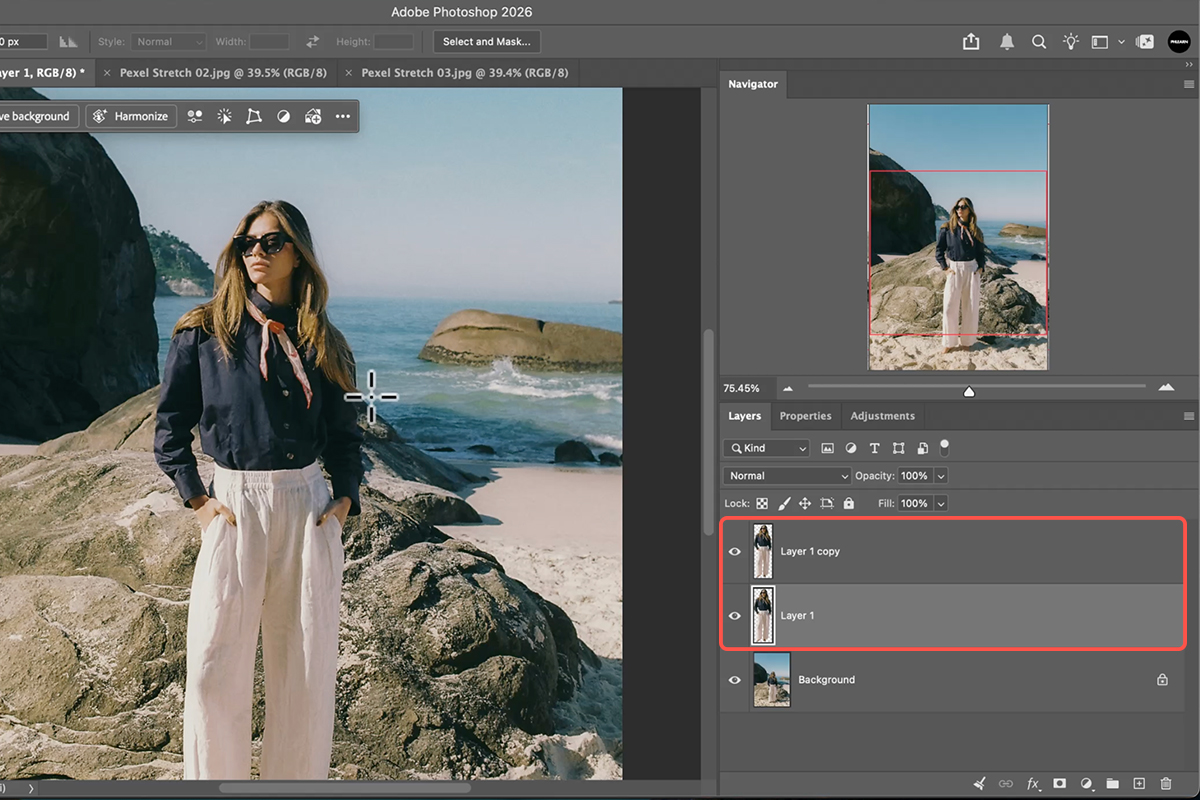
With the selection active, press Cmd/Ctrl + J twice. You now have three layers: the original background at the bottom, a middle copy that will become the stretched pixels, and a top copy that stays sharp.
-
Know Which Layer Does What
Middle layer = the pixel stretch. Top layer = the clean subject. Getting these backwards is the single most common way this goes wrong, so it’s worth naming them before you start transforming anything.
Pull the Pixel Stretch Across the Frame
This is the part that produces the pixel stretch, and it hinges on a tool most people have never clicked.
-
Select the Middle Layer
Click the middle copy in the Layers panel. The top copy stays untouched throughout — that’s what preserves your sharp subject.
-
Grab the Single Column Marquee Tool
It lives nested under the Marquee tools, and it’s easy to miss. Click anywhere on your subject and it slices a one-pixel-wide selection running the full height of the document. Where you click matters: the colors in that column are the colors you’ll be stretching, so pick a spot with the tones you want in the streak.
-
Stretch It With Free Transform
Press Cmd/Ctrl + T for Free Transform, hold Cmd/Ctrl, click the edge handle of the selection and drag outward. The single column repeats across the frame as a long graphic streak. Drag further for a more extreme look, or stop early for something subtler.
Bend It So It Reads as Movement
A perfectly straight stretch looks flat and digital. Curving it is what gives the pixel stretch the sense of flow that makes people stop scrolling.
-
Switch to Warp
While still inside the transform box, right-click and choose Warp. A grid appears over the stretched pixels.
-
Curve the Streak
Drag the corner handles or push directly on the center of the grid to bend the streaks. Follow the direction your subject is already moving or facing — a curve that agrees with the pose reads as motion, while one that fights it just looks like a mistake.
-
Commit the Transform
Press Enter to bake in the warp. If you want to keep this fully re-editable, convert the middle layer to a Smart Object before you transform — the same non-destructive principle behind Split Warp and most of Photoshop’s transform tools.
Fade It Into the Background
Right now the streak has a hard edge where it stops, which immediately gives away that it’s an effect. A gradient on a layer mask fixes it in one move.
-
Add a Layer Mask
With the middle layer selected, click the Layer Mask icon at the bottom of the Layers panel.
-
Draw a Black-to-Transparent Gradient
Press G for the Gradient Tool, set it to black-to-transparent, and drag from the far end of the streak back toward your subject. The stretch dissolves into the background instead of stopping abruptly.
-
Redraw Until the Falloff Feels Right
Because it’s a mask, you can drag the gradient again and again with no penalty — each pass replaces the last. A shorter drag gives a fast, punchy fade; a longer one gives a soft trail.
Push It Further
Stack Multiple Streaks
Repeat the whole process on additional layers, sampling different columns of your subject. Two or three overlapping streaks at different lengths give a much richer result than one heavy stretch.
Blend Modes Change Everything
Set the stretched layer to Screen for a light, airy trail or Multiply for something heavier and more graphic. Our PRO course on compositing with blending modes goes through how each mode actually treats the pixels underneath.
Match the Light
If the streak is fighting the lighting in the photo, add a subtle glow or shadow to reconcile them. Advanced Lighting Effects in Photoshop (PRO) covers the techniques for making an added element sit in the scene’s real light.
Mistakes That Flatten the Effect
Stretching the Top Layer
If your subject goes blurry, you transformed the wrong copy. The top layer must stay untouched — it’s the only thing keeping the subject sharp against the streaks.
Sampling a Dull Column
Click on a flat, low-contrast part of the subject and you’ll get a flat, low-contrast streak. Sample somewhere with real color variation and the stretch carries that variation with it.
Skipping the Gradient Mask
A stretch that stops dead at the edge of the frame never looks intentional. The fade is what turns a transform into a designed effect, and it takes about three seconds.
Why Such a Simple Technique Works
The reason a pixel stretch reads so convincingly as motion is that it isn’t invented data — it’s your subject’s own colors, in their own vertical order, extended through space. Your eye recognizes the relationship even when the shape is abstract, so the streak feels attached to the person rather than pasted behind them.
That’s also why the sampling point matters more than the drag distance. Get the column right and even a modest stretch looks intentional; get it wrong and no amount of warping saves it.
Make It Part of Your Toolkit
Select Subject, duplicate twice, single-column marquee on the middle layer, stretch with Free Transform, bend it with Warp, and fade it with a gradient mask. Download the free sample images and PSDs and build it once from scratch — then try it on a runner, a car, a bottle, or a dancer. The technique doesn’t care what the subject is; it only cares that something in the frame should feel like it’s moving.
For more creative looks like this taught in order, our PRO Artistic Effects Learning Path is where to go next.
Quick Reference: Keys, Menus and Settings
- Select the subjectSelect Subject in the task bar; for objects, the Object Selection tool with a rectangle
- Two copiesCmd/Ctrl + J twice, then work on the middle layer
- One column of pixelsSingle Column Marquee tool (under the Rectangular Marquee), click on the subject
- Stretch itCmd/Ctrl + T, then Cmd/Ctrl-drag a side handle outward
- Bend itRight-click inside the transform > Warp, drag the corners and center, press Enter
- Fade itAdd a layer mask, G for the Gradient tool, Basics > Foreground to Transparent with black in front, drag
- Subject over or underToggle the top copy, or lower its opacity
- Full screenF
Mac first, then Windows where they differ.

Free Downloads
Follow Along on the Same Photos
Get all 3 sample images, the 3 layered PSDs and the PDF guide, and build the stretch on the same photos. Free with a PHLEARN account.
Pixel Stretch Effect: Common Questions
What is the pixel stretch effect?
A single column of pixels from your subject, stretched sideways across the frame with Free Transform. It looks graphic and high end but is three steps: select the subject, grab one column, stretch it.
Why duplicate the subject twice?
The middle copy becomes the stretch. The top copy stays untouched so the subject can sit in front of the streak; turn it off and the subject shows through the stretch instead, or lower its opacity for something in between.
Which tool selects one column of pixels?
The Single Column Marquee tool, hidden under the Rectangular Marquee. It’s rarely used, but here it’s the whole trick: click once on the subject and it selects a one-pixel column from top to bottom.
How do I stretch the column?
With the selection active on the middle copy, press Cmd/Ctrl+T, then hold Cmd/Ctrl and drag a side handle outward. The handles are hard to grab on a one-pixel selection, which is why holding Cmd/Ctrl and dragging from the edge matters. You can pull in any direction.
Why warp the stretch?
A straight stretch works but looks flat. While still transforming, right-click and choose Warp, then push the corners and the center to bend it. The warp also makes parts of the stretch semi-transparent, so it reads as movement.
How do I fade the stretch into the background?
Add a layer mask to the stretch layer, press G for the Gradient tool, choose Basics > Foreground to Transparent with black as the foreground color, and drag. Each gradient point stays editable, so you can fade different directions later.
Does it work on objects, not just people?
Yes. For the car example, use the Object Selection tool (grouped with the Magic Wand), set it to Rectangle, and drag a box around the object. Then the same steps: two copies, single column, stretch, warp, fade.
Which photos suit it best?
Anything with movement: sports, running, athletics. Grabbing the column from a trailing foot makes the streak look like it’s following the subject.
Are the sample files free?
Yes, with a free PHLEARN account. You get all 3 sample images, the 3 layered PSDs and the PDF guide.
Master Photoshop, Lightroom and Photography
Join PHLEARN PRO for $12.99 a month or $99.99 a year. Cancel anytime, with a 100% money-back guarantee.





