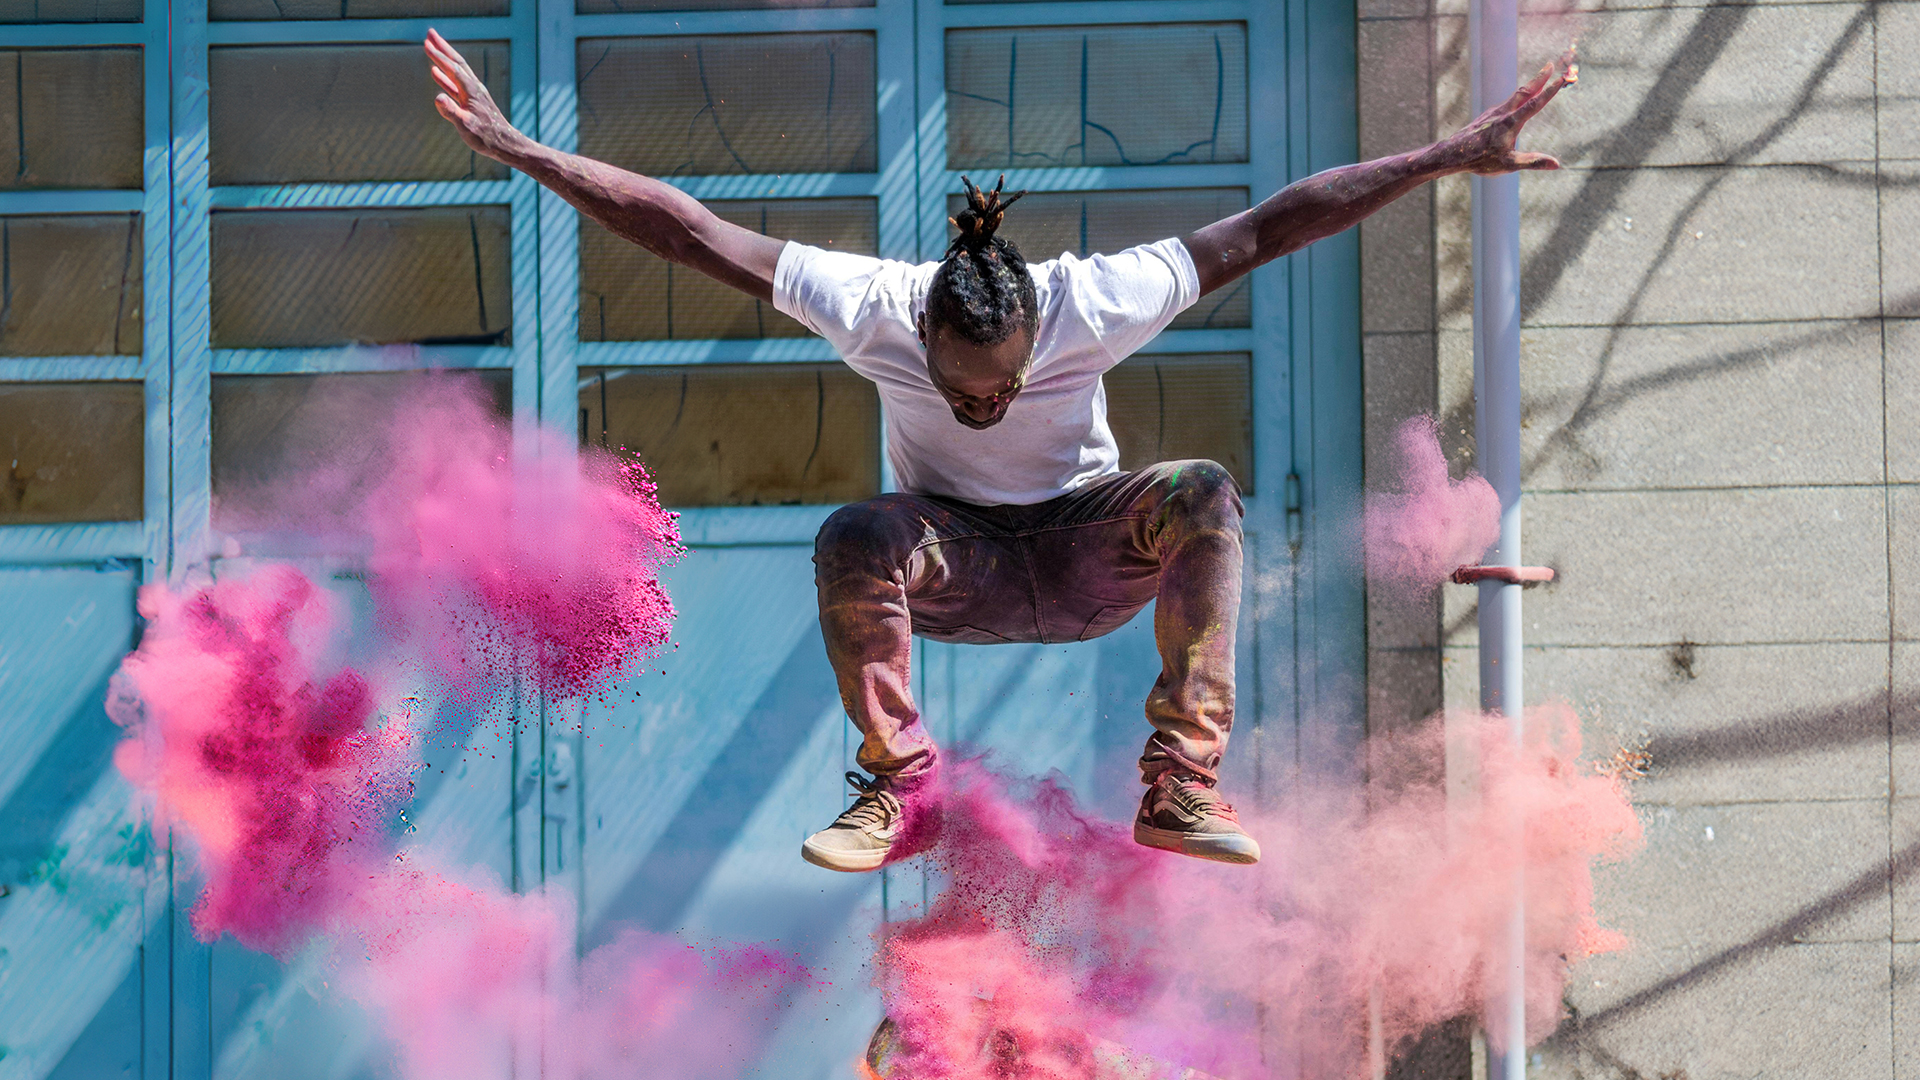

Download Assets
This tutorial includes 1 sample image, 1 sample PSD and 1 PDF guide. Downloads are free with a PHLEARN account.
- Download the sample images and PSDs from every free tutorial on PHLEARN
- New free tutorials published every week
- One free account — sign up once, then download anything
Free PDF Guide · 3 Pages
This Tutorial as a Step-by-Step PDF
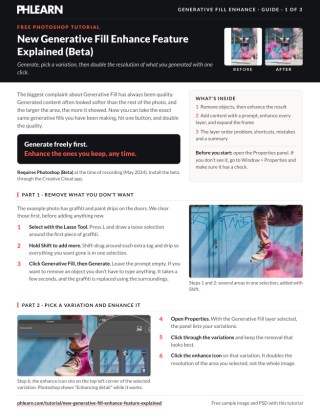
The guide walks through removing graffiti with the Lasso Tool and an empty Generative Fill prompt, the enhance icon in the Properties panel, adding pink dust with a copied prompt, enhancing every generated layer, and Generative Expand from the top layer with the Crop Tool (C), plus the fix for a hard line. Keep it next to your keyboard.
description
Generative Fill has always had one weakness: generated content can look softer than the rest of the photo. This tutorial covers the new Generative Fill Enhance feature in Photoshop Beta, which doubles the resolution of any generated area with one click. Learn how to remove unwanted objects, add new content with a prompt, reuse that prompt across selections, and expand a canvas with Generative Expand, then enhance every generated layer so it matches the original.
Enjoying This Free Tutorial?
We publish a new free tutorial every week, each one with sample images and PSDs you can download and follow along with. Sign up and they land straight in your inbox, along with early word on sales, events and subscriber-only offers.

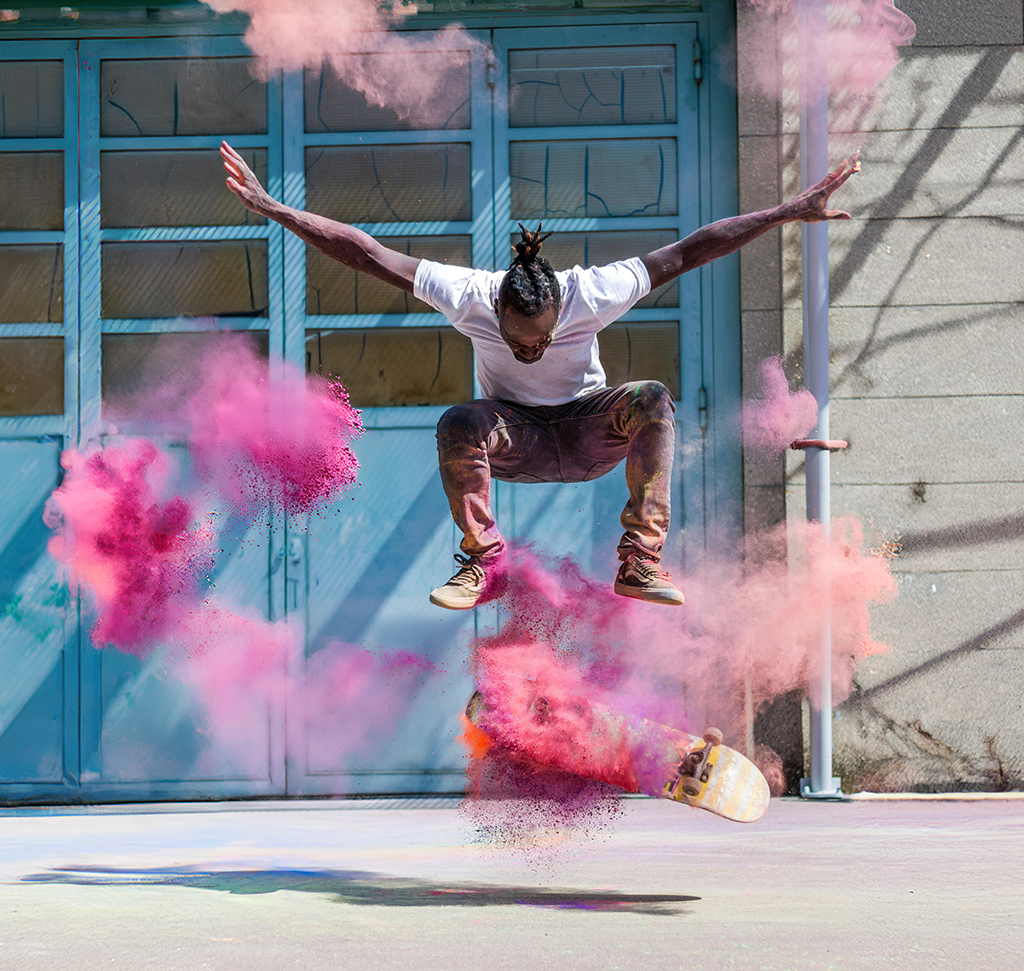
New Generative Fill Enhance Feature Explained (Beta)
The most common complaint about Generative Fill has always been quality — generated content often looked visibly softer than the rest of the photo. The new Generative Fill Enhance feature in Photoshop Beta addresses that directly by letting you double the resolution of any generated area with a single click, and it works whether you’re removing an object, adding new content, or expanding a canvas with Generative Expand.
Getting Started: Removing an Object with Generative Fill
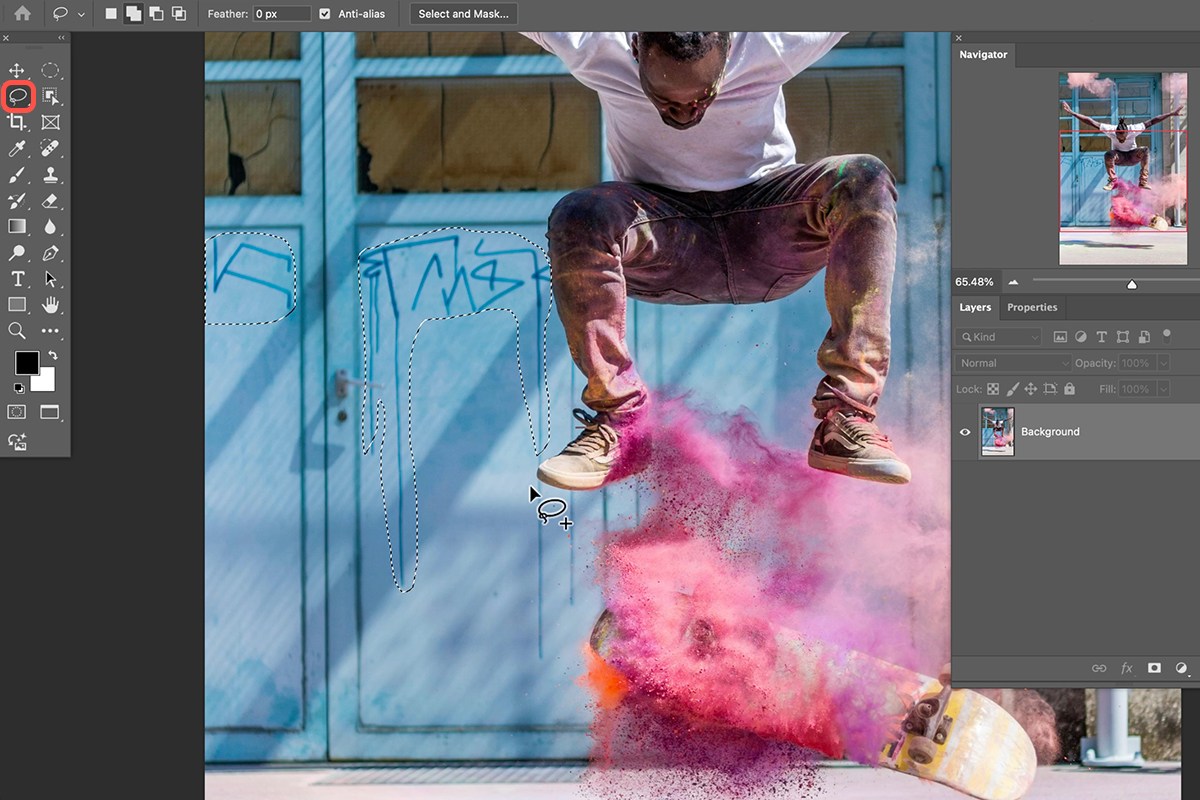
The example starts with a photo that has unwanted graffiti and drips that need removing before anything else is added.
-
Select the Area to Remove
Press L for the Lasso tool and draw a selection around the unwanted content.
-
Add to the Selection with Shift
Hold Shift and drag to add more areas to the same selection, gathering everything you want removed at once.
-
Generate with No Prompt to Remove Content
Click Generative Fill and click Generate without typing anything, which tells Photoshop to intelligently fill the selected area based on its surroundings.
Why This Feature Is a Big Deal
Generative Fill’s biggest limitation up to this point was that its output resolution didn’t always match the rest of a photo, especially over large selected areas. The Generative Fill Enhance feature closes that gap after the fact, meaning you no longer have to accept lower-quality generated regions as a trade-off for the convenience of AI fill.
Reviewing Variations and Enhancing Quality
-
Open the Properties Panel
Go to Window > Properties if it isn’t already open, to see the variations generated for your selection.
-
Click Through the Variations
Review the different generated results and pick the one that looks best.
-
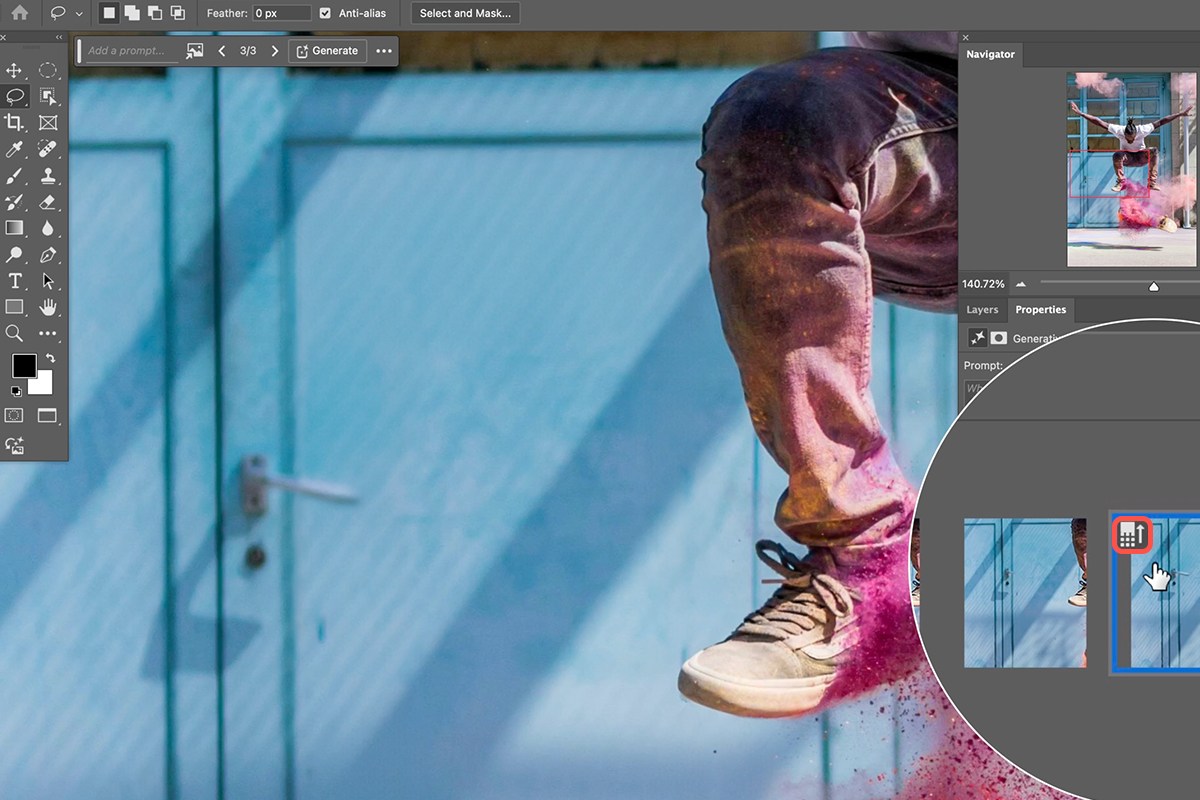
Click the Enhance Detail Icon
Click the new enhance icon in the Properties panel to double the resolution of the selected generated area.
What Enhance Detail Actually Does
The Enhance Detail button doubles the resolution specifically within the area you generated, rather than the whole image, and it can be applied at any time after generation — there’s no time limit requiring you to enhance immediately. This means you can generate freely first and go back to enhance only the results you decide to keep.
Adding Generated Content with Generative Fill
-
Make a New Selection
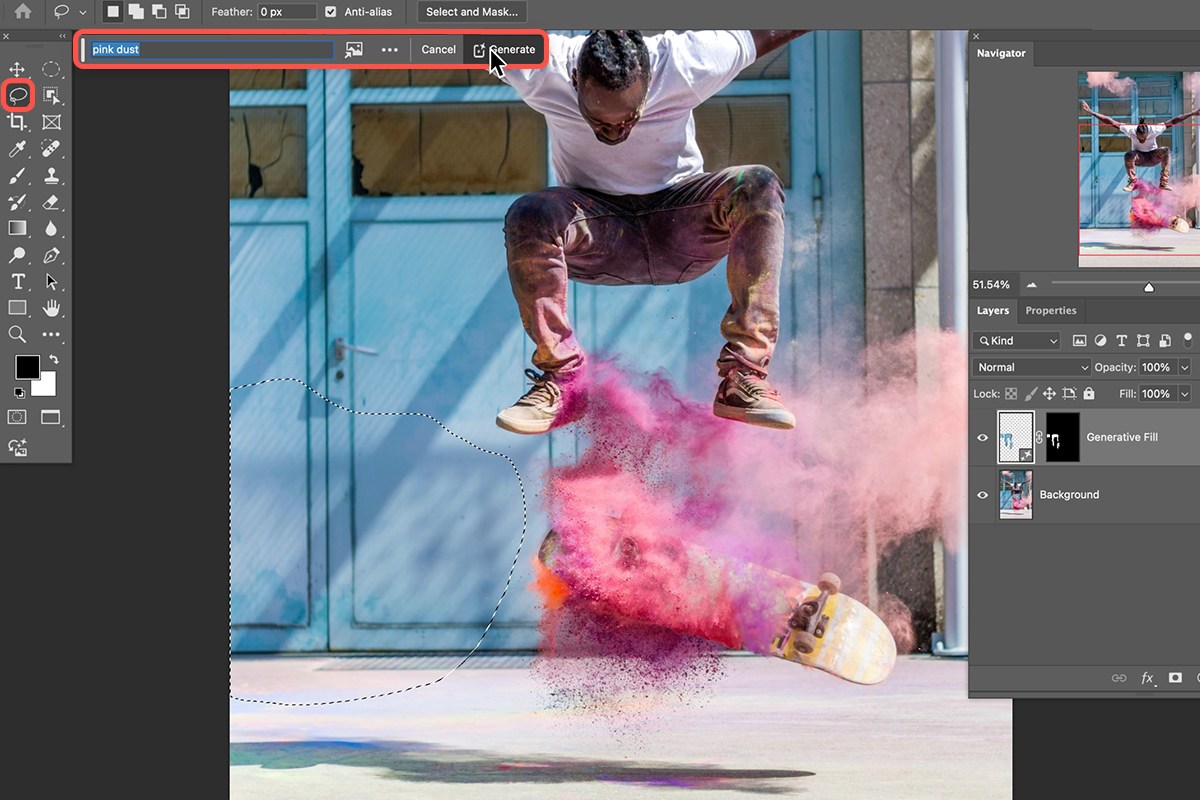
Once unwanted content is removed, make a new selection where you want to add something, like decorative dust or particles.
-
Type a Prompt and Generate
Click Generative Fill, type a descriptive prompt (for example, “pink dust”), and generate.
Reusing a Prompt Across Multiple Selections
-
Copy the Prompt Text
Select the prompt text you typed and press Ctrl + C (Cmd + C on Mac) to copy it.
-
Make Additional Selections and Paste
Make a new selection elsewhere in the image, click Generative Fill, and press Ctrl + V (Cmd + V) to paste the same prompt in rather than retyping it each time.
-
Regenerate for Different Results
Click Generate again on the same selection for new variations, or make an entirely new selection with the same pasted prompt if the results aren’t matching what you want.
-
Start a New Generative Fill Layer When Needed
If repeated generations on the same selection aren’t producing usable results, make a fresh selection with the Lasso tool to create a new Generative Fill layer and try again from there.
Enhancing Detail on Every Layer
With multiple Generative Fill layers built up across a document, each one needs to be enhanced individually to keep the quality consistent throughout the image.
-
Go Through Each Generative Fill Layer
Click on each Generative Fill layer one at a time in the Layers panel.
-
Enhance Detail on Each Variation
Open Properties for that layer and click the enhance icon on the chosen variation, repeating this for every generated layer in the document.
Using Enhanced Detail with Generative Expand
The same Generative Fill Enhance feature also applies to Generative Expand, which is especially useful since expanding a canvas creates entirely new image information that would otherwise be visibly lower quality than the original photo.
-
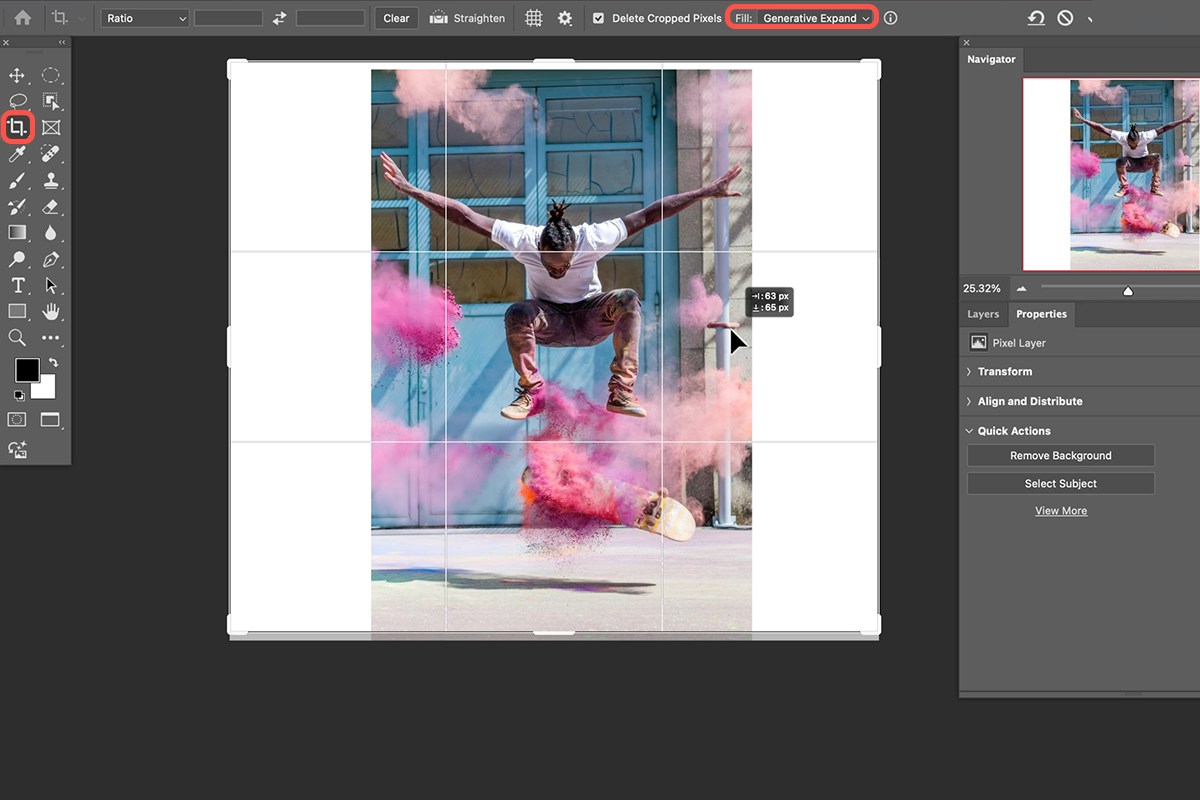
Switch to the Crop Tool
Press C for the Crop tool.
-
Set Fill to Generative Expand
In the options bar, set Fill to Generative Expand.
-
Drag to Expand the Canvas
Click and drag a crop handle outward to expand the canvas boundary, repositioning your subject as needed within the new composition.
-
Hold Alt/Option to Expand Both Sides at Once
Hold Alt (Option on Mac) while dragging to expand the canvas symmetrically from both sides simultaneously.
-
Generate the Expanded Area
Click Generate with no prompt needed, and Photoshop fills the new canvas area with AI-generated content that extends the existing scene.
Avoiding a Common Layer Order Mistake
Generative Expand creates its own new layer, and where that layer lands in the stack depends on which layer was selected beforehand.
-
Select the Top Layer Before Expanding
Before using the Crop tool with Generative Expand, click the topmost layer in your Layers panel to make sure the new expand layer is created above everything else.
-
Undo and Retry if a Hard Line Appears
If a visible hard edge or seam shows up between the expanded area and existing content, undo the expand, confirm the top layer is selected, and generate again.
Why Layer Order Matters Here
If a Generative Expand is triggered while a lower layer is selected, the new expand content gets inserted at that lower position in the stack rather than at the top — even though it visually appears to cover the canvas edges, other layers above it can still show through with a hard, mismatched line where they meet. Always confirming the top layer is active before expanding avoids this entirely.
Common Mistakes to Avoid
Skipping the Enhance Detail step on generated content is the most common oversight, especially on large areas where the quality difference from the rest of the photo becomes obvious on close inspection. Retyping the same prompt over and over instead of copying and pasting it wastes time across multiple selections, and triggering Generative Expand while a lower layer is selected produces a visible seam that’s easy to mistake for a bug rather than a simple layer-order issue.
Why This Approach Works
The Generative Fill Enhance feature matters because it decouples two things that used to be permanently linked: the convenience of generating content with a prompt, and the quality of that content once it’s in your final image. Being able to enhance detail after the fact, with no time limit, means you can experiment freely through several rounds of Generative Fill or Generative Expand without worrying about locking in a lower-quality result — the enhancement step is always available once you’ve settled on a variation you like.
Applying the same enhancement to Generative Expand specifically closes one of the most visible weak points of that feature, since an expanded canvas edge is exactly the kind of large, newly-generated area where a resolution mismatch would otherwise be most obvious. And understanding that layer selection determines where a new Generative Expand layer lands in the stack is what prevents a confusing, seemingly random glitch from turning into wasted troubleshooting time.
Final Thoughts
Since Enhance Detail can be applied at any point after generation, the most efficient workflow is to generate freely first, without worrying about quality, and then go back through every kept layer and enhance it in a dedicated pass. Combined with Generative Expand, this makes it realistic to significantly enlarge or recompose a photo using AI-generated content that actually holds up next to the original resolution, rather than settling for visibly softer results around the edges.
Quick Reference: Keys, Menus and Settings
- Remove an objectL for the Lasso Tool, Shift-drag to add areas, Generative Fill, Generate with no prompt
- Enhance detailWindow > Properties, then the enhance icon on the chosen variation
- Reuse the promptCmd/Ctrl + C to copy it, Cmd/Ctrl + V in each new prompt
- Wrong resultGenerate again, or a new Lasso selection for a new Generative Fill layer
- Expand the frameTop layer selected, C, Fill: Generative Expand, Alt/Option-drag for both sides, Generate
- Fix a hard lineCmd/Ctrl + Z to before the crop, click the top layer, expand again
Free Downloads
Follow Along on the Same Photo
Get the photo, the finished PSD with every enhanced Generative Fill and Generative Expand layer, and the 3-page PDF guide. Free with a PHLEARN account.
Generative Fill Enhance Detail: Common Questions
What does the Generative Fill enhance button do?
It doubles the resolution of the area you generated, not the whole image. Photoshop shows “Enhancing detail” while it works, and the result matches the quality of the photo much better.
Where is the enhance icon?
In the Properties panel, on the variation you have selected. If you don’t see Properties, go to Window > Properties and make sure it has a check. It was a Photoshop (Beta) feature when this was recorded.
How do I remove something with Generative Fill?
Press L for the Lasso Tool and select it, holding Shift to add more areas. Click Generative Fill and click Generate without typing anything. Photoshop fills the area from its surroundings.
Do I have to enhance right after generating?
No, there is no time limit. Build all of your generated layers first, then go back and enhance the variations you keep.
Does enhancing one layer enhance all of them?
No. Click each Generative Fill layer in the Layers panel, open Properties and click the enhance icon on the variation you are using. Repeat for every generated layer.
My prompt gave me something strange. What should I do?
“Pink dust” came back as a basketball hoop, a mailbox and a goat’s foot in the video. Click Generate again for more variations, or draw a fresh Lasso selection to start a new Generative Fill layer.
How do I use the same prompt on several selections?
Select the prompt text and press Cmd/Ctrl + C before you generate. For each new selection, click Generative Fill and press Cmd/Ctrl + V.
Can I enhance a Generative Expand?
Yes. Press C for the Crop Tool, set Fill to Generative Expand and drag out; hold Alt/Option to expand both sides at once. Click Generate with no prompt, pick a variation and click the enhance icon.
Why is there a hard line through my expanded image?
A lower layer was selected, so the Generative Expand layer landed in the middle of the stack. Dragging it to the top didn’t fix it. Undo with Cmd/Ctrl + Z to before the crop, click the top layer and expand again.
Are the sample files free?
Yes, with a free PHLEARN account. You get 1 sample image, 1 sample PSD and 1 PDF guide: the photo, the finished file with its generated layers and a 3-page step-by-step guide.
From the Magazine View all
Stories, interviews and guides for photographers, new every week.
 EditingLightCraft vs Lightroom: I Edited the Same RAW Files in BothThe free clone on the same RAW files: what matches, what breaks and who should switch.
 InspirationRare Historical Photos: 13 of the Rarest Pictures Ever TakenFrom the earliest surviving picture of a person to the last passenger pigeon: who took each one and why it survives.
 EditingArtCraft: Photoshop Cloned by AI in Two Weeks. Is It Legal?ArtCraft cloned Photoshop and Lightroom with AI and gave them away. Any good? Legal? Safe?
Master Photoshop, Lightroom and Photography
Join PHLEARN PRO for $12.99 a month, or $99.99 a year (save 36%). Cancel anytime, with a 30-day money-back guarantee.