
Download Assets
This tutorial includes 1 sample image, 1 sample PSD and 1 PDF guide. Downloads are free with a PHLEARN account.
- Download the sample images and PSDs from every free tutorial on PHLEARN
- New free tutorials published every week
- One free account — sign up once, then download anything
Free PDF Guide · 4 Pages
This Tutorial as a Step-by-Step PDF
Every step from the video in order: Window > Actions, the search box and Suggested list, the custom background, glowing highlights brush, make subject pop, the vintage paper and light leak overlays, when an action needs a new layer or a stamped layer, the hover preview, and where traditional actions live under Yours. Keep it next to your keyboard.
description
The AI Actions panel takes a plain description of what you want and builds the layers to do it. In this tutorial we’ll show you how to use intuitive text prompts to achieve sophisticated edits like background replacement and stylistic effects.
Enjoying This Free Tutorial?
We publish a new free tutorial every week, each one with sample images and PSDs you can download and follow along with. Sign up and they land straight in your inbox, along with early word on sales, events and subscriber-only offers.
Image Source
How to Use the AI Actions Panel in Photoshop
Actions have worked essentially the same way for over a decade: record a sequence of steps, save it, replay it on another file. Useful for repetitive work, and entirely dependent on you having recorded the right thing in advance.
The rebuilt Actions panel changes the premise. You describe what you want in plain language, and Photoshop assembles the edit — choosing from a large library of actions built on its own core tools. What makes it genuinely interesting is not the AI suggestion part. It is that the result is an ordinary, fully editable layer stack rather than a flattened effect.
A note on versions: this was recorded while the new Actions panel was available only in the Photoshop beta. It may have reached the main release by now, and the suggestions may differ. How it works is unchanged.
Opening the Panel
-
Make sure Photoshop is up to date
Check Creative Cloud for the latest version.
-
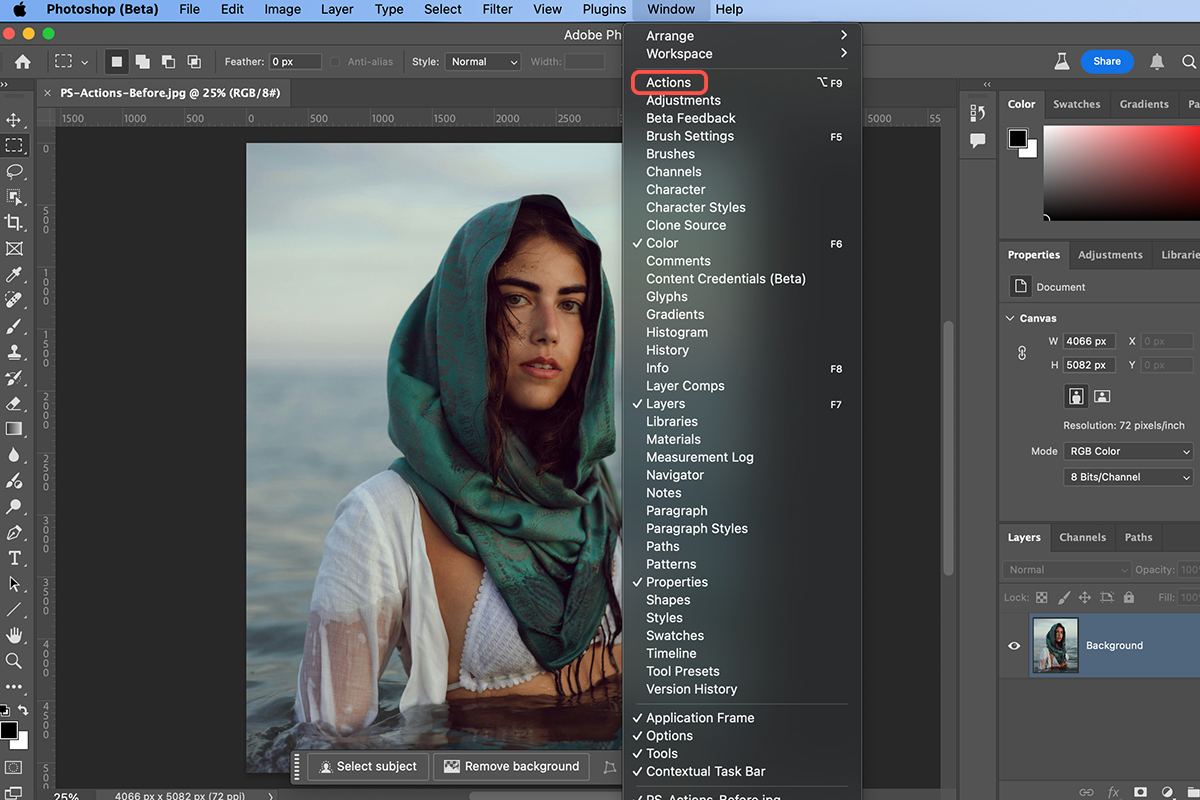
Go to Window, then Actions
Or press Alt + F9 on Windows, Option + F9 on Mac.
-
Dock it next to your Layers panel
Worth doing deliberately — you will be watching the Layers panel constantly to see what each action actually built.
Describing What You Want
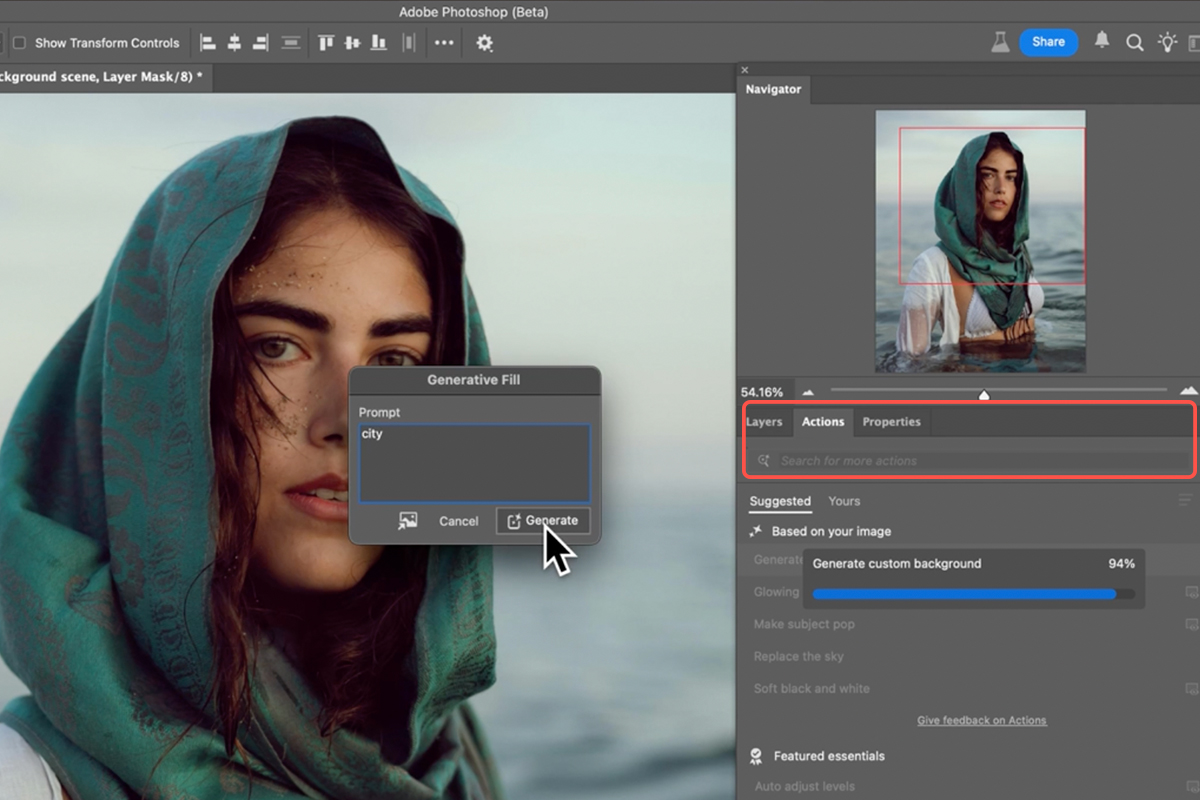
The panel opens with a search field and a set of suggestions. The suggestions are generated from your actual image, so a portrait against a plain background produces different offers than a landscape would.
You can also simply type what you want. The library covers a wide range of edits, and the matching is loose enough that plain descriptions work — “make the subject pop”, “generate a custom background”, “glowing highlights brush”.
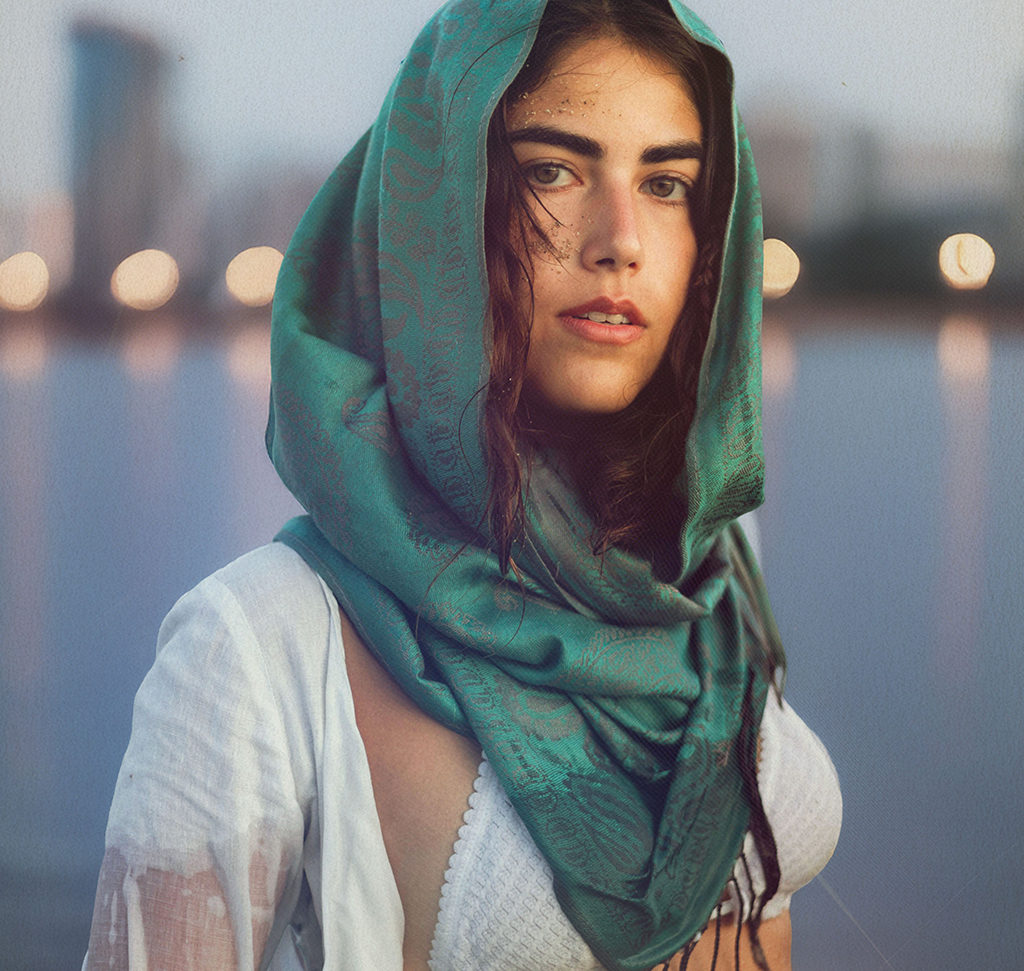
Some actions ask for input. Choosing to generate a background, for instance, prompts you for a description — type “city” and it uses Generative Fill to place your subject in one, offering several variations to pick between.
The Part That Actually Matters
Run an action, then look at your Layers panel. This is where the design decision behind the whole feature shows.
The background generation does not flatten anything. It separates your subject, creates the new environment behind them, and leaves both as normal layers. The subject is still masked, still adjustable, still yours.
A worked example
The glowing highlights action is a good illustration. Run it and you can paint glowing highlights onto your subject — an effect with no single tool behind it. Open up what it built and the construction is entirely conventional:
A stamped-visible composite layer. A Camera Raw Smart Filter on top of it, boosting whites and highlights. A selection of the subject converted into a layer mask. A brush you paint with to reveal the brightened version through that mask.
Every piece is a standard Photoshop technique. Nothing is hidden, nothing is proprietary, nothing is locked.
Which means you can change all of it
Double-click the Camera Raw filter and the panel opens with the exact settings the action used — adjust the highlight boost, or take it somewhere else entirely. Paint on the layer mask to change where the effect appears. Toggle any layer off to see its contribution. Delete the parts you do not want and keep the rest.
This is the difference between a filter and a starting point. A filter gives you a result; this gives you the working file you would have built yourself, without the twenty minutes of building.
Worth Trying
Generate a custom background. Handles the subject separation and the environment in one step, and leaves both editable. Faster than doing it manually and the result is a real composite rather than a flattened image.
Make the subject pop. A request most retouchers hear constantly and nobody can define. The action interprets it — typically separating the subject and adding an outer glow — and because you can see exactly what it did, you can push it further or dial it back.
Glowing highlights brush. Worth running once purely to inspect the construction. It is a genuinely useful demonstration of building a paintable effect from a smart filter and a mask.
Using It Well
Read what it built
The habit worth forming is opening every stack an action creates rather than accepting the result. These are effectively worked examples from people who know Photoshop well, and reverse-engineering a few teaches you techniques you can then use deliberately. The glowing highlights construction is reusable knowledge, not just a button.
Treat results as drafts
Actions are built to work across many different images, which means they are general rather than tuned to yours. Expect to adjust the mask, change the amount, or remove one layer of the stack. That is the intended workflow, not a shortcoming.
Watch for generative resolution
Any action using Generative Fill inherits its resolution cap, so a generated background on a large file can come back softer than your subject. Check at 100% before committing.
Where It Fits
Traditional recorded actions are not going away, and they are still the right answer for genuinely repetitive work — a resize and export you run on four hundred files does not need AI.
What this replaces is the fumbling in between: knowing roughly what you want an image to do but not immediately knowing which combination of adjustment layers, blend modes and masks gets there. Describing it and inspecting the result is often faster than reasoning it out, and you end up with a file you can still work on.
That last point is what makes it worth adopting. Plenty of AI features hand you an outcome and no way in. This one hands you the layers.
Quick Reference: Keys, Menus and Settings
- Open itWindow > Actions; dock it next to Layers
- Find an actionType in the search box (city, vintage, brighten, blur, focus) or use Suggested; the reload icon refreshes suggestions for the image
- PreviewHover the eye icon beside an action
- Actions from the videoGenerate custom background (“city”), Glowing highlights brush, Make subject pop, Auto adjust levels, Vintage paper texture overlay, Light leak overlay, Portrait brighter, Strong blur background, Retro film look overlay
- “Needs a visible layer”Make a new layer, or stamp everything with Shift + Option/Alt + Cmd/Ctrl + E and convert it to a Smart Object
- See what it didOpen the Layers panel: real layers, masks, smart filters and blend modes you can change
- Your old actionsThe Yours tab
Recorded in Photoshop Beta; generative actions (backgrounds, overlays) spend credits.

Free Downloads
Follow Along on the Same Photo
Get the portrait from the video, the PSD with every layer the Actions panel built, and the PDF guide. Free with a PHLEARN account.
AI Actions Panel: Common Questions
What is the new Actions panel?
A search box for edits. Type what you want (“make subject pop”, “vintage”) or pick from suggestions based on your image, and Photoshop runs the steps for you using its own tools. It replaced the old panel in Photoshop Beta.
Is the result a flattened image?
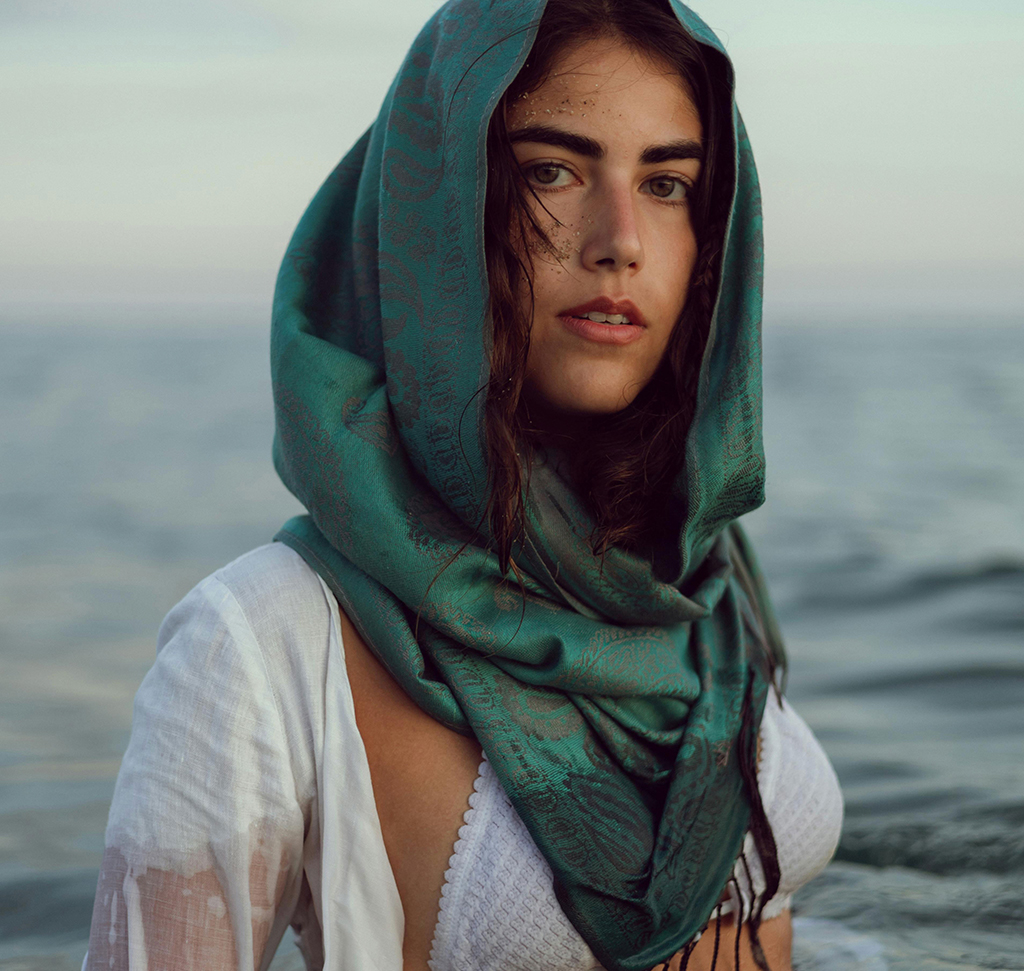
No, and that’s the point. Open the Layers panel and you see what it did: a stamped layer with a Camera Raw smart filter, an outer glow, a masked overlay on Multiply. Toggle, re-edit or delete any of it.
How did it put her in a city?
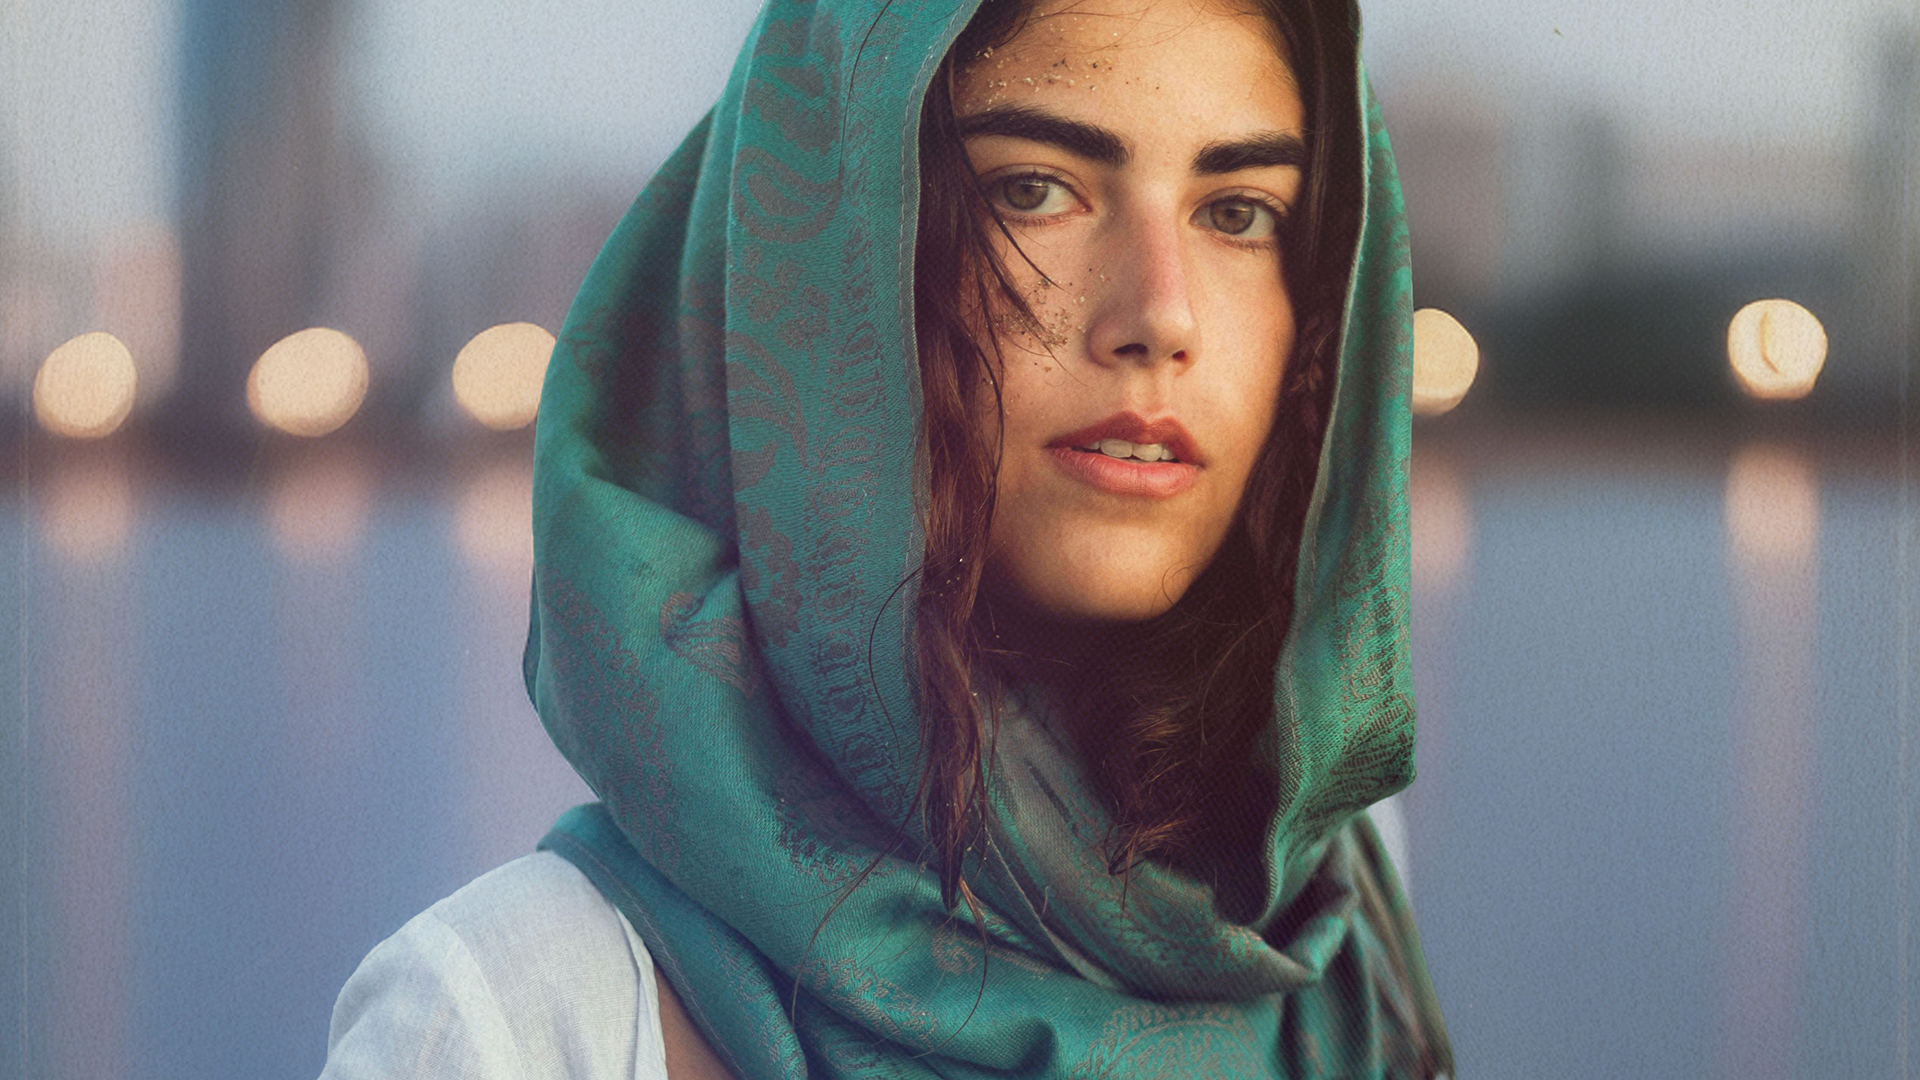
The Generate custom background action: it selected the subject and ran Generative Fill for a city behind her, leaving the subject on its own layer.
What does “make subject pop” do?
In the video it brightened the subject with a Camera Raw filter and added an outer glow. Aaron turned the glow off and kept the rest.
It says the action needs a visible layer. Why?
Some actions want a pixel layer to work on. Make a new layer first, or stamp everything to one layer and convert it to a Smart Object, then run the action.
Which actions didn’t impress?
The background blur, which uses Gaussian Blur. Aaron would rather it used Camera Raw’s lens blur. Portrait brighter also brightened the whole image, not just the subject.
Where did my own actions go?
The Yours tab. Traditional recorded actions still work.
Does it use generative credits?
The actions that generate pixels (custom backgrounds, AI texture and light leak overlays) run Generative Fill and spend credits. Adjustments like levels, curves or glow don’t.
Are the sample files free?
Yes, with a free PHLEARN account. You get the portrait, the PSD with every generated layer and the PDF guide.
Master Photoshop, Lightroom and Photography
Join PHLEARN PRO for $12.99 a month or $99.99 a year. Cancel anytime, with a 100% money-back guarantee.





