

Download Sample Images
Download Assets
Downloads are free with a PHLEARN account.
- Download the sample images and PSDs from every free tutorial on PHLEARN
- New free tutorials published every week
- One free account — sign up once, then download anything
description
Learn how to create seamless panoramas for Instagram using some quick math and easy-to-use Photoshop tools!
Enjoying This Free Tutorial?
We publish a new free tutorial every week, each one with sample images and PSDs you can download and follow along with. Sign up and they land straight in your inbox, along with early word on sales, events and subscriber-only offers.
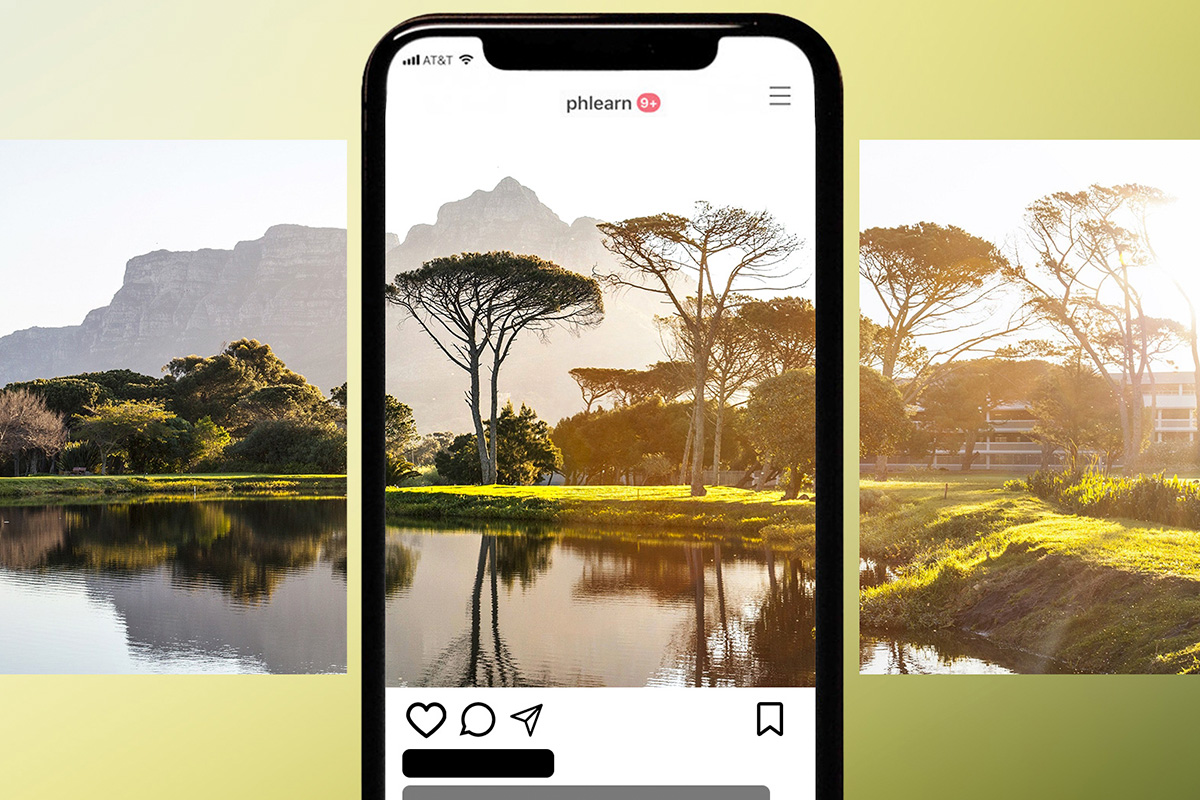
CREATE SEAMLESS PANORAMAS
How to Split a Panorama for Instagram in Photoshop
A panorama is the one kind of photo Instagram handles worst. Upload a wide shot on its own and the feed squeezes it into a thin strip that throws away most of what made the scene worth shooting in the first place. The fix is to stop fighting the crop and use it instead: cut the panorama into a set of evenly sized portrait images and post them together as a single multi-image carousel. When someone swipes, the slices line up edge to edge and the panorama reads as one continuous scene.
Photoshop can do the cutting for you automatically. The whole job comes down to one piece of arithmetic done before you crop, and once that number is right, every step after it is a couple of clicks. Below is the full process: the dimensions, the math, the crop, the guide layout, the Slice tool, and a single export that writes every slice to disk at once.
The Right Instagram Dimensions to Start With
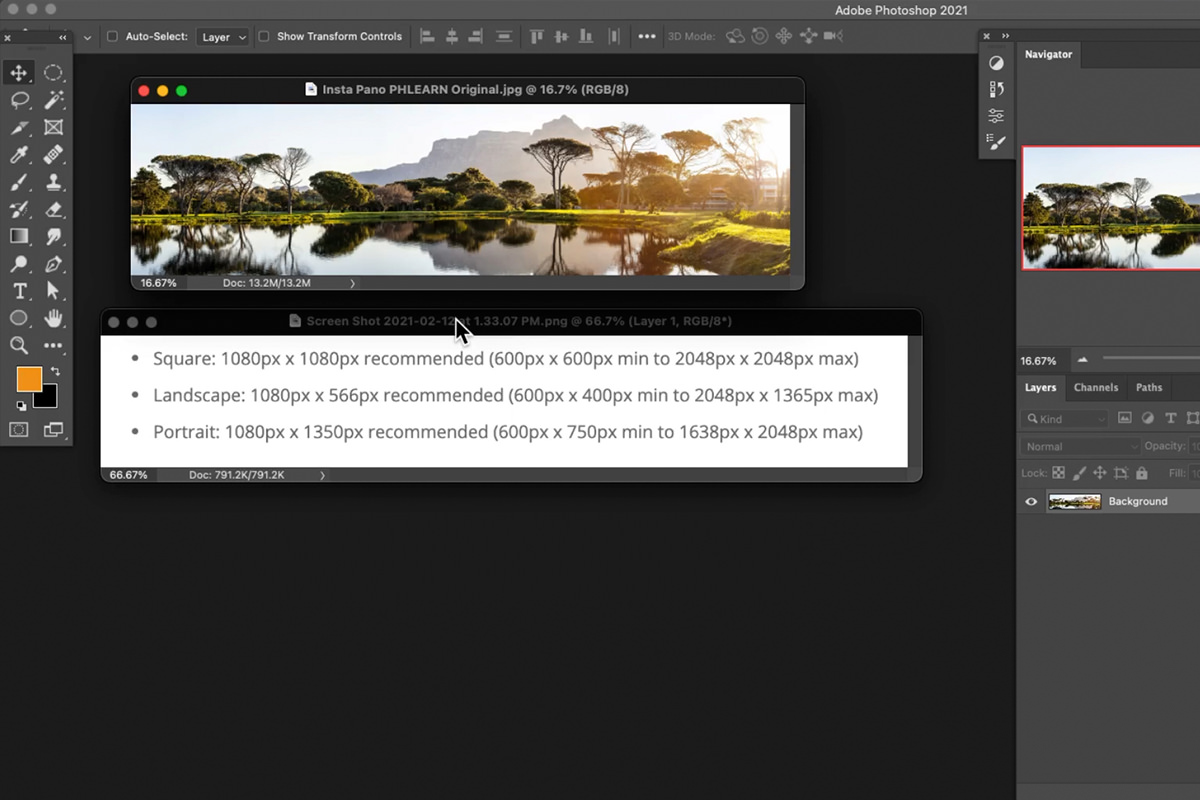
Instagram accepts three basic shapes, and each one has a recommended pixel size. Square posts are 1080 x 1080. Landscape posts are 1080 x 566. Portrait posts are 1080 x 1350. Those numbers are the foundation for everything that follows, because the slices you are about to create have to match one of them exactly.
For a panorama, portrait is almost always the right choice. It is the tallest shape Instagram allows, which means each slice takes up the most vertical space on screen, and taller slices mean the viewer sees more of the photo at any given moment. A panorama cut into square slices works, but it wastes screen height that Instagram is willing to give you for free.
Why the numbers matter more than usual here
With an ordinary single post, being slightly off on dimensions costs you a little sharpness and nothing else. With a sliced panorama it costs you the effect. If the slices are not identical in size, Instagram scales them differently, and the seams between images stop lining up. The illusion of one continuous photo depends entirely on every slice being the same width and the same height, which is why the math comes before the crop rather than after it.
The Math That Makes the Slices Line Up
Decide how many slices you want first. Somewhere between three and five works for most panoramas. Fewer than three and the effect is not obvious; more than five and people stop swiping before they reach the end.
Then multiply the width of a single slice by the number of slices. Using portrait dimensions and five slices:
1080 x 5 = 5400
That gives you a final image 5400 pixels wide and 1350 pixels tall. Every slice cut out of it will be exactly 1080 x 1350, which is precisely what Instagram wants. If you would rather post four slices, the width is 4320. Three slices is 3240. The height stays at 1350 no matter how many slices you use, because the height of the finished post never changes.
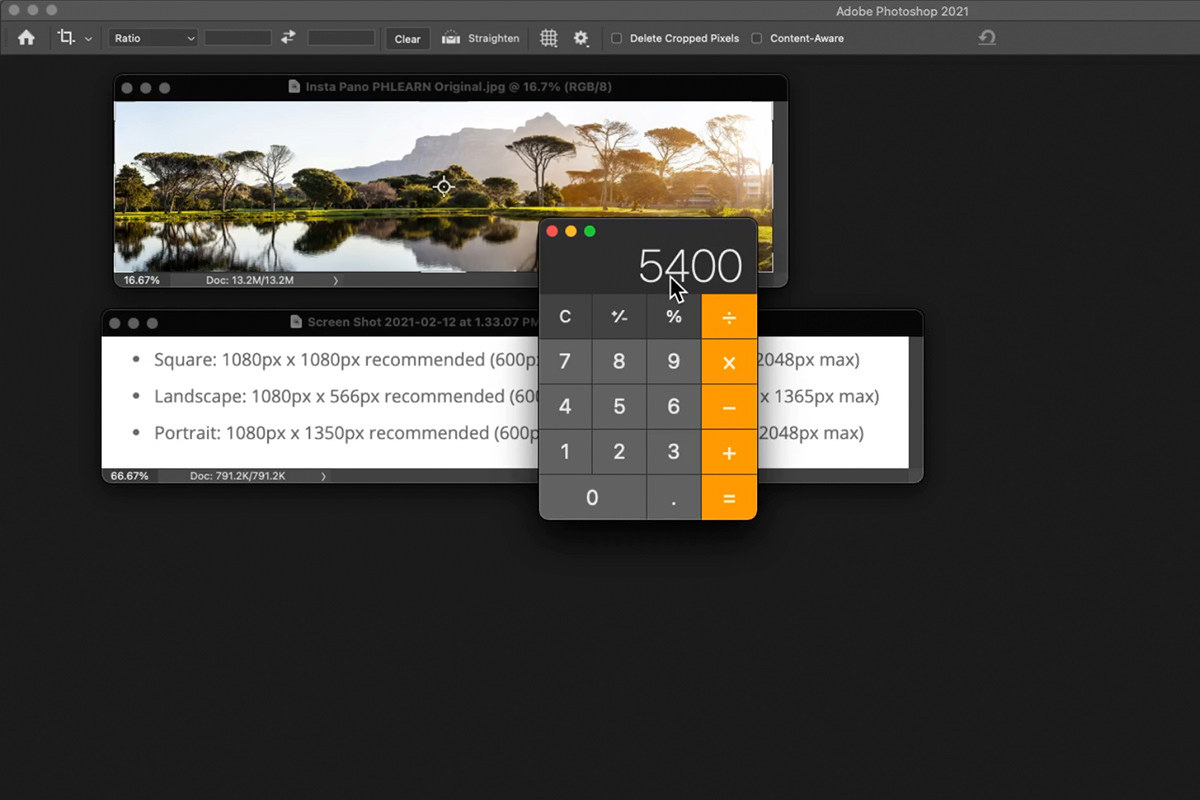
This is the only calculation in the tutorial, and it is worth doing before you touch the crop tool. Cropping first and doing the math afterward means cropping twice.
Cropping the Panorama to the Exact Width
With the target dimensions known, the crop is straightforward.
-
Open the panorama and select the Crop Tool
Press C, or pick the Crop Tool from the toolbar.
-
Switch the ratio dropdown to Width x Height x Resolution
By default the Crop Tool works in ratios, which will not give you exact pixel dimensions. The Width x Height x Resolution mode lets you type real numbers.
-
Type the width and height with units
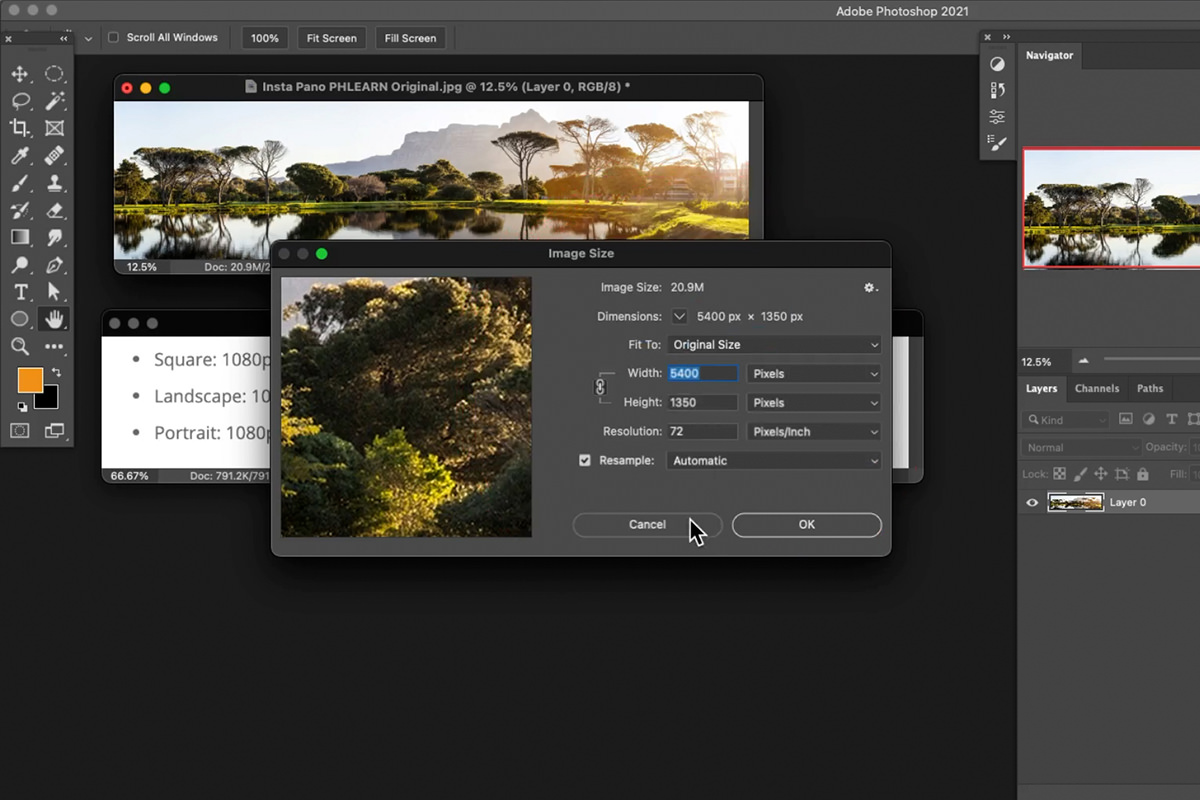
Enter 5400 px in the width field and 1350 px in the height field. Including px matters — without it, Photoshop may interpret the value as inches and produce a file far larger than you intended.
-
Position the crop and commit it
Drag the image inside the crop box to choose what stays. Press Enter to apply.
Expect to lose a little off the top or bottom. A panorama straight out of a stitching program is rarely in the exact aspect ratio Instagram wants, so something has to give. Look at the crop preview before committing and make sure nothing important is falling outside the box — a horizon that sits too high or a subject that ends up half out of frame is much easier to fix now than after the slices are exported.
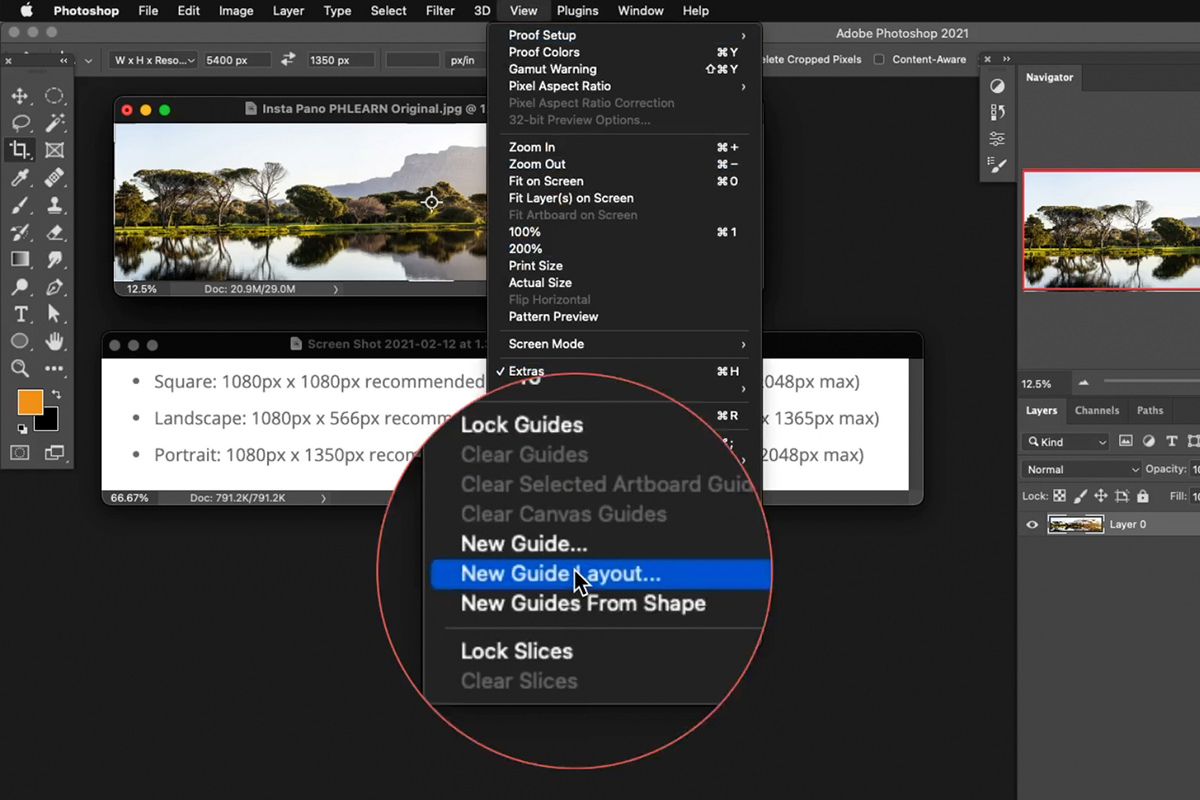
Confirm the size before moving on
Go to Image and then Image Size and check the numbers. You should see exactly 5400 x 1350 pixels. This takes two seconds and catches the most common mistake in the entire process — a crop that was applied in inches, or a width that was mistyped by a digit. Everything downstream depends on this number being right, so verify it rather than assuming it.
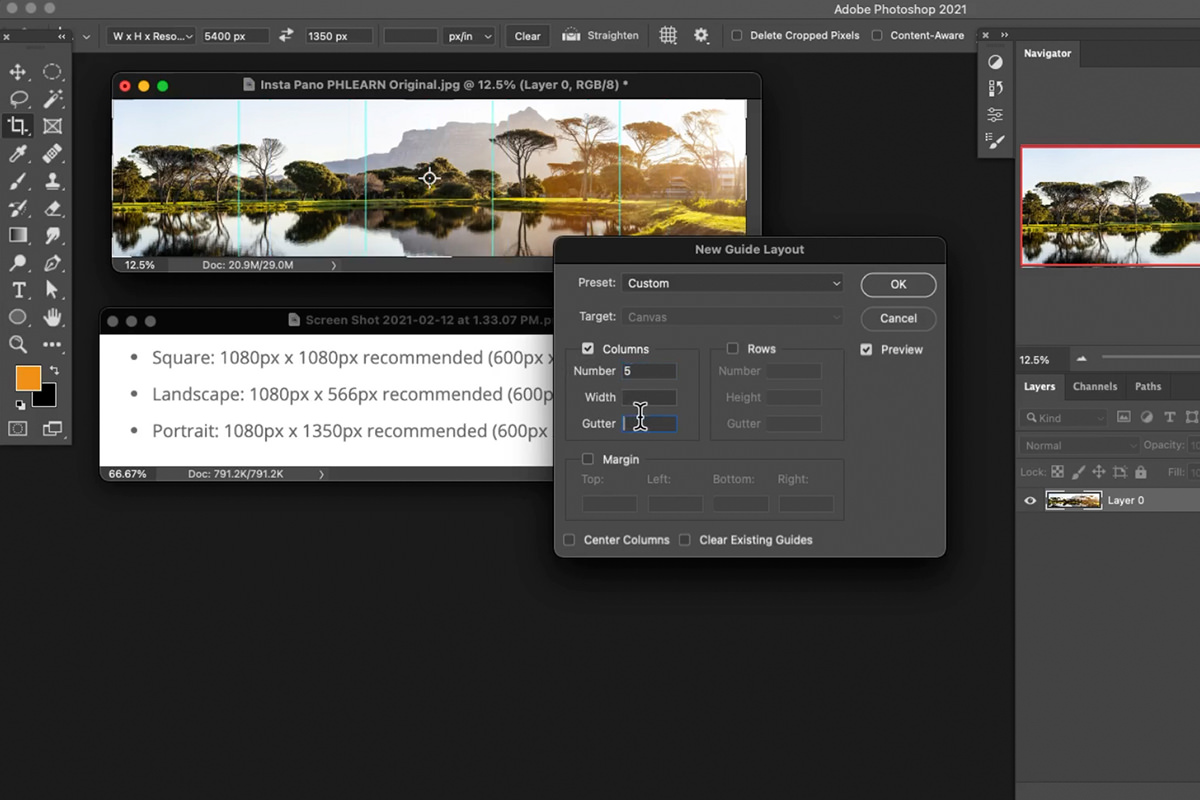
Dividing the Image with a Guide Layout
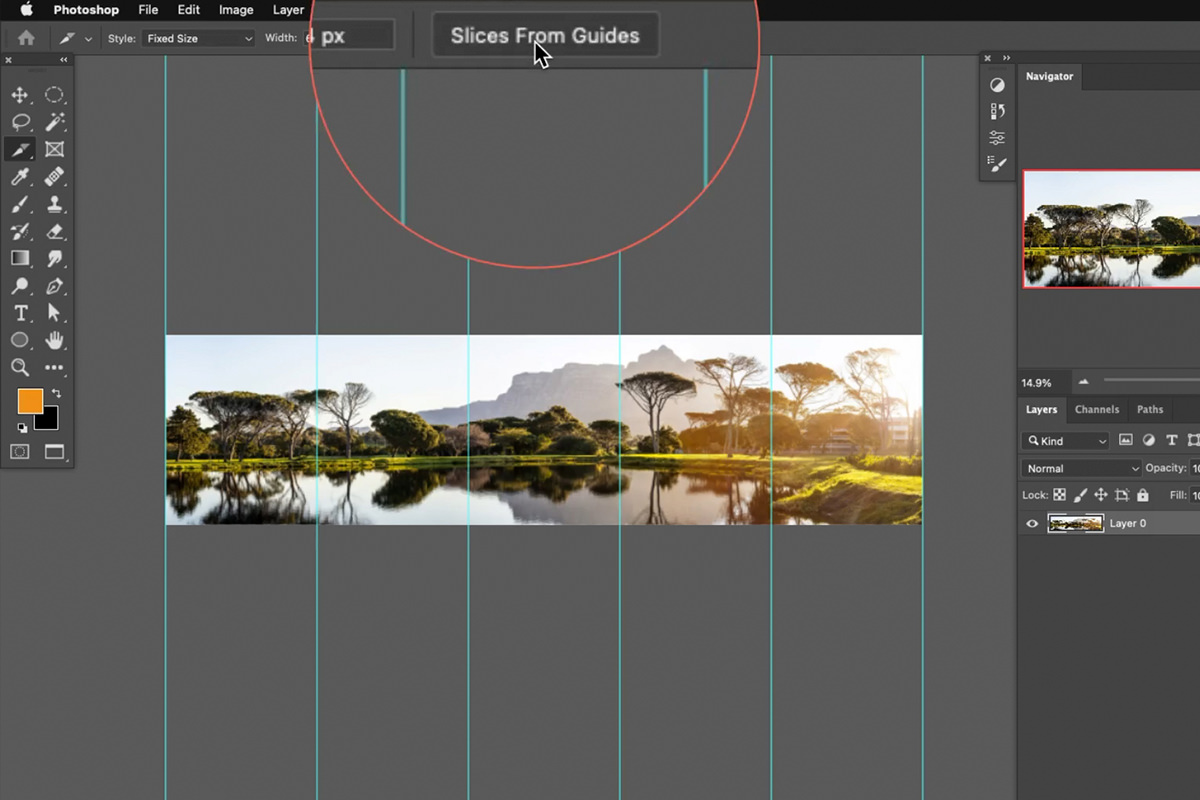
You could place guides by hand, but there is no reason to. Photoshop has a feature that divides a canvas into perfectly even columns in one dialog.
-
Go to View and then New Guide Layout
Press F first if you want to work in full screen, which makes the guides easier to see.
-
Set the number of columns
Enter the same number of slices you used in the math — 5 in this example. Photoshop divides the canvas evenly and places the guides for you.
-
Set Width and Gutter to zero
This is the step people miss. If the Gutter field has a value in it, Photoshop leaves a gap between columns and your slices will not be 1080 pixels wide. Both fields need to read zero.
-
Click OK
The canvas is now divided into identical vertical segments.
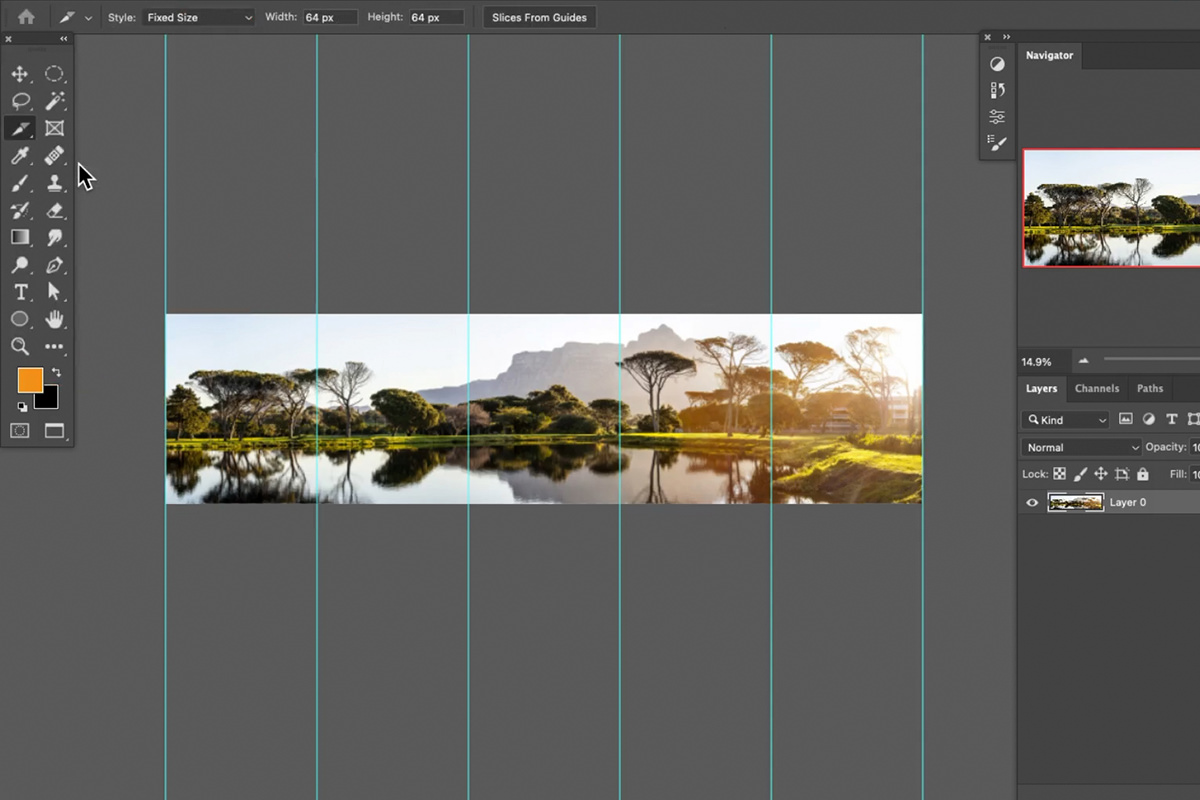
The guide layout is doing the hard part here. Dragging guides manually onto a 5400 pixel canvas and expecting them to land on exact 1080 pixel boundaries is not realistic, and being off by even a few pixels shows up as a visible jump between slices when the carousel is swiped.
Turning Guides into Slices
Guides on their own are just visual references — they do not affect the file. To turn them into something Photoshop can export, you need the Slice Tool.
-
Find the Slice Tool
It is nested underneath the Crop Tool. Click and hold on the Crop Tool icon to reveal it.
-
Click Slices From Guides
With the Slice Tool active, this button appears in the options bar at the top of the screen. One click converts every guide into a slice boundary.
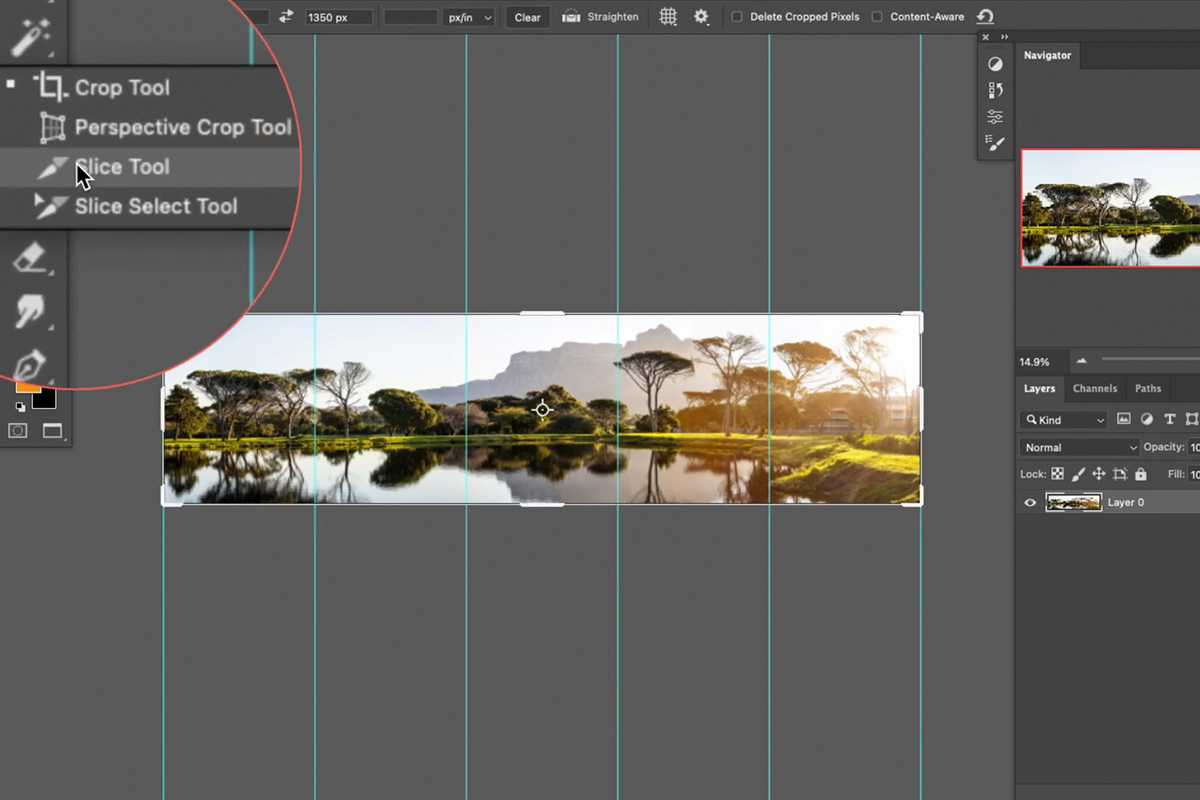
The canvas now shows numbered slice regions, one per segment. Nothing has been cut yet — the original file is untouched — but Photoshop now knows where to divide the image when you export.
Exporting Every Slice at Once
The payoff is that all the slices come out in one operation.
-
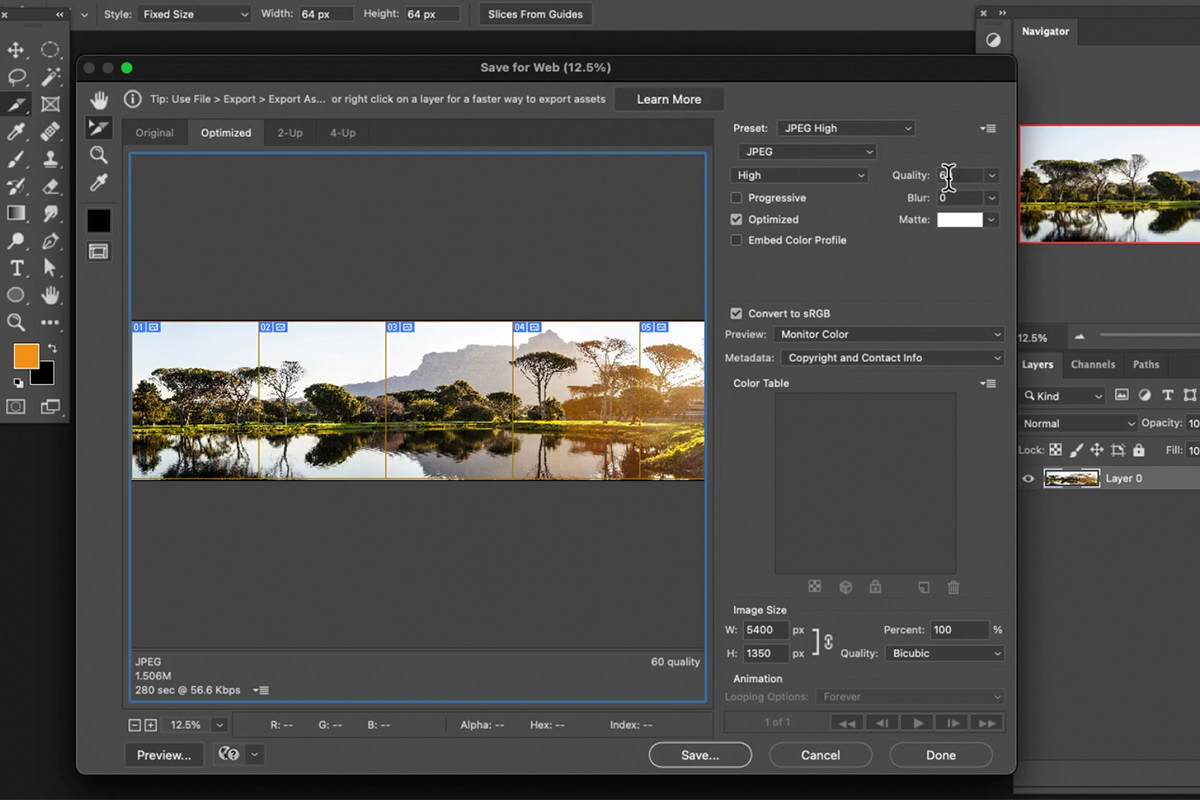
Go to File, then Export, then Save for Web (Legacy)
The word Legacy is a little alarming but this dialog is the one that understands slices, and it still works.
-
Select every slice
Zoom out so you can see the whole image, click the first slice, then hold Shift and click each remaining one. If you skip this, Photoshop exports only the slice that happens to be selected.
-
Choose your file settings
JPEG at a quality of around 60 is plenty for Instagram, which re-compresses everything you upload anyway. Nothing else in the dialog needs to change.
-
Save to a folder you will find again
Photoshop creates an images subfolder and writes out every slice, numbered in order.
Check one of the exported files before you go anywhere. Each one should be exactly 1080 x 1350 pixels. If they are, the hard part is done.
Posting the Carousel in the Right Order
Upload the slices to Instagram as a single multi-image post, adding them left to right in the order they were exported. The file names Photoshop generates are sequential, which makes this easy to get right — but it is also the last place the whole effect can fall apart, so double-check the order in the preview before you publish.
One thing worth knowing: Instagram shows the first slice as the cover image in the grid. That means the leftmost part of your panorama is what people see when they browse your profile, and it is doing the work of pulling them into the swipe. If the left edge of your panorama is the least interesting part of the scene, it is worth reconsidering the crop and shifting it so something compelling lands in the first slice.
Common Problems and How to Avoid Them
The seams do not line up
Almost always the Gutter value in the New Guide Layout dialog. Set both Width and Gutter to zero and redo the guides.
The exported files are the wrong size
Go back and check Image Size. If the canvas was not exactly 5400 x 1350 before you placed the guides, the slices cannot be 1080 x 1350 afterward. This usually traces back to a crop entered without the px suffix.
Only one file exported
The slices were not all selected in Save for Web. Click the first slice, then Shift-click the rest, then export again.
Instagram softened the images
Some quality loss is unavoidable because Instagram re-compresses uploads. Exporting at a slightly higher JPEG quality helps a little, but do not chase this too far — going from 60 to 100 mostly produces bigger files that Instagram compresses right back down.
Adapting the Technique
Nothing about this process is specific to five slices or to portrait dimensions. Change the multiplier and you change the number of slices. Use 1080 x 1080 as your slice size and the same steps produce a square carousel instead. You can even run the guide layout in rows rather than columns if you want to divide an image vertically, though that is a rarer use case.
The principle stays the same throughout: decide the final slice dimensions first, multiply to get the canvas size, crop to that exact number, then let the guide layout and the Slice Tool handle the division. Get the arithmetic right at the start and Photoshop does the rest without any manual measuring at all.
New Free Tutorials View All »











Enjoying This Free Tutorial? Go Further with PRO.
Unlock Full Sample Files, PSDs, and Hundreds of Masterclasses!

Download full project assets, original PSDs, and RAW images for every lesson
Unlimited access to our complete library of PRO Photoshop & Lightroom courses
Instant 4K Ultra HD streaming on all devices, anytime, anywhere
Full access to our entire library of Photoshop Actions, Presets, and LUTs
Flexible monthly and annual membership plans
Cancel anytime with zero hassle or commitments