
Download the Sample Image
Download Assets
This tutorial includes sample images and a PDF guide. Downloads are free with a PHLEARN account.
- Free sample files with every tutorial on PHLEARN
- New tutorials published every week
- Unlimited downloads with your free PHLEARN account
Description
2020 Edition
This lesson is from the original 30 Days of Photoshop. Photoshop has changed a great deal since — there is an updated version of this lesson in the 2025 Edition: How to Use Select Subject in Photoshop, Day 9.
If you need a selection with clean lines, smooth curves, and unmatched accuracy, look no further than the Pen Tool in Photoshop! Join us for a bézier ballet where we show you the ropes of this tricky, yet powerful, tool.
This is Day 26 of our 30 Days of Photoshop series. Follow along with all 30 episodes as we explore the magic of Photoshop together!
Continue Watching 30 Days of Photoshop
Enjoying This Free Tutorial?
We publish a new free tutorial every week, each one with sample images and PSDs you can download and follow along with. Sign up and they land straight in your inbox, along with early word on sales, events and subscriber-only offers.
Cut Out Anything with the Pen Tool
Automatic selection tools are great until they aren’t. Point the Quick Selection Tool or Magnetic Lasso at an object with a busy edge, or an edge that sits between two similar tones, and they start guessing wrong. The Pen Tool never guesses. You trace the edge yourself with a smooth, fully editable path, turn that path into a selection, and load it into a layer mask. If you can trace a gingerbread cookie, you can cut out anything with a solid edge.
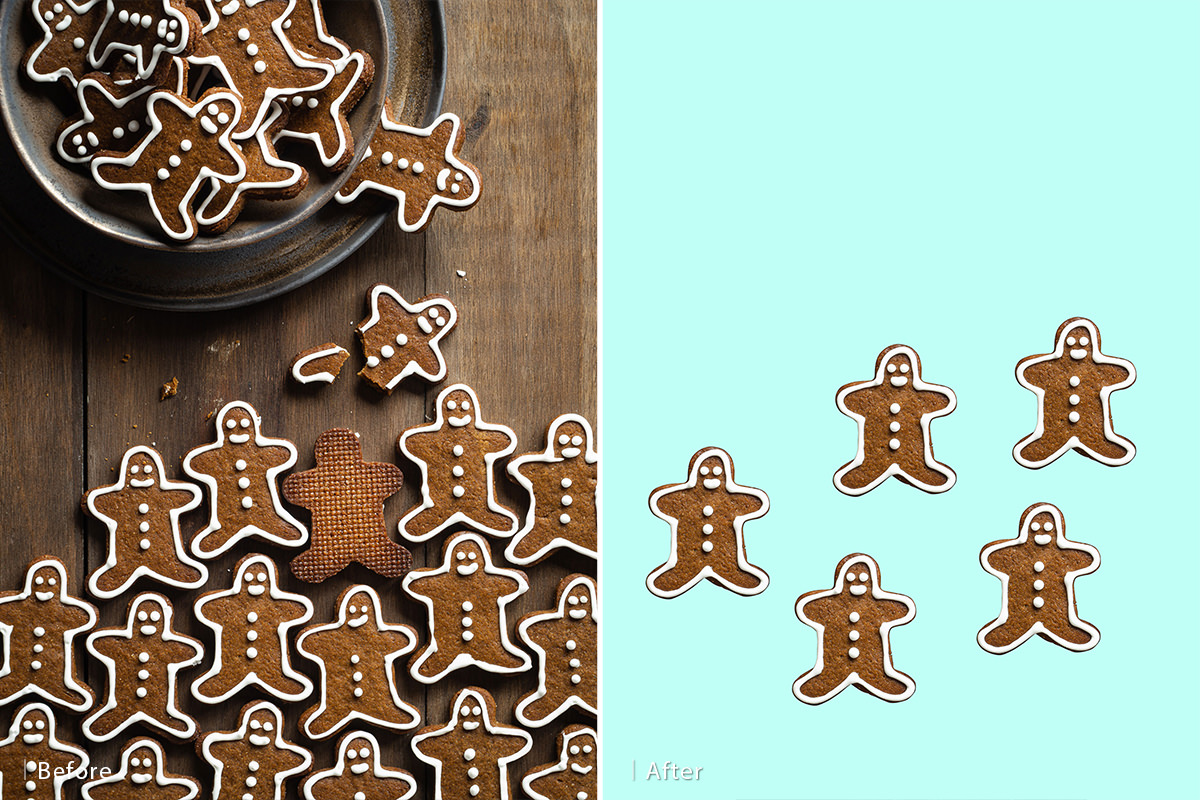
This lesson uses a plate of gingerbread people because their brown-on-white edges trip up every automatic tool. By the end you will have one cut out perfectly, sitting on a new background, ready to duplicate.
Set Up the Pen Tool
-
Choose Path Mode
Press P for the Pen Tool. In the Options bar make sure the first dropdown says Path, not Shape. You want a path you can convert to a selection, not a filled shape layer.
-
Adjust the Path Options
Click the gear icon in the Options bar. Bump the Thickness up to about 3 px so the path is easier to see, turn on Rubber Band so Photoshop previews the segment you are about to draw, and leave Auto Add/Delete checked.
-
Open the Paths Panel
Go to Window > Paths. Every path you draw is stored here. Photoshop saves it as a temporary “Work Path” that gets overwritten, so double-click the name and give each path a real name like “Crown” or “Gingerbread” to keep it.
Straight Lines and Editing Points
-
Click to Make Straight Segments
Click several points around the image. Each click adds an anchor point connected by a straight line. Hover over your first point until a small circle appears next to the cursor and click to close the path.
-
Move Points With Ctrl/Cmd
Hold Ctrl/Cmd and click the path to activate it, then keep holding and drag any anchor point to reposition it. Paths are never final; you can adjust them as much as you like.
-
Add and Remove Points
With Auto Add/Delete on, hover over an existing point and click to delete it, or hover anywhere on the path and click to add a new point.
-
Turn a Path Into a Selection
Hold Ctrl/Cmd and click the path’s thumbnail in the Paths panel, or click the dotted-circle icon at the bottom of the panel. Now you have a selection you can paint inside or load into a layer mask.
Drawing Curves
-
Click and Drag for a Curve
Instead of a simple click, click and drag. Two handles appear, and the direction you drag pulls the curve. Continue clicking and dragging along your shape and each new segment bends smoothly into the next.
-
Reshape With the Handles
Hold Ctrl/Cmd and drag a handle to change how it pushes and pulls the curve. By default the two handles stay in line so the curve remains continuous.
-
Make a Corner With Alt/Option
To turn a smooth point into a sharp corner, hold Alt/Option and drag one handle independently. Alt/Option-click a smooth point to strip its handles and make it a plain corner; Alt/Option-drag out of a corner point to give it handles again.
Trace the Gingerbread Person
-
Start a New Named Path
Click in an empty area of the Paths panel to deselect the practice path, zoom in close on the cookie, and begin clicking and dragging along its outer edge. Name the new path as soon as it appears.
-
Follow the Edge Point by Point
Use a click-and-drag at the start and end of each curve. For big, simple curves use as few points as possible; for small bumps place points closer together. Hold the Spacebar at any time to pan around the image without leaving the tool.
-
Handle Corners Correctly
When the edge changes direction sharply, just click (no drag) to place a corner point, then click and drag again to start the next curve. If a corner comes out rounded, Alt/Option-click it.
-
Fix Mistakes Without Starting Over
Ctrl/Cmd + Z undoes the last point. To adjust an earlier point, hold Ctrl/Cmd and drag it. If you accidentally deselect the path, Ctrl/Cmd-click it to reactivate it, then hover over the last anchor point until the cursor shows a small square with two lines and click to continue drawing.
-
Brighten the Image to See the Edge
If the edge is hard to read, add a temporary Curves adjustment layer and brighten the whole image. Reactivate your path and keep tracing. Turn the Curves layer off when you are done.
-
Decide How Much Detail to Keep
You do not have to trace every crumb. Smoothing over tiny irregularities often gives a cleaner result. Close the path when you return to your starting point.
Make the Selection and Mask
-
Convert the Path to a Selection
With the Pen Tool still active, right-click on the canvas and choose Make Selection. Leave feathering at 0 for a crisp edge and click OK.
-
Add a Layer Mask
Select the image layer and click the Add Layer Mask button at the bottom of the Layers panel. If the mask hides the cookie instead of the background, press Ctrl/Cmd + I to invert it. Shift-click the mask thumbnail any time to toggle it on and off.
-
Add a New Background
Add a Solid Color fill layer beneath the image layer and pick any color you like. The gingerbread person now sits cleanly on the new background.
-
Duplicate the Cut-Out
Ctrl/Cmd-click the layer mask to load the selection, then press Ctrl/Cmd + J to copy the cookie to its own layer. Repeat to make as many copies as you need for cards, animations or graphics.
Key Takeaways
- Use the Pen Tool in Path mode whenever automatic selections struggle with an edge.
- Click for corners, click-and-drag for curves, and use as few points as the shape allows.
- Ctrl/Cmd moves points and handles; Alt/Option converts between smooth and corner points.
- Paths are stored in the Paths panel and stay editable forever, so name them.
- Right-click > Make Selection, then add a layer mask to complete the cut-out.
Related Tutorials
Master Photoshop, Lightroom and Photography
Join PHLEARN PRO for $12.99 a month or $99.99 a year. Cancel anytime, with a 100% money-back guarantee.





