

Download Assets
Download Assets
This tutorial includes 4 sample images and 4 sample PSDs. Downloads are free with a PHLEARN account.
- Download the sample images and PSDs from every free tutorial on PHLEARN
- New free tutorials published every week
- One free account — sign up once, then download anything
description
Effortless outfit changes are here! Master the art of transforming clothes and adding accessories to any photo in Photoshop, using the power of AI to achieve stunningly realistic results.
Enjoying This Free Tutorial?
We publish a new free tutorial every week, each one with sample images and PSDs you can download and follow along with. Sign up and they land straight in your inbox, along with early word on sales, events and subscriber-only offers.
Artist Credit
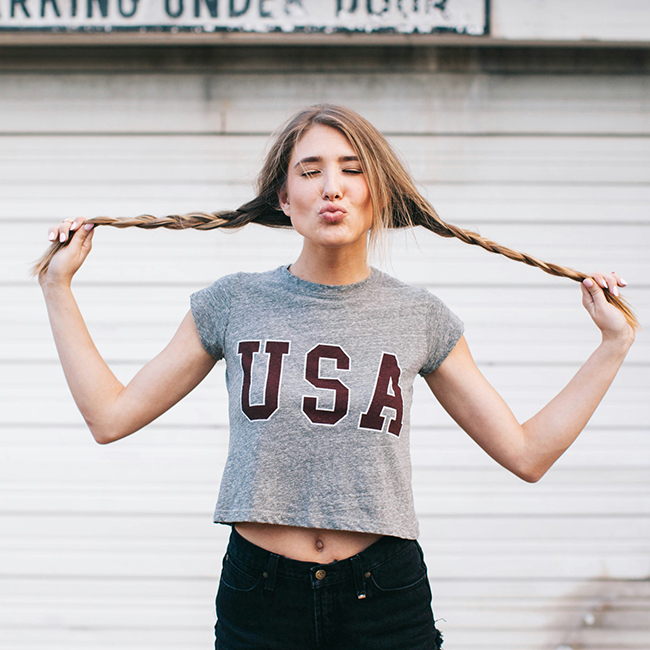
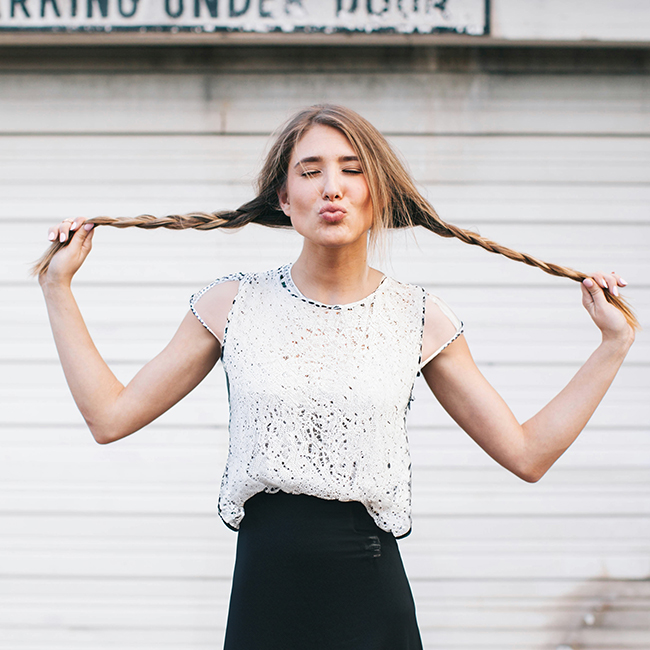
How to Change Clothes Using AI in Photoshop
Changing what someone is wearing used to be a compositing job — sourcing a garment, warping it to the body, matching the light, painting in shadows and folds. Generative Fill does it from a rough selection and a one-word prompt.
It works well, but the results swing wildly depending on where you draw the selection boundary. Most of the skill here is in that boundary, not in the wording.
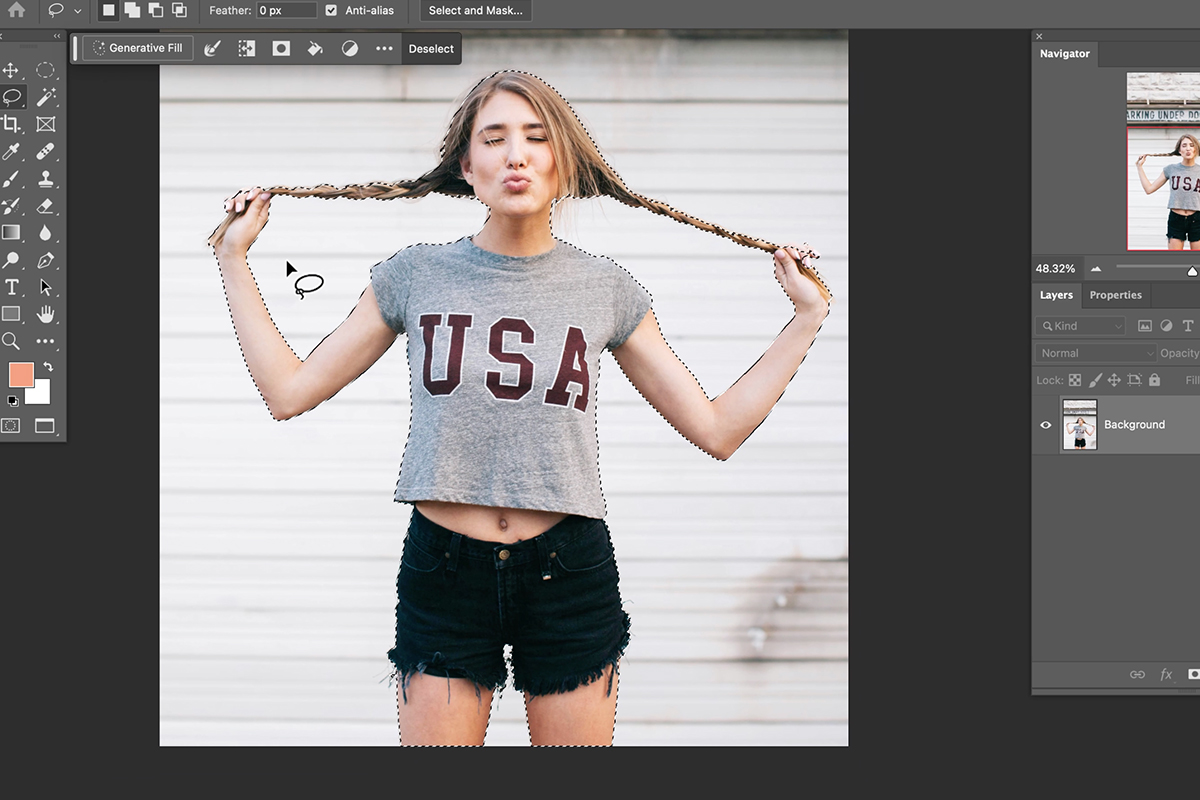
Where the Selection Boundary Should Fall
-
Click Select Subject in the contextual task bar
This gives you the whole person as a starting point.
-
Press L for the Lasso Tool
You are about to cut the selection down to just the clothing.
-
Hold Alt or Option and draw around the face, hands and arms
Subtracting these removes them from the selection so the AI cannot touch them.
-
Hold Shift to add anything missed
A sleeve that was cut off, or fabric the automatic selection did not include.
Leave room around the garment
Do not trace tightly around the existing clothing. A new garment has its own silhouette — a jacket sits wider than a shirt, a dress falls differently — and the AI can only generate inside what you selected. A tight selection forces the new clothing into the exact outline of the old one, which is why results sometimes look shrink-wrapped to the body.
Select generously, out into the surrounding background, and let the garment find its own shape.
Keep the face out of it, always
This is the one rule worth treating as absolute. If any part of the face falls inside the selection, the AI is permitted to regenerate it — and generated faces are subtly, unmistakably wrong. It is the fastest way to turn a usable edit into something that reads as fake.
Hands deserve the same caution. They are hard to generate convincingly and they are usually near clothing, so it is worth spending an extra moment subtracting them cleanly.
Writing the Prompt: Less Is More
Short prompts outperform detailed ones here. A single word — dress, shirt, jacket, coat — is usually enough.
The reason is that Photoshop is already reading the surrounding image: the lighting, the angle of the body, the color temperature of the scene, the way the person is standing. All of that context is doing work you do not need to describe. Adding instructions about fabric, fit and lighting tends to pull the result away from the photograph rather than toward it.
Where extra words do help is naming a style or material when it genuinely matters — a leather jacket, a linen shirt, a formal gown. One qualifier, not a paragraph.
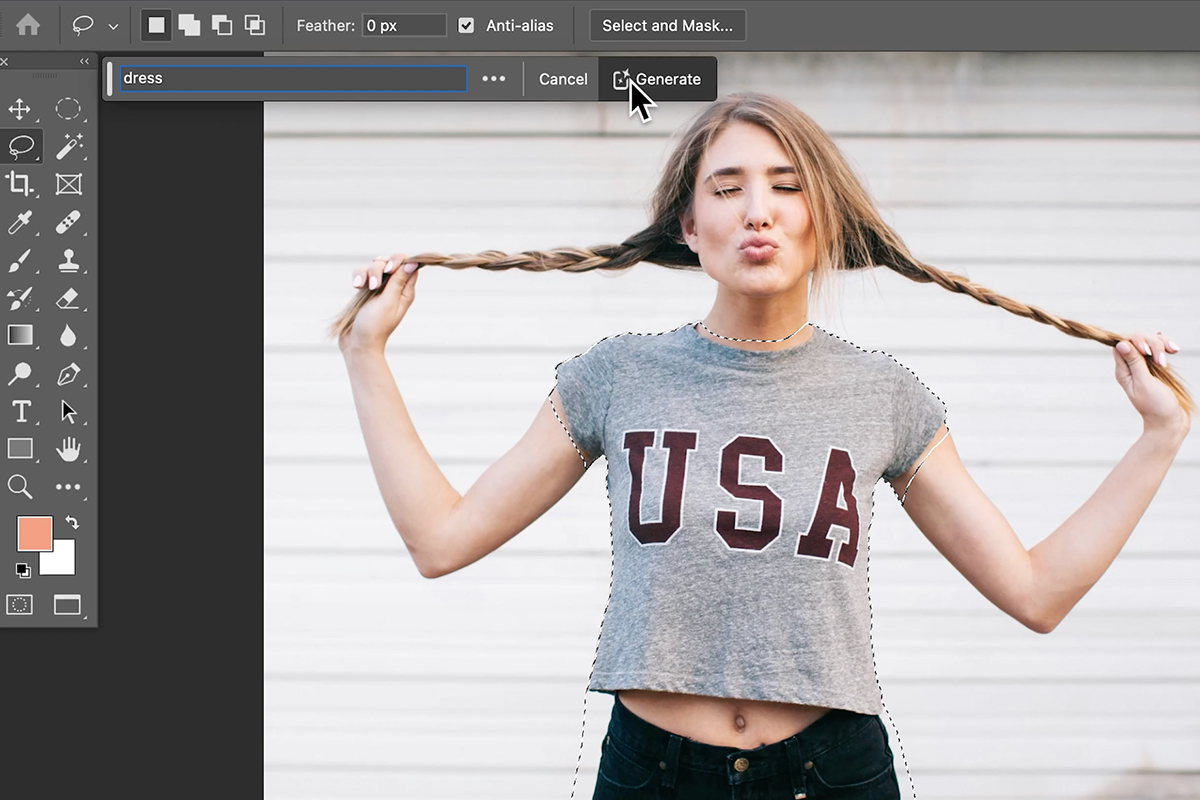
Generating and Comparing
Three variations come back each time, and clicking Generate again produces three more. This is worth doing more than people expect — clothing results vary considerably between generations, and the fourth or fifth attempt is often noticeably better than anything in the first batch.
Each generation lands on its own layer, so nothing is lost by trying again. Group the ones you like and toggle between them to compare properly rather than judging each in isolation.
Fixing Problem Areas Without Starting Over
A common outcome is a garment that works overall but has one bad spot — a seam that does not line up at the shoulder, an odd fold near the waist, a collar that meets the neck strangely.
Do not regenerate the whole thing. Make a small new selection around just the problem area, including a margin of the good clothing around it, and run Generative Fill again. Photoshop blends the patch into what is already there.
This is far more efficient than rerolling a full garment and hoping the good parts survive, and it is the habit that separates fast work from frustrating work with any generative tool.
Adding Accessories on Top
Once the clothing is settled, accessories go on as separate generations — a necklace, earrings, a bracelet, an arm cuff. Prompts like “gold necklace” or “gold bracelet” work well.
Keep each one on its own layer rather than selecting several areas at once. Independent layers mean you can regenerate the earrings without disturbing the necklace, and mask any single item if it overlaps something awkwardly. There is more on this in our tutorial on adding accessories using AI in Photoshop.
More Free Compositing Tutorials
If this was useful, these go further in the same direction:
- How to Create a Composite in Photoshop — building the layered file first.
- Compositing Highlights, Shadows and Reflections — making an added element sit in the scene.
- How to Use the Select and Mask Workspace — cleaner cut-outs, which compositing depends on.
- How to Create and Use Layer Masks — confining an effect to exactly where it belongs.
- How to Make Realistic Shadows in Photoshop — the shadow that anchors an object.
- How to Use Select Subject in Photoshop — the selection engine behind most cut-outs.
Keeping the Result Believable
Check where fabric meets skin
Necklines, cuffs and hems are where generated clothing most often fails. Zoom to 100% and look at the boundary — a soft or slightly melted transition between fabric and skin is the giveaway, and it is easily fixed with a small regeneration of that area.
Watch the light direction
Generated garments usually inherit the scene’s lighting correctly, but not always. If the highlights on the new clothing fall on a different side from the highlights on the face, the composite will feel wrong even to someone who cannot say why. Regenerate rather than trying to paint over it.
Mind the resolution
Generated content comes back at a capped resolution, so on a large file a full-body garment can look softer than the face above it. Working in sections helps, as does keeping the selection no larger than it needs to be.
What This Is Actually Good For
For concepting, this is genuinely useful. Showing a client three wardrobe directions before a shoot, testing whether a darker outfit suits a composition, or previewing a styling idea — all of that now takes minutes instead of a day.
For final commercial work involving a real product, treat it as a starting point rather than an output. The AI generates a plausible garment, not a specific one, so it will not match an actual item a client sells. Where the exact product matters, this is a layout tool and the real garment still has to be photographed.
The one thing worth being deliberate about: changing what someone is wearing is a meaningful edit to how they appear. If it is a brief, that is straightforward. If it is not, it is worth asking first.
New Free Tutorials View All »











Enjoying This Free Tutorial? Go Further with PRO.
Unlock Full Sample Files, PSDs, and Hundreds of Masterclasses!

Download full project assets, original PSDs, and RAW images for every lesson
Unlimited access to our complete library of PRO Photoshop & Lightroom courses
Instant 4K Ultra HD streaming on all devices, anytime, anywhere
Full access to our entire library of Photoshop Actions, Presets, and LUTs
Flexible monthly and annual membership plans
Cancel anytime with zero hassle or commitments