

Download Assets
This tutorial includes 1 custom brush. Downloads are free with a PHLEARN account.
- Free sample files with every tutorial on PHLEARN
- New tutorials published every week
- Unlimited downloads with your free PHLEARN account
description
One photographed bird is enough to build a brush that paints an entire flock. This free tutorial isolates a single silhouette, crops it into its own document, and uses Levels to force it to pure black on pure white before defining it as a brush preset. Scattering and Spacing spread the birds out, Size, Angle, and Roundness Jitter keep any two from looking identical, and the finished settings are saved as a reusable preset.
Enjoying This Free Tutorial?
We publish a new free tutorial every week, each one with sample images and PSDs you can download and follow along with. Sign up and they land straight in your inbox, along with early word on sales, events and subscriber-only offers.
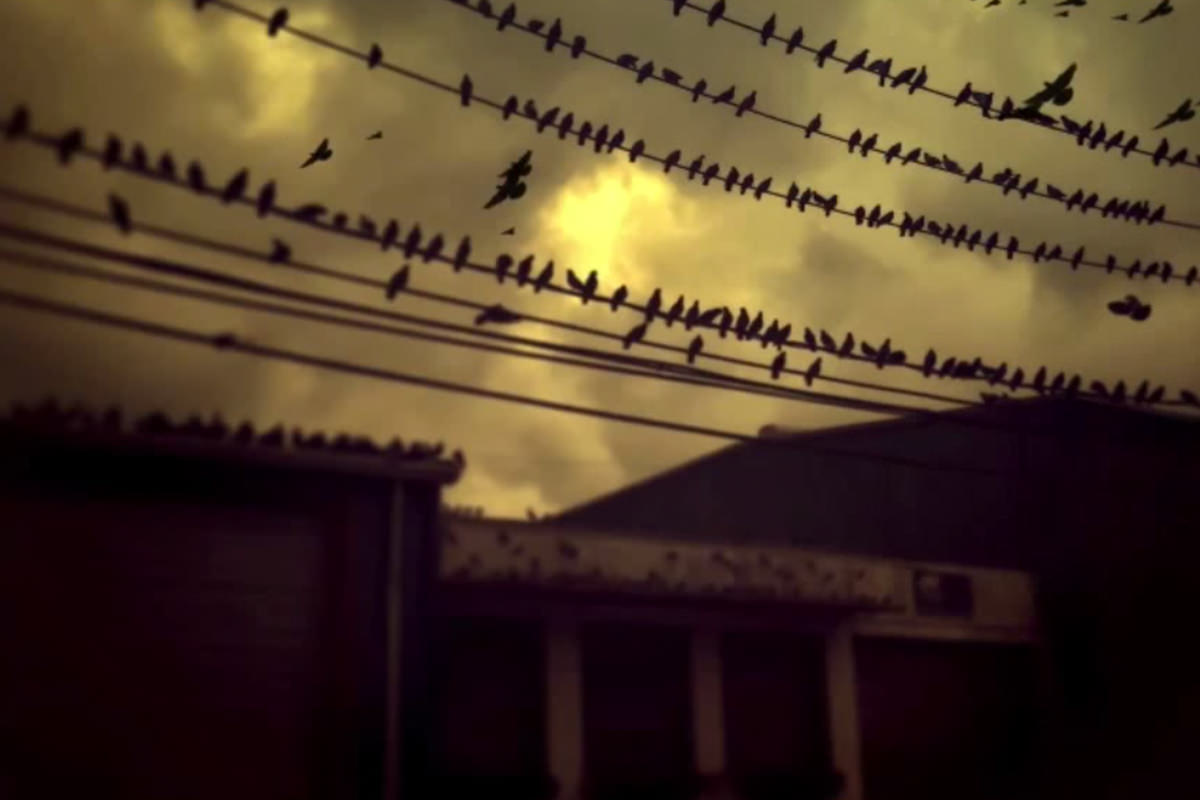
How to Create a Bird Brush in Photoshop
A single bird silhouetted against the sky can become an entire custom brush, ready to scatter a whole flock across any photo without ever needing to composite individual birds by hand. As with any custom brush, the process comes down to isolating a clean shape, converting it to black on white, and then using Photoshop’s brush dynamics to introduce natural-looking variation.
Getting Started: Selecting a Clean Bird Silhouette
A dark bird against a light sky is close to ideal for this kind of brush, since the contrast makes it easy to select cleanly.
-
Select a Single Bird
Use the Marquee Tool to draw a selection around one clear, well-defined bird in your photo.
-
Duplicate It to a New Layer
Press Ctrl + J on PC (Cmd + J on Mac) to duplicate the selection onto its own layer.
Moving and Cropping the Bird into Its Own Document
Rather than building the brush inside the original photo, moving the isolated bird into a fresh document keeps things simple and focused.
-
Duplicate the Layer to a New Document
Right-click the layer, choose Duplicate Layer, and send it to a new document.
-
Crop to the Selection
Hold Ctrl on PC (Cmd on Mac) and click the layer’s thumbnail to reload its shape as a selection, then go to Image > Crop to trim the canvas down to just that area.
Converting the Bird to Black on White
As with any custom brush, Photoshop needs a pure black shape on a pure white background before it can define the shape as a brush.
-
Desaturate the Image
Press Shift + Ctrl + U on PC (Shift + Cmd + U on Mac) to remove color.
-
Use Levels to Force Pure White and Black
Press Ctrl + L on PC (Cmd + L on Mac) to open Levels, and use the white-point eyedropper to click the background until it reads as fully white with no gray remaining. Check the preview closely — a background that still looks slightly gray will show up as a faint box around the bird once the brush is defined.
Defining and Testing the Brush
With a clean black bird on solid white, defining the shape as a brush takes a single menu command.
-
Define the Brush Preset
Go to Edit > Define Brush Preset and name it.
-
Select It and Start Painting
Switch to your original photo, press B for the Brush Tool, right-click to find your new brush at the bottom of the list, and click anywhere on the canvas to stamp another bird.
Adding Scattering and Spacing for a Flock
A single repeated click produces identical, evenly spaced birds; the Brush panel’s scattering and spacing controls are what turn that into something closer to a real flock.
-
Turn On Scattering
Open the Brush panel (Window > Brush), click Scattering, and raise the Scatter value so birds spread out from your stroke rather than following it in a tight line.
-
Increase Spacing
Under Brush Tip Shape, raise the Spacing value if the scattered birds are landing too close together.
Adding Size, Angle, and Roundness Variation
Scattering alone still produces birds that all look identical; Shape Dynamics is what makes each one look like a genuinely different bird.
-
Turn On Size Jitter
Click Shape Dynamics and enable Size Jitter, optionally linking it to pen pressure if you’re using a pressure-sensitive tablet, so pressing harder produces larger birds and lighter pressure produces smaller ones.
-
Add Angle Jitter and Roundness Jitter
Raise Angle Jitter so birds tilt at slightly different angles, and raise Roundness Jitter so some appear with wings more flattened or foreshortened than others — both help avoid the obvious repetition of a single identical silhouette.
Why a Little Bit of Each Setting Goes a Long Way
Pushing every jitter setting to its maximum tends to look chaotic and unnatural, since real flocks of birds still share a broadly similar size and orientation. Small to moderate amounts of Size, Angle, and Roundness Jitter together are usually enough to disguise that every bird came from the same source shape.
Saving the Finished Brush with All Its Settings
Once scattering and jitter are dialed in, saving those settings as part of the brush preset means never rebuilding them for future images.
-
Save as a New Brush Preset
Right-click your brush picker, choose New Brush Preset, and give it a descriptive name that distinguishes it from the plain, unsettled version defined earlier.
Building a Library of Different Birds
Repeating this entire process with a few different bird photos — different species, poses, or wing positions — and saving each as its own brush gives you a small library to combine, producing far more convincing variation in a flock than relying on jitter settings from a single source bird alone.
Why This Also Works for Subjects Other Than Birds
The dark-subject-on-light-background principle that makes this bird easy to select applies just as well to any small, well-defined shape — a leaf, a falling snowflake, a splash of water. Anything with strong contrast against its background is a reasonable candidate for the exact same brush-building process.
Common Mistakes to Avoid With This Technique
The most common mistake is leaving a trace of gray in the background during the Levels step, which shows up as a faint box or halo around every bird the brush paints. The second is pushing every jitter setting to its extreme in search of maximum variation, which tends to look more chaotic than natural. If your flock still looks too repetitive after adding jitter, building a second or third brush from different bird photos usually solves it faster than pushing the settings on a single brush any further.
More Free Photoshop Tutorials
If you enjoyed building this brush, these free tutorials cover other custom brush techniques:
- How to Create a Snowflake Brush in Photoshop
- How to Create a Kiss Brush in Photoshop
- How to Create a Fog Brush in Photoshop
Why This Technique Works
The reason one photographed bird can convincingly stand in for an entire flock comes down to the same principle behind every custom Photoshop brush: define a clean shape once, then let the Brush panel’s dynamics settings introduce enough randomness in size, angle, spacing, and position that repetition isn’t obvious. A flock built this way holds up because real birds in flight already vary in exactly those ways — no two are angled identically or exactly the same apparent size — so matching that natural variation with jitter settings is what sells the illusion. Building a small library of brushes from a few different source birds, rather than relying on one brush’s jitter alone, pushes that realism even further.
Final Thoughts
Once this brush is built and saved, adding a flock of birds to any sky becomes a matter of a few clicks and strokes rather than compositing individual birds by hand. The core lesson carries well beyond birds: any small, well-contrasted subject photographed against a plain background can become a scattering brush using this same isolate-convert-define process, with the same jitter and scattering settings ready to bring it to life.
New Free Tutorials View All »











Enjoying This Free Tutorial? Go Further with PRO.
Unlock Full Sample Files, PSDs, and Hundreds of Masterclasses!

Download full project assets, original PSDs, and RAW images for every lesson
Unlimited access to our complete library of PRO Photoshop & Lightroom courses
Instant 4K Ultra HD streaming on all devices, anytime, anywhere
Full access to our entire library of Photoshop Actions, Presets, and LUTs
Flexible monthly and annual membership plans
Cancel anytime with zero hassle or commitments