Portraits Learning Path
Six tutorials on editing portraits start to finish in Photoshop and Camera Raw, in order. Natural light and studio portraits, a fast client retouch, advanced AI-assisted editing, a full fashion shoot and creative portrait composites.
Free tutorials
Keep practicing, free
Four short free tutorials with more ways to edit portraits. Watch them any time, no membership needed.
Retouch a Portrait in Photoshop
Free tutorial · 18 min
Edit Portraits in Lightroom Classic
Free tutorial · 17 min
Remove Distractions from Portraits with AI
Free tutorial · 7 min
Brighten Portraits in 2 Minutes
Free tutorial · 4 min
What You’ll Learn
The Portraits Learning Path is six tutorials on taking a portrait from raw file to finished image. Where the Retouching Learning Path goes deep on skin and detail, this path is about the whole picture: light, background, color and mood, on the kinds of portraits photographers actually shoot. It starts with natural light, moves into the studio, and ends with creative portrait composites.
- 1. Edit natural light portraits Seven portraits start to finish: backlight, haze, underexposure and batch-editing raw files in Camera Raw and Photoshop.
- 2. Edit studio portraits Clean and extend backgrounds, cut out hair with no fringing, replace backgrounds and finish a studio shot.
- 3. Retouch a portrait in under an hour A streamlined workflow with liquify, dodge and burn and sharpening for client deadlines.
- 4. Edit portraits at an advanced level AI people masks, background blur, distraction removal, color and exposure, and advanced sharpening on eight raw portraits.
- 5. Edit a fashion shoot From Lightroom Classic into Photoshop: background changes, added elements, sky swaps, frequency separation and color.
- 6. Create surreal portraits Portrait composites built from textures and stock images with blending modes, color knockouts and light.
Who This Path Is For
Portrait, headshot, family and fashion photographers who want a repeatable way to finish their images, and editors who handle full sessions rather than single hero shots.
You should be comfortable with layers and masks. If not, the Photoshop Learning Path covers them first.
What You Need
- Photoshop A current version, including Camera Raw, for the AI masking steps.
- Lightroom Classic Used in the fashion tutorial; optional elsewhere.
- Sample files Included raw portraits for every tutorial.
- Layers and masks Assumed knowledge. Everything else is taught.
A calibrated monitor matters for portraits: skin tone is where color errors show first.
How Long It Takes
Six tutorials and 36 lessons, about 13 hours of video. The advanced portrait editing course is the longest. At a few hours a week, plan on three to four weeks.
Edit one of your own sessions alongside each tutorial; the techniques transfer directly.
Frequently Asked Questions
Do I need a PHLEARN PRO membership?
Yes. This is a PRO Learning Path, so all six tutorials and their sample files are included with a membership.
How is this different from the Retouching path?
Retouching goes deep on skin, hair and detail. Portraits covers the whole edit: light, background, color, mood and creative composites.
Natural light or studio?
Both. The first tutorial is natural light and the second is studio, and the rest apply to either.
Do I have to follow the order?
It is built to be followed in order, from simpler edits to the advanced and creative ones.
Does it cover shooting?
Lighting comes up where it affects the edit, but this path is about editing. For shooting, see the Photography & Photo Editing Learning Path.
Where to Go Next
- Magical Compositing Learning Path
- AI Photo Editing Learning Path
- 30 Days of Lightroom
- 30 Days of Photoshop
- Beauty & Fashion Retouching Learning Path
Start the Path
Start with natural light portrait editing, then move into the studio in step two.
PHLEARN PRO
Every tutorial in this path, with RAW files and PSDs, plus the full PRO library.

Discover the complete workflow for natural light portrait editing! Learn how to enhance sun glow, remove flare, fix underexposure, and master professional light sculpting using the latest tools. This tutorial includes 8 RAW files and a our exclusive Frequency Separation Action.
Photoshop | Photo Editing | Medium | 2.5 hours
8 Sample Images (RAW Files) | 1 Sample Image (JPEG File) | 7 Sample TIFFs | 1 Photoshop Action

Master studio photo editing in Photoshop! This tutorial combines traditional and AI tools to teach you background changes, retouching, and essential techniques. Get JPEG and RAW files, plus our Frequency Separation Action!
Photoshop | Photo Editing | Medium | 2 hours
6 Sample PSDs | 6 Sample Images (JPEG) | 1 Sample Image (RAW) | 1 Photoshop Action
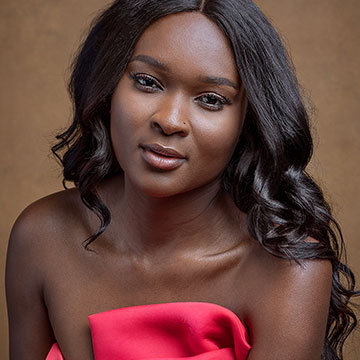
Your time is valuable! Learn how to retouch a portrait quickly and efficiently as we take you through every step of the professional’s workflow. And all in under an hour!
Photoshop | Retouching | Medium | 1 hours
1 RAW Sample Image | 1 Sample PSD | 2 Photoshop Actions
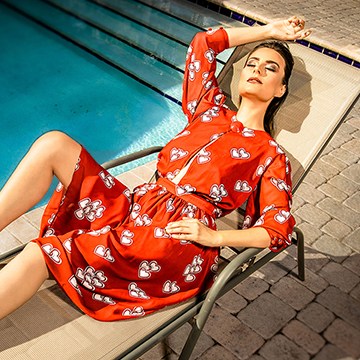
Transform your portraits! This advanced tutorial in Photoshop and Camera Raw guides you through editing eight diverse RAW photographs, tackling unique challenges. Learn AI masking, reshape lighting, and more!
Photoshop | Photo Editing | Advanced | 3.5 hours
8 Sample Images (RAW Files) | 8 Sample PSDs

Master fashion photo editing with Lightroom & Photoshop! In this tutorial we’ll show you the best workflows and techniques, including background replacement, sky enhancement, and frequency separation retouching. The best part? We’ve included 14 RAW files, so you can follow along.
Photoshop, Lightroom | Photo Editing | Advanced | 3.25 hours
14 RAW Files | 1 Photoshop Action
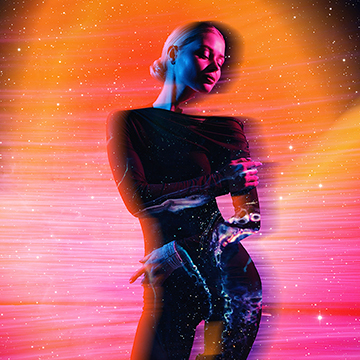
Craft extraordinary surreal portraits, entirely by hand in Photoshop! Discover essential compositing techniques, and as a thrilling bonus, learn how to animate your creations with AI.
Photoshop | Compositing | Advanced | 1.75 hours
21 Sample Images | 5 Sample PSDs