Photoshop Tools & Techniques Learning Path
Eight deep dives into the Photoshop tools professionals use every day, in order. Adjustment layers, blending modes, smart objects, the Pen and Brush tools, luminosity masks, sharpening and actions.
What You’ll Learn
The Photoshop Tools & Techniques Learning Path is eight complete courses, each on one tool, in the order they build on each other. Where the Photoshop Learning Path gives you the overview, this path goes all the way into each tool: every option, every mode and the real uses for them.
- 1. Master adjustment layers Every adjustment and fill layer, with color correction, black and white and toning examples.
- 2. Master blending modes How every blend mode works, with light effects, flares and compositing examples.
- 3. Master smart objects Smart objects end to end through a brand campaign: linked files, perspective mockups and smart filters.
- 4. Master the Pen Tool Standard, Curvature and Freeform pens, paths and vector masks, and precise cut-outs.
- 5. Master the Brush Tool Brush settings, custom brushes and tablet pressure, used for rain, snow, smoke and dust.
- 6. Master luminosity masks A precise alternative to automatic HDR for blending exposures and recovering skies and shadows.
- 7. Master sharpening Every sharpening method (Unsharp Mask, Smart Sharpen, High Pass) on landscapes, portraits and products.
- 8. Master actions Record, edit and batch-run actions to automate everything above.
Who This Path Is For
Photoshop users who know the basics and want to understand the tools properly, and anyone who has watched a tutorial and wondered what the other settings do.
Basic Photoshop is assumed. If you are new, start with the Photoshop Learning Path.
What You Need
- Photoshop Any recent version. These tools have worked the same way for years.
- Sample files Included for every course.
- A graphics tablet Helpful for the Brush Tool course; optional elsewhere.
- Basic Photoshop Assumed knowledge.
Each course stands on its own as a reference, so expect to come back to them.
How Long It Takes
Eight tutorials and 140 lessons, about 29 hours of video. The Brush Tool course is the longest. At a few hours a week, plan on five to seven weeks.
These are reference courses as much as lessons: watch them in order once, then return to a tool when a job needs it.
Frequently Asked Questions
Do I need a PHLEARN PRO membership?
Yes. This is a PRO Learning Path, so all eight tutorials and their sample files are included with a membership.
How is this different from the Photoshop path?
The Photoshop path is the overview, from beginner to professional. This path is a full course on each tool.
Are older courses still accurate?
Yes. Adjustment layers, blend modes, the Pen and Brush tools and sharpening work the way they are taught here.
Do I have to follow the order?
It is built to be followed in order, but each course stands alone, so you can jump to the tool you need.
Why end with actions?
Because once you know the tools, actions let you automate the steps you repeat.
Where to Go Next
- 30 Days of Photoshop
- Portraits Learning Path
- Magical Compositing Learning Path
- Products Learning Path
- Master Photoshop
Start the Path
Start with adjustment layers, the tool behind most non-destructive edits.
On This Page
PHLEARN PRO
This entire collection plus every other Learning Path, with sample files throughout.
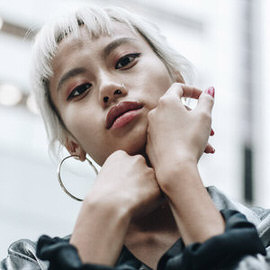
Adjustment Layers are the smartest and most powerful tools for photo editing in Photoshop. We walk you through all 19 Adjustment Layers while showing you how to fix exposure, apply professional coloring, create custom LUTs and more.
Photoshop | Tools & Techniques | Easy | 4.5 hours
45 Sample Images

Blending Modes control how different layers blend, interact, and create a combined image. Join us as we go in-depth with each of the 27 Blending Modes to add clouds to a clear sky, make colors pop, and learn to sharpen an image like a pro.
Photoshop | Tools & Techniques | Easy | 3.25 hours
72 Sample Images | 1 Custom Texture

Master Smart Objects in Photoshop! Learn to create vector logos, design realistic mockups, update massive layouts automatically, and package your files for seamless client delivery.
Photoshop | Tools & Techniques | Medium | 4 hours
20 Sample Images | 8 Sample PSDs | 2 PDF Guides
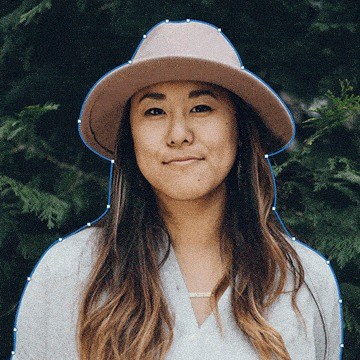
In this tutorial, we teach you everything you need to know about the Pen Tool, from the most important keyboard shortcuts to making beautiful lines and curves. Learn to change a background color, remove an entire background, and create a simple logo.
Photoshop | Tools & Techniques | Medium | 2.75 hours
14 Sample Images

Learn how to create rain, snow, and atmosphere from scratch and how paint in photo-realistic hair for perfect cutouts. Watch 15 in-depth examples of how to use some of the 35 custom Photoshop brushes included with this tutorial!
Photoshop | Photo Effects | Medium | 6.25 hours
26 Sample Images | 35 Photoshop Brushes
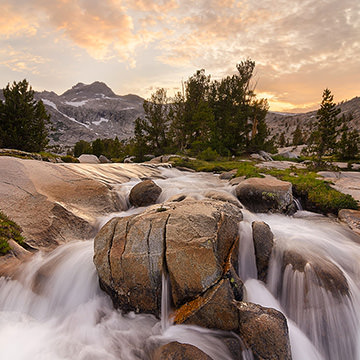
In this tutorial, we walk you through how to manually blend exposures using the power and flexibility of Luminosity Masks. You will learn to create selections based on light levels and then use those selections to paint detail back into your photos.
Photoshop | Photo Editing | Advanced | 3.5 hours
11 Sample Images | 2 Photoshop Actions

Give your photos a professional finish with sharpening in Photoshop. Learn to enhance details, create contrast, and prepare your images for print, web, and social media.
Photoshop | Tools & Techniques | Medium | 3 hours
18 Sample Images | 1 Photoshop Action

Photoshop Actions can help you work faster than ever! Record and save complicated tasks, like coloring or sharpening, and apply them to any other image in only a fraction of the time.
Photoshop | Workflow & Productivity | Medium | 3.25 hours
30 Sample Images | 12 Photoshop Actions